1. Introduction
This manual provides detailed instructions for assembling, setting up, and operating your JMBricklayer L4 Engine Building Kit. This STEM model is designed to offer an engaging and educational experience, allowing you to understand the fundamental principles of an L4 engine through hands-on construction. Please read all instructions carefully before beginning assembly.
2. Safety Information
WARNING: Choking Hazard - Small Parts. Not suitable for children under 3 years old.
Keep all small parts away from young children to prevent accidental ingestion. Ensure all connections are secure during assembly to avoid parts detaching during operation. This product requires 3 AA batteries (not included). Do not mix old and new batteries. Do not mix alkaline, standard (carbon-zinc), or rechargeable (nickel-cadmium) batteries. Always remove batteries if the product will not be used for an extended period.
3. Package Contents
Before starting, verify that all components are present. Your JMBricklayer L4 Engine Building Kit includes:
- 1787 Building Block Pieces
- 1 Power Motor
- Instruction Manual
- Required accessories for assembly
Note: 3 AA batteries are required for operation and are not included in the package.
4. Assembly Instructions
Follow the step-by-step diagrams in the included instruction booklet to assemble your L4 engine model. Pay close attention to the orientation and connection points of each piece. The assembly process is divided into numbered bags for easier organization.
4.1. Engine Block and Piston Assembly
Begin by constructing the core engine block and assembling the piston and connecting rod mechanisms. Ensure smooth movement of these parts as you build.

Image: Close-up view of the engine's internal structure, showing the red pistons and connecting rods in motion, illustrating the precision-engineered design.

Image: A detailed view highlighting the pistons within the engine model, demonstrating their vertical movement during operation.
4.2. Valve and Ignition System
Proceed with the assembly of the valve and simulated ignition system. This section reveals how the internal components interact to control the engine's cycle.
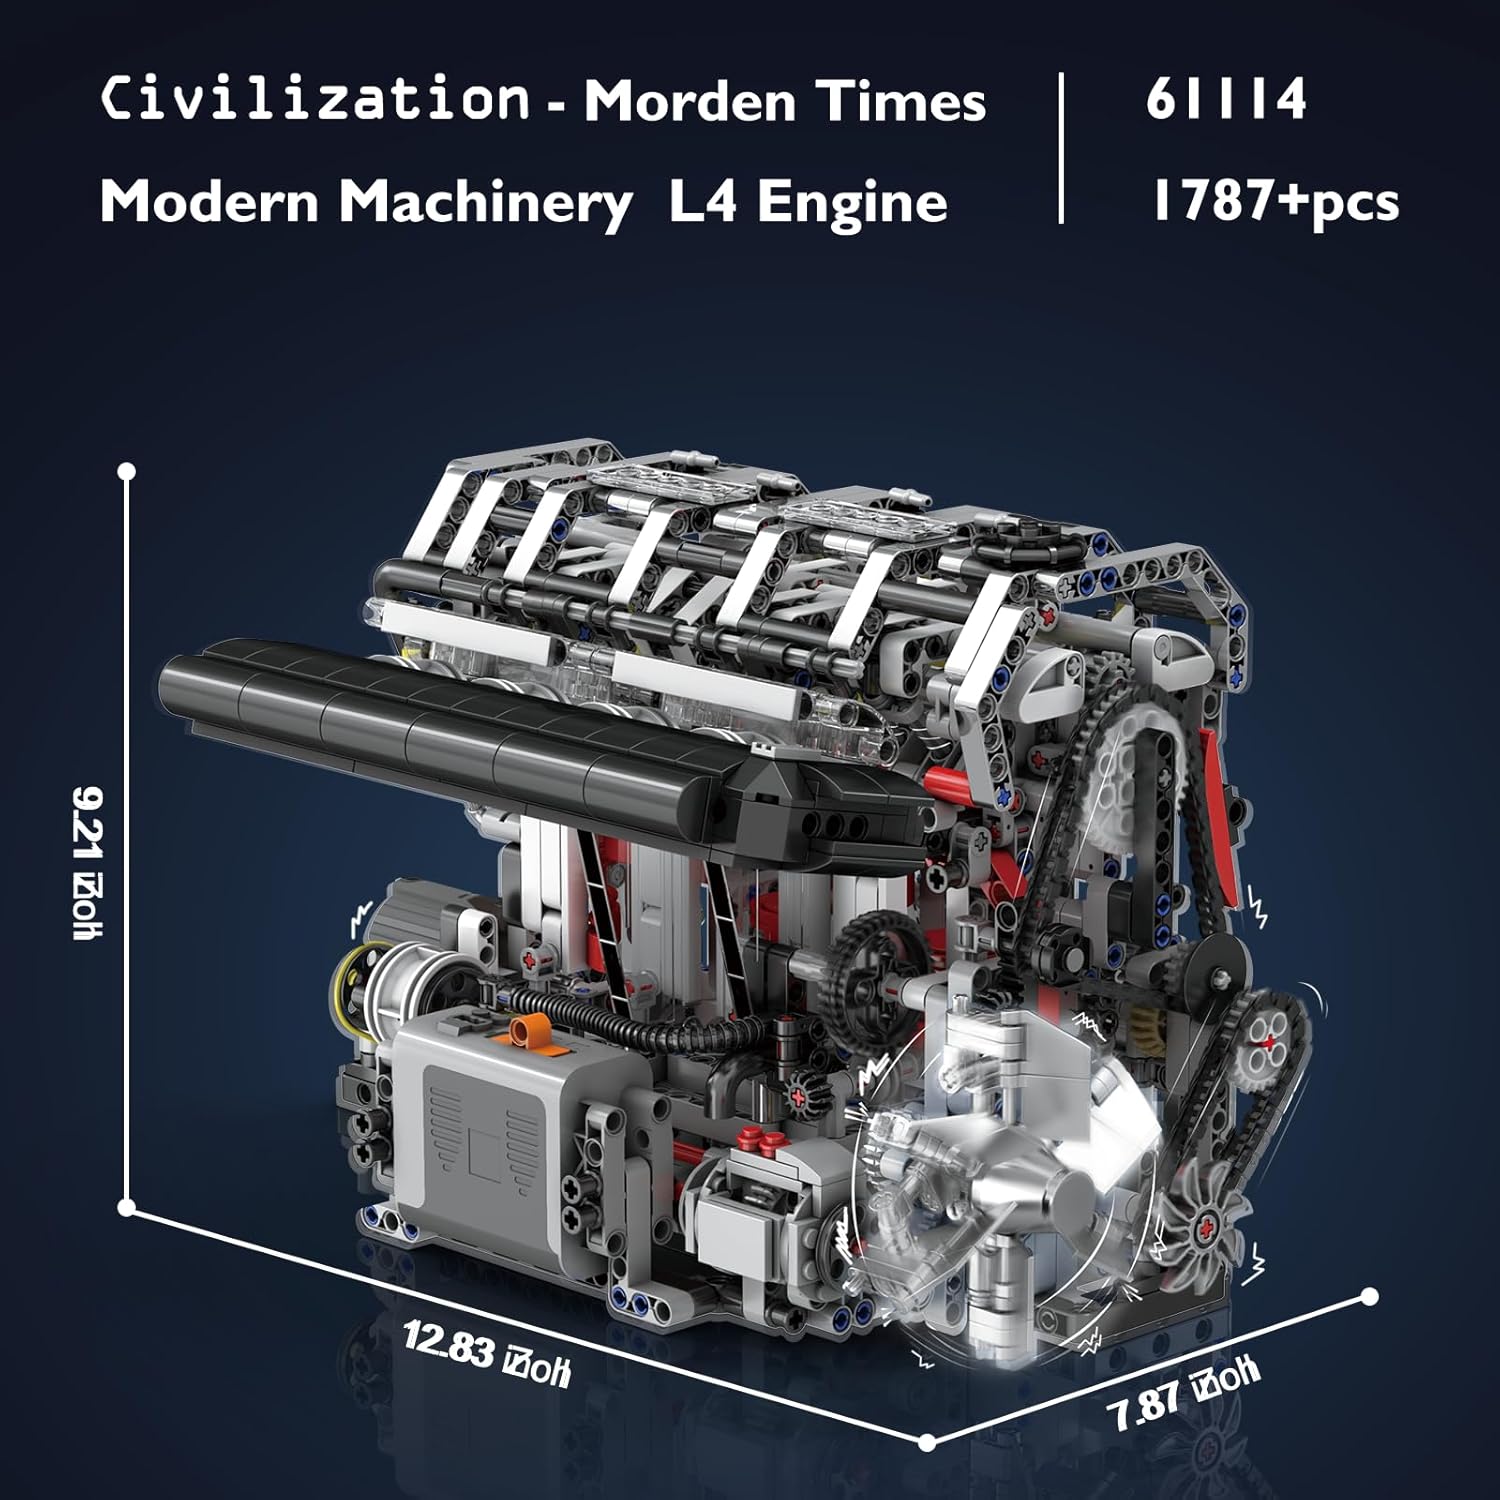
Image: A close-up of the engine's simulated valve and ignition system, showing the intricate gear and lever mechanisms that control their movement.
4.3. Exhaust System and External Components
Attach the exhaust manifold and other external components, including the motor fan. Ensure all gears and belts are correctly aligned for proper function.

Image: The assembled exhaust system with its metallic-look pipes, showcasing the detailed external design of the engine model.

Image: A detailed shot of the timing chain and various gears, illustrating the complex mechanical connections within the engine model.
4.4. Final Assembly and Motor Integration
Complete the remaining structural elements and integrate the power motor. Double-check all connections to ensure the engine operates smoothly.
Image: The completed L4 engine model, showcasing its intricate mechanical design and the visible internal workings.
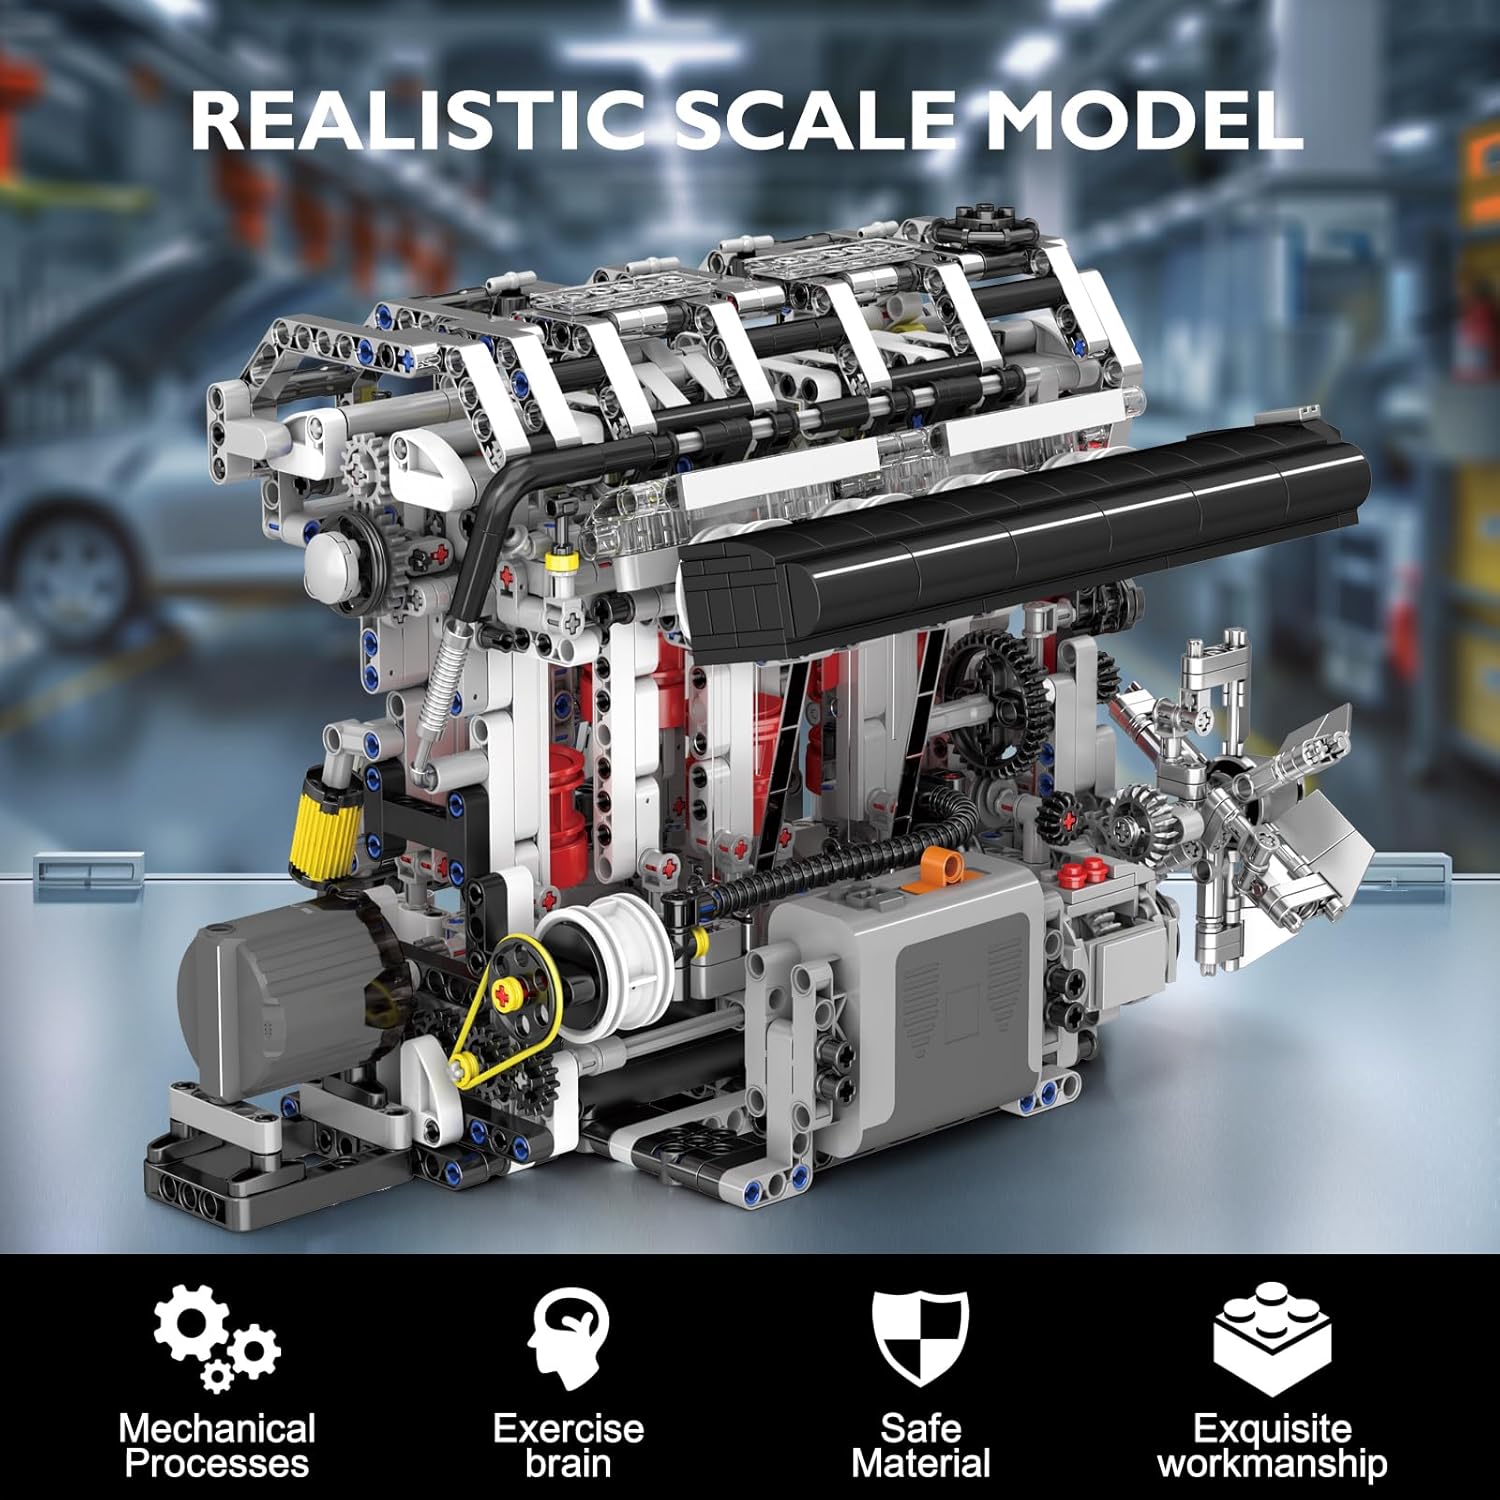
Image: A full view of the realistic scale model of the L4 engine, demonstrating its detailed construction and overall appearance.
5. Setup
5.1. Battery Installation
Locate the battery compartment on the base of the engine model. Insert 3 AA batteries, ensuring correct polarity (+/-). Close the compartment securely.
6. Operating Instructions
Once assembled and batteries are installed, you can activate your L4 engine model to observe its mechanical functions.
6.1. Powering On
Press the power button on the motor unit. The motor will start, initiating the movement of the pistons, connecting rods, and the motor fan.
6.2. Observing Engine Mechanics
Watch the synchronized movement of the pistons, the rotation of the motor fan, and the operation of the simulated valve and ignition system. This visual demonstration provides insight into how a real L4 engine functions.
7. Maintenance
To ensure the longevity and optimal performance of your L4 engine model, follow these maintenance guidelines:
- Cleaning: Use a soft, dry cloth to gently wipe down the model. Avoid using harsh chemicals or abrasive materials.
- Storage: Store the model in a cool, dry place away from direct sunlight and extreme temperatures.
- Battery Care: Remove batteries if the model will not be used for an extended period to prevent leakage.
- Inspection: Periodically check for any loose or damaged parts. Reassemble or replace as necessary.
8. Troubleshooting
If you encounter any issues with your L4 engine model, refer to the following common problems and solutions:
| Problem | Possible Cause | Solution |
|---|---|---|
| Engine does not start or operate. | Incorrect battery installation, dead batteries, or loose motor connection. | Check battery polarity, replace with fresh batteries, ensure motor is securely connected. |
| Parts are not moving smoothly. | Incorrect assembly, misaligned gears, or obstructions. | Review assembly steps, ensure gears are properly meshed, remove any foreign objects. |
| Unusual noises during operation. | Loose parts or friction between components. | Inspect all connections, ensure no parts are rubbing against each other. |
9. Specifications
- Product Dimensions: 13.78 x 8.66 x 5.12 inches
- Item Weight: 4.38 pounds
- Item Model Number: 61128
- Manufacturer Recommended Age: 14 years and up
- Batteries: 3 AA batteries required (not included)
- Number of Pieces: 1787
Image: The L4 engine model with overlaid dimensions, indicating its length, width, and height.
10. Warranty and Support
JMBricklayer stands behind the quality of its products. For warranty information, technical support, or assistance with missing/damaged parts, please contact our customer service team. You can find contact details on our official website or through your retailer's support channels. Please provide your model number (61128) and purchase details when contacting support.


