
1. Introduction
This manual provides essential information for the safe and efficient use of your Ryobi RIW18BL-0 18V ONE+ Brushless Cordless Impact Wrench. Please read these instructions carefully before operating the tool and keep them for future reference. This tool is designed for fastening and loosening nuts and bolts, particularly suitable for automotive applications and heavy construction tasks.
Always observe general power tool safety warnings and instructions provided with the product packaging and any accompanying safety guides. Ensure you understand all safety precautions before use.
2. Setup
2.1 Unpacking
Carefully remove the impact wrench from its packaging. Inspect the tool for any signs of damage. This product is supplied as a bare tool; the battery and charger are sold separately and are not included.
2.2 Battery Installation
The Ryobi RIW18BL-0 is part of the 18V ONE+ system. Ensure you use a compatible Ryobi 18V ONE+ battery. To install the battery, align the battery pack with the tool's base and slide it in until it clicks securely into place. To remove, press the release button on the battery and slide it out.
2.3 Attaching Sockets
The impact wrench features a 1/2 inch square drive with a friction ring for easy and secure socket attachment. To attach a socket, simply push it onto the square drive until it is firmly seated. To remove, pull the socket off the drive.

Figure 1: Front view of the Ryobi RIW18BL-0 Impact Wrench. This image shows the tool's overall design, including the 1/2 inch square drive for socket attachment and the battery interface at the base.
3. Operating Instructions
3.1 Powering On/Off
To power on the tool, press the trigger switch. The tool's speed is variable and controlled by the amount of pressure applied to the trigger. To power off, release the trigger switch.
3.2 Speed Settings and Auto-Stop Mode
The impact wrench offers 3 different speed settings, allowing for versatile control depending on the application. Additionally, it features an optimized Auto-stop mode, particularly useful for working with car wheel nuts. This mode helps prevent over-tightening or damage by automatically stopping the tool once a certain torque is reached or a fastener is loosened.
3.3 Tri-Beam LED Lights
The tool is equipped with Tri-Beam LED lights that illuminate the work area. These lights are designed to eliminate shadows on bits and fasteners, ensuring clear visibility even in dark working conditions.
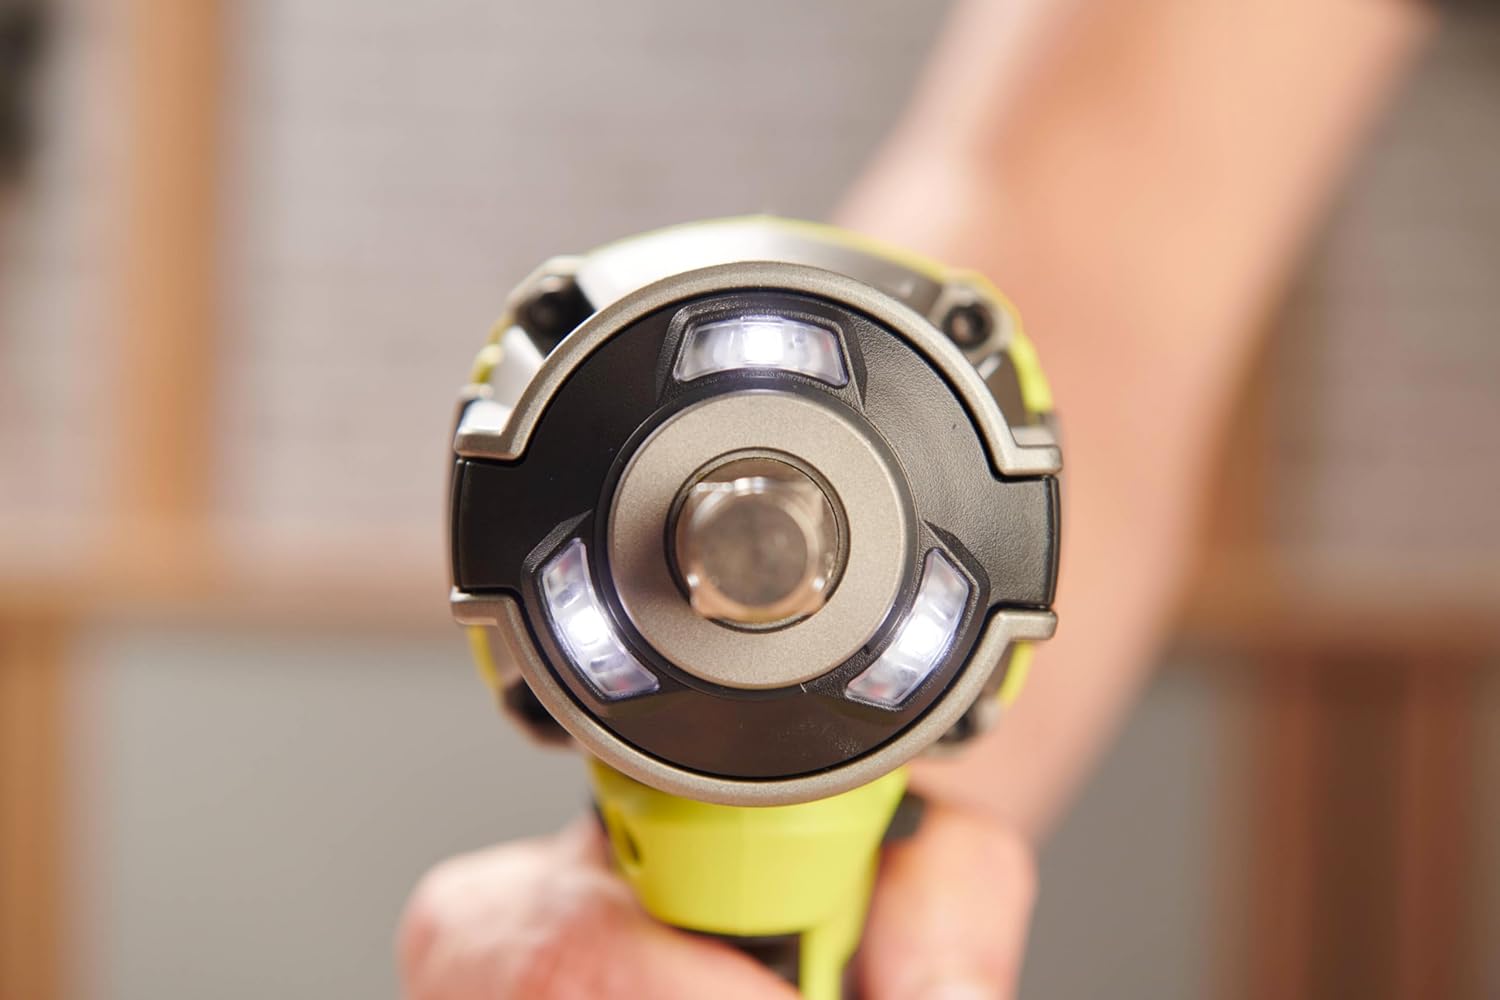
Figure 2: Close-up view of the impact wrench head, showing the Tri-Beam LED lights surrounding the 1/2 inch square drive. These lights provide enhanced visibility during operation.
3.4 Torque Performance
The Ryobi RIW18BL-0 delivers a powerful 900 Nm of nut-busting torque for breaking loose stubborn fasteners and 700 Nm of fastening torque for secure tightening. This makes it ideal for demanding tasks such as removing and installing automotive lug nuts or heavy-duty construction fasteners.

Figure 3: The Ryobi RIW18BL-0 Impact Wrench in action, demonstrating its use for removing a car wheel nut. The integrated LED lights illuminate the work area.
Figure 4: The impact wrench being used for an automotive repair task under a vehicle, highlighting its versatility for various fastening applications.
4. Maintenance
4.1 Cleaning
Keep the tool's ventilation openings clean and free from obstructions. Regularly wipe down the tool with a soft, damp cloth. Do not use harsh chemicals or abrasive cleaners. Ensure the tool is dry before storage or next use.
4.2 Brushless Motor
The Ryobi RIW18BL-0 features a brushless motor, which generally requires less maintenance compared to brushed motors. This design contributes to longer tool life and improved efficiency. No user-serviceable brushes are present.
4.3 Battery and Charger Care
Refer to the separate instruction manuals provided with your Ryobi 18V ONE+ battery and charger for specific care and maintenance guidelines. Always store batteries in a cool, dry place and charge them according to manufacturer instructions.
5. Troubleshooting
If you encounter issues with your Ryobi RIW18BL-0 impact wrench, consult the following common troubleshooting tips:
- Tool does not start: Ensure the battery is fully charged and correctly inserted into the tool. Check for any obstructions in the trigger mechanism.
- Reduced power or performance: The battery may be low on charge. Recharge the battery. Ensure the correct speed setting is selected for the task.
- Excessive vibration or noise: Stop using the tool immediately. Check for loose components or damaged accessories. Do not attempt to repair the tool yourself.
- Fastener not loosening/tightening: Ensure the correct size socket is used and it is properly seated. The fastener may be seized or require higher torque than the tool can provide. Do not force the tool.
For problems not resolved by these steps, or for any internal issues, contact Ryobi customer support or an authorized service center. Do not attempt to disassemble or repair the tool yourself, as this may void the warranty and pose safety risks.
6. Technical Specifications
| Model Number | RIW18BL-0 |
| Brand | RYOBI |
| Voltage | 18V (ONE+ System) |
| Motor Type | Brushless |
| Nut-Busting Torque | 900 Nm |
| Fastening Torque | 700 Nm |
| Speed Settings | 3 speeds + Auto-stop mode |
| Drive Size | 1/2 inch Square Drive with Friction Ring |
| Lighting | Tri-Beam LED lights |
| Dimensions (L x W x H) | 22 x 9 x 20 cm |
| Weight (without battery) | 1.7 kg |
| Material | Steel or Steel Alloy |
| Included Components | 1/4 inch Hexagonal Adapter, Belt Clip |
| Battery/Charger | Not included (requires Ryobi 18V ONE+ battery and charger) |
7. Warranty and Support
7.1 Parts Availability
Spare parts for the Ryobi RIW18BL-0 are generally available for a period of 5 years from the date of purchase. Please refer to your purchase documentation for specific warranty terms and conditions.
7.2 Customer Support
For technical assistance, warranty claims, or service inquiries, please contact Ryobi customer support through their official website or the contact information provided in your product documentation. Always provide your model number (RIW18BL-0) and serial number when contacting support.
Note: This manual is for informational purposes. Always refer to the official Ryobi product documentation for the most current and complete safety and operational instructions.


