1. Introduction
This manual provides comprehensive instructions for the setup, operation, and maintenance of your Dntum 10.1'' Touch POS System. This integrated point-of-sale solution is designed for various retail environments, including restaurants, cafes, and general stores, offering efficient inventory and billing management.
2. What's Included
Upon unboxing your Dntum POS System, please verify that all the following components are present:
- 1 x Dntum Cash Register (Main POS Terminal)
- 1 x Paper Roll (for thermal printer)
- 1 x User Manual (this document)
- 1 x Key (for cash drawer)
- 1 x Power Driver + Plug Cable

Image: The Dntum 10.1 inch Touch POS System, showing the main terminal, integrated thermal printer, and cash drawer.
3. Product Features
The Dntum POS System is equipped with features designed for efficiency and reliability:
- Plug and Play Operation: The system comes with pre-installed software and operating system, allowing for immediate use upon unpacking.
- User-Friendly Interface: Designed for quick learning, enabling new operators to become proficient in approximately 5 minutes.
- Integrated Software and Hardware: Simplifies after-sales support and maintenance due to seamless integration.
- Open Source Operating System: Provides a secure environment, free from common virus violations and copyright disputes.
- Industrial Grade Architecture: Built with an industrial computer core, ensuring durability and long-term supply duration.
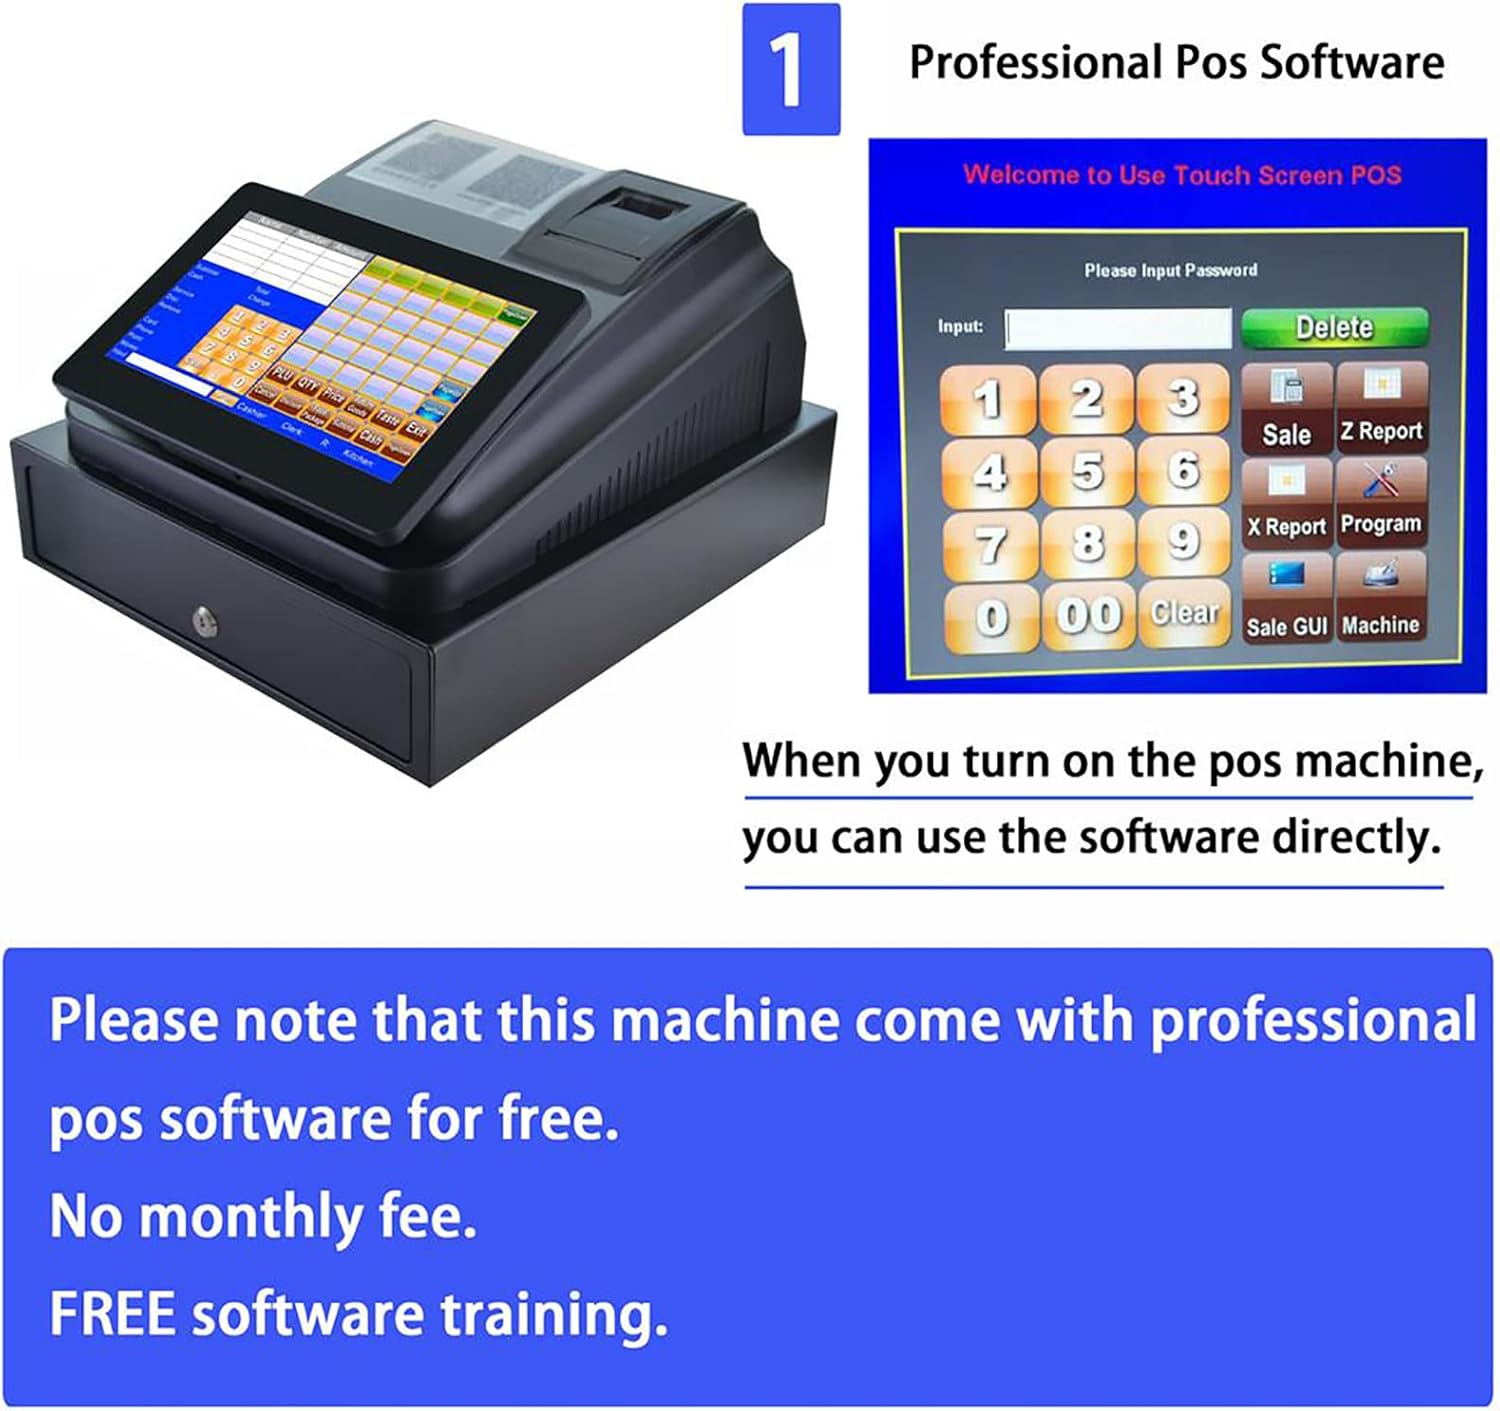
Image: The initial login screen of the professional POS software, showing a numeric keypad for password entry. The system is ready for use directly upon power-on.

Image: A detailed view of the POS software settings interface, displaying options for product management (PLU), pricing, discounts, payment types, and customer management.
4. Setup
Follow these steps for the initial setup of your Dntum POS System:
- Unpack the System: Carefully remove all components from the packaging.
- Place the Unit: Position the POS terminal on a stable, flat surface.
- Connect Power: Insert the power driver cable into the "Power" port on the back of the POS terminal and plug the other end into a standard electrical outlet.
- Connect Peripherals (Optional):
- Cash Drawer: Connect the cash drawer cable to the "Cash drawer port" on the back.
- External Printer: If using an external kitchen printer, connect it to the "COM1/LAN Port" or "USB Port" as appropriate.
- Barcode Scanner: Connect a barcode scanner to a "USB Port".
- Scale: Connect a scale to the "COM2 Port".
- U-Disk: For data transfer, connect a U-Disk to a "USB Port".
- Power On: Press the power button, usually located on the back or side of the main unit. The system will boot up automatically.

Image: A diagram illustrating the various ports on the backside of the POS system, including USB, Network, COM1 (for Kitchen Printer), COM2 (for Scale), Power, and Cash Drawer port, along with examples of connected peripherals like U-Disk, Barcode Scanner, Kitchen Printer, and Scale.
5. Operating Instructions
This section covers the basic operation of your Dntum POS System.
5.1 Initial Software Access
Upon first boot-up, the system will display the POS software login screen. Enter the default password (refer to your system administrator or initial setup guide for the default password, if not provided, try common defaults like "0000" or "1234") using the on-screen numeric keypad. Once logged in, you can begin configuring your products and services.
5.2 Basic Operations
- Product Entry: Use the touch screen to select products from your inventory.
- Quantity Adjustment: Modify item quantities as needed.
- Discount Application: Apply discounts directly through the software interface.
- Payment Processing: Process various payment methods (cash, card, etc.) as configured in the software.
- Receipt Printing: Receipts will automatically print after a transaction is completed.
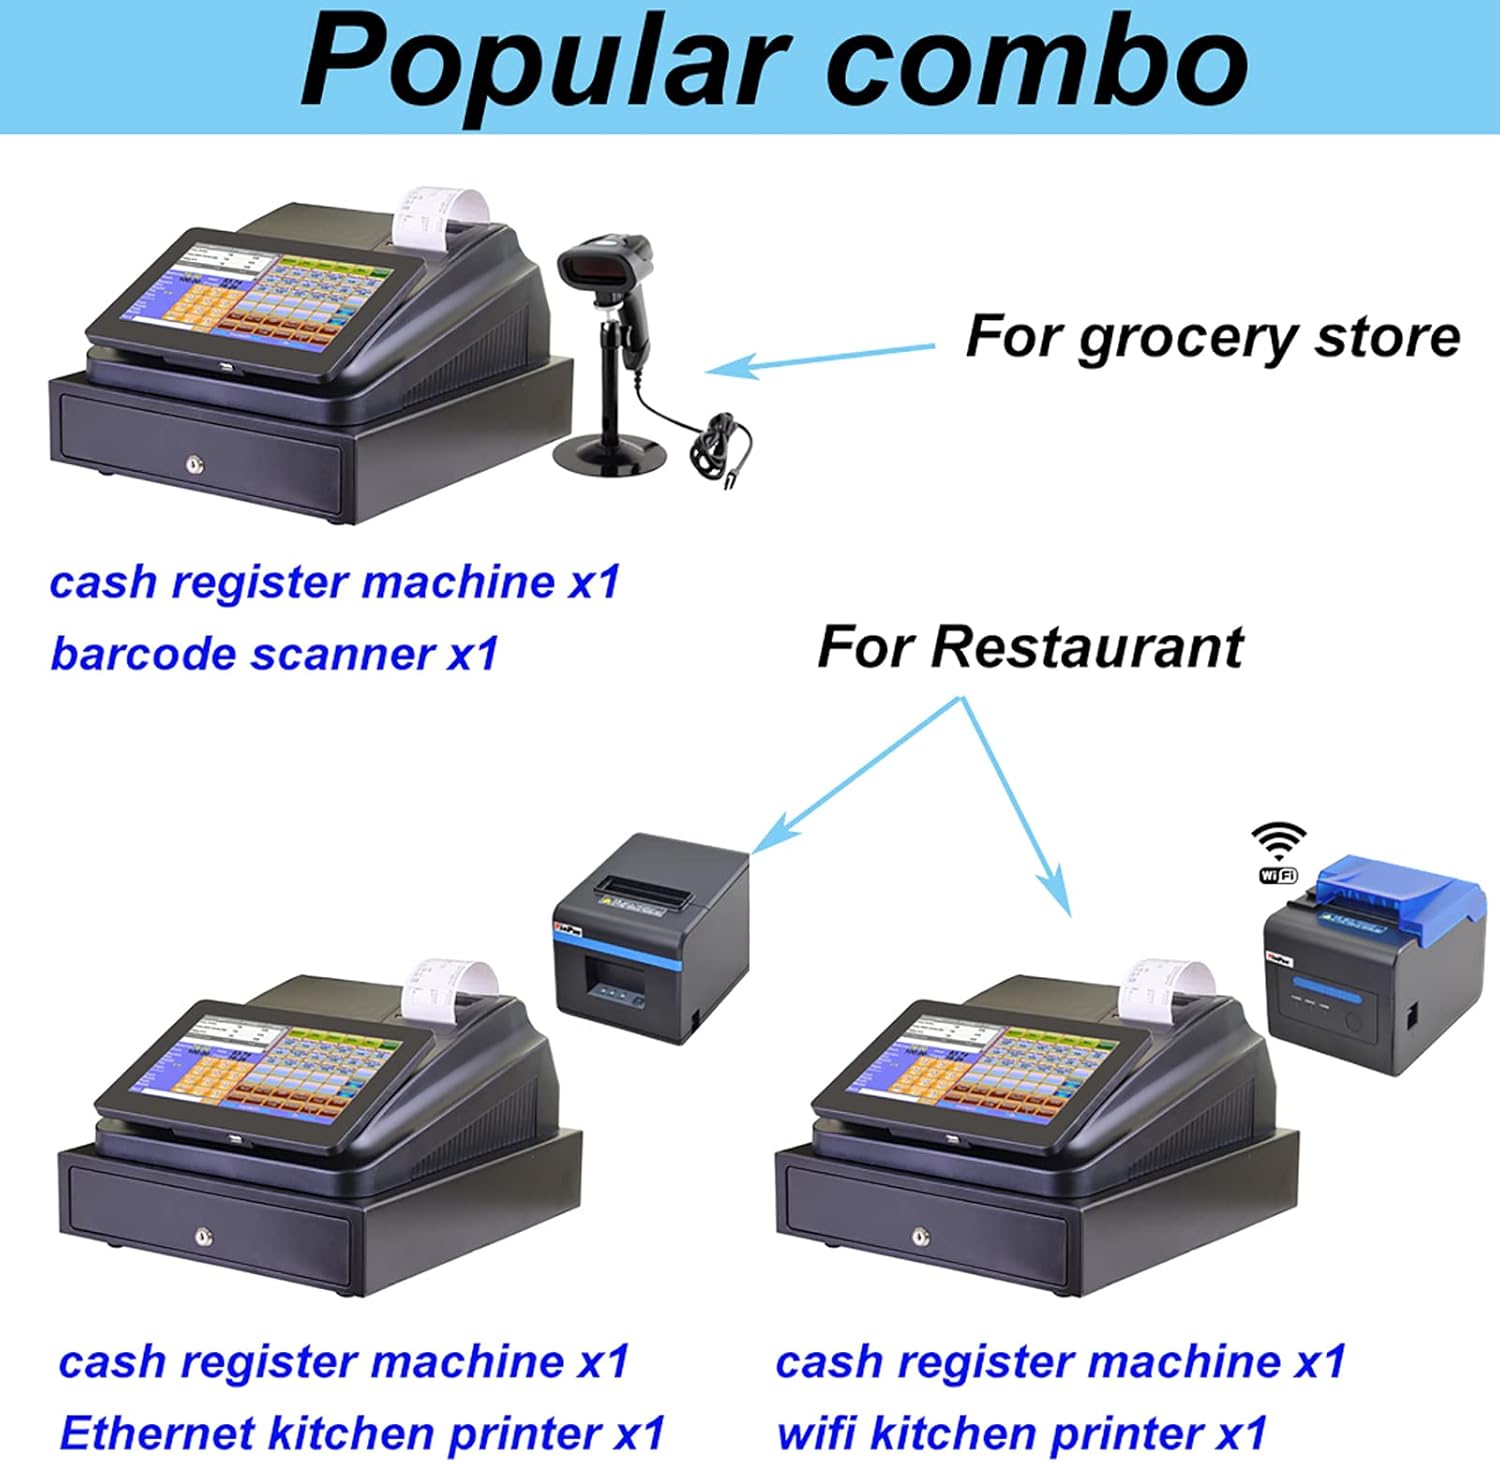
Image: Examples of popular POS system configurations. One setup shows the cash register machine with a barcode scanner, suitable for grocery stores. Another shows the cash register with an Ethernet kitchen printer, and a third with a WiFi kitchen printer, both suitable for restaurants.

Image: A collage demonstrating the versatility of the POS system across different business environments, including Shopping Malls, Super Markets, Warehouses, Pharmacies, Restaurants, Hospitals, and Book Stores.
6. Maintenance
Proper maintenance ensures the longevity and optimal performance of your POS system:
- Cleaning: Regularly wipe the touch screen and exterior surfaces with a soft, damp cloth. Avoid abrasive cleaners or excessive moisture.
- Printer Maintenance: Ensure the thermal printer is free of dust and paper debris. Replace paper rolls promptly when empty.
- Software Updates: Periodically check for and install software updates to ensure security and access to new features.
- Data Backup: Regularly back up your sales and inventory data to an external storage device to prevent data loss.
7. Troubleshooting
This section addresses common issues you might encounter:
- System Not Powering On:
- Check if the power cable is securely connected to both the POS terminal and the power outlet.
- Verify that the power outlet is functional.
- Printer Not Printing:
- Ensure the printer paper roll is correctly installed and not empty.
- Check the printer's connection to the POS terminal (USB or LAN).
- Verify printer settings within the POS software.
- Touch Screen Unresponsive:
- Restart the POS system.
- Ensure the screen is clean and free of obstructions.
- Cash Drawer Not Opening:
- Check the connection of the cash drawer cable to the POS terminal.
- Ensure the transaction is finalized or the manual open command is used correctly.
For issues not covered here, please refer to the Warranty and Support section.
8. Specifications
| Feature | Specification |
|---|---|
| Manufacturer | Dntum |
| Model | 10.1'' Touch POS Terminal |
| Display | 10.1 inch capacitive touch screen (1024x600 resolution) |
| Customer Display | LED 8 digital display |
| Printer | 58MM Thermal Receipt Printer |
| Interfaces | 2 x RS232, 2 x USB, 1 x Local Area Network (LAN), 1 x Cash Drawer Port |
| POS Software | Independent intellectual property rights software |
| Cash Drawer Size | 33.5 x 36.8 x 8 cm |
| Power Supply | DC12V 4A |
| RAM / Storage | 512MB / 8GB |
| Country of Origin | China |
| ASIN | B0DDKL4DBX |
9. Warranty and Support
For warranty information, technical support, or service inquiries regarding your Dntum 10.1'' Touch POS System, please contact the manufacturer or your point of purchase. Details regarding specific warranty periods and support channels are typically provided with your purchase documentation or can be found on the manufacturer's official website.


