1. Introduction
This manual provides essential information for the safe and efficient operation of your Dntum 3-in-1 Mini Oven Grill Plate Toast Oven. Please read these instructions thoroughly before first use and retain for future reference.
The Dntum 3-in-1 Breakfast Station combines a 9-liter oven, a non-stick frying pan, and a drip coffee machine into a single compact unit, allowing for simultaneous preparation of various breakfast items.
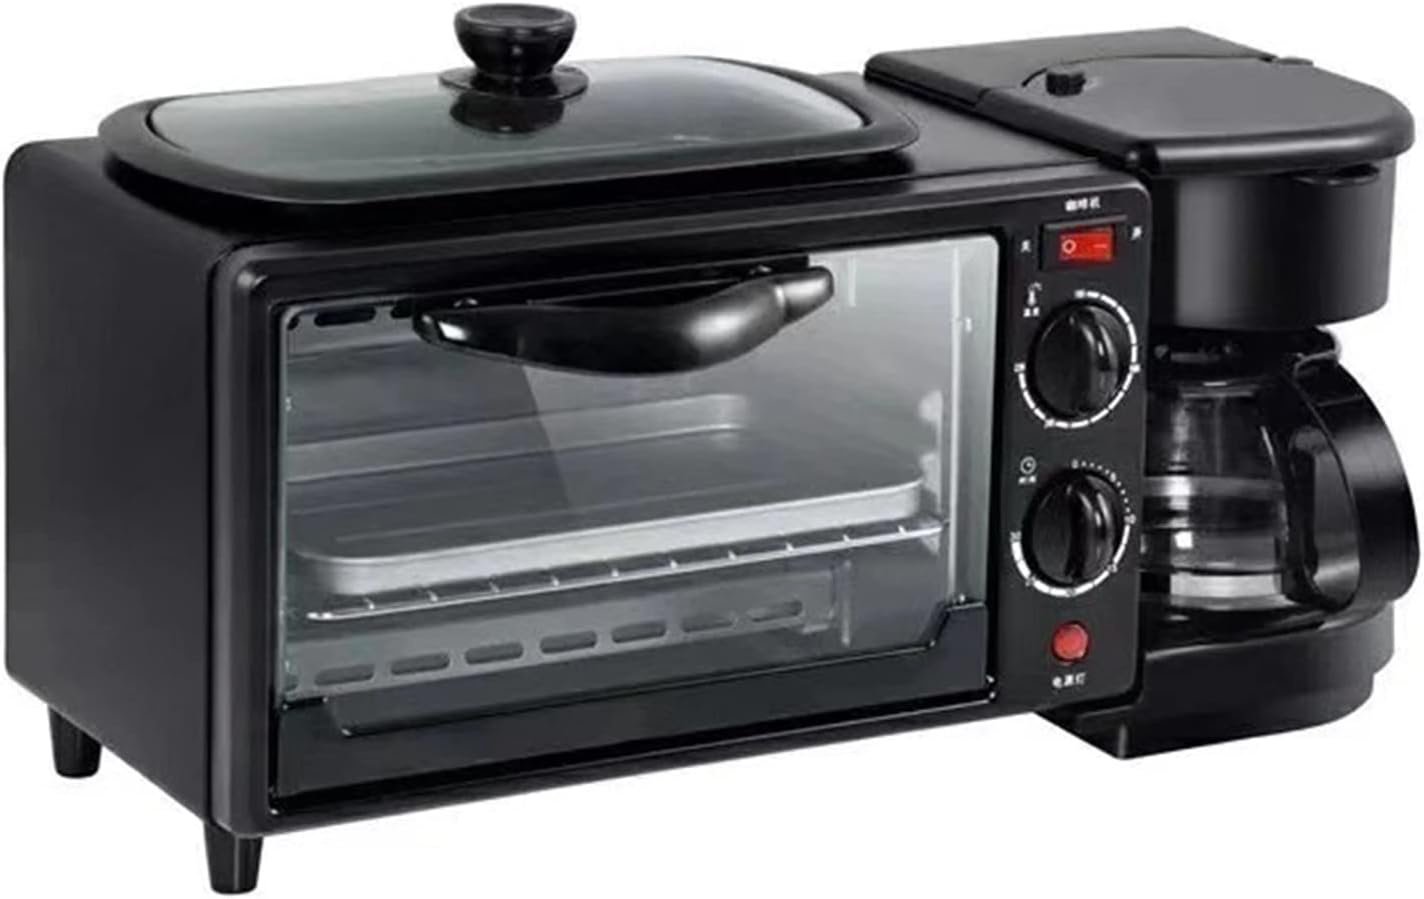
Image 1.1: Overview of the Dntum 3-in-1 Mini Oven Grill Plate Toast Oven. This image displays the complete appliance, showcasing the oven compartment, top frying pan, and integrated coffee maker on the right side.
2. Safety Instructions
WARNING: To reduce the risk of fire, electric shock, or injury, always follow these basic safety precautions.
- Read all instructions before using the appliance.
- Do not touch hot surfaces. Use handles or knobs.
- To protect against electrical shock, do not immerse cord, plugs, or the appliance body in water or other liquid.
- Close supervision is necessary when any appliance is used by or near children.
- Unplug from outlet when not in use and before cleaning. Allow to cool before putting on or taking off parts.
- Do not operate any appliance with a damaged cord or plug, or after the appliance malfunctions or has been damaged in any manner.
- The use of accessory attachments not recommended by the appliance manufacturer may cause injuries.
- Do not use outdoors.
- Do not let cord hang over edge of table or counter, or touch hot surfaces.
- Do not place on or near a hot gas or electric burner, or in a heated oven.
- Extreme caution must be used when moving an appliance containing hot oil or other hot liquids.
- Always attach plug to appliance first, then plug cord into the wall outlet. To disconnect, turn any control to "off", then remove plug from wall outlet.
- Do not use appliance for other than intended use.
- Oversized foods or metal utensils must not be inserted in a toaster oven as they may create a fire or risk of electric shock.
- A fire may occur if the toaster oven is covered or touching flammable material, including curtains, draperies, walls, and the like, when in operation.
- Do not place any of the following materials in the oven: paper, cardboard, plastic, or similar materials.
- Do not store any materials, other than manufacturer's recommended accessories, in this oven when not in use.
- Do not cover crumb tray or any part of the oven with metal foil. This will cause overheating of the oven.
3. Product Components
Familiarize yourself with the components of your Dntum 3-in-1 Breakfast Station before operation.

Image 3.1: Diagram showing the main unit and included accessories with dimensions. The image labels the main unit as "Host", the wire rack as "Grilled net", the baking tray as "Baking tray", the fry pan as "Fry pan", and the coffee pot as "Coffee pot".
Included Components:
- Main Unit (Host)
- Oven Grill (Wire Rack)
- Baking Tray
- Nonstick Griddle (Fry Pan)
- Coffee Pot (Glass Jug)
- Crumb Tray
- User Manual (this document)
4. Setup
- Unpacking: Carefully remove all packaging materials and accessories. Ensure all components listed in Section 3 are present.
- Placement: Place the appliance on a stable, heat-resistant, and level surface. Ensure there is adequate ventilation around the unit (at least 10 cm / 4 inches clearance on all sides). Do not place near flammable materials.
- Initial Cleaning: Before first use, wipe down the exterior of the unit with a damp cloth. Wash the baking tray, wire rack, nonstick griddle, and coffee pot with warm, soapy water. Rinse thoroughly and dry completely.
- Power Connection: Ensure the voltage of your power outlet matches the appliance's specifications (220V, 50Hz). Plug the power cord into a grounded electrical outlet.
5. Operating Instructions
The Dntum 3-in-1 Breakfast Station features independent controls for the oven/frying pan and the coffee machine, allowing for versatile cooking options.
5.1 Oven Operation
The oven has a 9-liter capacity and features upper and lower heating tubes for even cooking. It is suitable for baking bread, pizza, toast, and more.

Image 5.1.1: Detailed view of the oven area, highlighting the upper and lower heating tubes, 9L capacity, 30-minute timer knob, and 100-230°C temperature controller.
- Prepare Food: Place food on the baking tray or wire rack.
- Insert Tray: Slide the tray/rack into the desired slot within the oven.
- Set Temperature: Use the top rotary knob to select the desired temperature between 100°C and 230°C.
- Set Timer: Use the lower rotary knob to set the cooking time (0-30 minutes). The oven will begin heating once the timer is set.
- Monitor Cooking: Observe food through the glass door. The oven will automatically turn off when the timer expires.
- Remove Food: Use oven mitts to carefully remove the hot tray/rack and food.
5.2 Frying Pan Operation
The non-stick frying pan is located on top of the oven and is ideal for cooking eggs, bacon, sausages, and other breakfast meats. It shares the same temperature control as the oven.

Image 5.2.1: Close-up of the frying pan area, highlighting its non-stick, anti-hot, anti-corrosion, and easy-to-clean properties. The image shows the pan with its glass lid.
- Preheat: Place the nonstick griddle on the designated area on top of the unit. Turn the top rotary knob to the desired temperature setting (same as oven temperature).
- Add Ingredients: Once heated, add a small amount of cooking oil (if necessary) and your ingredients to the frying pan.
- Cook: Cook food to your preference. The frying pan heats simultaneously with the oven.
- Serve: Carefully remove cooked food.
5.3 Coffee Machine Operation
The integrated coffee machine has a 600ml capacity and uses a drip distillation method for brewing coffee. It can also be used for tea or boiling water.
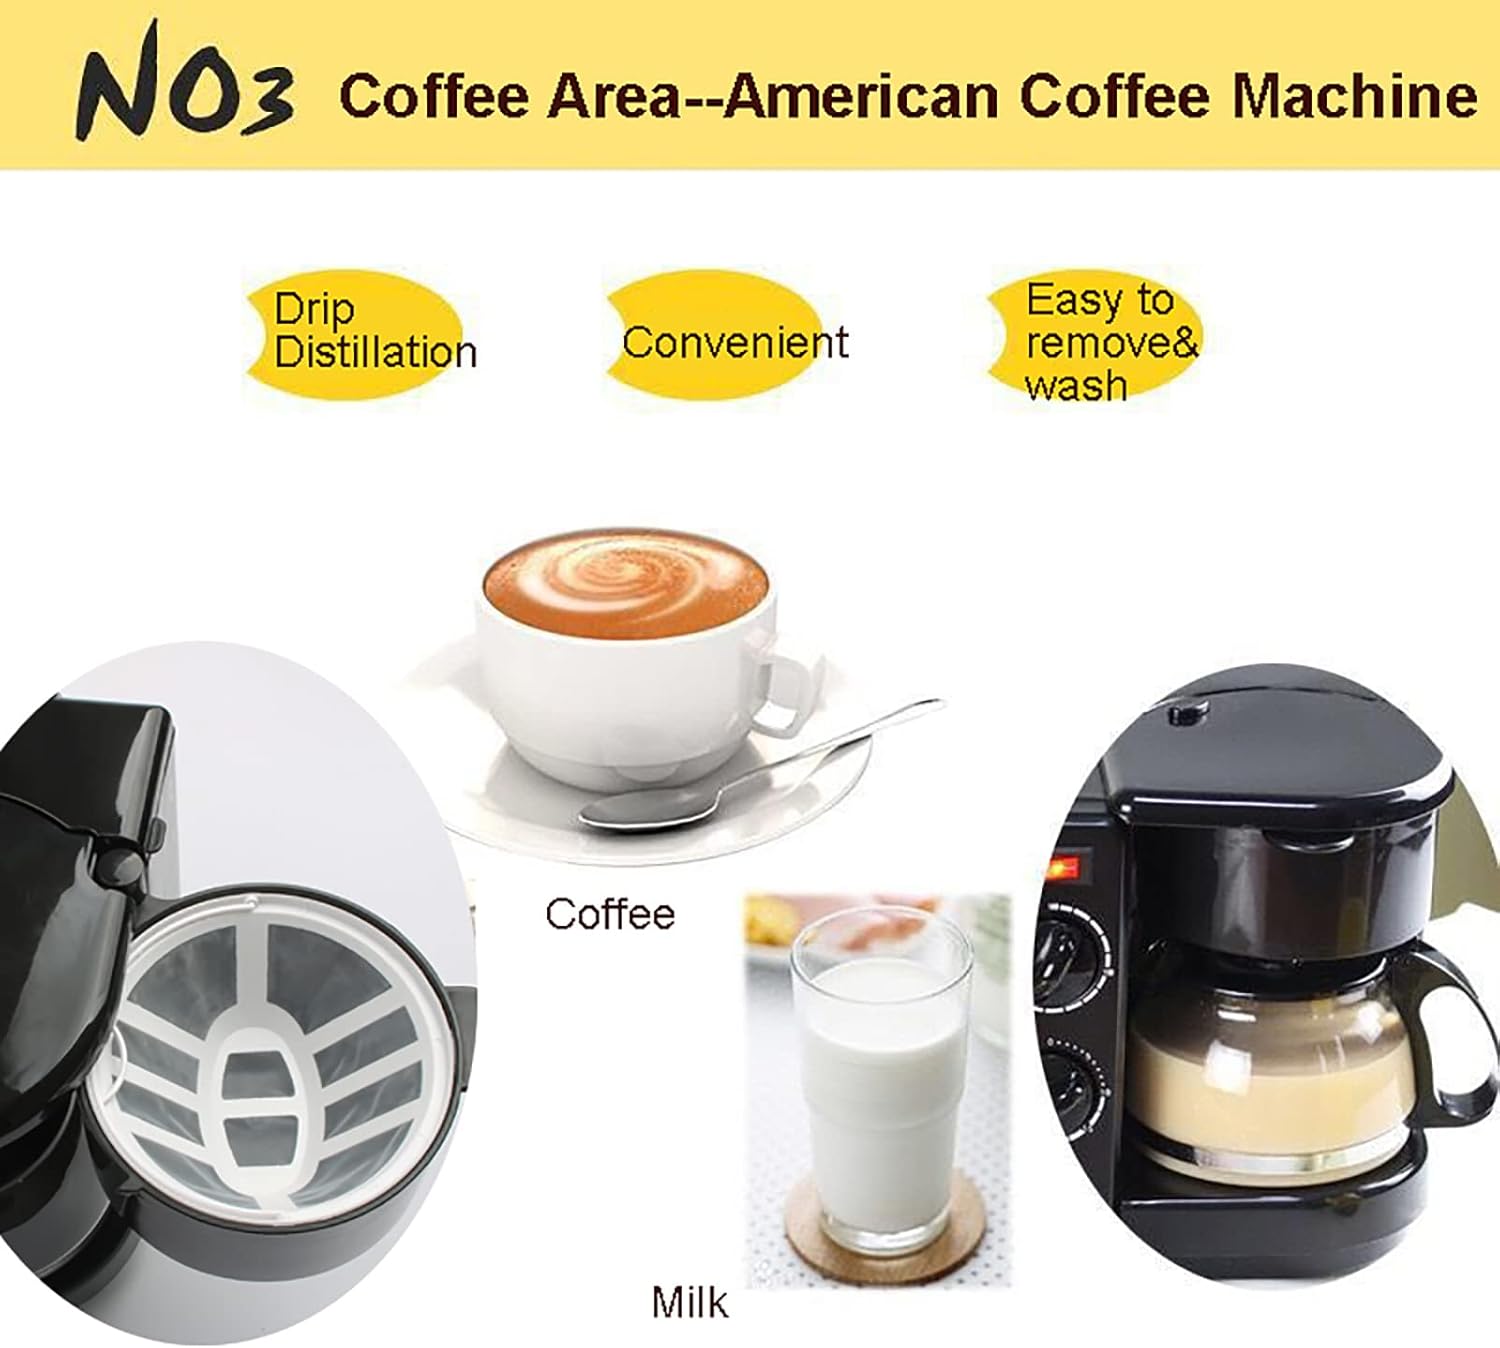
Image 5.3.1: View of the coffee machine area, illustrating its drip distillation method, convenience, and ease of cleaning. The image shows the filter basket and the glass coffee pot.
- Fill Water Reservoir: Open the lid of the water reservoir and fill with fresh, cold water up to the desired level (max 600ml).
- Add Coffee Grounds: Place a coffee filter into the filter basket and add your desired amount of ground coffee.
- Place Pot: Ensure the glass coffee pot is correctly positioned on the warming plate.
- Start Brewing: Use the dedicated switch (usually a button near the coffee machine controls) to turn on the coffee maker. The coffee will begin to brew.
- Serve: Once brewing is complete, carefully remove the coffee pot and serve. The warming plate will keep the coffee hot.
5.4 Example Cooking Process
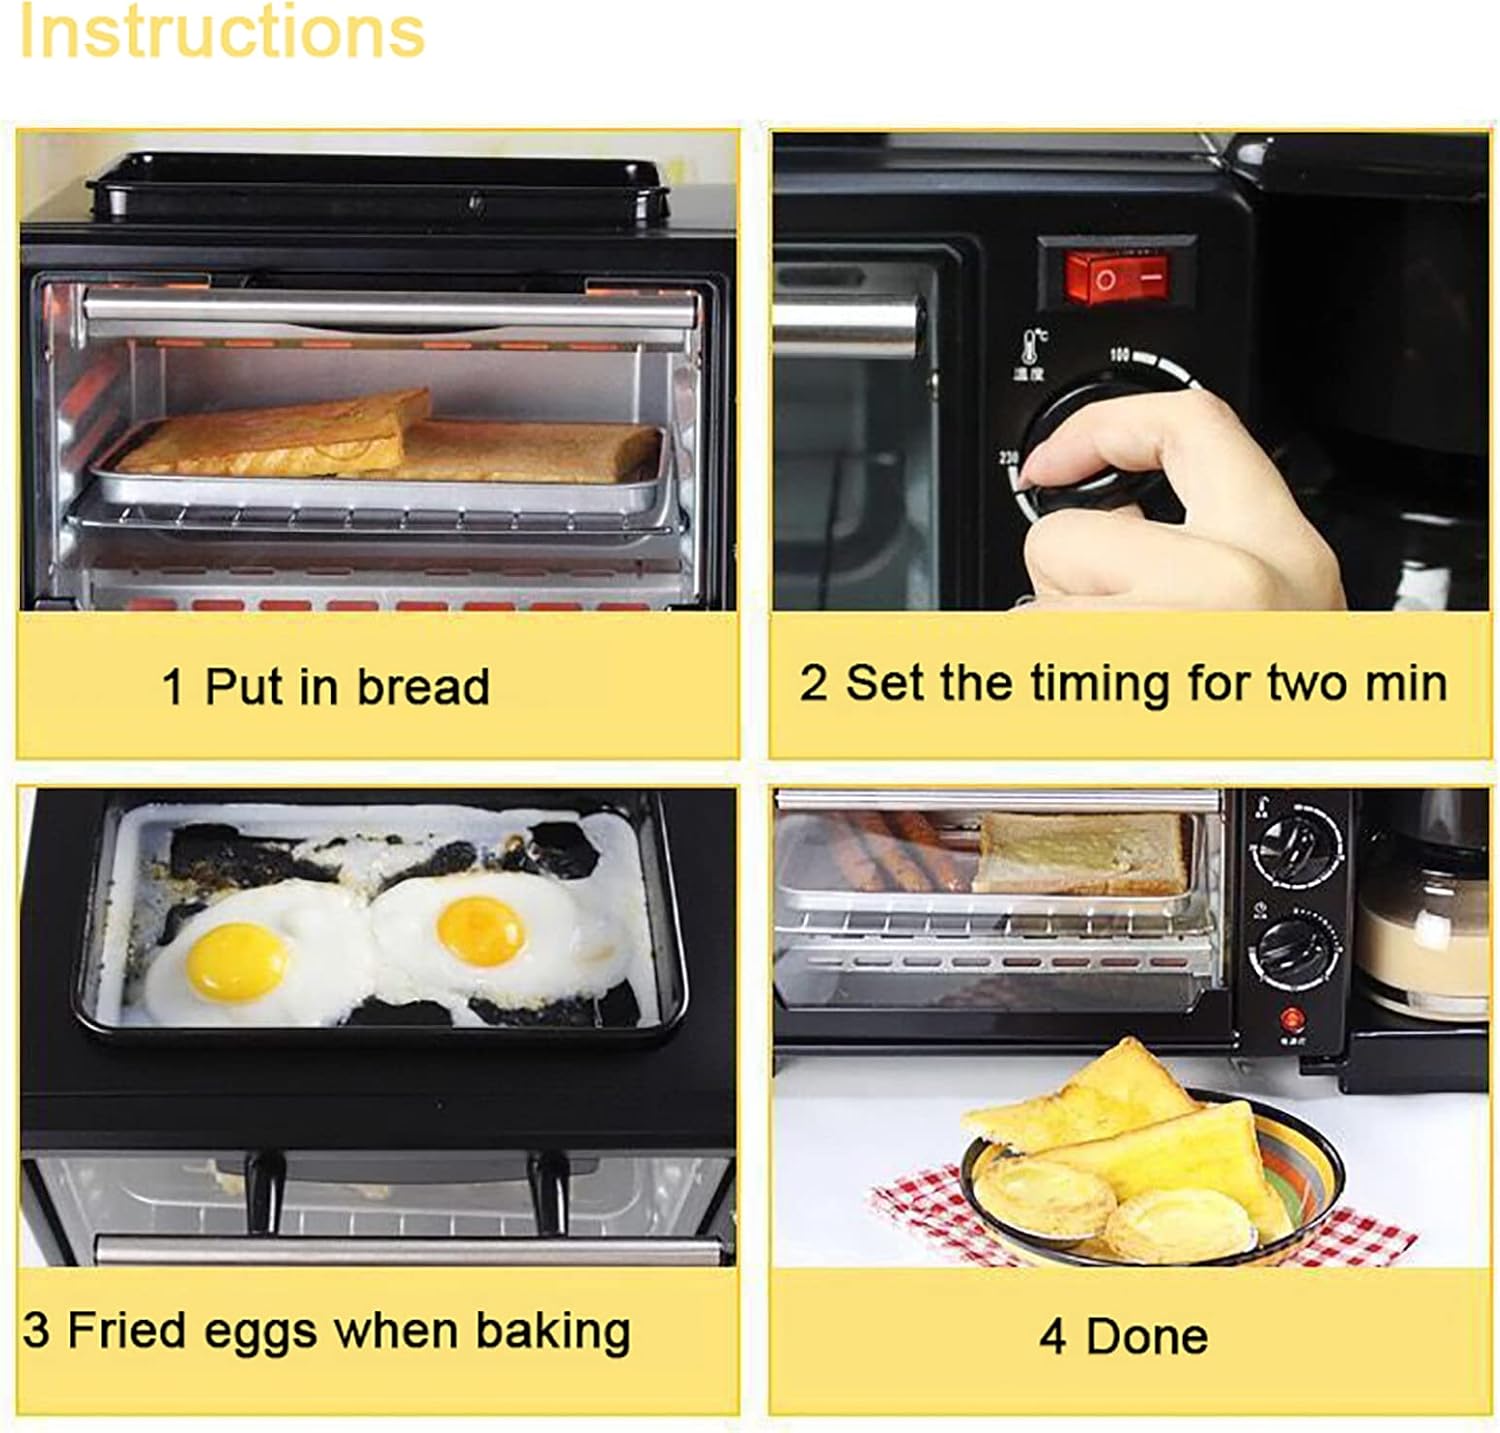
Image 5.4.1: A four-panel image demonstrating a simple breakfast preparation: 1. Placing bread in the oven. 2. Setting the oven timer. 3. Frying eggs on the top griddle while the oven bakes. 4. The finished breakfast meal.
This image illustrates a common use case where the oven and frying pan are used simultaneously:
- Place bread or other items in the oven.
- Set the oven timer and temperature as required (e.g., 2 minutes for toast).
- While the oven is operating, use the top frying pan to cook eggs or other items.
- Once cooking is complete, carefully remove all items.
6. Maintenance and Cleaning
Regular cleaning ensures optimal performance and extends the lifespan of your appliance. Always unplug the unit and allow it to cool completely before cleaning.
- Exterior: Wipe the exterior surfaces with a soft, damp cloth. Do not use abrasive cleaners or scouring pads.
- Oven Interior: The oven tray, wire rack, and crumb tray are removable for easy cleaning. Wash them in warm, soapy water, rinse, and dry thoroughly. For stubborn stains, a non-abrasive cleaner can be used.
- Frying Pan: The nonstick griddle is removable. Wash with warm, soapy water using a soft sponge. Avoid metal utensils or abrasive cleaners to protect the nonstick coating.
- Coffee Pot & Filter Basket: The glass coffee pot and filter basket can be washed in warm, soapy water. Rinse well and dry.
- Crumb Tray: Regularly remove and empty the crumb tray to prevent accumulation of food particles, which can be a fire hazard.
- Do NOT immerse the main unit in water or any other liquid.
7. Troubleshooting
| Problem | Possible Cause | Solution |
|---|---|---|
| Appliance does not turn on. | Not plugged in; power outlet malfunction; timer not set. | Ensure the power cord is securely plugged into a working outlet. Check if the timer knob is set for oven/frying pan operation. Ensure the coffee machine switch is on. |
| Oven not heating. | Temperature or timer not set correctly. | Verify that both the temperature and timer knobs are set to the desired cooking parameters. |
| Coffee not brewing. | Water reservoir empty; coffee machine switch off. | Fill the water reservoir. Ensure the coffee machine's power switch is in the "on" position. |
| Uneven cooking. | Food placement; oven too crowded. | Ensure food is placed centrally and not overcrowding the oven. Rotate food halfway through cooking if necessary. |
| Smoke or burning smell. | Food spills; accumulated crumbs; flammable materials inside. | Immediately unplug the unit. Allow to cool. Clean the interior, crumb tray, and heating elements. Ensure no flammable materials are near or inside the oven. |
If the problem persists after attempting these solutions, please contact customer support.
8. Specifications
| Feature | Detail |
|---|---|
| Brand | Dntum |
| Model | B0DDKKV2SS |
| Material | High borosilicate glass, ABS, cold rolled sheet, galvanised sheet metal |
| Coffee Pot Capacity | 600 ml (20.29 oz) |
| Oven Volume | 9 litres (2.38 gal) |
| Oven / Frying Pan Power | 600 W |
| Coffee Pot Power | 450 W |
| Total Rated Power | 1050 W |
| Voltage | 220 V |
| Frequency | 50 Hz |
| Operating Mode | Separate operation for oven/frying pan and coffee machine |
| Time Control | 0-30 minutes timer |
| Temperature Control | 100-230°C |
| Product Dimensions (L x W x H) | 45 x 18 x 26 cm (17.72 x 7.09 x 10.23 inches) |
| Weight | 4 kg (8.82 lbs) |
9. Warranty and Support
Information regarding product warranty and customer support was not provided in the available product data. Please refer to the retailer or manufacturer's website for specific warranty terms and contact information for support inquiries.
For general inquiries or assistance, you may also refer to the seller "paozhanggumf" on the Amazon platform where the product was purchased.