
Spider Farmer Auto Drip Irrigation System User Manual
Brand: Spider Farmer
Model: 21e103d0-103f-4dcc-8db2-7b16f3748c1a
Product Overview
The Spider Farmer Auto Drip Irrigation System is designed to provide efficient and automatic watering for your plants in grow tents, greenhouses, or lawns. This comprehensive kit includes a 13-gallon bucket, a powerful 25W intelligent water pump, and adjustable drip emitters to ensure precise water delivery directly to plant roots.
Key features include:
- 25W Intelligent Water Pump: Delivers up to 12 L/min flow rate and features a low water level sensor for automatic stop/start, enhancing irrigation efficiency.
- 13-Gallon Large Capacity Bucket: Reduces refill frequency. Constructed from durable nylon polyester fiber base cloth with a double-layer high-strength PVC coating for temperature and corrosion resistance. ROHS compliant.
- 8-outlet Drip Emitter: Adjustable multi-spout with a 0-360° spraying range and a maximum water output of 160 L/H, allowing for customized irrigation schemes.
- Water Saving: Delivers water directly to plant roots, minimizing waste and evaporation for optimized plant growth and improved yield.

Image: The complete Spider Farmer Auto Drip Irrigation System, showing the central 13-gallon bucket connected to four plant pots, illustrating its application in a growing environment.
Safety Information
Ensure the water pump is connected to a properly grounded outlet and avoid using the kit near water sources to reduce the risk of electric shock. Always follow local electrical safety guidelines.
What's Included (Packing List)
The Spider Farmer Auto Drip Irrigation System includes the following components:
- 25W Intelligent Water Pump
- 13-Gallon Folding Bucket (50L)
- 8pcs Drip Emitter
- 5pcs Upright Column
- 2M 8/12mm Drip Tubing (Feeding Air Hose)
- 12M 4/6mm Drip Tubing (Feeding Air Hose)
- 2pcs Tube Connector
- AC Adapter (Power Adapter)
- Upright Column Base
- Overflow Spout
- 8/12mm Locking Switch Valve
- 8/12mm Locking Plug
- Check Valve
- Drain Switch Valve

Image: A visual representation of all components included in the Spider Farmer Auto Drip Irrigation System kit, laid out for easy identification.
Setup Instructions
Follow these steps to set up your Spider Farmer Auto Drip Irrigation System:
- Assemble the Bucket Structure: Insert the upright columns into the designated sleeves on the side of the folding bucket. Attach the upright column bases (feet) to the bottom of these columns for stability.
- Install Overflow Spout: Insert the overflow spout into the hole located on the top side of the bucket. Ensure the waterproof ring is correctly placed on both sides for a secure seal.
- Install Drain Switch Valve: Install the drain switch valve into the hole at the bottom of the bucket. This valve allows for easy draining and cleaning of the reservoir.
- Connect Water Pump and Power: Thread one end of the power adapter cable through the designated hole on the bucket and connect it to the water pump inside the bucket. Place the water pump at the bottom of the bucket.
- Attach Main Hose: Connect one end of the larger 8/12mm drip tubing to the water pump's outlet inside the bucket and thread it out through the same hole as the power cable.
- Install Check Valve: Install the check valve onto the main hose (8/12mm drip tubing) to prevent water from siphoning back into the reservoir when the pump is off.
- Connect Locking Switch Valve: Connect the 8/12mm locking switch valve to the main hose. This valve controls the overall water flow from the reservoir.
- Attach Tube Connector: Connect the 4-way tube connector (or appropriate connector for your setup) to the main hose after the locking switch valve.
- Run Smaller Tubing to Plants: Cut the smaller 4/6mm drip tubing to the required lengths for each plant. Connect one end of these smaller tubes to the outlets on the tube connector.
- Install Drip Emitters: Connect a drip emitter to the end of each 4/6mm PVC pipe. For easier installation, you may soak the ends of the smaller hoses in hot water before pressing them onto the barb fittings of the emitters. Insert the drip emitter into the soil near the base of each plant.
- Secure End Cap: Attach the locking plug (end cap) to the end of the main hose to complete the circuit and prevent water leakage.

Image: Detailed view of the 50L folding bucket, highlighting its durable construction and capacity markings.

Image: Diagram illustrating the 25W intelligent water pump, showing its flow rate and power specifications.
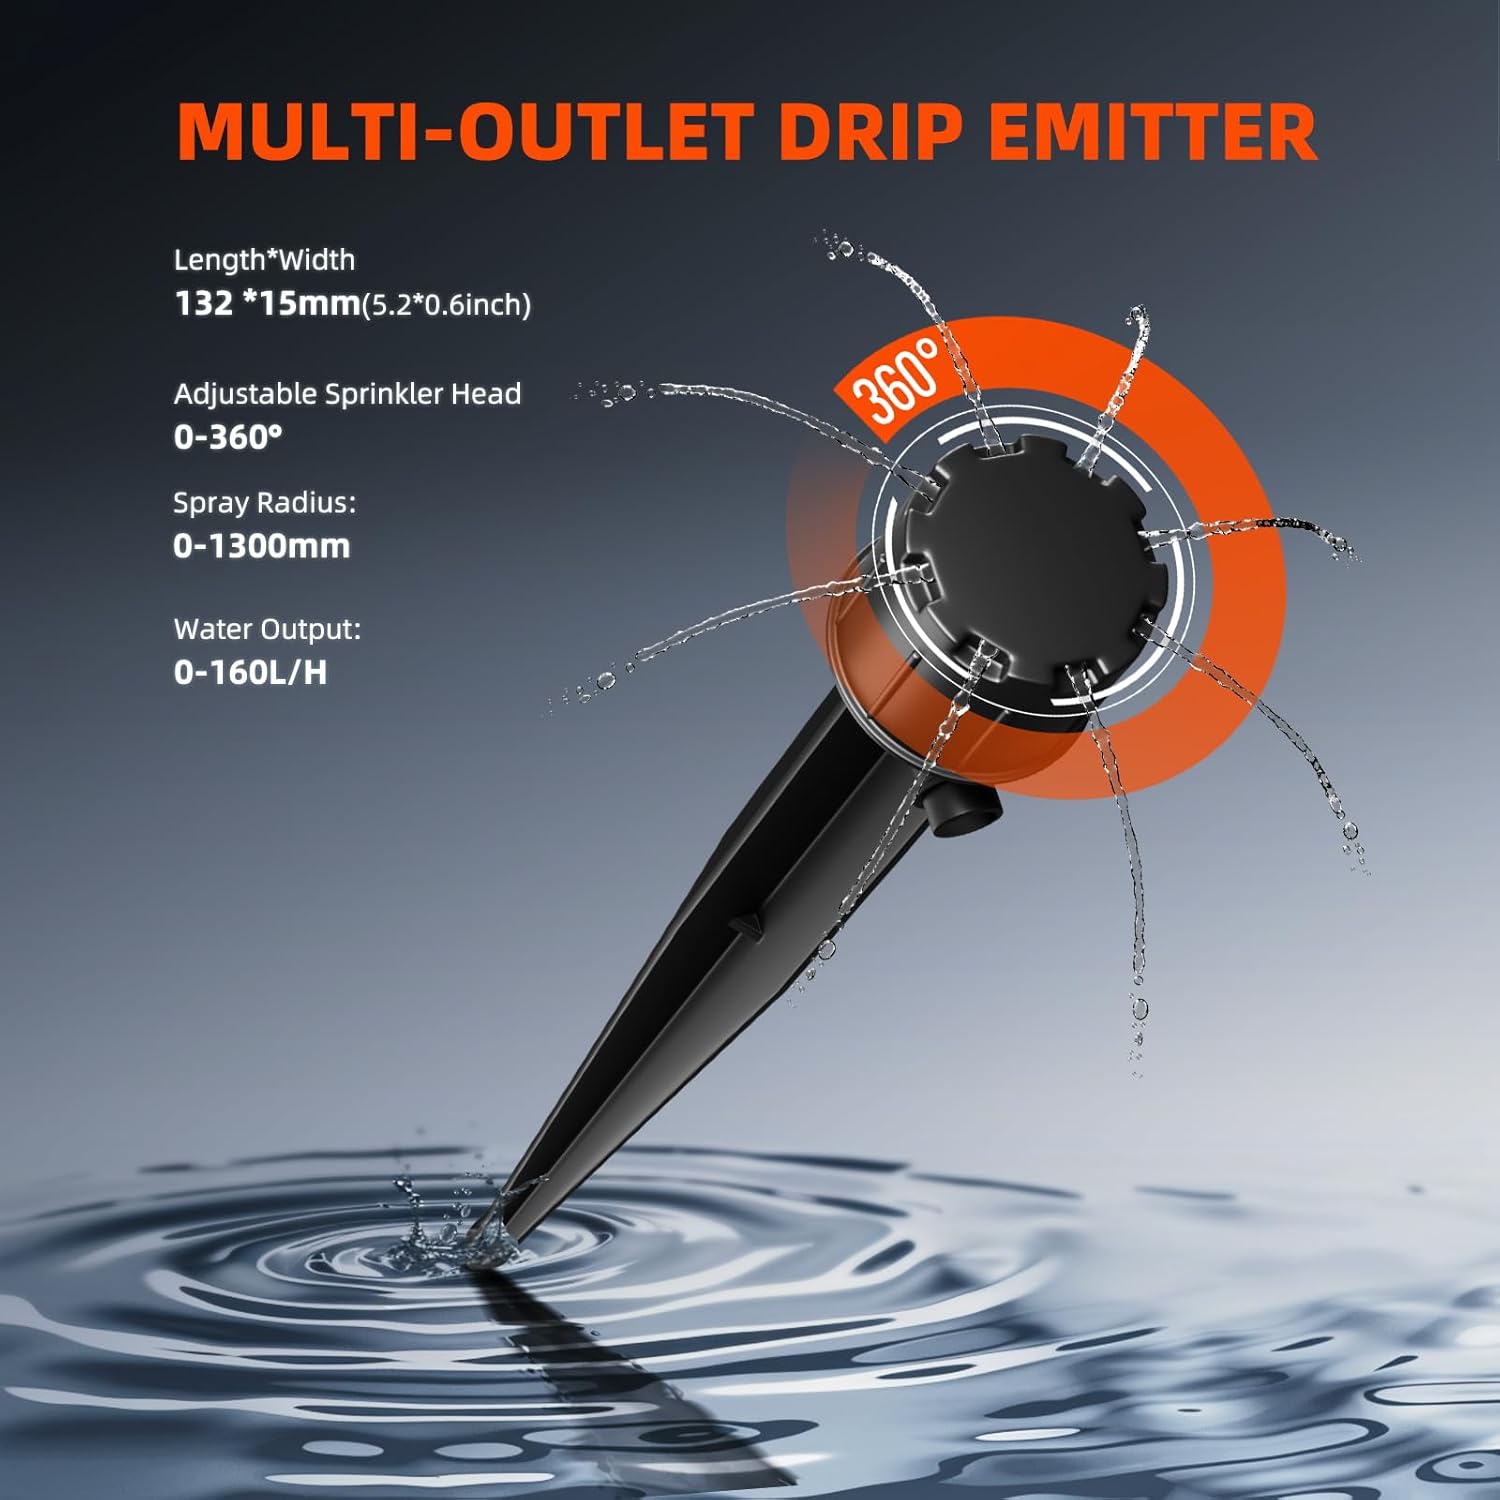
Image: Close-up of the multi-outlet drip emitter, detailing its adjustable spray range and water output capabilities.

Image: An example installation scenario showing how the drip irrigation system can be set up to water multiple plants from the central bucket.
Setup Video Guide
Video: Official Spider Farmer Drip Irrigation System installation guide, demonstrating the assembly and setup process step-by-step.
Operating Instructions
Once the system is fully assembled and the reservoir is filled with water (and nutrients, if desired), you can begin operation:
- Fill the Reservoir: Open the zippered lid of the 13-gallon bucket and carefully pour in your water solution. The bucket has markings for volume (e.g., 10L, 20L, up to 50L).
- Turn On Power: Locate the inline switch on the power cable and turn it to the "ON" position. The intelligent water pump will begin to operate, delivering water through the tubing to the drip emitters.
- Adjust Water Flow: Each drip emitter features an adjustable sprinkler head. Twist the head clockwise to reduce water flow or counter-clockwise to increase it. Adjust the flow rate for each plant based on its specific watering needs.
- Monitor Water Levels: The intelligent pump features a low water level sensor that will automatically stop the pump when water levels are too low and restart when refilled. Regularly check the water level in the reservoir to ensure continuous operation.

Image: Close-up view of the adjustable sprinkler head, demonstrating how to twist it to regulate water output for precise control.
Maintenance
Regular maintenance ensures the longevity and optimal performance of your drip irrigation system:
- Reservoir Cleaning: Periodically drain and clean the 13-gallon bucket to prevent algae buildup and sediment accumulation. The drain switch valve at the bottom makes this process easy.
- Emitter Inspection: Regularly check the drip emitters for any clogs or blockages. If an emitter is not dispensing water properly, gently clean it or replace it if necessary.
- Tubing Check: Inspect all drip tubing for kinks, leaks, or damage. Ensure all connections are secure to prevent water loss.
- Pump Maintenance: Occasionally remove the water pump from the reservoir and clean its filter to ensure unrestricted water flow and prevent pump strain.
Troubleshooting
Here are some common issues and their potential solutions:
- No Water Flow:
- Check if the power adapter is properly connected and the inline switch is ON.
- Ensure the reservoir has sufficient water. The intelligent pump will stop if water levels are too low.
- Verify that the locking switch valve is open.
- Inspect the water pump filter for clogs.
- Check for kinks or blockages in the main hose or smaller drip tubing.
- Uneven Water Distribution:
- Adjust the flow rate of individual drip emitters by twisting their heads.
- Check for partial clogs in specific emitters and clean them.
- Difficulty Attaching Small Hoses to Emitters:
- Soak the ends of the smaller 4/6mm hoses in hot water for a few seconds before pressing them onto the barb fittings of the drip emitters. This will make the tubing more pliable.
- Water Continues to Flow When Power is Off:
- Ensure the check valve is correctly installed and functioning. If water siphons back, the check valve may be installed incorrectly or be faulty.
- Verify that the locking switch valve is fully closed.
Specifications
| Feature | Value |
|---|---|
| Brand | Spider Farmer |
| Model Number | 21e103d0-103f-4dcc-8db2-7b16f3748c1a |
| Package Dimensions | 16.77 x 6.93 x 5 inches |
| Item Weight | 5.29 Pounds |
| Material | Nylon Polyester Fiber Base Cloth |
| Power Source | AC Adapter |
| Special Feature | Automatic Watering, Adjustable |
| Water Pump Flow Rate | Up to 12 L/min |
| Bucket Capacity | 13 Gallons (50 Liters) |
| Drip Emitter Spray Range | 0-360° |
| Drip Emitter Max Water Output | 160 L/H |
Warranty and Support
For warranty information, technical support, or any inquiries regarding your Spider Farmer Auto Drip Irrigation System, please contact Spider Farmer customer service directly. Refer to the product packaging or the official Spider Farmer website for contact details.
You can also visit the Spider Farmer Store on Amazon for additional resources and product information.