
Introduction
This manual provides detailed instructions for the assembly, operation, maintenance, and storage of your Balsam Hill Frosted Alpine Balsam Fir artificial Christmas tree. Please read all instructions carefully before setup to ensure proper use and longevity of your product.
Package Contents
Your Balsam Hill Frosted Alpine Balsam Fir tree package includes the following items:
- Tree sections (number varies by height, for 4.5ft model, typically 2-3 sections)
- Premium and sturdy metal tree stand
- Durable storage bag for easy off-season storage
- Protective gloves for safe tree shaping
- Foot pedal for convenient light control (for pre-lit models)

Figure 1: Included accessories and tree sections.
Setup Instructions
Follow these steps to assemble your Balsam Hill Frosted Alpine Balsam Fir artificial Christmas tree:
- Prepare the Stand: Unfold the metal tree stand and place it on a flat, stable surface. Ensure the stand is fully open and secure.
- Insert Bottom Section: Carefully insert the bottom section of the tree into the stand. Tighten the screws on the stand to secure the tree section.
- Connect Middle Sections: Insert the middle tree section(s) into the section below it. The Easy Plug technology will automatically connect the lights as you assemble the sections.
- Attach Top Section: Place the top section of the tree onto the uppermost middle section.
- Shape the Branches: Wearing the provided protective gloves, begin shaping the branches. The tree features pre-fluffed memory wire branches that fan out automatically. Gently spread and arrange individual branch tips from the trunk outwards to achieve desired fullness. Ensure spacious gaps between branches for ornament display, characteristic of the sparse design.

Figure 2: Easy Plug technology for automatic light connection during assembly.

Figure 3: Visual guide for assembly and branch shaping.
Operating Instructions
Your Balsam Hill Frosted Alpine Balsam Fir tree comes pre-lit with LED Clear Fairy Lights. Follow these instructions to operate the lighting:
- Power Connection: Ensure all tree sections are properly connected. Plug the main power cord into a standard electrical outlet.
- Light Control: Use the included foot pedal to turn the lights on and off.
- Light Modes: For models with multiple light functions, repeatedly press the foot pedal to cycle through available light modes (e.g., steady on, flashing, fading). This specific model features clear fairy lights, typically offering a steady on/off function.
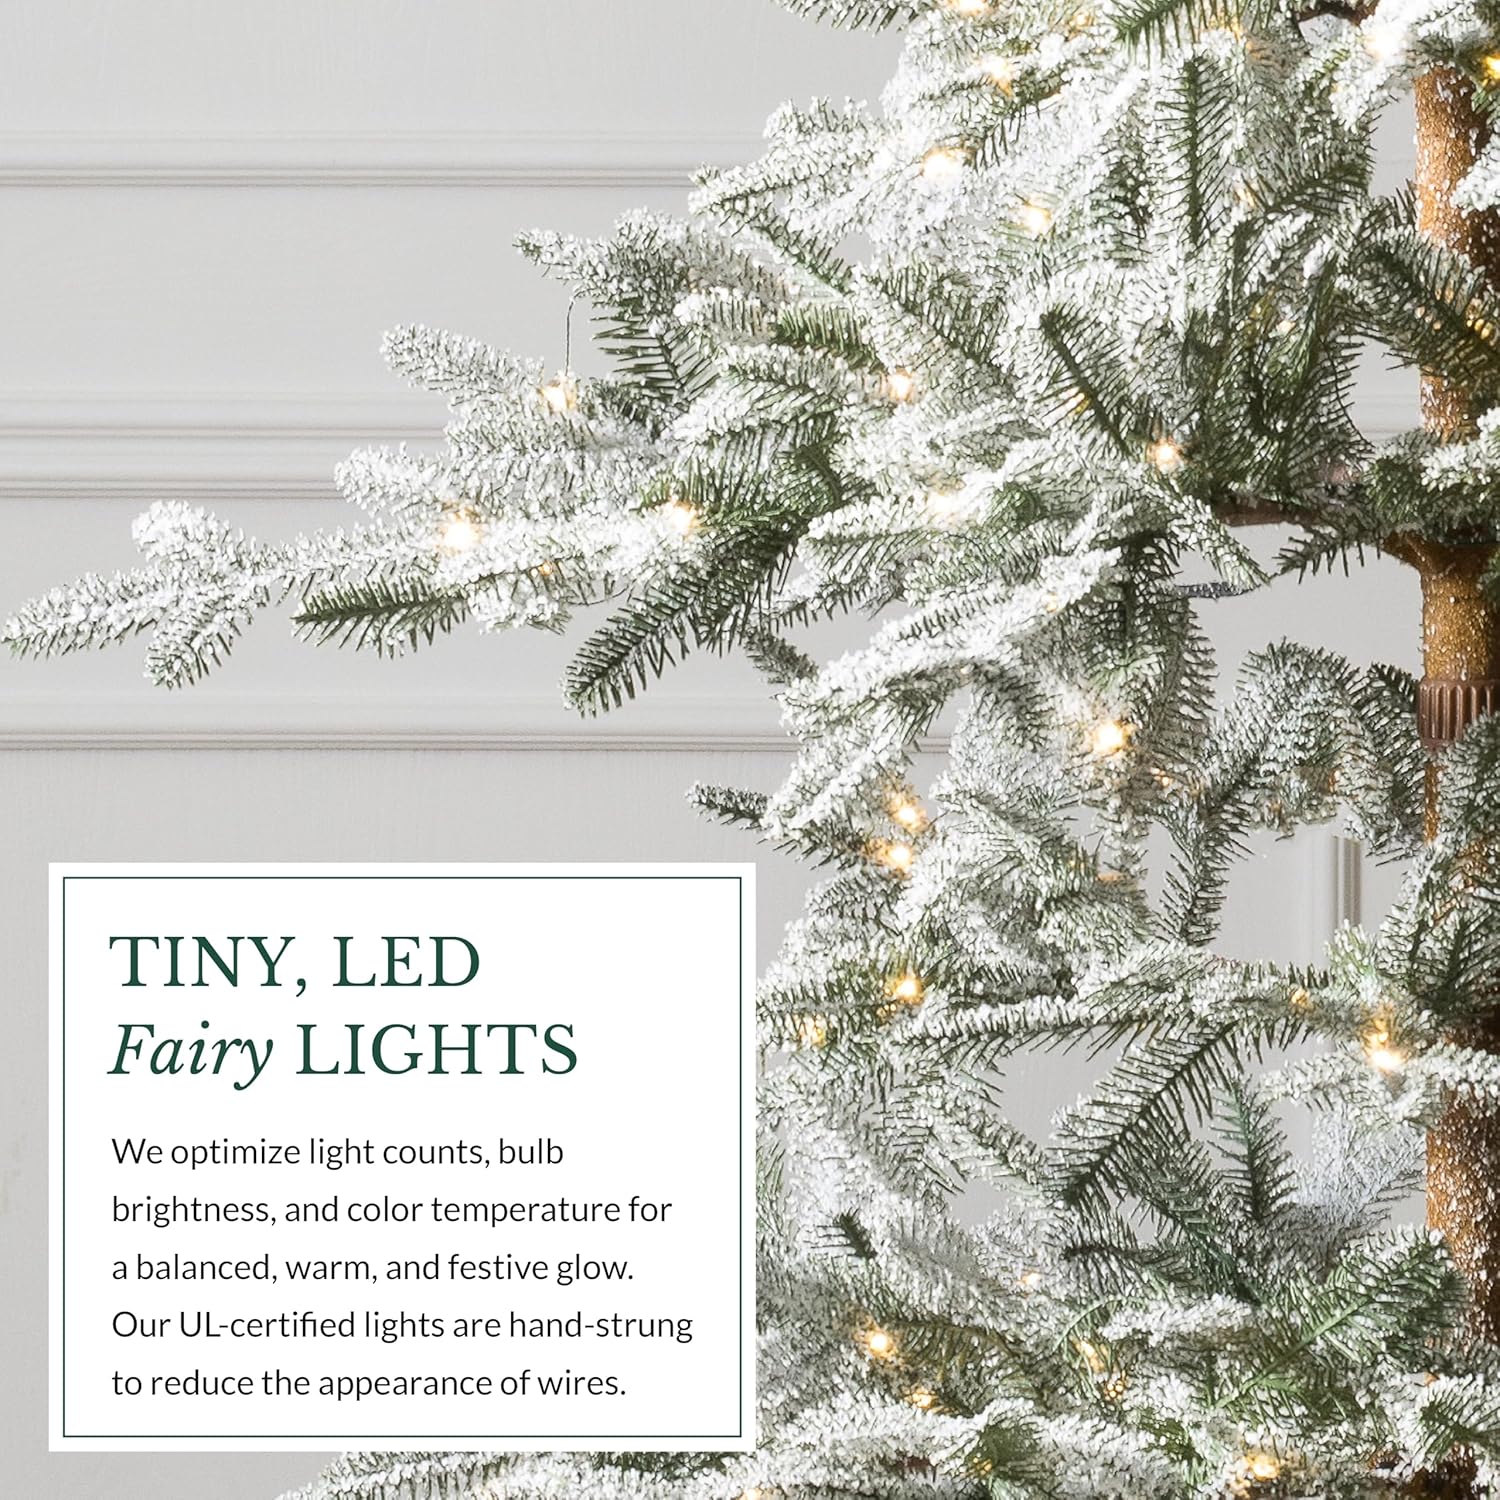
Figure 4: Detail of the LED Clear Fairy Lights.
Maintenance
To keep your artificial Christmas tree in optimal condition:
- Cleaning: Dust the branches periodically with a soft cloth or duster. Avoid using harsh chemicals or abrasive cleaners.
- Light Check: Before and after each season, inspect the LED lights for any damage or loose connections. Replace any non-functioning bulbs if necessary (refer to manufacturer guidelines for specific bulb replacement).
- Branch Adjustment: Over time, branches may shift. Gently reshape them as needed to maintain the tree's desired appearance.
Storage
Proper storage is essential for preserving your tree's quality and extending its lifespan:
- Remove Ornaments: Ensure all ornaments and decorations are removed from the tree.
- Unplug Lights: Disconnect the power cord from the outlet and the tree.
- Compress Branches: Gently compress the branches towards the center pole. If the tree came with ribbons or ties, use them to secure the branches.
- Disassemble Sections: Carefully dismantle the tree sections from top to bottom.
- Store in Bag: Place each section into the provided durable storage bag. Store the tree in a cool, dry location, away from direct sunlight and extreme temperatures.

Figure 5: Example of proper storage for artificial trees.
Troubleshooting
If you encounter issues with your Balsam Hill artificial Christmas tree, refer to the following common troubleshooting tips:
- Lights Not Working:
- Check all power connections, ensuring the tree is securely plugged into an outlet and all internal section connections are firm.
- Verify that the foot pedal is functioning correctly and is in the "on" position.
- Inspect individual bulbs for damage. Some LED light sets may have replaceable bulbs or fuses.
- Tree Stability:
- Ensure the tree stand is fully extended and the screws are tightened securely around the bottom pole.
- Verify that the tree is placed on a flat, even surface.
- Branches Not Full:
- Dedicate sufficient time to shaping each branch and individual tip. The memory wire branches are designed to be easily manipulated for optimal fullness.
Specifications
| Feature | Detail |
|---|---|
| Brand | Balsam Hill |
| Model Number | 2807867 |
| Product Dimensions (4.5ft model) | 32"D x 32"W x 54"H |
| Color | Fairy Lights - Frosted |
| Material | Polyethylene |
| Item Weight | 9 Pounds |
| Tip Count (4.5ft model) | 448 |
| Built-in Light | Yes |
| Light Color | Clear |
| UPC | 196041218341 |
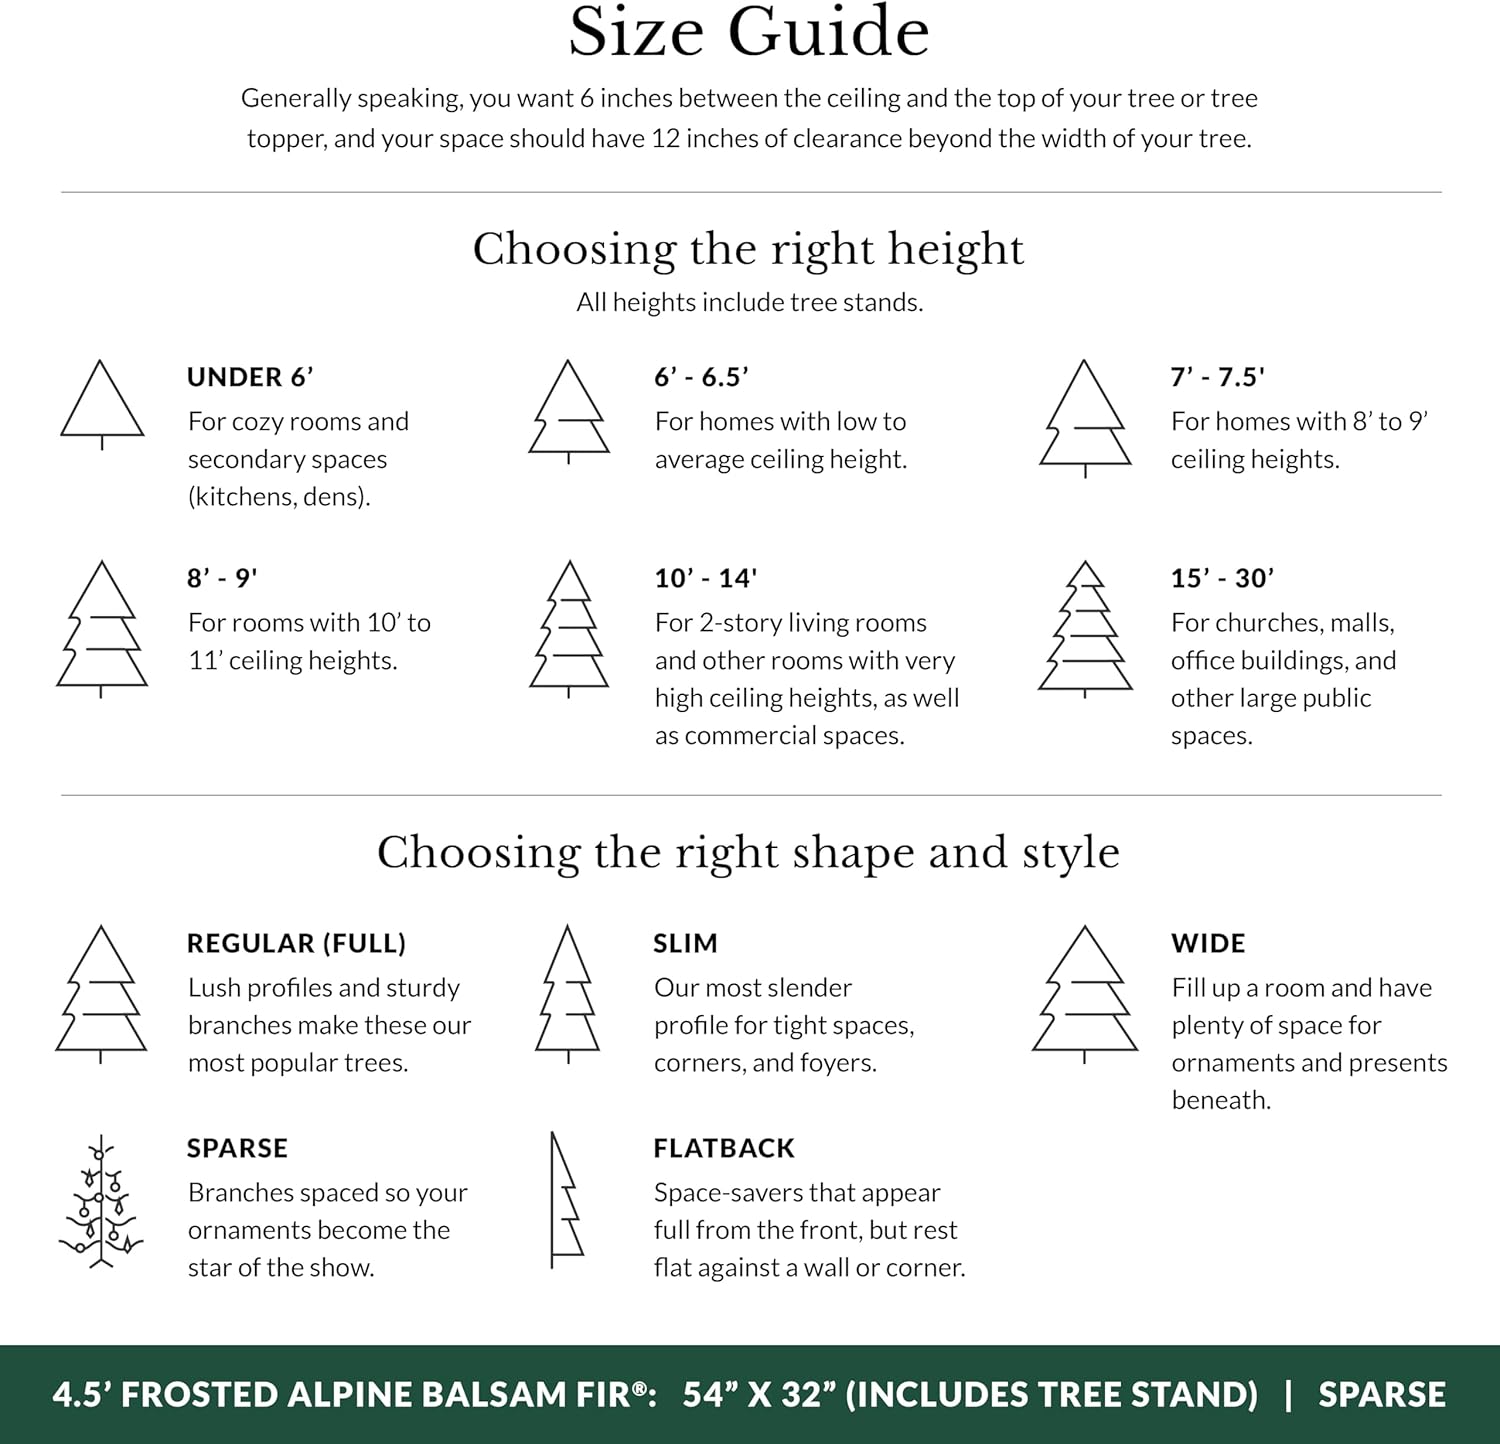
Figure 6: General size guide for Balsam Hill trees.
Warranty and Support
For warranty information, product support, or to purchase replacement parts, please contact Balsam Hill customer service directly. Refer to the product packaging or the official Balsam Hill website for the most current contact details and warranty terms.