
1. Introduction
The METALFISH ZH-1400 CPU Cooler is designed to provide efficient and quiet cooling for your computer's central processing unit. Featuring advanced heat pipe technology and a 4-pin PWM ARGB fan, it ensures optimal thermal performance while maintaining low noise levels. This manual provides detailed instructions for installation, operation, maintenance, and troubleshooting to help you get the most out of your CPU cooler.
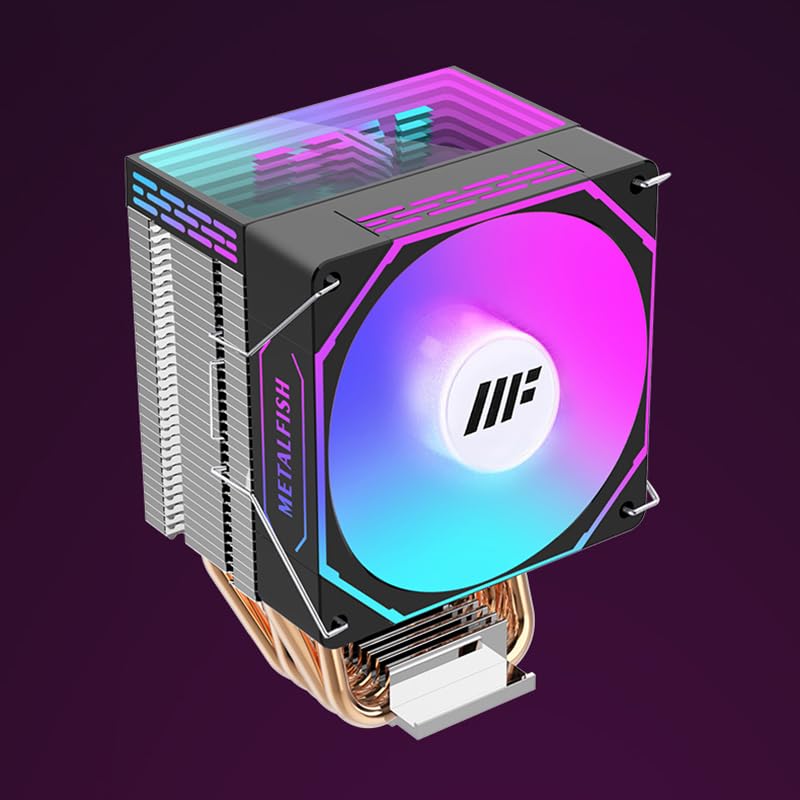
Figure 1: The METALFISH ZH-1400 CPU Cooler, showcasing its ARGB fan and heatsink design.
2. Package Contents
Before installation, please verify that all components are present in the package:
- METALFISH ZH-1400 CPU Cooler (Heatsink and Fan assembly)
- Mounting accessories kit (brackets, screws, backplates for various sockets)
- Thermal paste
- User Manual (this document)
3. Installation Guide
This section provides general installation steps. Specific steps may vary slightly depending on your motherboard's CPU socket type (Intel or AMD). Always refer to your motherboard's manual for precise socket information.
3.1 Prepare Your System
- Power off your computer and disconnect all cables.
- Open your computer case to access the motherboard.
- Remove any existing CPU cooler. Clean the CPU surface thoroughly to remove old thermal paste using isopropyl alcohol.
3.2 Install Mounting Hardware
Select the appropriate mounting brackets and backplate for your CPU socket (Intel LGA 1700/1200/115x/1366/2011 or AMD AM4/AM5/AM3).
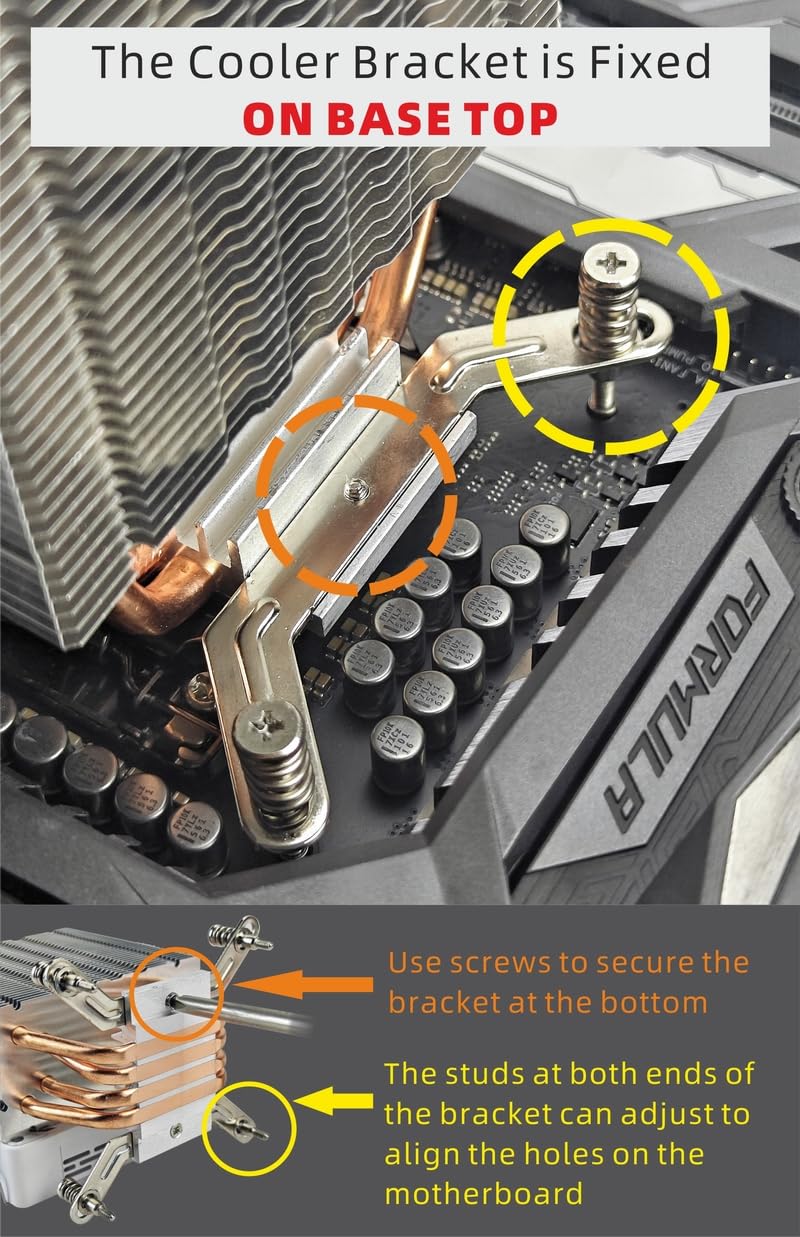
Figure 2: Illustration of the cooler bracket being fixed to the motherboard. The image shows how screws secure the bracket at the bottom, and adjustable studs align with motherboard holes for various socket types.
- Attach the correct backplate to the rear of your motherboard, aligning it with the CPU socket holes.
- Secure the mounting studs or standoffs through the motherboard from the front side.
- Place the cooler's mounting bracket onto the studs, ensuring it is oriented correctly. Use the provided screws to secure the bracket firmly but do not overtighten.
3.3 Apply Thermal Paste and Mount Cooler
- Apply a small amount of thermal paste (pea-sized dot or thin line) to the center of your CPU's integrated heat spreader (IHS). Do not spread it manually; the pressure from the cooler will distribute it.
- Carefully place the METALFISH ZH-1400 CPU cooler onto the CPU, aligning the cooler's base with the mounting bracket.
- Secure the cooler to the mounting bracket using the provided screws or clips. Tighten screws in a diagonal pattern (e.g., top-left, bottom-right, top-right, bottom-left) until snug. Do not overtighten.
3.4 Connect Fan and ARGB Cables
- Connect the 4-pin PWM fan cable to the "CPU_FAN" header on your motherboard.
- If your motherboard supports Addressable RGB (ARGB), connect the ARGB cable from the fan to a compatible 3-pin 5V ARGB header on your motherboard. Note: Do not connect to a 4-pin 12V RGB header, as this can damage the ARGB components.
Ensure all cables are routed neatly and do not obstruct fan blades or other components.
4. Operation
The METALFISH ZH-1400 CPU Cooler is designed for automatic and efficient operation once properly installed.
4.1 Cooling Mechanism
The cooler utilizes direct contact heat pipes to efficiently transfer heat from the CPU to the aluminum fin stack. The 4-pin PWM fan then dissipates this heat by moving air through the fins.
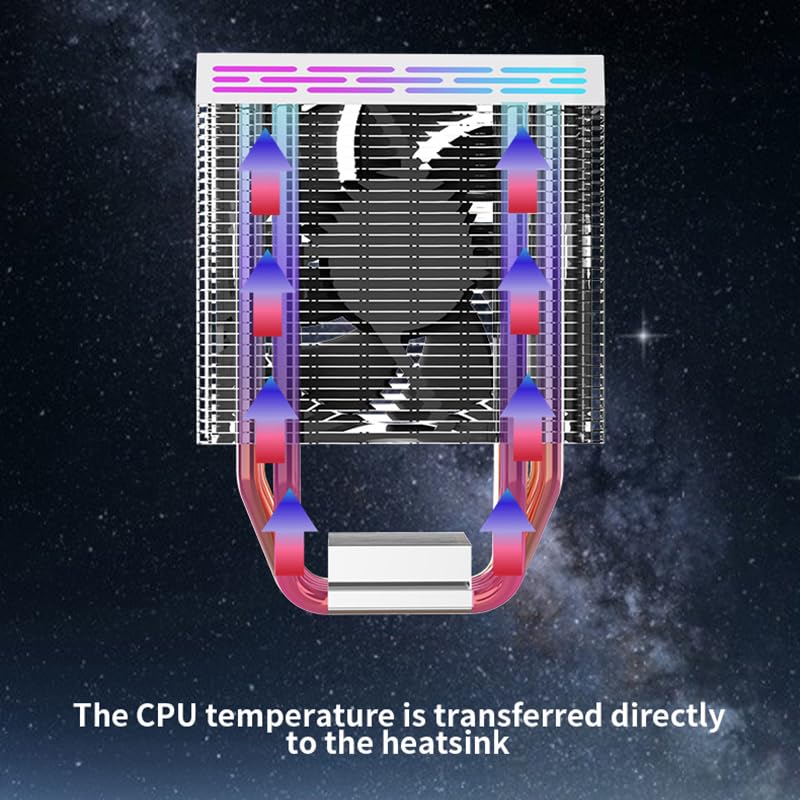
Figure 3: Visual representation of how CPU temperature is transferred directly to the heatsink via heat pipes for efficient cooling.
4.2 PWM Fan Control
The 4-pin PWM (Pulse Width Modulation) fan automatically adjusts its speed based on the CPU temperature. This ensures optimal cooling performance when needed and quieter operation during lighter loads.
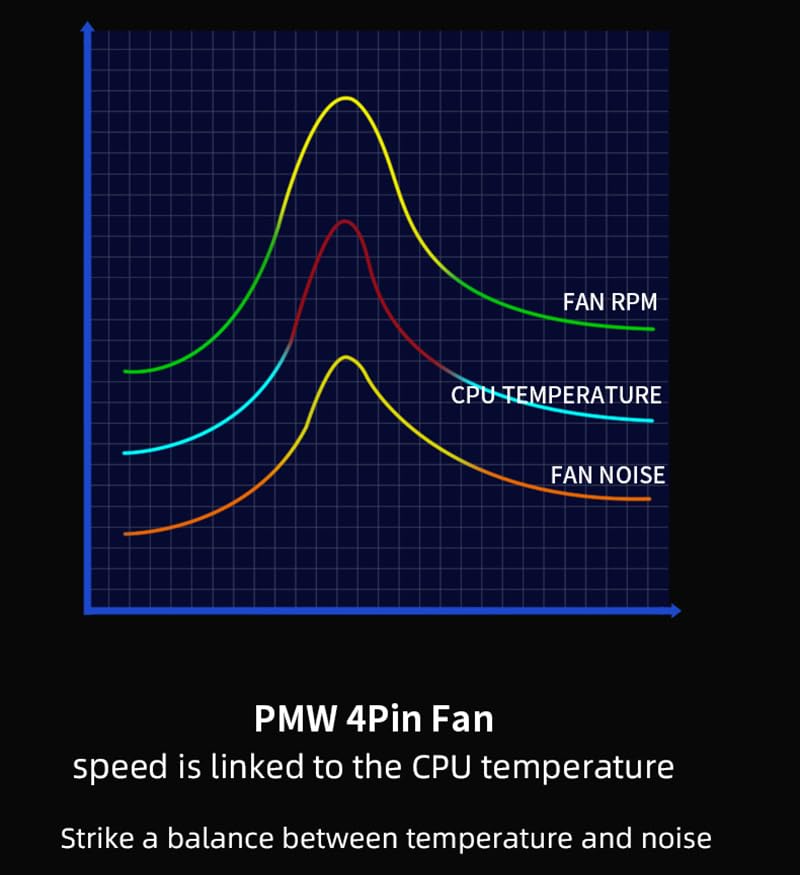
Figure 4: A graph illustrating the relationship between PWM fan speed, CPU temperature, and fan noise. The fan speed dynamically adjusts to balance temperature and noise levels.
You can typically configure fan curves and monitor temperatures through your motherboard's BIOS/UEFI settings or dedicated software provided by your motherboard manufacturer.
4.3 ARGB Lighting Control
If connected to a compatible ARGB header, the fan's lighting can be controlled via your motherboard's ARGB software (e.g., ASUS Aura Sync, MSI Mystic Light, Gigabyte RGB Fusion, ASRock Polychrome Sync). This allows for synchronization with other ARGB components in your system.
5. Maintenance
Regular maintenance ensures the longevity and optimal performance of your CPU cooler.
- Dust Cleaning: Periodically (every 3-6 months, depending on environment) clean dust from the heatsink fins and fan blades using compressed air or a soft brush. Ensure the fan is held stationary while cleaning with compressed air to prevent over-spinning and potential damage.
- Fan Inspection: Check the fan for any signs of wear, unusual noises, or obstructions.
- Cable Connections: Verify that all fan and ARGB cables are securely connected to the motherboard.
- Thermal Paste: While not typically required frequently, if you remove the cooler for any reason, it is recommended to clean off old thermal paste and apply new thermal paste before reinstallation.
6. Troubleshooting
If you encounter issues with your METALFISH ZH-1400 CPU Cooler, refer to the following common problems and solutions:
- Fan Not Spinning:
- Ensure the 4-pin PWM fan cable is securely connected to the "CPU_FAN" header on the motherboard.
- Check BIOS/UEFI settings to ensure the CPU fan header is enabled and configured correctly.
- Verify that the fan blades are not obstructed by cables or other components.
- High CPU Temperatures:
- Confirm the cooler is properly seated and securely mounted to the CPU.
- Check if sufficient thermal paste was applied and evenly spread. Reapply if necessary.
- Ensure the fan is spinning at appropriate speeds. Adjust fan curves in BIOS/UEFI if needed.
- Clean any dust accumulation from the heatsink fins.
- Verify adequate airflow within your computer case.
- ARGB Lighting Not Working:
- Ensure the ARGB cable is connected to a 3-pin 5V ARGB header, not a 4-pin 12V RGB header.
- Check the connection of the ARGB cable to both the fan and the motherboard.
- Verify that your motherboard's ARGB software is installed and configured correctly.
- Excessive Fan Noise:
- Check for any obstructions hitting the fan blades.
- Adjust fan speed curves in your motherboard's BIOS/UEFI to reduce maximum RPMs if temperatures allow.
- Ensure the fan is securely mounted and not vibrating against other components.
7. Specifications
| Feature | Specification |
|---|---|
| Model | ZH-1400 |
| Dimensions (L x W x H) | 3.8" x 2.8" x 5.3" (96.5mm x 71.1mm x 134.6mm) |
| Cooling Method | Air Cooling (Heat Pipe Direct Contact) |
| Fan Type | 4-Pin PWM ARGB Fan |
| Maximum Rotational Speed | 2200 RPM |
| Noise Level | 21 dB (at minimum speed) |
| Power Connector | 4-Pin (PWM) |
| TDP (Thermal Design Power) | 180W (estimated from Wattage: 180 watt-hours, assuming this refers to cooling capacity) |
| Compatible Intel Sockets | LGA 1700, 1200, 1150, 1155, 1156, 1366, 2011 |
| Compatible AMD Sockets | AM5, AM4, AM3, x99, x79 |
| Included Components | Mounting accessories, Thermal paste |
8. Warranty Information
METALFISH products are manufactured to the highest quality standards. For specific warranty terms and conditions, please refer to the warranty card included with your product or visit the official METALFISH website. Keep your proof of purchase for warranty claims.
9. Customer Support
If you have any questions, require technical assistance, or need to report an issue, please contact METALFISH customer support through their official website or the contact information provided in your product packaging. When contacting support, please have your product model (ZH-1400) and proof of purchase ready.
Official METALFISH Store: Visit the METALFISH Store on Amazon


