1. Product Overview
The JUNSUN Portable EV Charger is designed to provide efficient and reliable charging for Tesla electric vehicles, including Model 3, Model Y, Model S, and Model X. It features a 26ft charging cable and a 240V NEMA 14-50 plug, delivering up to 32 Amps (7.68 kW) of power. This charger is suitable for home, workplace, and on-the-go charging needs.

Image 1: JUNSUN Portable EV Charger connected to a Tesla, illustrating compatibility with Model X, S, Y, and 3. Note: J1772 EV owners require an additional adapter (not included).
Key Features:
- High Compatibility: Designed for Tesla Model 3/Y/S/X. Can also be used with J1772 EVs with an adapter (not included).
- User-Friendly Design: Equipped with a 26ft long charging cable for flexibility and ease of access.
- NEMA 14-50 Plug: Ideal for standard 240V outlets found in homes and workplaces.
- Advanced Safety: Includes over-voltage, over-current, and over-temperature protection.
- Durable & Portable: Constructed from high-quality materials for daily use and easy transport.
- Clear Indicators: Intuitive charging indicators display the charging status at a glance.
2. Safety Information
Read all safety instructions carefully before using the EV charger. Failure to follow these instructions may result in electric shock, fire, or serious injury.
- Professional Installation: Installation of a NEMA 14-50 receptacle should be performed by a qualified electrician to ensure compliance with local electrical codes and safety standards.
- Proper Grounding: Ensure the power outlet used is properly grounded. Do not use the EV charger if the outlet is not properly grounded.
- Avoid Water Exposure: Keep the charger and its connections away from water sources. The plug itself is not waterproof.
- Environmental Conditions: Avoid direct sunlight exposure during use, as this can significantly raise the charger's temperature. Seek outdoor shade for safety and longevity. The charger is designed to withstand temperatures from -25°F to +55°F.
- Inspect Before Use: Before each use, inspect the charger for any visible damage, frayed cables, or loose connections. Do not use if damaged.
- Children and Pets: Keep the charger out of reach of children and pets during operation.
- Emergency Shutdown: In case of any malfunction or unusual behavior, immediately disconnect the charger from the power source and the vehicle.

Image 2: The charger is built for safety and reliability, tested for low temperatures (-25°F), IP56 waterproof and Type 4 degree protection, high temperatures (+55°F), and 10,000 plug and pull cycles. Note: The plug is not waterproof; keep away from water sources.
3. Setup
3.1 Power Source Requirements
The JUNSUN Portable EV Charger requires a 240V NEMA 14-50 outlet. If you do not have this type of outlet, consult a qualified electrician for proper installation. Do not attempt to modify the plug or use unapproved adapters.
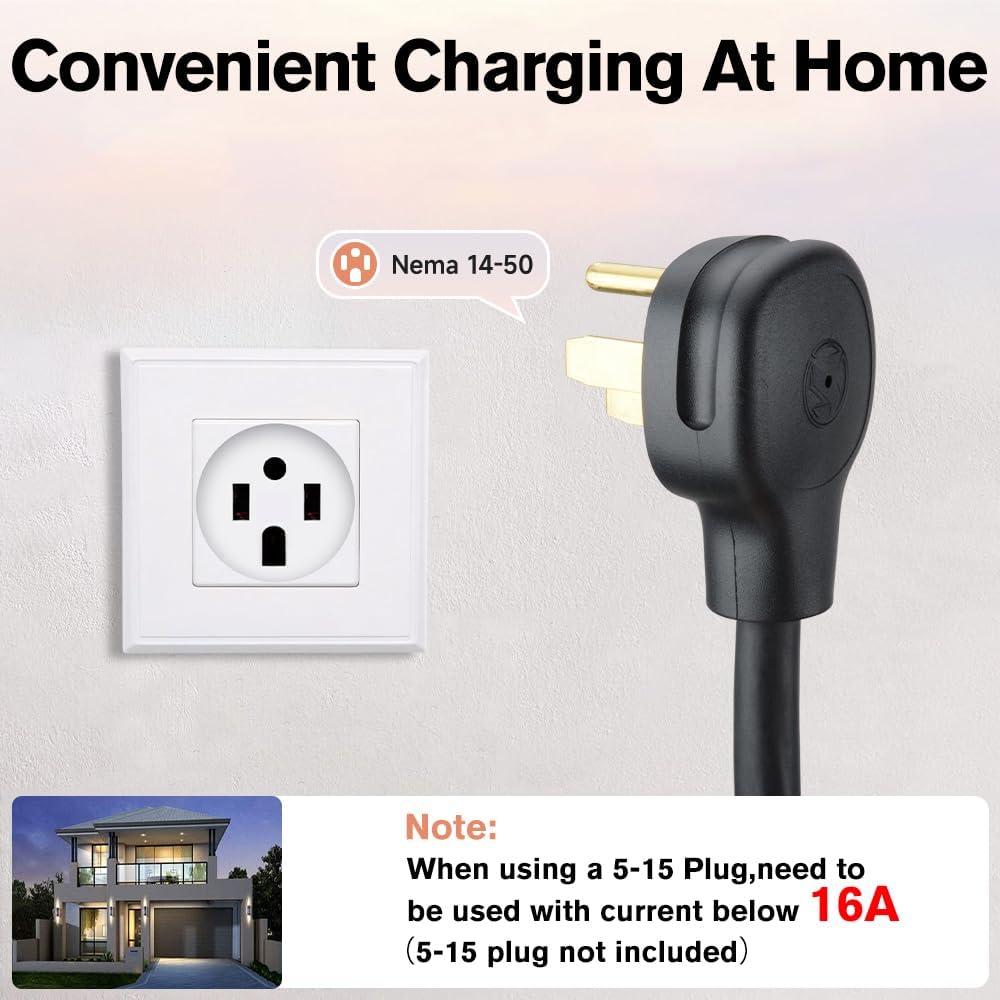
Image 3: Convenient home charging with a NEMA 14-50 plug. Note: When using a 5-15 Plug (not included), current must be below 16A.
3.2 Mounting the Charger
The charger comes with brackets for wall mounting. Choose a location that is dry, protected from direct sunlight, and within reach of your vehicle's charging port. Ensure the mounting surface is sturdy enough to support the charger's weight.
- Secure the mounting brackets to the wall using appropriate screws and anchors.
- Hang the charger unit onto the mounted brackets.
- Ensure the charging cable can be neatly coiled around the unit or stored in the provided storage bag when not in use.

Image 4: The package includes brackets, screws, a storage bag, the EV charger, and a user manual, making it convenient and portable.
3.3 Initial Connection
- Plug the NEMA 14-50 connector into the dedicated 240V outlet.
- The charger's LCD screen will power on, displaying current status information.
4. Operating Instructions
4.1 Connecting to Your Vehicle
- Open your Tesla's charging port.
- Insert the charging connector firmly into the vehicle's charging port. Ensure a secure connection.
- The charger's display and your vehicle's interface will indicate that charging has begun.
Video 1: Demonstrates the process of connecting a portable EV charger to a Tesla vehicle using a 240V outlet, showing the charger's display and the vehicle's charging status.
4.2 Adjusting Charging Current
The charger allows you to adjust the charging current. Refer to the user manual for specific instructions on how to cycle through available amperage settings (e.g., 16A, 20A, 24A, 32A) using the control button on the charger unit.
4.3 Monitoring Charging Status
The integrated LCD screen provides real-time charging data, including temperature, voltage, current, power delivered, and charging duration. This allows for easy monitoring of your vehicle's charging progress.

Image 5: The LCD screen displays real-time charging data, including temperature, CP voltage, charging connector status, connection status, ground wire, voltage, amperage, power, charging time, and charge quantity.
4.4 Scheduling Charging Time
Some models may offer a feature to program or delay the start of charging (e.g., up to 5 hours) to take advantage of off-peak electricity rates. Consult your specific model's manual for details on this function.
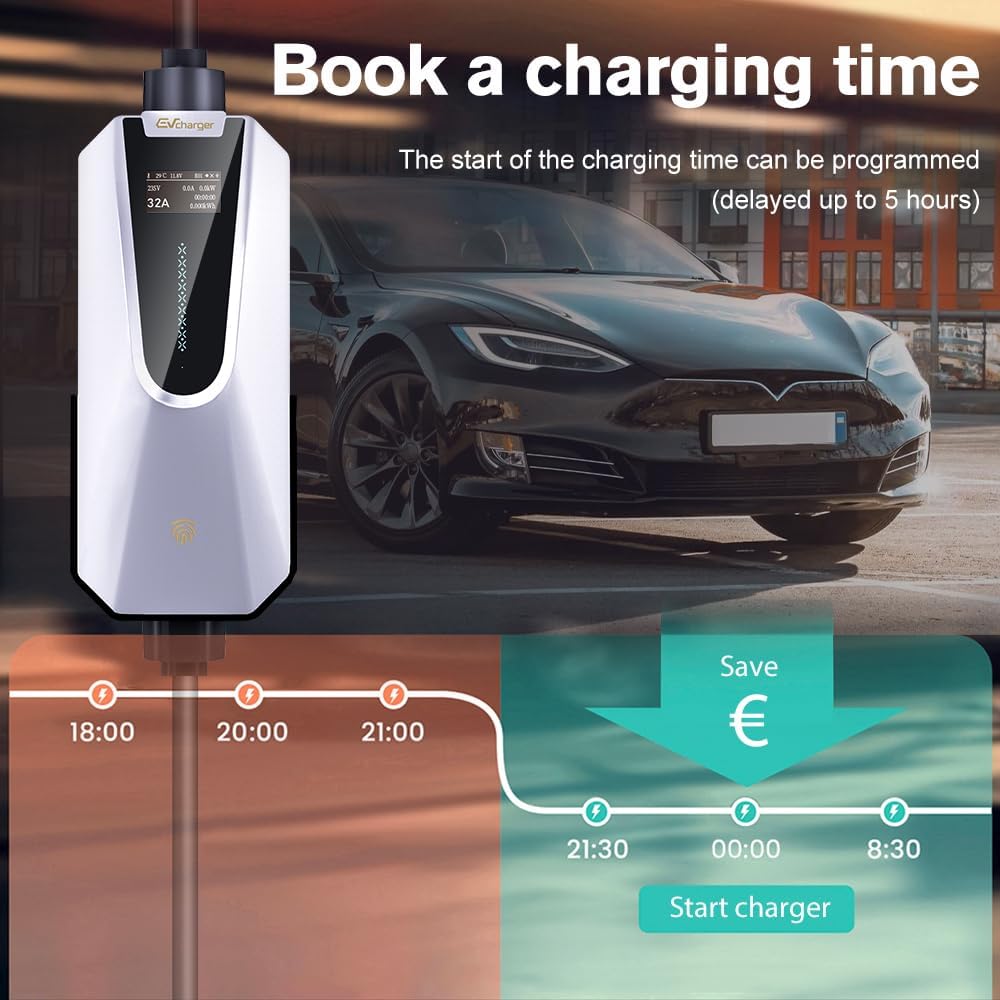
Image 6: The charger allows for scheduling charging times, enabling users to delay charging up to 5 hours to utilize off-peak rates.
4.5 Disconnecting the Charger
- Ensure charging has stopped (indicated by the charger's display and vehicle's interface).
- Press and hold the button on the charging connector handle to release the latch.
- Gently pull the connector from the vehicle's charging port.
- Disconnect the NEMA 14-50 plug from the wall outlet if you intend to store the charger.
Video 2: Illustrates the connection and disconnection process of a Tesla Level 2 charger, showing the charging port opening and the plug being inserted and removed.
5. Maintenance
- Cleaning: Use a soft, dry cloth to clean the charger unit and cables. Do not use abrasive cleaners or solvents.
- Storage: When not in use, coil the charging cable neatly and store the charger in its provided storage bag in a dry, cool place.
- Cable Care: Avoid kinking, twisting, or driving over the charging cable. This can damage the internal wiring and compromise safety.
- Regular Inspection: Periodically check the charger, cable, and connectors for any signs of wear, damage, or corrosion.
6. Troubleshooting
If you encounter issues with your charger, refer to the LED status descriptions on the charger unit or in the full user manual for guidance. Common issues and their potential solutions include:
- No Power: Check if the NEMA 14-50 plug is securely inserted into the wall outlet. Verify the circuit breaker is not tripped.
- Charging Not Starting: Ensure the charging connector is fully inserted into the vehicle's port. Check the vehicle's charging settings.
- Slow Charging: Verify the selected amperage setting on the charger. Ensure the vehicle's charging settings allow for the desired current.
- Error Indicators: Consult the LED status description in the manual to identify the specific error code and recommended action.

Image 7: The charger incorporates multiple protection features: IP66 Waterproof Rating, Lightning Protection, Over-voltage Protection, Low-voltage Protection, Overcurrent Protection, Ground Protection, Overcharge Protection, and Overheating Protection.
7. Specifications
| Feature | Specification |
|---|---|
| Brand | Junsun |
| Model Number | SY-SC-AC1.0-32AS+SY-SP2-AC3.0-32AS |
| Input Voltage | 240 Volts (AC) |
| Amperage | 32 Amps |
| Wattage | 7.68 KW |
| Cable Length | 26 ft |
| Connector Type | Tesla Proprietary (J1772 compatible with adapter) |
| Compatible Devices | Tesla Model 3, Tesla Model S, Tesla Model X, Tesla Model Y |
| Special Feature | Portable, Travel |
| IP Rating | IP66 Waterproof Rating (charger unit) |
8. Warranty & Support
For technical support, warranty claims, or any product-related inquiries, please contact Junsun Car Electronics directly through their Amazon store page. They offer 24-hour technical support.
To contact support:
- Visit the Junsun Store on Amazon.
- Look for the 'Ask a question' button or similar contact option.


