
1. Introduction
This manual provides detailed instructions for the safe and effective use of your Godox AD600Pro II All-in-One Outdoor Flash Light. The AD600Pro II is a powerful 600W flash unit featuring a 2.4G wireless system, TTL auto-flash capabilities, 1/8000s High-Speed Sync (HSS), and a 40W bi-color modeling light. Please read this manual thoroughly before operation to ensure optimal performance and longevity of your device.

Figure 1.1: Godox AD600Pro II Flash Light and Included Components
2. Safety Information
To prevent damage to the product or injury to yourself or others, read all safety precautions completely before using this product. Keep these safety instructions where all users will read them.
- Do not disassemble or modify this product. If the product breaks down, it must be repaired by an authorized maintenance center.
- Keep this product dry. Do not handle with wet hands or immerse in water.
- Do not use the flash unit in the presence of flammable gases, chemicals, or other materials.
- Do not touch the flash tube after use, as it may be hot.
- Keep out of reach of children. This product is not suitable for children.
- Use only the specified power adapter and battery.

Figure 2.1: General Safety Warning
3. Product Overview
3.1. Components
The Godox AD600Pro II package typically includes the following items:
- Godox AD600Pro II Flash Body
- Flash Tube
- Lithium Battery (2600mAh)
- Power Cord
- Power Adapter
- Reflector
- Reflector Protection Cover
3.2. Key Features
The AD600Pro II offers advanced features for professional photography:
- High Performance: 600W output with a recycle time of 0.01 to 0.9 seconds.
- High-Speed Sync (HSS): Supports sync speeds up to 1/8000s.
- 2.4G Wireless System: Integrated Godox 2.4G Wireless System for seamless integration with TTL auto flash systems across various camera brands.
- One-Tap Sync: Simplifies wireless synchronization with compatible triggers like the X3.
- Group Control: Features 16 groups, each identifiable by a distinct color on the flash unit and X3 trigger for multi-light setups.
- Freeze Mode: Captures fast-moving subjects with ultra-short flash durations up to 1/20400s (t0.1).
- Bi-color Modeling Light: A powerful 40W bi-color continuous LED light for versatile lighting.
- AC Power Support: Compatible with the optional AC26 AC power adapter for continuous studio use.
- Color Screen Control: Vibrant TFT color screen for enhanced visibility and streamlined control.
- Smart Battery Charging: Utilizes the Godox UC46 USB Charger for efficient and monitored battery recharging.
- Bowens Mount Compatibility: Supports a wide range of Bowens mount accessories.

Figure 3.1: Godox AD600Pro II Key Features
4. Setup
4.1. Battery Installation
- Ensure the flash unit is powered off.
- Locate the battery compartment on the rear of the flash unit.
- Insert the 2600mAh lithium battery, ensuring proper alignment with the contacts.
- Close the battery compartment securely.
4.2. Flash Tube Installation
- Ensure the flash unit is powered off and cooled down.
- Carefully align the pins of the flash tube with the sockets on the flash head.
- Gently push the flash tube into place until it clicks securely.
4.3. Reflector Attachment
- Align the reflector with the Bowens mount on the front of the flash head.
- Insert the reflector and rotate it clockwise until it locks into position.
- To remove, press the release button and rotate counter-clockwise.
4.4. Mounting the Flash
The AD600Pro II can be mounted on a light stand using its integrated bracket. Adjust the tilt angle and secure it with the locking knob. Ensure the stand is stable before use.

Figure 4.1: Connecting the Optional AC Power Adapter
5. Operating Instructions
5.1. Power On/Off
Press and hold the power button for approximately 1 second to turn the flash unit on or off. The TFT color screen will illuminate upon power-on.
5.2. Mode Selection and Power Adjustment
Use the 'MODE' button to cycle through available flash modes: TTL (Through-The-Lens), Manual (M), and Multi (Stroboscopic). In Manual mode, use the dial to adjust the power output from 1/1 to 1/256 or 1/512, depending on the specific setting. The color screen provides clear visual feedback of current settings.
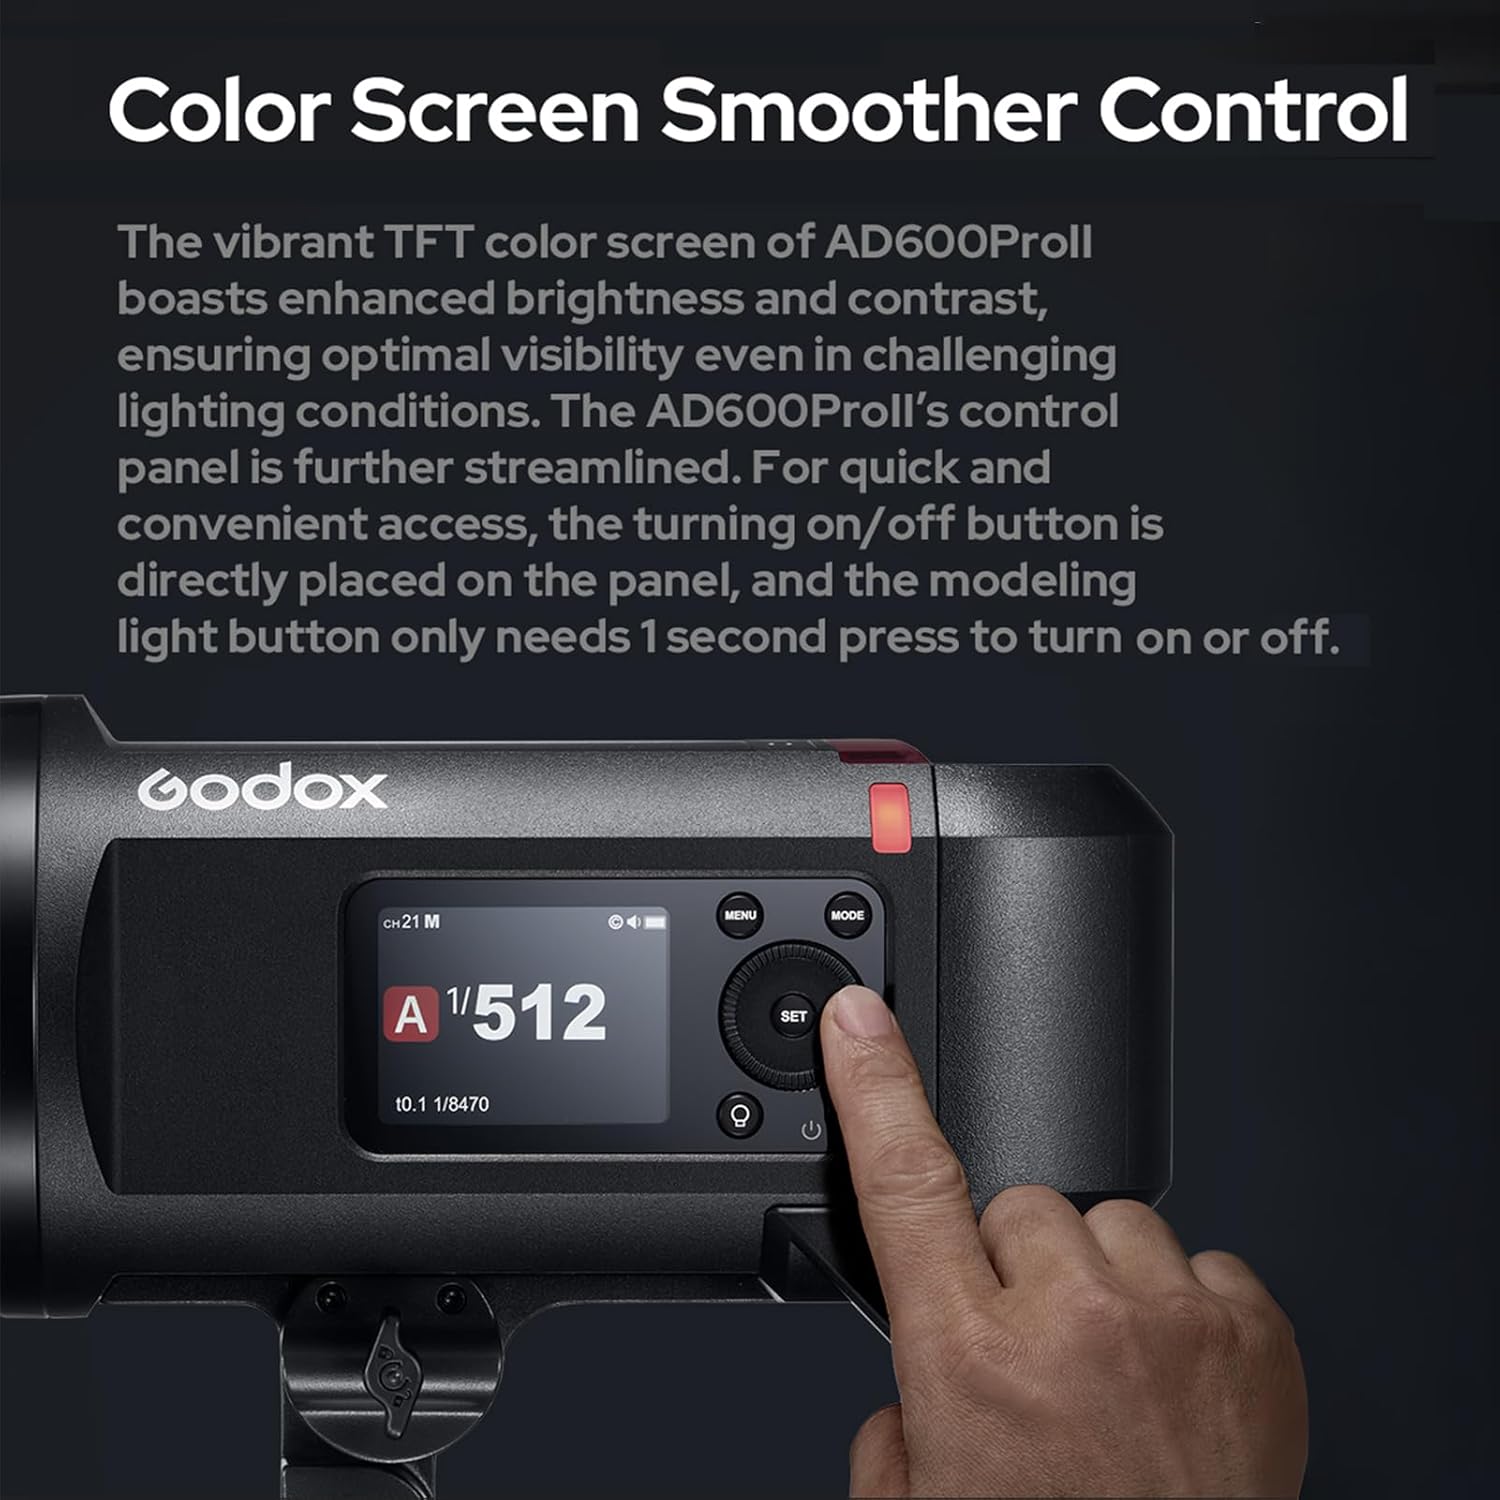
Figure 5.1: TFT Color Screen for Control and Settings
5.3. Wireless Control
The AD600Pro II integrates with the Godox 2.4G wireless system, allowing remote control via compatible triggers (e.g., X3, XproII, X2T). Ensure the flash unit and trigger are set to the same channel and group.
One-Tap Sync
For quick synchronization with an X3 Flash Trigger, activate the wireless sync function on the X3 and select the sync icon on the AD600Pro II. The devices will synchronize wirelessly within seconds, streamlining your workflow.

Figure 5.2: One-Tap Sync with X3 Trigger
16 Groups & 16 Colors
The AD600Pro II supports up to 16 groups for multi-light setups. Each group can be assigned a different color, displayed on both the flash unit and the X3 trigger, for easy identification and management of individual lights.

Figure 5.3: Multi-Light Setup with 16 Groups and Colors
5.4. Modeling Light Operation
The 40W bi-color continuous LED modeling light can be activated by a 1-second press of its dedicated button. Adjust the brightness and color temperature (from 2800K to 6000K) as needed. This light can serve as a continuous light source for video or to fill shadows.

Figure 5.4: 40W Bi-color Modeling Light Functionality
5.5. Freeze Mode
Activate Freeze Mode to capture fast-moving subjects with exceptional clarity. This mode provides ultra-short flash durations, allowing you to freeze motion with precision.

Figure 5.5: Freeze Mode for Capturing Motion
5.6. Using AC Power
For extended studio sessions, the optional Godox AC26 AC power adapter can be used to power the AD600Pro II directly, replacing the battery and providing continuous, stable power output.

Figure 5.6: Energy Support Options (Battery, Charger, AC Adapter)
6. Maintenance
- Cleaning: Use a soft, dry cloth to clean the flash unit. For stubborn dirt, a slightly damp cloth can be used, followed by immediate drying. Do not use solvents or abrasive cleaners.
- Battery Care: Charge the lithium battery fully before first use. For long-term storage, charge the battery to approximately 50% and store it in a cool, dry place. Avoid extreme temperatures.
- Flash Tube: Handle the flash tube carefully. Avoid touching the glass part directly with bare hands to prevent oil residue. If necessary, clean with a lint-free cloth and alcohol.
- Storage: Store the flash unit in a dry, dust-free environment when not in use. Remove the battery if storing for extended periods.

Figure 6.1: Godox UC46 USB Charger for Battery Maintenance
7. Troubleshooting
If you encounter issues with your Godox AD600Pro II, refer to the table below for common problems and solutions. If the problem persists, contact customer support.
| Problem | Possible Cause | Solution |
|---|---|---|
| Flash does not fire | Low battery; Incorrect trigger settings; Flash tube not installed correctly; Overheating protection activated. | Charge or replace battery; Check trigger channel/group; Reinstall flash tube; Allow unit to cool down. |
| Wireless sync failure | Incorrect channel/group; Distance too far; Interference. | Verify channel/group settings; Reduce distance between flash and trigger; Change channel to avoid interference. |
| Modeling light not working | Not activated; Faulty LED. | Press and hold modeling light button for 1 second; Contact support if LED is faulty. |
| Slow recycle time | Low battery; High power setting. | Charge battery; Reduce power output. |
8. Specifications
| Feature | Specification |
|---|---|
| Model Number | AD600Pro II |
| Product Dimensions | 9.84 x 9.65 x 5.12 inches |
| Item Weight | 7.31 pounds |
| Flash Sync Speed | 1/8000s (High-Speed Sync) |
| Camera Flash Type | Built-In |
| Compatible Mountings | Outdoor Flash Light (Bowens Mount) |
| Manufacturer | GODOX |
| Date First Available | August 19, 2024 |
9. Warranty and Support
The Godox AD600Pro II is covered by a manufacturer's warranty. Please refer to the warranty card included with your product for specific terms and conditions. For technical support, service, or warranty claims, please contact your retailer or the official Godox customer service channels.