1. Product Overview
The BN-LINK Electric Mini-Tank Water Heater is designed to provide fast, reliable hot water for various applications. Its compact size makes it ideal for under-sink installations, small kitchens, bathrooms, offices, or RVs where space is limited. Featuring a plastic shell and glass-lined tank, it offers excellent thermal insulation and resistance to corrosion, rust, and leakage. The unit operates at 1440W and 120V, ensuring quick heating and efficient performance.

Figure 1.1: Front view of the BN-LINK Electric Mini-Tank Water Heater.
2. What's in the Box
Upon unboxing your BN-LINK Mini-Tank Water Heater, you should find the following components:
- BN-LINK Mini-Tank Water Heater Unit (Model CP-C190)
- Product Manual
- Pressure Relief Valve (T&P Valve)
- Teflon Tape
- Plastic Washers/Gaskets
- Power Cord (pre-attached, 3.28 feet long)
Video 2.1: Unboxing the BN-LINK Mini-Tank Water Heater, showing included components and initial inspection.
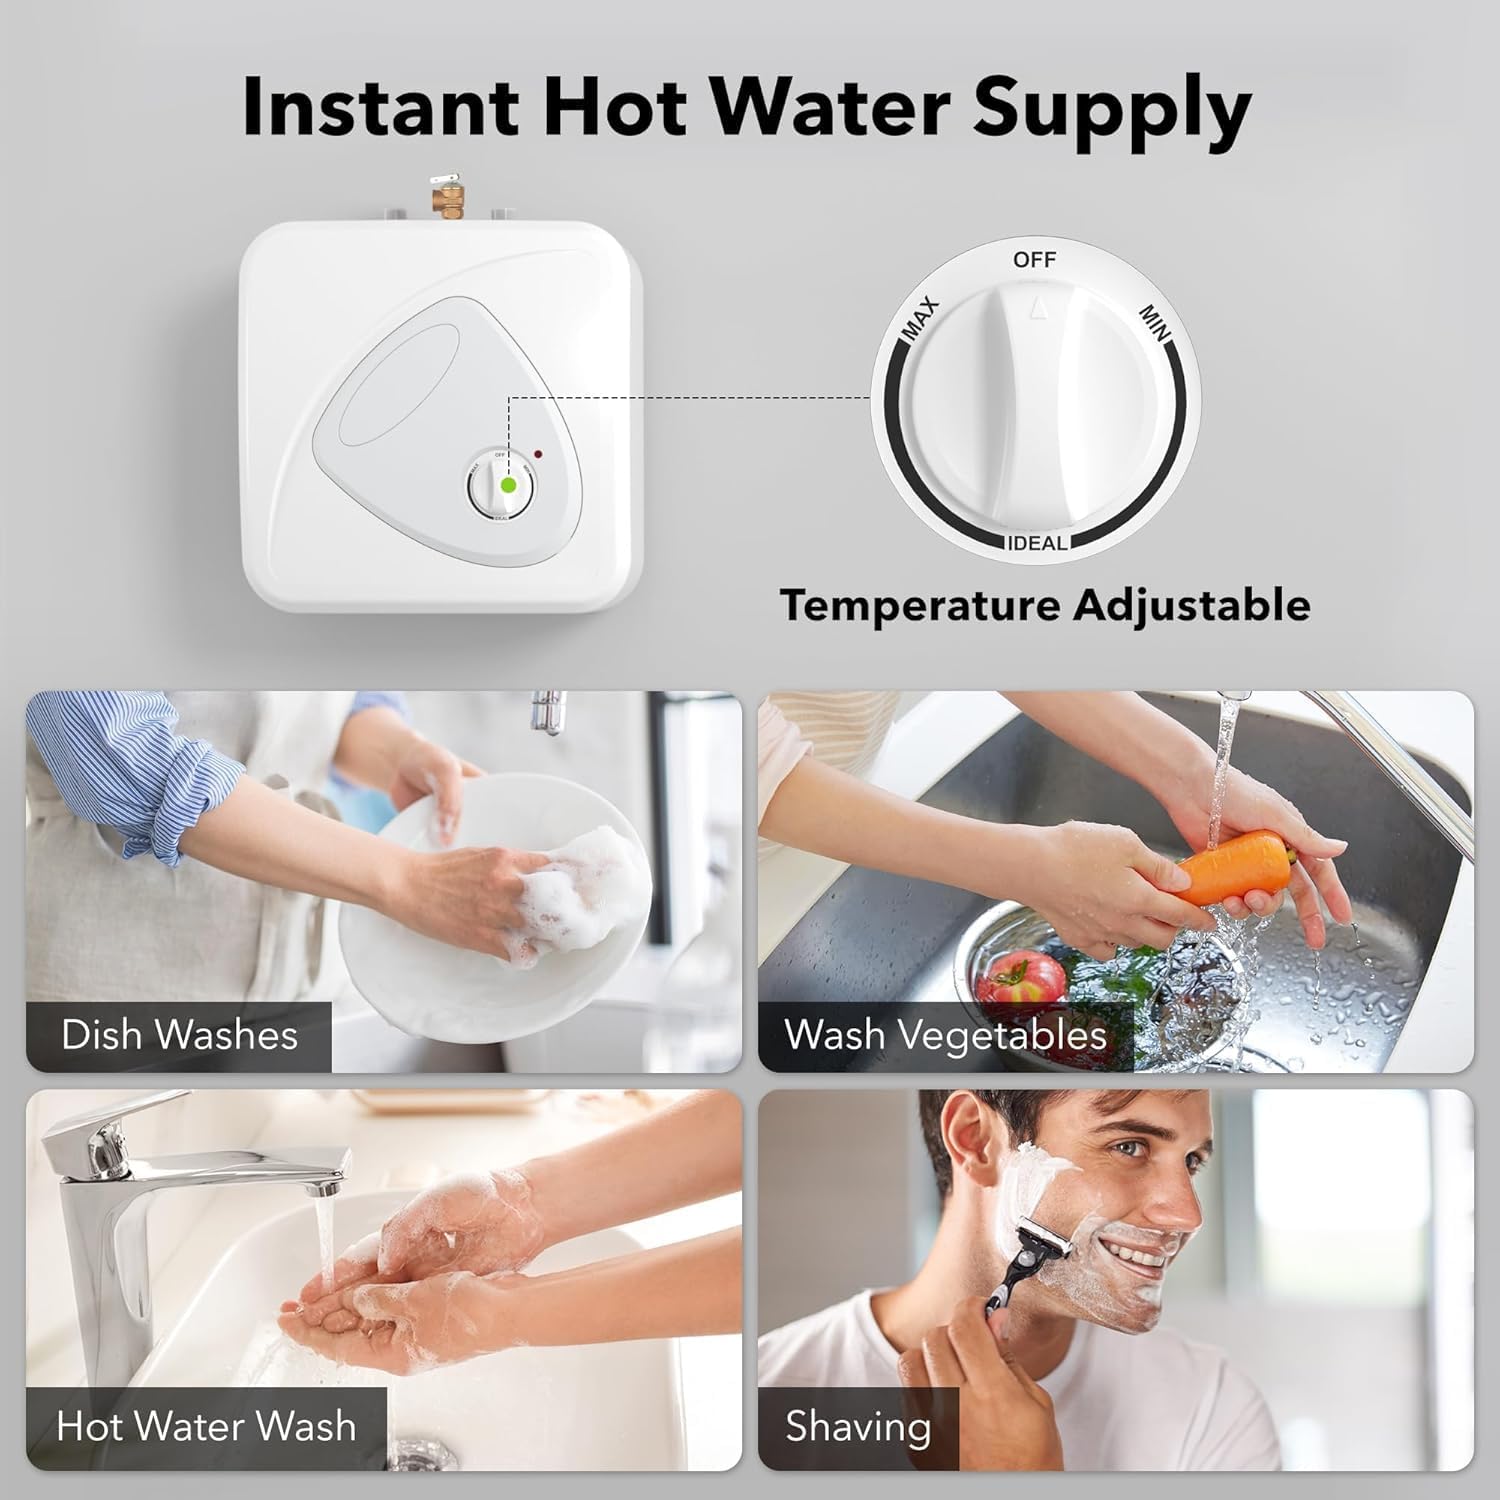
Figure 2.1: View of the water heater unit and accessories as packaged.
3. Installation Guide
The BN-LINK Mini-Tank Water Heater offers flexible installation options, including wall-mounted or floor-mounted configurations. It can be used independently for a single sink or installed in series with a larger system to supply hot water to multiple sinks.
3.1 Safety Precautions
- Pre-Use Water Filling: Ensure the tank is completely filled with water before powering on the unit. Operating the water heater without water can cause damage to the heating element and impact performance.
- Electrical Safety: To reduce the risk of electric shock, disconnect from power supply before replacing temperature-limiting devices. Always plug into a Ground Fault Circuit Interrupter (GFCI) protected outlet.
- Temperature Control: Hot water can produce 3rd-degree burns. Water at 60°C (140°F) can cause 3rd-degree burns in 5 seconds. Water at 54°C (130°F) can cause 3rd-degree burns in 30 seconds. Thermostat controls are factory set at 49°C (120°F). Contact qualified service personnel for adjustments if needed.
- Pressure Relief Valve: The included T&P (Temperature and Pressure) relief valve must be installed to release internal high pressure and ensure the safety of the tank.
3.2 Connecting the Unit
The unit features 1/2" NPT standard pipe fittings for hot water outlet (red) and cold water inlet (blue). Ensure all connections are secure and leak-free using Teflon tape on threaded connections.
- Install T&P Valve: Carefully remove the plastic cap from the pressure relief valve port on top of the unit. Apply Teflon tape to the threads of the T&P valve and screw it into the designated port. Tighten securely with a wrench to prevent leaks.
- Connect Cold Water Inlet: Connect your cold water supply line to the blue-marked inlet. Ensure proper adapters are used if necessary (e.g., 3/4 inch garden hose to 1/2 inch NPT).
- Connect Hot Water Outlet: Connect your hot water line to the red-marked outlet, leading to your faucet or desired point of use.
- Purge Air: Before plugging in the unit, open the hot water faucet at the point of use and allow water to flow until all air is purged from the tank and lines. This ensures the tank is full and prevents damage to the heating element.

Figure 3.1: Examples of wall-mounted and floor-mounted installations.
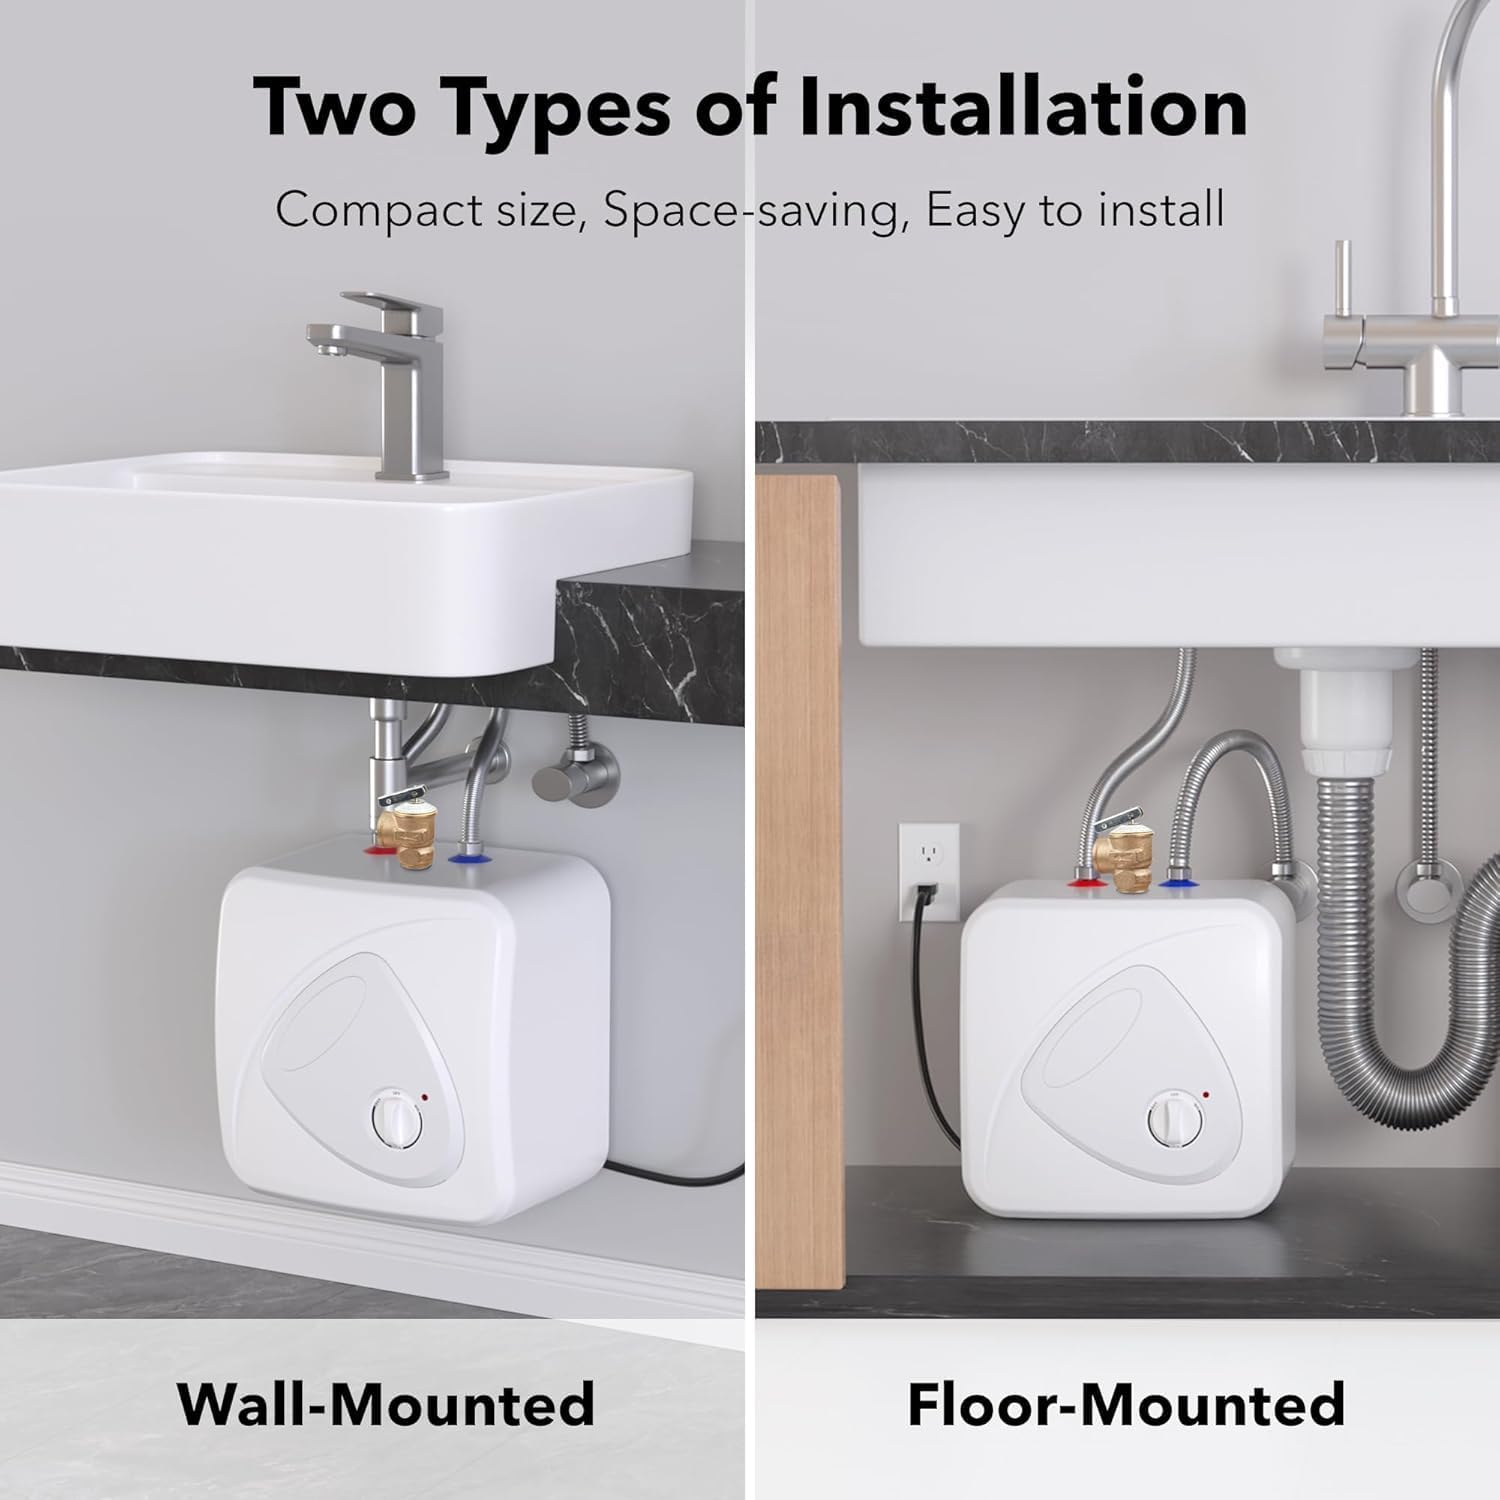
Figure 3.2: ETL Listed Multiple Protections including Overheat, Dry Combustion, Over Pressure, Anti-frozen, Grounding, and Electrical Isolation Protection.

Figure 3.3: Independent/Stand-Alone and Supplemental/In-Line Installation methods.
Video 3.1: Detailed steps for installing the T&P valve and connecting water lines.
4. Operating Instructions
Once the unit is properly installed and filled with water, you can begin operation.
- Power On: Plug the water heater into a GFCI-protected 120V outlet.
- Set Temperature: Use the front-mounted rotary knob to adjust the desired water temperature. The temperature range is from 86°F to 167°F (30°C to 75°C). The "Ideal" setting is typically around 120°F (49°C).
- Heating Indicator: A red indicator light will illuminate when the unit is actively heating water. It will turn off once the set temperature is reached.
- Energy Saving: The V0-grade flame-retardant foam insulation helps reduce energy consumption by minimizing heat loss.

Figure 4.1: Temperature adjustable knob and applications for instant hot water.
Video 4.1: Demonstration of temperature adjustment and water output.
5. Maintenance
Regular maintenance ensures the longevity and efficient operation of your water heater. While specific maintenance details are not provided in the general manual, it is recommended to:
- Periodically check for any leaks around the connections and the unit itself.
- Inspect the T&P relief valve annually to ensure it is functioning correctly.
- Consider flushing the tank periodically to remove sediment buildup, especially in areas with hard water. Consult a qualified technician if unsure.

Figure 5.1: Internal components and connections of the water heater.
6. Troubleshooting
If you encounter issues with your water heater, consider the following common troubleshooting steps:
- No Hot Water:
- Check if the unit is plugged in and the power outlet is functioning.
- Ensure the temperature knob is set to a desired heating level (not "Off").
- Verify that the tank is full of water and all air has been purged.
- Water Not Hot Enough:
- Increase the temperature setting on the rotary knob.
- Allow sufficient time for the water to heat up, especially after initial setup or if the tank was drained.
- Leaks:
- Check all plumbing connections for tightness. Apply more Teflon tape if necessary.
- Inspect the T&P relief valve for drips; this may indicate excessive pressure or a faulty valve.
- Noisy Operation:
- Sediment buildup can cause noise. Consider flushing the tank or consulting a professional for descaling.
For persistent issues or complex problems, contact qualified service personnel or BN-LINK customer support.
7. Specifications
| Feature | Detail |
|---|---|
| Brand | BN-LINK |
| Model Number | CP-C190 |
| Product Dimensions | 10.75"W x 13.75"H |
| Item Weight | 14.5 pounds |
| Capacity | 2.7 Gallons (10 Liters) |
| Wattage | 1440 watts |
| Voltage | 120 Volts |
| Maximum Temperature | 167 Degrees Fahrenheit (75°C) |
| Maximum Operating Pressure | 150 Pound per Square Inch |
| Special Features | Anti-Freezing Protection, Dry Combustion Protection, High Water Pressure Protection, Overheat Protection, Temperature Lock |
| Mounting Type | Wall or Floor Mounted |
| ETL Listed | Yes |
8. Warranty and Support
Specific warranty information is typically provided within the product packaging or on the manufacturer's official website. For any product support, troubleshooting assistance, or warranty claims, please refer to the contact information provided in your product manual or visit the official BN-LINK website.
For additional resources and product information, you may visit the BN-LINK Store on Amazon.
Related Documents - CP-C190
 |
BN-LINK CP-U191 Dual Outlet Outdoor Digital Timer User Manual Comprehensive user manual for the BN-LINK CP-U191 Dual Outlet Outdoor Digital Timer. Includes setup, programming, scheduling, vacation security, DST, and troubleshooting instructions. |
 |
BN-LINK CP-U191 Dual Outlet Outdoor Digital Timer User Manual Comprehensive guide for the BN-LINK CP-U191 Dual Outlet Outdoor Digital Timer, covering setup, programming, safety instructions, and troubleshooting. Features include dual outlets, weatherproof design, and energy-saving capabilities. |
 |
BN-LINK BND-60/U57 Photocell Countdown Timer User Manual User manual for the BN-LINK BND-60/U57 Photocell Countdown Timer, detailing features, installation, operating modes, troubleshooting, safety information, and specifications for outdoor lighting control. |
 |
BN-LINK BND-60/U97S Digital Repeat Cycle Timer User Manual User manual for the BN-LINK BND-60/U97S Digital Repeat Cycle Timer. Learn how to set ON/OFF durations, choose cycle modes (24H, Day, Night), and understand product specifications, applications, and warranty information. |
 |
BN-LINK BNE-60/U167 Digital Timer User Manual and Setup Guide Comprehensive guide for the BN-LINK BNE-60/U167 Digital Timer, covering setup, programming, features like random mode and DST, and troubleshooting. Learn to schedule your devices efficiently. |
 |
BN-LINK BNE-60/U210S Dual Outlet Digital Timer User Manual User manual for the BN-LINK BNE-60/U210S Dual Outlet Digital Timer. Learn how to set up, program, and use features like random mode and DST for energy saving. Includes ratings, warnings, and troubleshooting. |