1. Introduction
This manual provides comprehensive instructions for the cenmate 3 Bay Hard Drive Enclosure. This device is designed to expand your storage capacity by accommodating up to three 2.5-inch or 3.5-inch SATA HDDs/SSDs, offering high-speed data transfer and flexible expansion options. Please read this manual thoroughly before use to ensure proper installation and operation.

Image 1.1: Front view of the cenmate 3 Bay Hard Drive Enclosure.
2. Package Contents
Verify that all items are present in your package:
- 1 x cenmate 3 Bay Hard Drive Enclosure (NO RAID functionality)
- 1 x USB A/C 3.0 Cable
- 1 x Power Adapter
- 1 x User Manual (this document)

Image 2.1: The included 2-in-1 USB A/C 3.0 cable for versatile connectivity.
3. Product Overview
The cenmate 3 Bay Hard Drive Enclosure is constructed from durable aluminum alloy and features a built-in cooling fan to maintain optimal operating temperatures for your drives. It supports a total storage capacity of up to 60TB (20TB per drive).
3.1 Key Features
- High Capacity: Supports up to three 2.5-inch or 3.5-inch SATA HDDs/SSDs, with a maximum capacity of 20TB per drive, totaling 60TB.
- Efficient Cooling: Integrated 2.7-inch cooling fan and aluminum alloy construction ensure effective heat dissipation.
- Fast Data Transfer: Equipped with USB 3.0 interface, providing data transfer speeds up to 5Gbps.
- Hot-Swappable: Allows for drive replacement without powering down the enclosure.
- Tool-Free Installation: Simplifies drive installation and removal.
- Daisy Chain Expansion: Expand storage by connecting up to three enclosures, supporting a total of 180TB.
- Wide Compatibility: Compatible with Windows 7 and above, Mac OS 9.1 and above, and Linux operating systems.
3.2 Component Identification
Refer to the images below for a visual guide to the enclosure's components and features.

Image 3.1: Rear panel with USB ports, power input, and cooling fan.
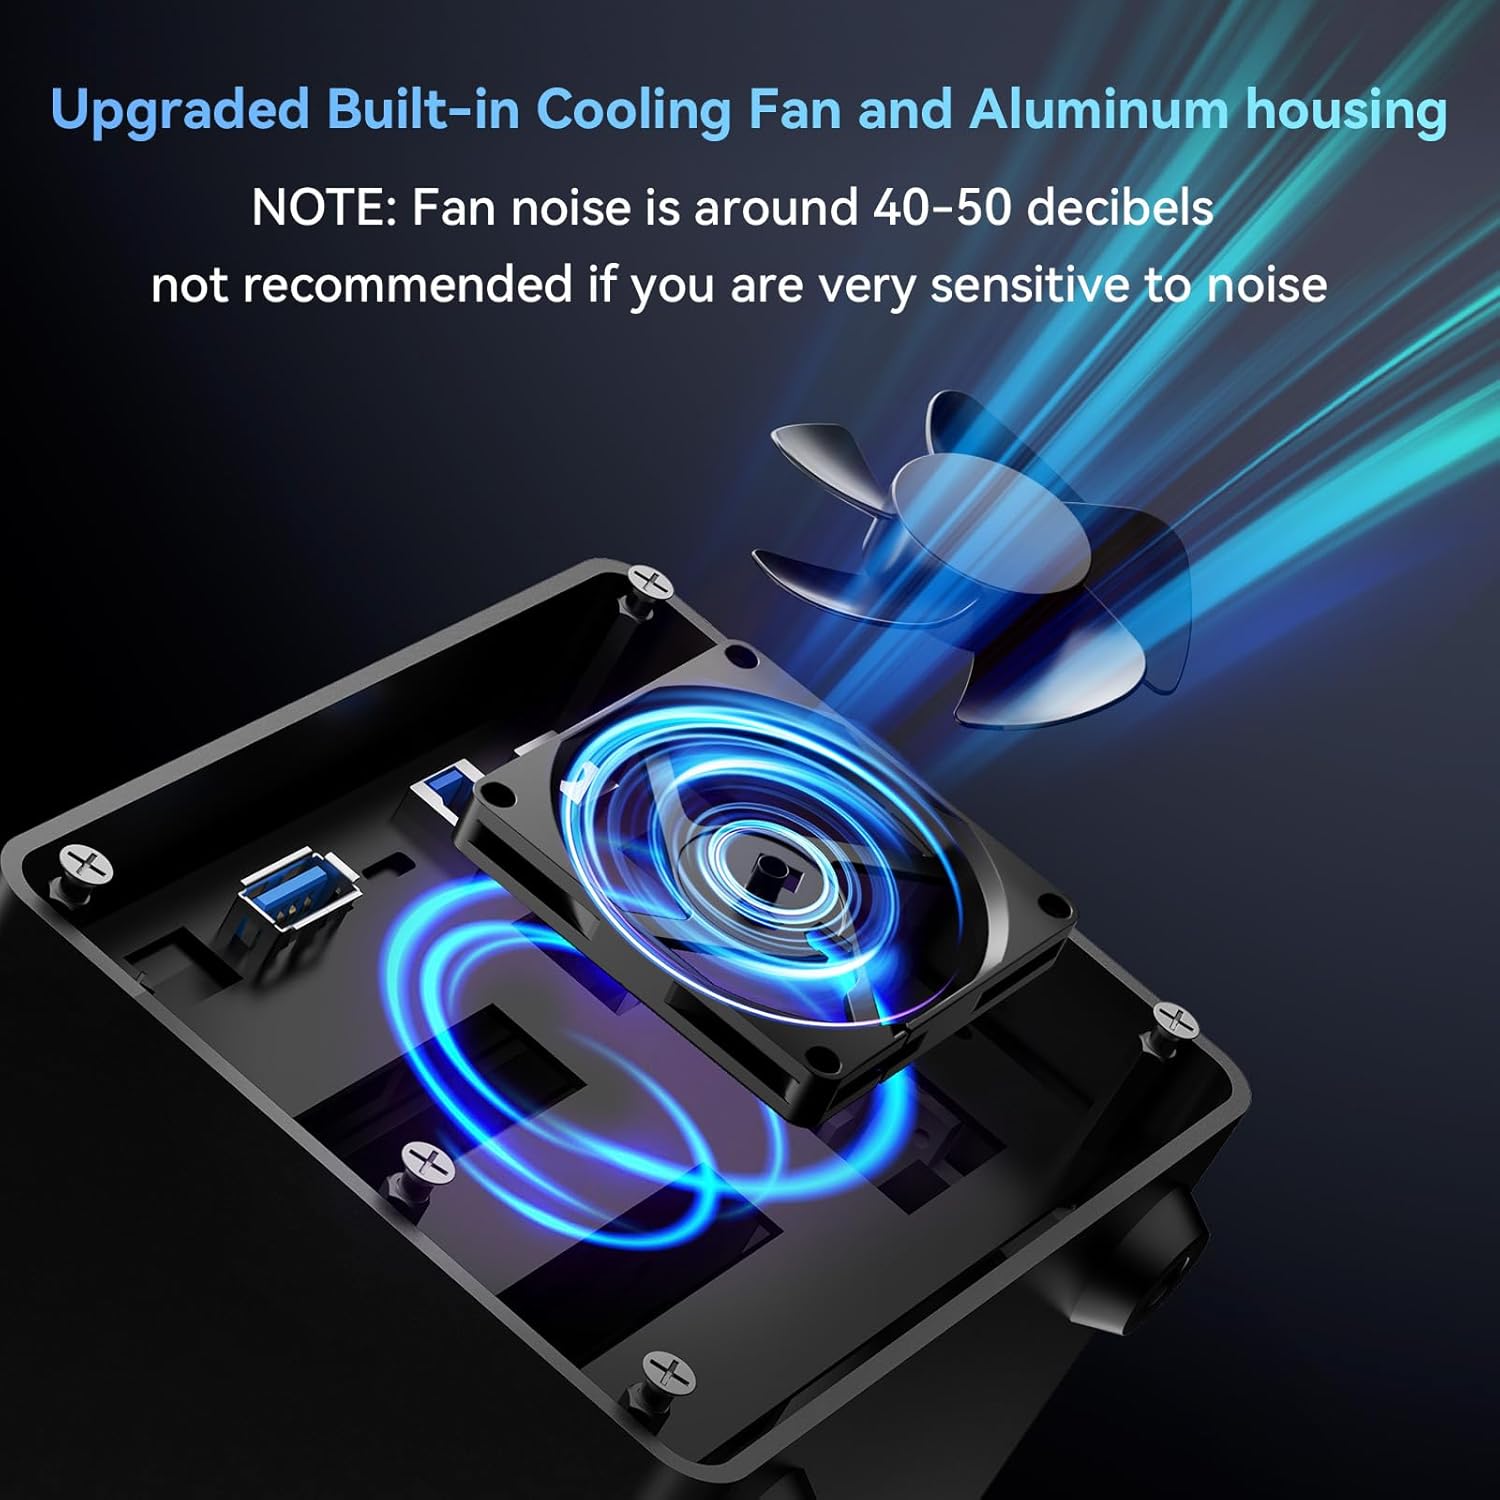
Image 3.2: Illustration of the internal cooling fan for heat management.

Image 3.3: LED indicators for drive status. Blue indicates standby, red flashing indicates read/write activity.
4. Setup Instructions
4.1 Installing Hard Drives
- Ensure the enclosure is powered off and disconnected from your computer.
- Gently press the release button on the front of an empty drive bay and pull out the drive tray.
- For 3.5-inch drives: Align the drive with the tray and slide it in until it clicks into place. The tool-free design secures the drive.
- For 2.5-inch drives/SSDs: Place the 2.5-inch drive onto the tray and secure it using the provided screws through the bottom of the tray.
- Slide the loaded drive tray back into the enclosure until it locks securely.
- Repeat for additional drives.
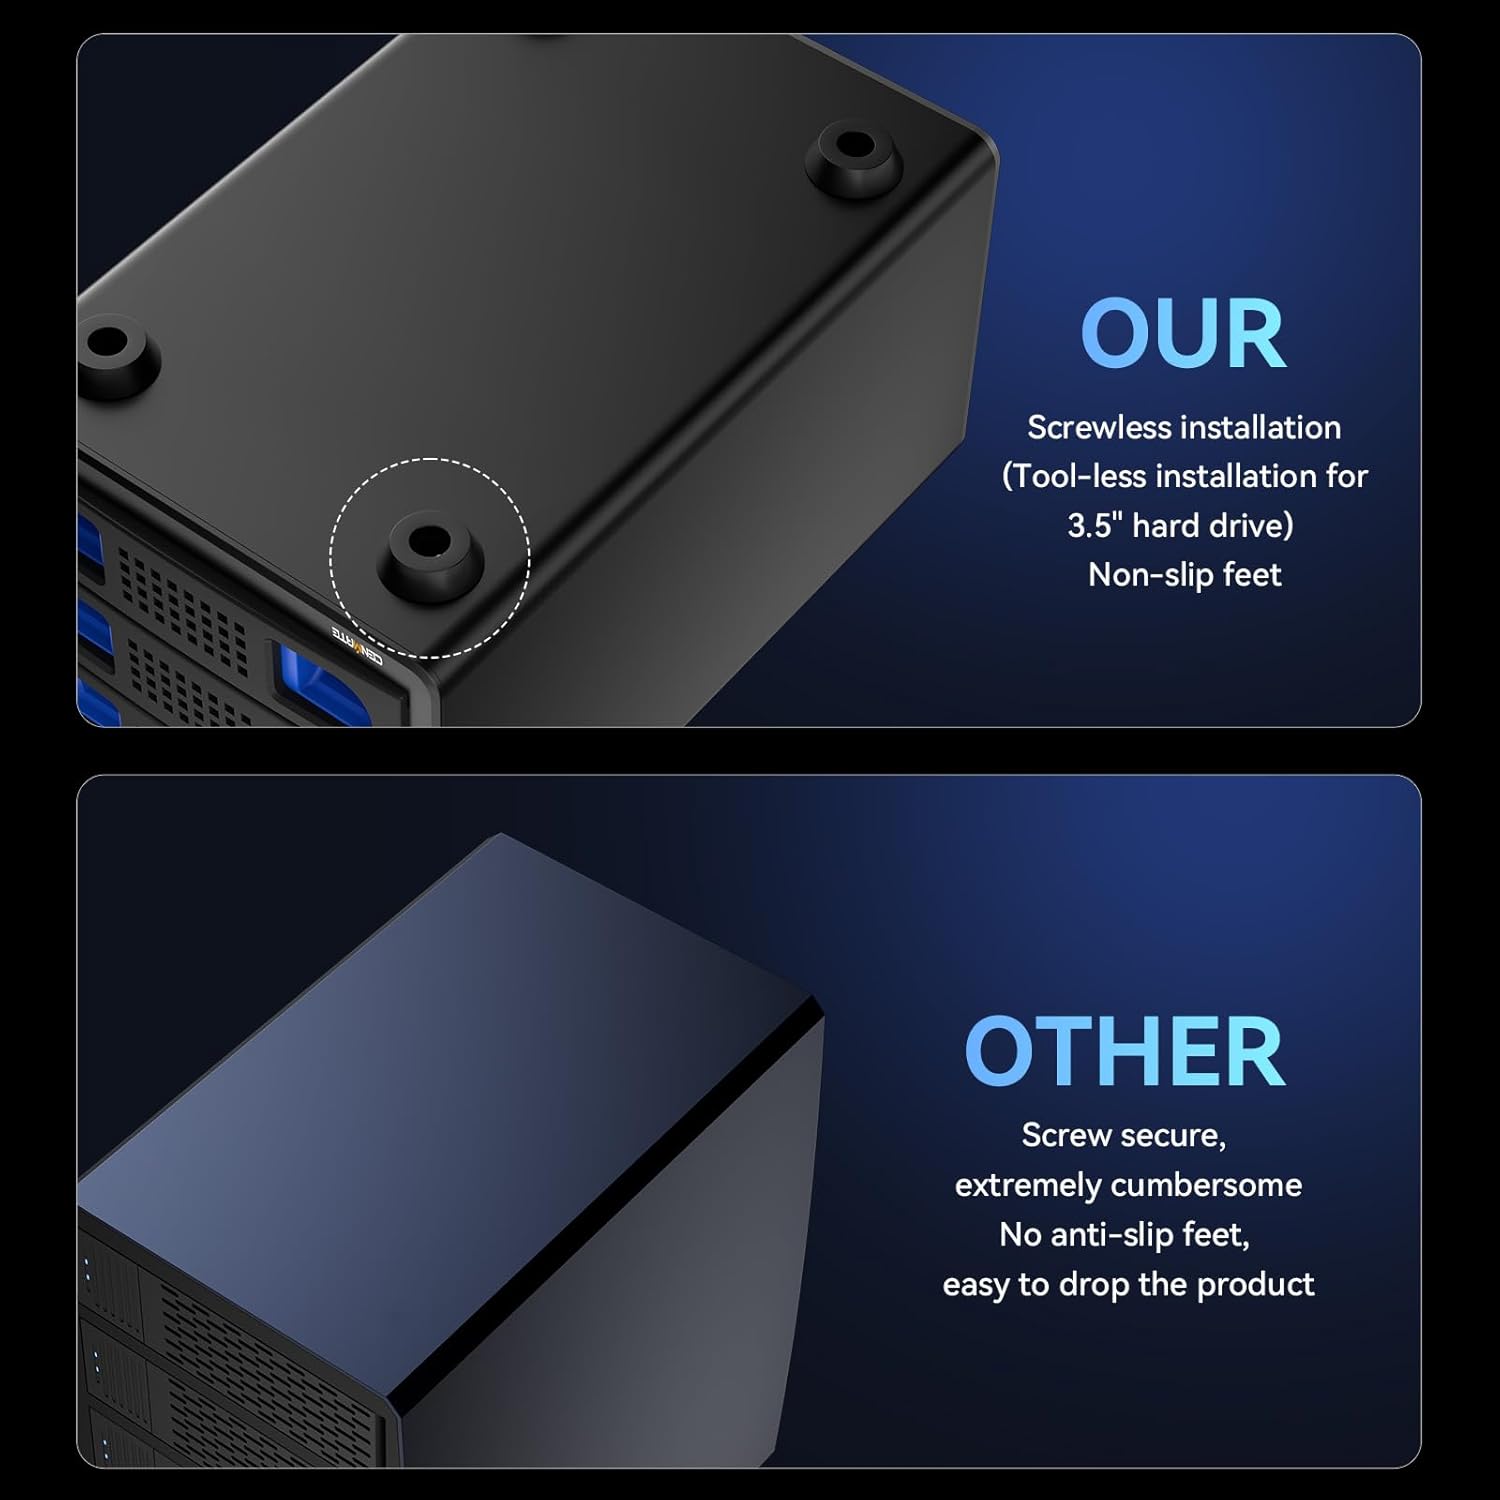
Image 4.1: Tool-free installation of a 3.5-inch hard drive into a tray.
4.2 Connecting to Your Computer
- Connect one end of the provided USB A/C 3.0 cable to the USB 3.0 port on the rear of the enclosure.
- Connect the other end of the USB cable to an available USB-A or USB-C port on your computer.
- Connect the power adapter to the DC 12V input port on the rear of the enclosure, then plug the adapter into a power outlet.
- Turn on the power switch located on the rear of the enclosure.
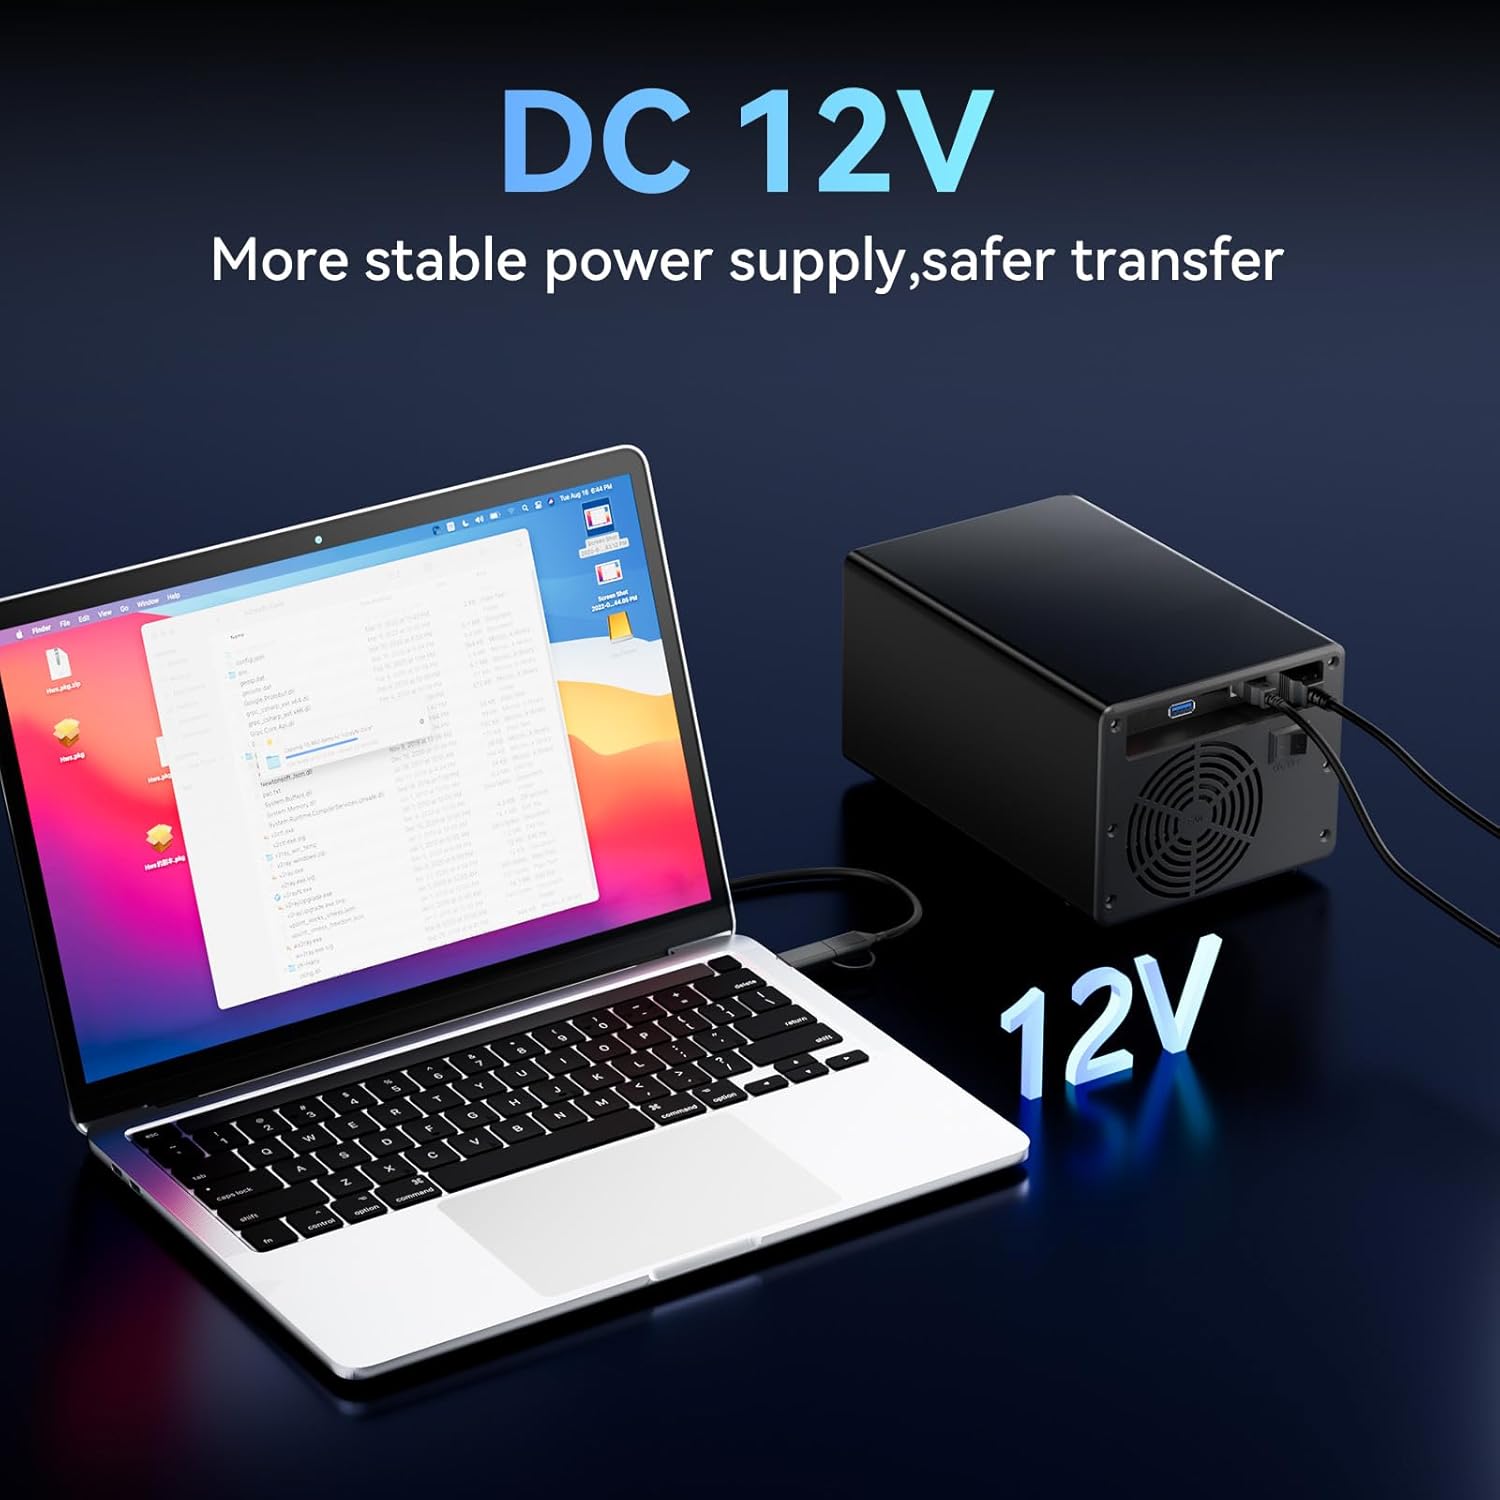
Image 4.2: Enclosure connected to a laptop, illustrating the DC 12V power supply connection.
4.3 Initial Drive Recognition
Once powered on and connected, your operating system (Windows, Mac, or Linux) should automatically detect the new drives. For new drives, you may need to initialize and format them through your operating system's disk management utility before they can be used.
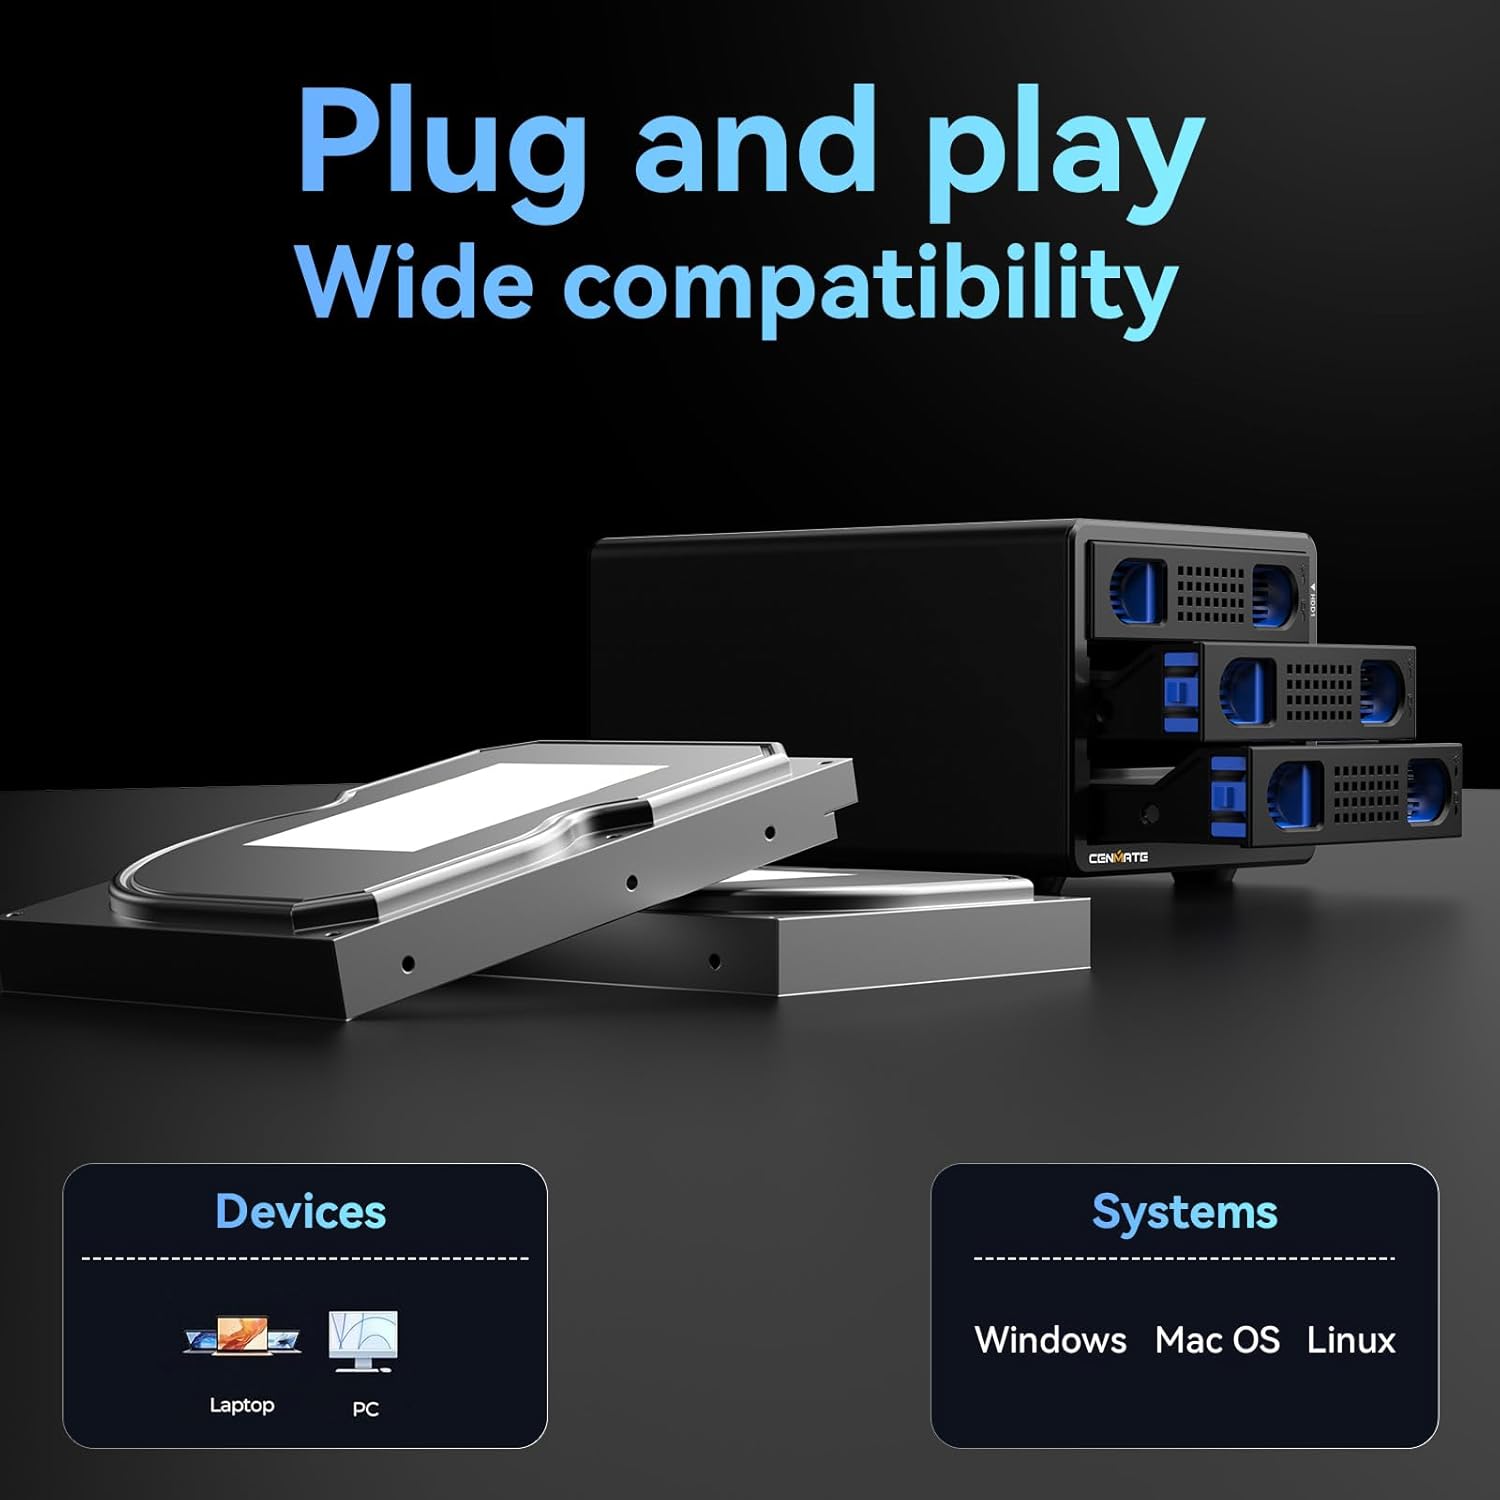
Image 4.3: The enclosure is compatible with laptops and PCs running Windows, Mac OS, and Linux.
5. Operating Instructions
5.1 Hot Swapping Drives
The enclosure supports hot-swapping. This means you can remove and insert drives while the enclosure is powered on and connected to your computer, without needing to shut down the system. Ensure that no data transfer is actively occurring to or from the drive you intend to remove to prevent data loss.
5.2 Daisy Chain Expansion
To expand your storage beyond three drives, you can daisy chain multiple cenmate enclosures. Connect the USB HOST port of one enclosure to the USB 3.0 input of another. Up to three enclosures can be daisy-chained, providing a total storage capacity of 180TB. Each enclosure in the daisy chain requires its own power connection.
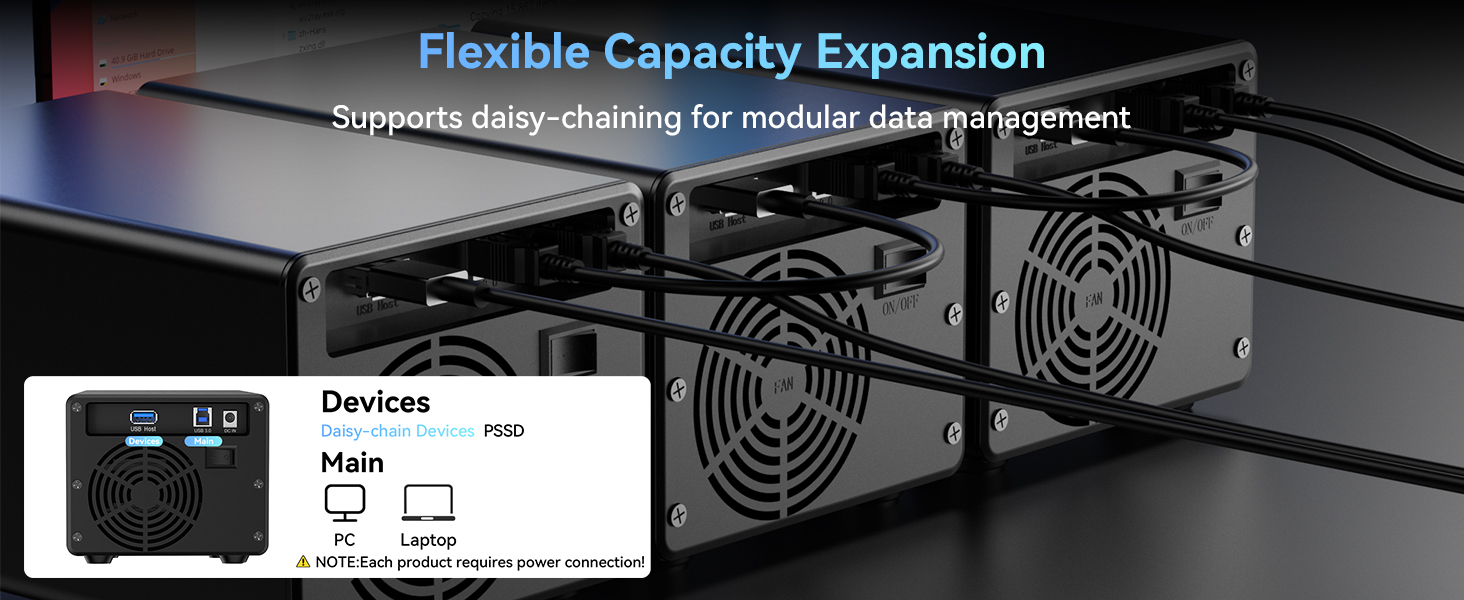
Image 5.1: Daisy chain setup for flexible capacity expansion.
6. Maintenance
6.1 Cleaning
To ensure optimal performance and longevity, periodically clean the exterior of the enclosure with a soft, dry cloth. Ensure the cooling fan vents are free from dust accumulation. Do not use liquid cleaners or abrasive materials.
6.2 Fan Noise
The built-in cooling fan operates to maintain safe temperatures for your hard drives. The fan noise level is typically around 40-50 decibels. If you are particularly sensitive to noise, please consider this operational characteristic.
7. Troubleshooting
7.1 Drive Not Recognized
- Ensure the drive is properly seated in its tray and the tray is fully inserted into the enclosure.
- Verify that the enclosure is powered on and the power adapter is securely connected.
- Check the USB cable connection between the enclosure and your computer. Try a different USB port or cable.
- For new drives, ensure they are initialized and formatted through your operating system's disk management utility.
- Test the drive in another enclosure or directly connected to a computer (if possible) to rule out drive failure.
7.2 Slow Data Transfer Speeds
- Ensure you are using a USB 3.0 port on your computer. Connecting to a USB 2.0 port will result in slower speeds.
- Verify the USB cable is rated for USB 3.0 speeds.
- Check for other devices connected to the same USB controller that might be consuming bandwidth.
- The performance of the hard drive itself can affect transfer speeds.
7.3 Enclosure Overheating
- Ensure the cooling fan vents are not obstructed.
- Operate the enclosure in a well-ventilated area.
- If using multiple drives, ensure they are not consistently under heavy load for extended periods without adequate airflow.
8. Specifications
| Feature | Specification |
|---|---|
| Brand | cenmate |
| Model Number | 3 Bay |
| Material | Aluminum |
| Color | Black |
| Compatible Drives | 2.5-inch / 3.5-inch SATA HDD/SSD |
| Max Capacity per Drive | 20 TB |
| Total Memory Storage Capacity | 60 TB |
| Hardware Interface | USB 3.0 |
| Data Transfer Rate | Up to 5 Gigabits Per Second |
| Compatible Devices | Desktop, Laptop |
| Hardware Platform | Windows, Mac, Linux |
| Max Number of Supported Devices (Daisy Chain) | 3 (for daisy chain expansion) |
| Product Dimensions | 7.95 x 5.2 x 4.41 inches |
| Item Weight | 2.33 pounds (1.06 Kilograms) |
9. Warranty and Support
cenmate is committed to providing high-quality products and excellent customer service.
9.1 Technical Support
Should you encounter any issues or have questions regarding your cenmate 3 Bay Hard Drive Enclosure, please do not hesitate to contact our technical support team. We aim to reply and resolve your problem within 24 hours.
Contact information for support can typically be found on the cenmate official website or through your purchase platform.
9.2 Warranty Information
Specific warranty details may vary by region and retailer. Please refer to the warranty card included with your product or contact cenmate customer service for detailed warranty terms and conditions.


