
PWAYTEK PWAYTEK-DT262W
PWAYTEK Wireless 4K HDMI Transmitter and Receiver User Manual
Model: PWAYTEK-DT262W
1. Introduction
Thank you for choosing the PWAYTEK Wireless HDMI Transmitter and Receiver. This device allows you to wirelessly transmit high-definition video and audio signals from a source device (e.g., laptop, camera, set-top box) to a display device (e.g., TV, projector, monitor) without the need for long HDMI cables. This manual provides detailed instructions on how to set up, operate, and troubleshoot your wireless HDMI extender.

Figure 1: PWAYTEK Wireless HDMI Transmitter and Receiver Units
2. Product Features
- Versatile Compatibility: Displays content from various devices such as laptops, cameras, and set-top boxes to HD TVs, projectors, and monitors.
- Plug and Play: Simple setup; connect the receiver to your display and the transmitter to your HDMI source for immediate wireless connection. No complex drivers or software installation required.
- High-Quality Wireless Connection: Transmits 4K video and audio at 30Hz with low latency and zero compression, ensuring an excellent visual experience. Also supports resolutions up to 1080p Full HD with 3D functionality.
- Dual-Band Wireless Transmission: Utilizes HDMI 1.4 transmission protocol with 2.4G/5G frequencies, offering a strong and stable signal. The wireless transmission distance can reach up to 500 meters (1640 feet) in an open environment.
- HDMI Loop-Out: The transmitter unit includes an HDMI loop-out port, allowing you to connect an additional local display.
- Multi-Receiver Support: One transmitter can connect to up to eight receivers (additional receivers sold separately).
3. Package Contents
Please check the package contents upon unboxing to ensure all items are present:
- 1 x PWAYTEK Wireless HDMI Transmitter (TX)
- 1 x PWAYTEK Wireless HDMI Receiver (RX)
- 2 x Power Adapters (DC 12V)
- 1 x User Manual
- 1 x Warranty Card
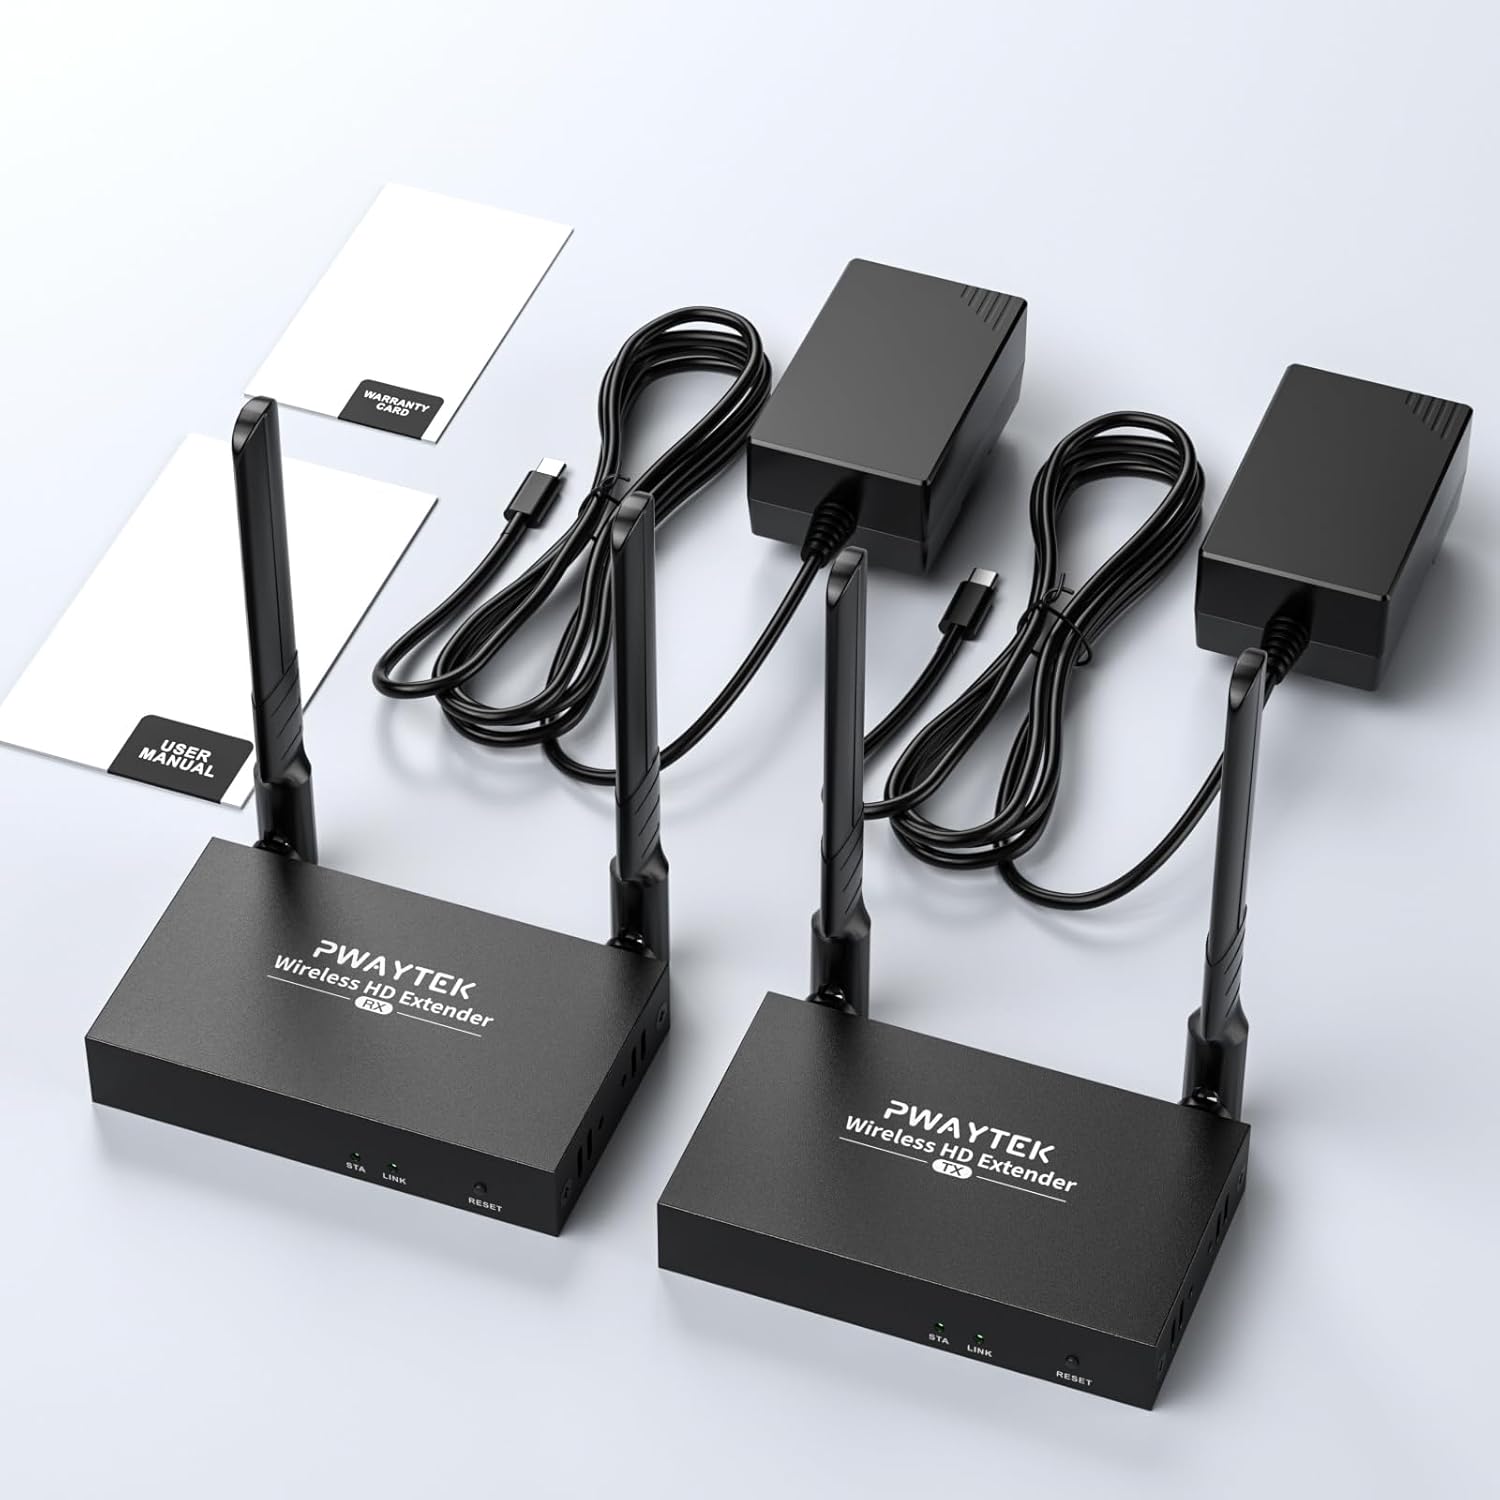
Figure 2: Included components: Transmitter, Receiver, Power Adapters, User Manual, and Warranty Card.
4. Setup Instructions
Follow these steps to set up your PWAYTEK Wireless HDMI system:
- Connect the Receiver (RX): Connect one end of an HDMI cable (not included) to the HD OUT port on the Receiver unit and the other end to the HDMI input port on your display device (TV, projector, monitor).
- Power the Receiver: Connect the provided DC 12V power adapter to the DC 12V port on the Receiver unit and plug it into a power outlet. The STA and LINK indicators on the receiver will light up.
- Connect the Transmitter (TX): Connect one end of an HDMI cable (not included) to the HD IN port on the Transmitter unit and the other end to the HDMI output port of your source device (laptop, camera, set-top box).
- Power the Transmitter: Connect the second DC 12V power adapter to the DC 12V port on the Transmitter unit and plug it into a power outlet. The STA and LINK indicators on the transmitter will light up.
- Pairing and Connection: The Transmitter and Receiver units are pre-paired from the factory. Once both units are powered on, the LINK indicator on both units will blink and then turn solid, indicating a successful wireless connection. Your source device's display should now appear on your connected display device.
- Optional HDMI Loop-Out: If you wish to connect a local display to your source, connect an HDMI cable from the HD OUT port on the Transmitter unit to an HDMI input on a local display.

Figure 3: Rear view of Transmitter (left) and Receiver (right) with port labels.

Figure 4: HDMI Loop-Out feature on the Transmitter unit, allowing an additional local display.
5. Operating Instructions
Once set up, the PWAYTEK Wireless HDMI system operates automatically. Ensure both the transmitter and receiver units are powered on for continuous operation.
- Status Indicators:
- STA (Status) Light: Indicates power and operational status.
- LINK Light: Indicates wireless connection status. A solid light means a stable connection, while blinking indicates searching for a connection.
- Reset Button: A small 'RESET' button is located on both units. In case of connection issues, you can press this button to reset the unit.
- Multi-Receiver Setup: For applications requiring multiple displays, you can connect up to eight receiver units to a single transmitter. Each receiver will display the same content transmitted by the single transmitter.

Figure 5: Support for one Transmitter (TX) to up to eight Receivers (RX).

Figure 6: The system supports transmission distances up to 500 meters (1640 feet) in open environments.
6. Maintenance
To ensure the longevity and optimal performance of your PWAYTEK Wireless HDMI system, follow these maintenance guidelines:
- Cleaning: Use a soft, dry cloth to clean the units. Do not use liquid cleaners or aerosol sprays.
- Environment: Keep the units in a cool, dry place, away from direct sunlight, heat sources, and excessive moisture.
- Ventilation: Ensure proper ventilation around the units to prevent overheating. Do not block any ventilation openings.
- Handling: Handle the units with care. Avoid dropping or subjecting them to strong impacts.
7. Troubleshooting
If you encounter issues with your wireless HDMI system, refer to the following troubleshooting tips:
| Problem | Possible Cause | Solution |
|---|---|---|
| No signal on display |
|
|
| Poor video/audio quality or flickering |
|
|
| Units not pairing |
|
|
8. Specifications
- Brand: PWAYTEK
- Model: PWAYTEK-DT262W
- Product Dimensions: 24.1 x 13 x 6.5 cm; 650 g (approx. 9.5 x 5.1 x 2.6 inches; 1.43 lbs)
- Output Power: 5 Watts
- Wireless Transmission Protocol: HDMI 1.4
- Wireless Frequency: 2.4G/5G Dual-band
- Max. Resolution Support: Up to 4K@30Hz (also supports 1080p Full HD with 3D)
- Max. Transmission Distance: 500 meters (1640 feet) in open environment
- Power Supply: DC 12V (via included power adapters)
- Batteries Required: No
9. Warranty and Support
PWAYTEK products are designed for reliability and performance. For any technical assistance, warranty claims, or product inquiries, please contact PWAYTEK customer support through the retailer where you purchased the product or refer to the contact information provided on the warranty card included in your package.
Related documentsPWAYTEK-DT262W


Ask a question about this manual
Ask about setup, troubleshooting, compatibility, parts, safety, or missing instructions. Manuals+ will review the question and use this page’s manual context to help answer it.