
ARCCAPTAIN MIG160
ARCCAPTAIN 160A MIG Welder User Manual
Model: MIG160 | Brand: ARCCAPTAIN
1. Introduction
The ARCCAPTAIN MIG160 is a versatile 4-in-1 welding machine designed for a wide range of welding applications. It supports Gas MIG, Gasless MIG (Flux Core), Lift TIG, and MMA (Stick) welding modes, making it suitable for both beginners and experienced users for home DIY projects, outdoor repairs, and general maintenance.
This manual provides essential information for the safe and effective operation, maintenance, and troubleshooting of your ARCCAPTAIN MIG160 welder.
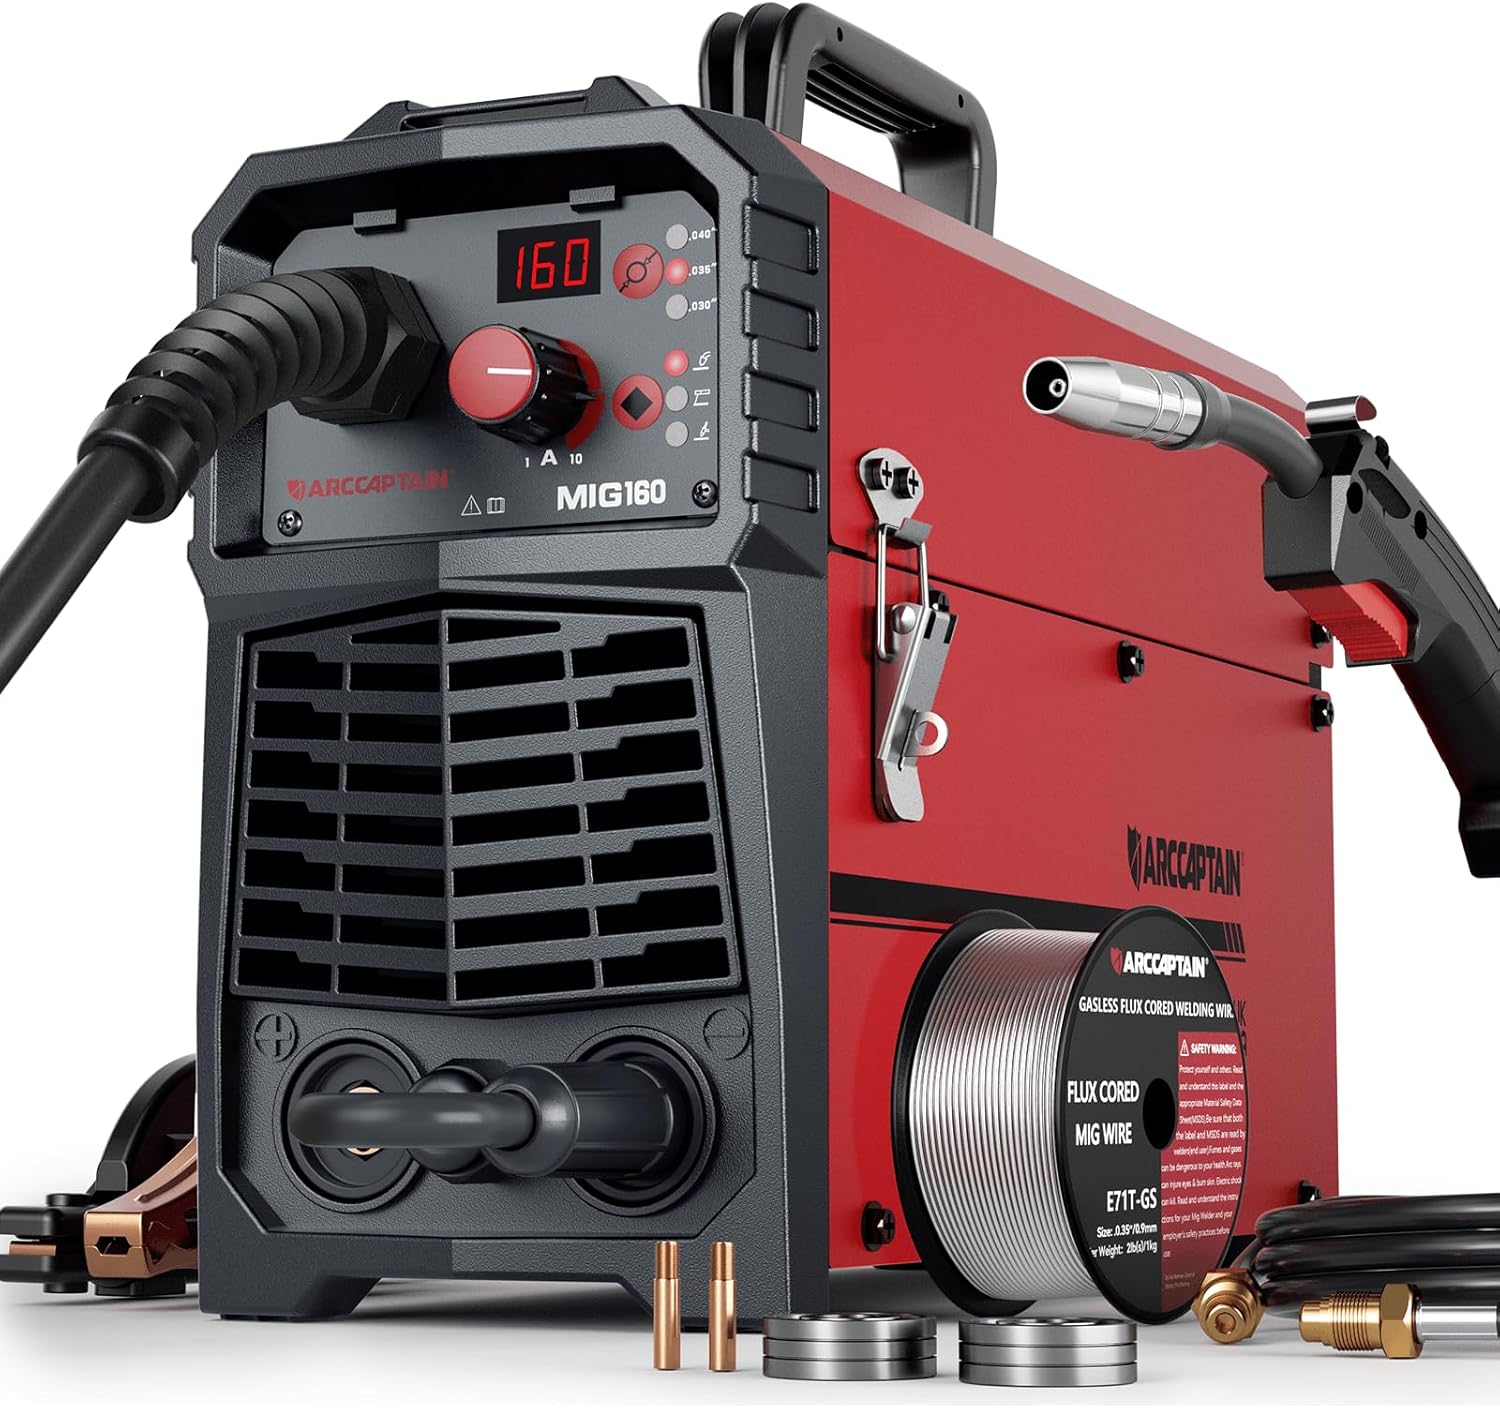
Figure 1: ARCCAPTAIN 160A MIG Welder, a compact and powerful multi-process welding machine.
2. Safety Information
WARNING: Welding can be dangerous. Always follow safety precautions to prevent injury or death.
- Always wear appropriate Personal Protective Equipment (PPE), including a welding helmet with proper shade, flame-resistant clothing, welding gloves, and safety shoes.
- Ensure adequate ventilation in your work area to avoid inhaling hazardous fumes.
- Protect yourself and others from electric shock. Do not touch live electrical parts.
- Be aware of fire hazards. Keep flammable materials away from the welding area.
- The ARCCAPTAIN MIG160 welder includes built-in over-current protection, over-load protection, overheating, and over-voltage functions to enhance user safety and extend machine lifespan.
- IMPORTANT NOTE: Do not power on the machine again until the screen turns off and the fan stops, indicating proper cool-down.
3. Components Overview
The ARCCAPTAIN MIG160 Welder package typically includes the following components:
- 1 x ARCCAPTAIN MIG160 Welder Unit
- 1 x MIG Torch
- 1 x Ground Clamp
- 1 x Electronic Holder (for MMA/Stick welding)
- 1 x 2lbs Flux Cored Wire (.035")
- 2 x Rollers (V/K, .030"/.035")
- 2 x Contact Tips (.030"/.035")
- 1 x Brush & Hammer
- 1 x Welding Gas Hose (for Gas MIG)
- 1 x User Manual

Figure 2: Included accessories and components with the ARCCAPTAIN MIG160 Welder.
4. Setup
4.1 Power Connection
The ARCCAPTAIN MIG160 supports both 110V and 220V input. Connect the power cord to a suitable power outlet. Ensure the power source matches the machine's requirements for optimal performance. For full 160A output, a 220V connection is recommended.
4.2 Wire Loading (MIG/Flux Core)
- Open the side panel of the welder.
- Place the wire spool onto the spindle.
- Secure the spool with the provided retainer.
- Feed the wire through the drive roller mechanism. Ensure the correct groove on the roller matches your wire diameter (.030" or .035").
- Close the drive roller tension arm.
- Feed the wire into the MIG torch liner until it emerges from the tip.
Video 1: Overview of the ARCCAPTAIN 160A MIG Welder, demonstrating wire loading and basic setup for MIG welding.
4.3 Gas Connection (Gas MIG)
For Gas MIG welding, connect your shielding gas cylinder to the gas inlet on the back of the welder using the provided gas hose. Ensure all connections are tight to prevent gas leaks. Adjust the gas flow rate using a regulator (not included) according to your welding requirements.

Figure 3: Connection diagrams for Gas MIG, Gasless MIG, MMA, and Lift TIG welding modes.
5. Operating Modes
The ARCCAPTAIN MIG160 features synergic control, automatically matching recommended current and wire feeding speed based on the selected welding wire diameter. This simplifies operation, especially for beginners.

Figure 4: Synergic control simplifies welding by automatically matching wire feed speed and voltage.
5.1 Gas MIG Welding
Ideal for carbon steel, stainless steel, and thicker materials, providing clean welds with minimal spatter. Requires shielding gas (e.g., Argon/CO2 mix).
- Select "Gas MIG" mode on the control panel.
- Adjust current based on material thickness and wire diameter using the synergic control knob.
- Ensure proper gas flow.
5.2 Gasless MIG (Flux Core) Welding
Suitable for outdoor repairs and rusty metals, as it does not require external shielding gas. The flux within the wire creates its own shielding.
- Select "Flux Core Gasless MIG" mode.
- Adjust current and wire speed as needed.
5.3 MMA (Stick) Welding
Used for welding thicker materials and in various environmental conditions. Requires stick electrodes.
- Connect the electrode holder and ground clamp.
- Select "MMA" mode.
- Choose the appropriate electrode and adjust current.
5.4 Lift TIG Welding
Provides precise and clean welds, often used for stainless steel and other alloys. Requires a separate Lift TIG torch (not included).
- Connect the Lift TIG torch and ground clamp.
- Select "Lift TIG" mode.
- Adjust current for desired weld quality.

Figure 5: Recommended welding parameters for Gas MIG, Gasless MIG, MMA, and Lift TIG modes based on material thickness and wire/electrode diameter.

Figure 6: Visual representation of the four welding modes supported by the ARCCAPTAIN MIG160.
6. Maintenance
Regular maintenance ensures the longevity and optimal performance of your welding machine.
- Cleaning: Periodically clean the machine's exterior and ventilation openings to prevent dust and debris buildup. Use a soft, dry cloth.
- Torch and Cable Inspection: Regularly inspect the MIG torch, electrode holder, ground clamp, and all cables for signs of wear, damage, or loose connections. Replace damaged parts immediately.
- Wire Drive System: Keep the wire drive rollers clean and free of debris. Check tension to ensure smooth wire feeding.
- Storage: Store the welder in a dry, clean environment, away from excessive dust, moisture, and extreme temperatures.
- The ARCCAPTAIN welder has undergone rigorous laboratory tests, including vibration, drop, waterproof, metal dust, prolonged load, conducted interference, high-low temperature, power switch durability, water spray, and transportation simulation tests, ensuring high quality and durability.

Figure 7: The ARCCAPTAIN MIG160 has passed over 300 authoritative laboratory tests for durability and reliability.
7. Troubleshooting
| Problem | Possible Cause | Solution |
|---|---|---|
| No Power | Power cord unplugged, circuit breaker tripped, machine overheating. | Check power connection, reset breaker, allow machine to cool down. |
| Poor Arc Start/Stability | Improper ground connection, incorrect settings, dirty workpiece, worn contact tip. | Ensure good ground, adjust current/wire speed, clean workpiece, replace contact tip. |
| Wire Feeding Issues | Incorrect drive roller tension, tangled wire, clogged liner, wrong roller groove. | Adjust tension, untangle wire, clean liner, ensure correct roller groove. |
| Excessive Spatter | Incorrect voltage/amperage, improper stick-out, dirty material, wrong gas flow (MIG). | Adjust settings, maintain proper stick-out, clean material, check gas flow. |
8. Specifications
| Feature | Detail |
|---|---|
| Manufacturer | ARCCAPTAIN |
| Model Number | MIG160 |
| Item Weight | 10 pounds |
| Product Dimensions | 14.9 x 5.3 x 9.7 inches |
| Country of Origin | China |
| Power Source | DC (110V/220V compatible) |
| Welding Modes | Gas MIG, Gasless MIG (Flux Core), Lift TIG, MMA (Stick) |
| Max Output Current | 160A |
| Material | Metal+Plastic |
| Color | Red+Black |
9. Warranty and Support
For warranty information, technical support, or service inquiries, please contact ARCCAPTAIN customer service. Refer to the contact details provided in the packaging or on the official ARCCAPTAIN website.
ARCCAPTAIN is dedicated to providing quality welding solutions and accessories, backed by extensive industry experience and advanced technology.
Related documentsMIG160


Ask a question about this manual
Ask about setup, troubleshooting, compatibility, parts, safety, or missing instructions. Manuals+ will review the question and use this page’s manual context to help answer it.