1. Introduction
This manual provides detailed instructions for the installation, operation, and maintenance of your JVC KW-M595BT Digital Car Stereo. Please read this manual thoroughly before using the product to ensure proper and safe operation. Keep this manual for future reference.
2. What's in the Box
Verify that all items are present before beginning installation:
- JVC KW-M595BT Receiver
- GPS Antenna
- Power Supply Cable
- Extension Parking Cable
- Screw Set
- User Manual & Warranty Card
3. Setup and Installation
Proper installation is crucial for optimal performance and safety. It is recommended that installation be performed by a qualified professional.
3.1 Unit Dimensions
Ensure adequate space for installation. Refer to the diagram below for precise measurements.

Image: Front and side view of the JVC KW-M595BT showing its dimensions in inches and millimeters.
3.2 Wiring Connections
Carefully connect all necessary cables. Incorrect wiring can cause damage to the unit or vehicle. Consult your vehicle's wiring diagram and the included installation guide for specific connections.

Image: Rear view of the JVC KW-M595BT showing various input/output ports including USB, GPS antenna, iDatalink Maestro connector, audio preouts, and power connections.
- Power Supply Cable: Connect to vehicle's power, ground, and accessory wires.
- GPS Antenna: Connect the GPS antenna for navigation features.
- USB Terminal (1.0 m): For smartphone connection and media playback.
- Audio Preouts: Front, Rear, and Subwoofer preouts for external amplifiers.
- iDatalink Maestro Connector: For advanced vehicle integration (Maestro RR/RR2 sold separately).
- Rear View Camera Input: Connect a compatible rear-view camera.
- FM/AM Antenna Input: Connect your vehicle's radio antenna.
3.3 Initial Power-On
After installation, turn on your vehicle's ignition. The unit should power on. Follow any on-screen prompts for initial setup, such as language selection and time zone.
4. Operating Instructions
Familiarize yourself with the unit's controls and features for an optimal user experience.
4.1 Front Panel Controls
The 6.8-inch capacitive touchscreen display provides intuitive control over all functions. Physical buttons are located on the left side of the unit.

Image: Front view of the JVC KW-M595BT display with labels pointing to various controls and screen elements, including power, volume, home, voice recognition, and source selection.
- Power/Home: Press to turn on/off or return to the home screen.
- Volume: Adjust audio output level.
- Voice Recognition: Activate voice commands for connected smartphones.
- Source Selection: Switch between different audio/video sources.
- Built-in Microphone: For hands-free calling and voice commands.
4.2 Bluetooth Connectivity
Pair your smartphone via Bluetooth for wireless audio streaming and hands-free calling.
- Enable Bluetooth on your smartphone.
- On the KW-M595BT, navigate to the Bluetooth settings.
- Select your device from the list of available devices and confirm pairing.

Image: A smartphone displaying a music player app connected via Bluetooth to the JVC KW-M595BT, which is showing music playback information.
4.3 Apple CarPlay
Connect your iPhone via USB to access Apple CarPlay features directly on the unit's display.
- Connect your iPhone to the USB port using a certified USB cable.
- Select the Apple CarPlay icon on the unit's home screen.
- Follow any on-screen prompts on both the unit and your iPhone.

Image: The JVC KW-M595BT display showing the Apple CarPlay interface with various app icons like Phone, Music, Maps, and Messages, with an iPhone connected via USB.
4.4 Android Auto
Connect your Android smartphone via USB to use Android Auto for navigation, communication, and entertainment.
- Connect your Android phone to the USB port using a certified USB cable.
- Select the Android Auto icon on the unit's home screen.
- Follow any on-screen prompts on both the unit and your Android phone.

Image: The JVC KW-M595BT display showing the Android Auto interface with app icons like Maps, Waze, Messages, and Phone, with an Android phone connected via USB.
4.5 USB Mirroring for Smartphone
Mirror your Android smartphone screen (OS 7.0+) to the KW-M595BT monitor via USB and Bluetooth using the Mirroring OA for JVC app.
- Download and install the Mirroring OA for JVC app on your Android smartphone.
- Connect your smartphone via USB and ensure Bluetooth is paired.
- Launch the Mirroring OA app and select the USB Mirroring function on the KW-M595BT.

Image: The JVC KW-M595BT display showing a navigation app mirrored from a smartphone, with icons for other popular apps below.
4.6 Audio Control (Equalizer & Time Alignment)
Customize your audio experience using the 13-band graphic equalizer and digital time alignment features.

Image: The JVC KW-M595BT display showing the graphic equalizer interface, allowing users to adjust frequency bands for sound customization.
- Graphic Equalizer: Adjust specific frequency bands to tailor the sound to your preference. Access this feature through the audio settings menu.
- Digital Time Alignment: Optimize the sound stage by adjusting the delay for each speaker, ensuring sound reaches your ears simultaneously.
4.7 iDatalink Maestro Integration
The KW-M595BT is compatible with iDatalink Maestro RR/RR2 (sold separately) for advanced vehicle integration, retaining factory features and displaying vehicle information.
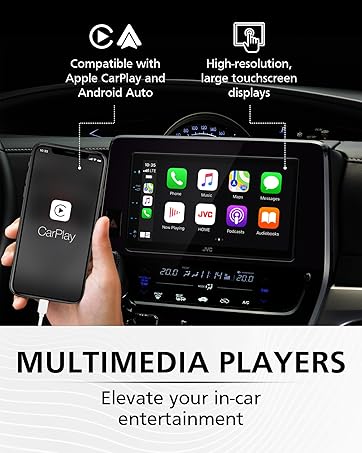
Image: The JVC KW-M595BT display showing various vehicle information screens (gauges, climate, parking assist, vehicle info) enabled by iDatalink Maestro, with the Maestro module shown next to the head unit.
5. Maintenance
Regular maintenance helps ensure the longevity and performance of your car stereo.
- Cleaning the Display: Use a soft, dry cloth to gently wipe the touchscreen. For stubborn smudges, slightly dampen the cloth with water or a screen cleaner designed for electronics. Avoid harsh chemicals or abrasive materials.
- Software Updates: Periodically check the JVC website for firmware updates to ensure optimal performance and access to new features.
6. Troubleshooting
If you encounter issues with your KW-M595BT, refer to the following common problems and solutions:
| Problem | Possible Cause | Solution |
|---|---|---|
| No Power | Incorrect wiring, blown fuse, vehicle battery issue. | Check power connections, inspect the fuse (15A), ensure vehicle battery is charged. |
| No Sound | Volume too low, mute activated, incorrect speaker wiring, amplifier issue. | Increase volume, check mute status, verify speaker connections, test external amplifier if used. |
| Bluetooth Not Connecting | Bluetooth off on phone/unit, device not in pairing mode, interference. | Ensure Bluetooth is active on both devices, put unit in pairing mode, try re-pairing, move closer to the unit. |
| Apple CarPlay/Android Auto Not Launching | Faulty USB cable, app not installed/updated, phone settings. | Use a certified USB cable, ensure the respective app is installed and updated on your phone, check phone's USB connection settings. |
| Touchscreen Unresponsive | Temporary software glitch, screen dirty. | Perform a soft reset (refer to manual for reset button location), clean the screen. |
If the problem persists after trying these solutions, contact JVC customer support or a qualified service technician.
7. Specifications
Key technical specifications for the JVC KW-M595BT Digital Car Stereo:

Image: A visual comparison demonstrating the higher resolution and finer detail of the WSVGA (1024x600 pixel) display compared to a conventional WVGA (800x480 pixel) display.
- Model Number: KW-M595BT
- Display: 6.8-inch WSVGA Capacitive LCD Touch Panel (1024x600 resolution)
- Dimensions (W x H x D): 7.06 x 3.38 x 3.94 inches (178mm x 100mm x 86mm)
- Item Weight: 2.41 pounds
- Connectivity: Bluetooth, USB
- Smartphone Integration: Apple CarPlay, Android Auto, USB Mirroring (for Android OS 7.0+)
- Audio Features: 13-Band Graphic EQ, Digital Time Alignment, MP3/WMA/AAC/WAV/FLAC support
- Preouts: Front, Rear, Subwoofer (2.5V)
- Special Features: iDatalink Maestro Ready, SiriusXM Ready, USB 2.1A Charging
- Video Encoding: H.264, MPEG-4
- Surround Sound Channel Configuration: 5.1
8. Warranty Information
Your JVC KW-M595BT comes with a manufacturer's warranty. Please refer to the warranty card included in the product packaging for detailed terms, conditions, and registration information. Keep your proof of purchase for warranty claims.
9. Customer Support
For further assistance, technical support, or service inquiries, please visit the official JVC website or contact their customer service department:
- JVC Official Website: www.jvc.com
- Refer to the included documentation for specific contact numbers or email addresses for your region.


