Introduction
This manual provides detailed instructions for the installation, operation, and maintenance of the GODIYMODULES 10S 30A 36V Lithium Battery Charge Board with Protection Balancer. This Battery Management System (BMS) is designed to protect 3.7V Ternary, Lithium Cobaltate, and Lithium Manganese Oxide battery packs, ensuring their safe and efficient operation.
Safety Information
WARNING: Improper installation or handling of lithium batteries and BMS boards can lead to serious injury, fire, or explosion. Always exercise extreme caution and follow all instructions carefully.
- Ensure all connections are correct before applying power. Incorrect wiring can damage the BMS and battery pack.
- Work in a well-ventilated area.
- Wear appropriate personal protective equipment (PPE), including safety glasses and insulated gloves.
- Do not short-circuit the battery terminals or BMS connections.
- Keep the BMS away from moisture and extreme temperatures.
- If you are unsure about any step, consult a qualified professional.
Product Overview
Components Included
The package typically includes:
- 1x GODIYMODULES 10S 30A 36V Lithium Battery BMS Board
- 1x Balance Wire Harness (11-pin connector)
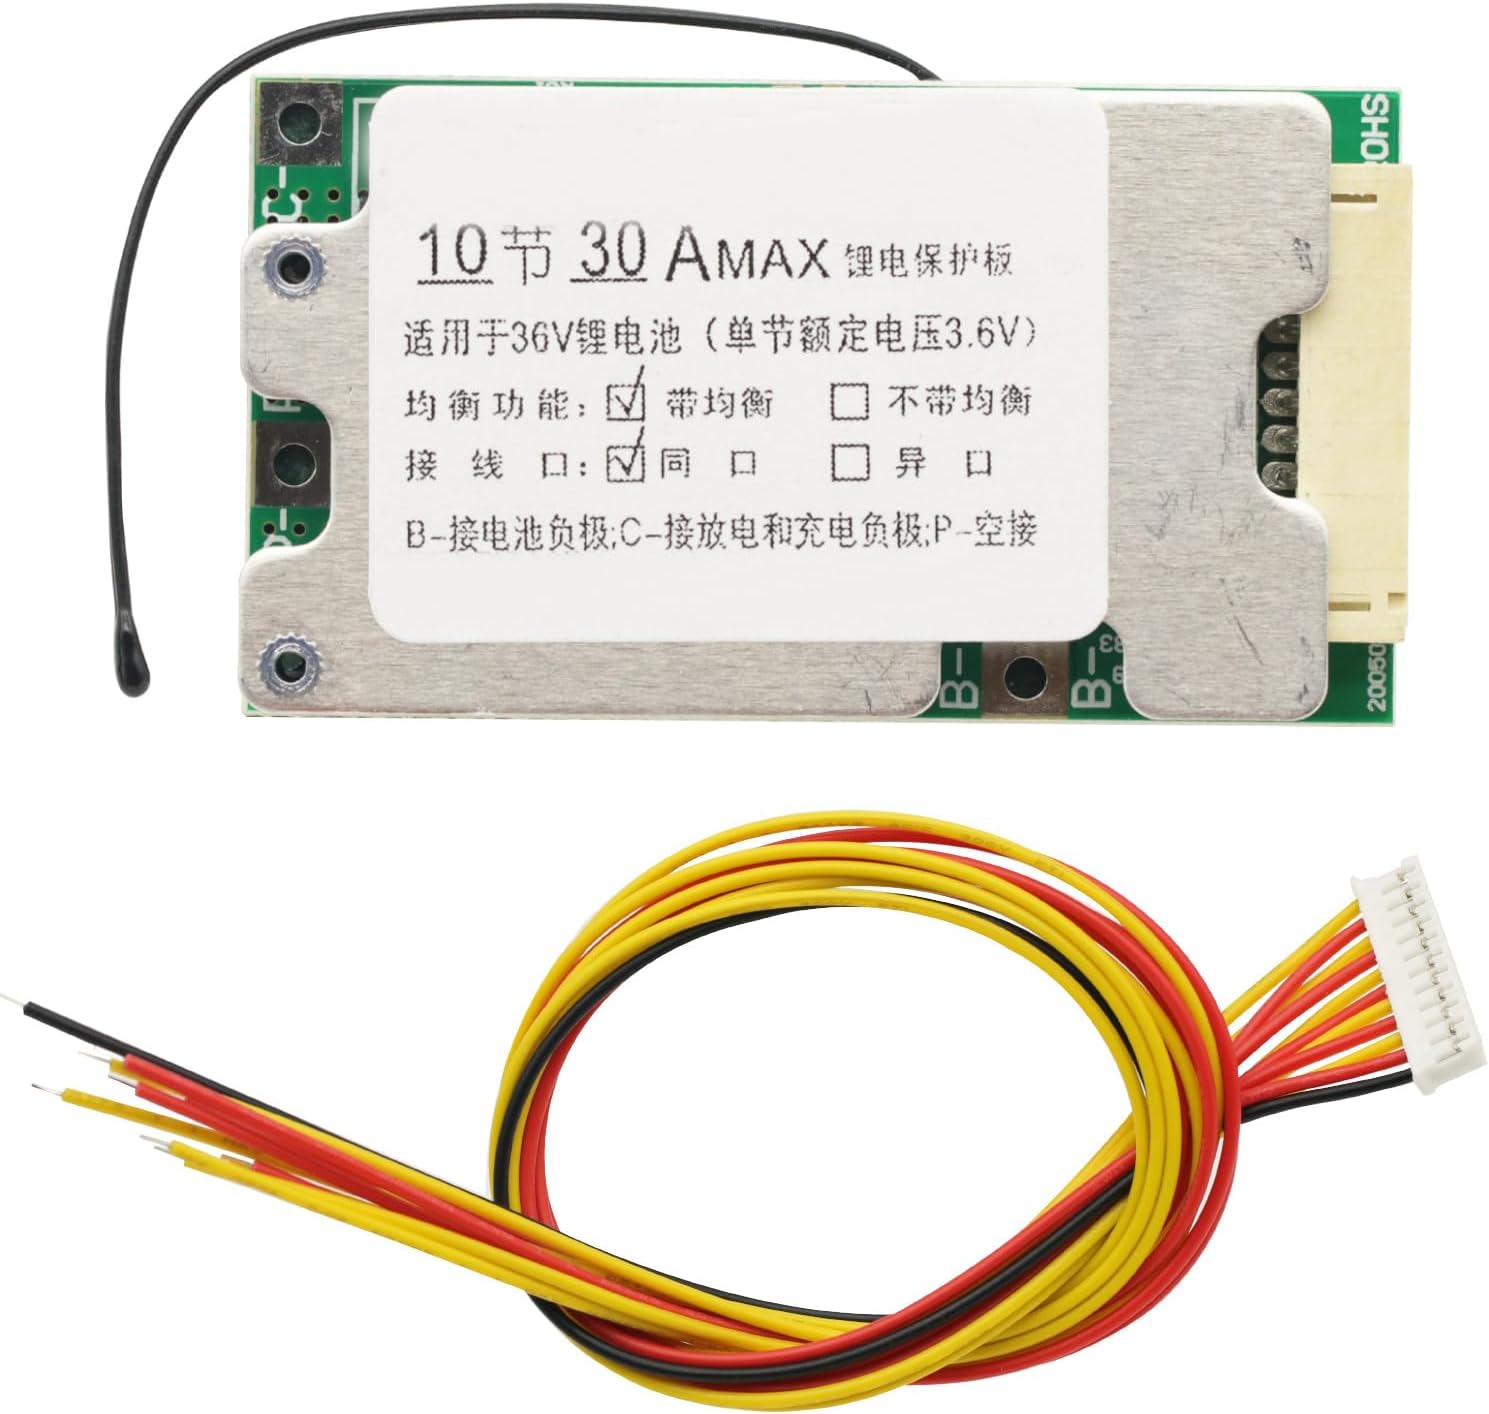
Figure 1: The GODIYMODULES 10S 30A 36V BMS board with its accompanying balance wire harness.
Key Features
- Designed for 3.7V Ternary, Lithium Cobaltate, Lithium Manganese Oxide battery types.
- Suitable for 36V battery packs with power less than 1000W.
- Integrated Over-charge Protection.
- Integrated Over-discharge Protection.
- Integrated Over-current Protection.
- Integrated Output Short-circuit Protection.
- Integrated Over-temperature Protection (Discharge max temperature 75°C, Charge min temperature -7°C).
- Balance charge function with 4.2V balance charge voltage.
Specifications
| Specification | Value |
|---|---|
| Working Current | 30A (max) |
| Continuous Working Current | 25A (max) |
| Over-discharge Protect Voltage | 2.6V per cell |
| Over-charge Protect Voltage | 4.25V per cell |
| Charge Current | 10A |
| Balance Charge Voltage | 4.2V per cell |
| Output Voltage | 36 Volts (DC) |
| Input Voltage (per cell) | 3.7 Volts |
| Item Weight | 0.04 Kilograms |
Setup and Installation
Carefully follow these steps to connect the BMS to your 10S lithium battery pack. Incorrect wiring can cause damage to the BMS, battery, or connected devices.
Wiring Diagram

Figure 2: Detailed wiring diagram for the 10S BMS, illustrating the "Same Port Connection" method for charging and discharging.
Connection Steps (Same Port)
- Connect B- to Battery Pack Negative: Solder the thick black wire labeled "B-" from the BMS directly to the main negative terminal of your 10S battery pack. This is the overall negative terminal of the entire series.
- Connect Balance Wires (B0 to B10):
- Connect the thinnest black wire (often labeled B0 or 0V) from the balance harness to the main negative terminal of the battery pack (the same point as B-).
- Connect B1 to the positive terminal of the first cell (Cell 1+).
- Connect B2 to the positive terminal of the second cell (Cell 2+).
- Continue this sequence, connecting each balance wire (B3, B4, ..., B10) to the positive terminal of its corresponding cell. B10 will connect to the main positive terminal of the entire 10S battery pack.
- Ensure the balance harness connector is securely plugged into the BMS board after all individual balance wires are connected to the battery cells.
- Connect C- to Charge/Discharge Negative: Solder the thick wire labeled "C-" from the BMS to the negative terminal of your charger and the negative terminal of your load (device being powered). This is the common negative for both charging and discharging.
- Connect P- (Optional/Alternative): The diagram indicates a "Same port connection" where C- handles both charge and discharge negative. If your BMS has a separate P- terminal for discharge, it would connect to the load negative, while C- would connect to the charger negative. For this specific BMS, the diagram suggests C- is the common port.
- Connect Battery Pack Positive: The main positive terminal of the 10S battery pack (where B10 is connected) will serve as the positive connection for both the charger and the load.
Important: Always connect the balance wires to the battery cells first, then plug the balance connector into the BMS. When disconnecting, unplug the balance connector from the BMS first, then disconnect the balance wires from the cells.
Operating Instructions
Once the BMS is correctly installed, it will automatically manage the charging and discharging of your battery pack, providing protection against various conditions.
- Charging: Connect your 36V lithium battery charger to the main positive terminal of the battery pack and the C- terminal of the BMS. The BMS will monitor cell voltages and balance them during charging.
- Discharging: Connect your load (e.g., motor, inverter) to the main positive terminal of the battery pack and the C- terminal of the BMS. The BMS will protect against over-discharge and over-current conditions.
- Protection Activation: If any protection threshold is exceeded (e.g., over-charge, over-discharge, over-current, short-circuit), the BMS will temporarily cut off the output to protect the battery. Normal operation should resume once the condition is resolved.
Maintenance
The GODIYMODULES BMS is designed for reliable operation with minimal maintenance. However, following these guidelines can help ensure its longevity:
- Regular Inspection: Periodically inspect all wiring connections for signs of corrosion, loose connections, or damage.
- Cleanliness: Keep the BMS board clean and free from dust, dirt, and moisture. Use a soft, dry brush or compressed air for cleaning.
- Environmental Conditions: Operate the BMS within its specified temperature range. Avoid exposing it to extreme heat, cold, or high humidity.
- Battery Health: Ensure the individual cells in your battery pack are of good quality and matched. A BMS cannot compensate for severely unbalanced or damaged cells.
Troubleshooting
| Problem | Possible Cause | Solution |
|---|---|---|
| No output from BMS |
|
|
| Battery not charging |
|
|
| Cells are unbalanced |
|
|
Warranty and Support
For warranty information or technical support, please refer to the seller's policies or contact GODIYMODULES directly through their official channels. Keep your purchase receipt as proof of purchase.
For further assistance, you may visit the product page on Amazon or contact the seller "DIY-Module".


