
Important Safety Information
Before operating your Soumye Electric Mountain Bike, please read this manual thoroughly. Failure to follow instructions can result in serious injury or property damage. Always wear a helmet and appropriate safety gear when riding. Ensure all components are securely fastened before each ride.
- Regular Checks: Inspect brakes, tires, and all fasteners before every ride.
- Battery Safety: Use only the provided charger. Do not expose the battery to extreme temperatures or puncture it.
- Riding Conditions: Avoid riding in heavy rain or extreme weather. Be aware of your surroundings and local traffic laws.
- Weight Limit: Do not exceed the maximum load capacity of 290 lbs (131 kg).
Package Contents
Your Soumye Electric Mountain Bike package includes the following components:
- Soumye Electric Mountain Bike Frame with integrated battery
- Front Wheel
- Handlebar Assembly
- Saddle and Seat Post
- Pedals (Left and Right)
- Front and Rear Fenders
- Rear Rack
- Headlight
- Battery Charger
- Tool Kit
- User Manual (this document)
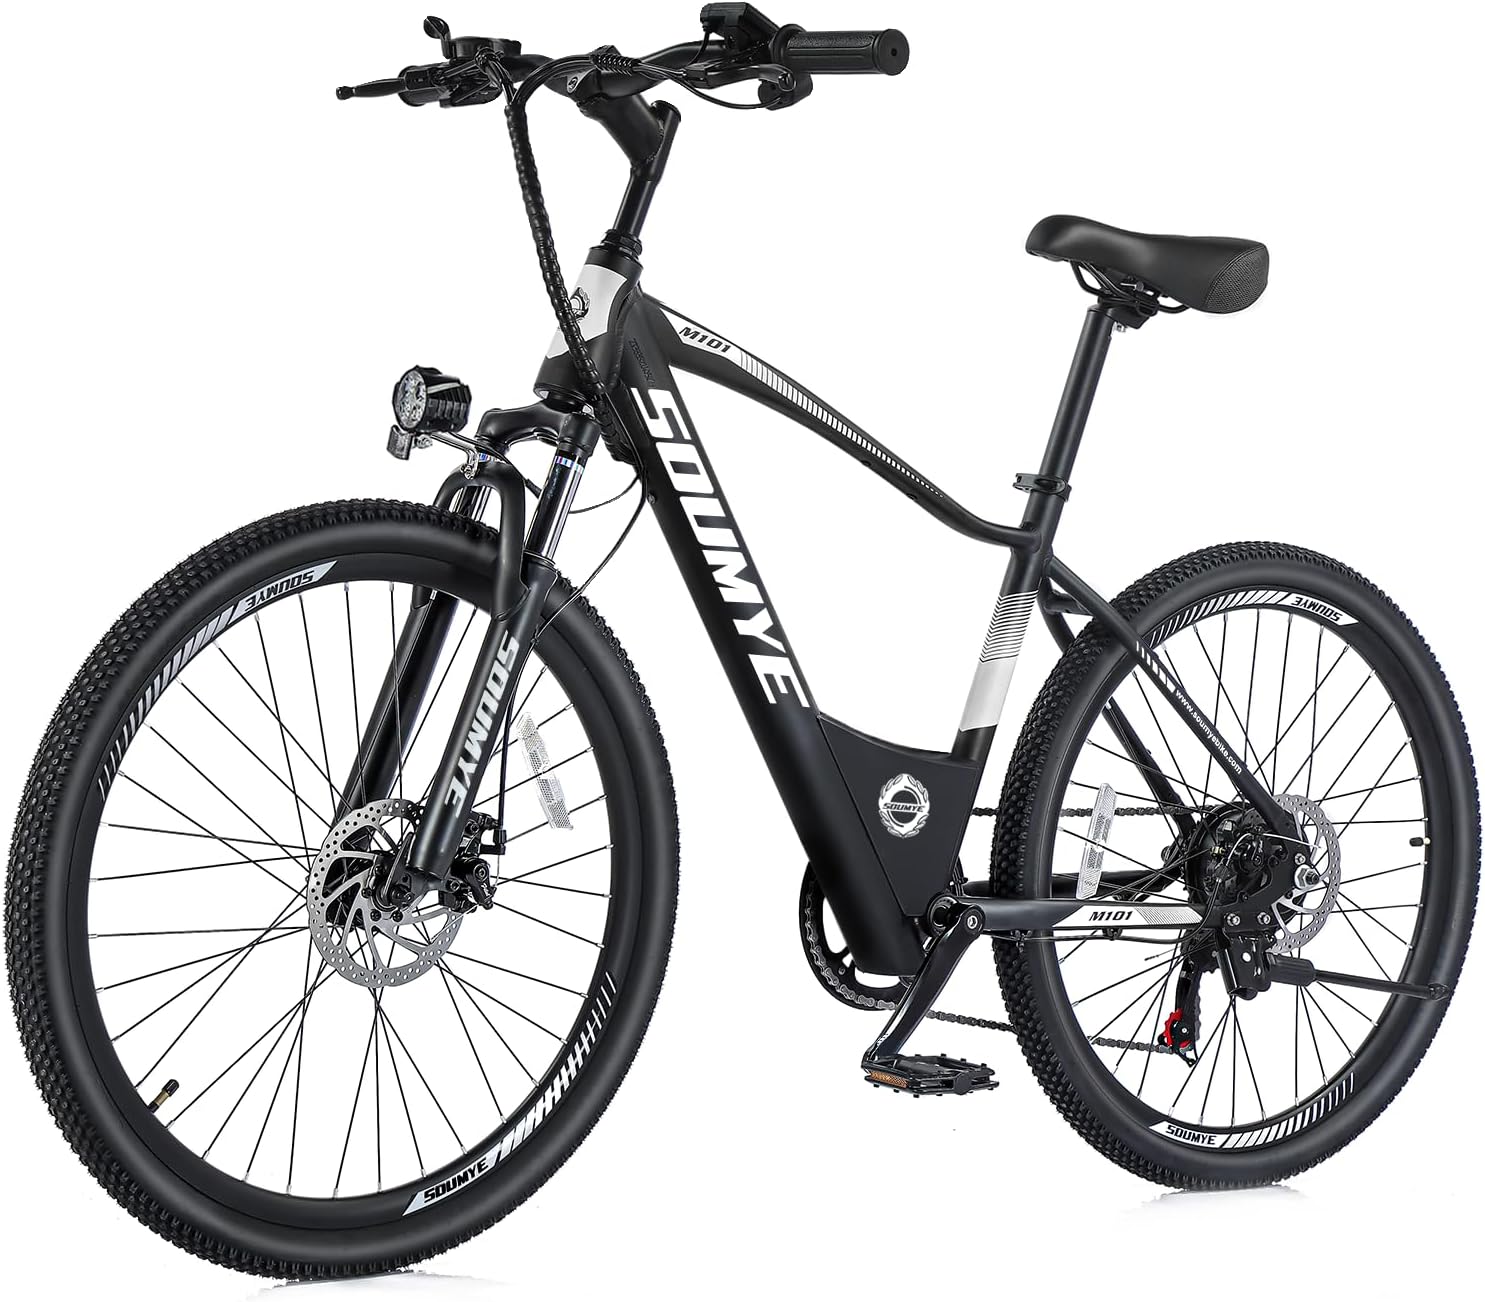
Figure 1: Soumye Electric Mountain Bike (Model M101-B)
Setup and Assembly
Your Soumye Electric Mountain Bike arrives 90% pre-assembled. Follow these steps for final assembly. For a visual guide, please refer to the assembly video provided below.
Video 1: M101 Assembly Instruction & Feature Introduction. This video provides a step-by-step visual guide for unboxing, assembling, and introducing the features of the Soumye M101 Electric Mountain Bike.
Assembly Steps:
- Unboxing and Initial Inspection: Carefully remove all components from the packaging. Remove all protective wrapping and ties. Ensure all parts listed in the "Package Contents" section are present.

Figure 2: All components unboxed and ready for assembly.
- Install Kickstand: Locate the kickstand and attach it to the designated mounting point near the rear wheel using the provided screws. Tighten securely.
- Rotate Front Fork: The front fork may be reversed for packaging. Rotate it 180 degrees so that the brake caliper mounting points face forward.
- Inflate Tires: Inflate the rear wheel to 58 PSI and the front wheel to 52 PSI. Check the tire sidewall for recommended pressure ranges.
- Install Handlebar: Remove the handlebar cap. Insert the handlebar stem vertically into the bike's head tube. Slightly tighten the screw to allow for preliminary adjustments. Adjust the handlebar to your desired angle, ensuring it is perpendicular (T-shaped) to the front tire, then fully tighten the handlebar screws. Replace the handlebar cap.

Figure 3: Close-up of the handlebar with LCD display, 7-speed shifter, horn, and power switch.
- Install Front Wheel: Remove the support rod from the front fork. Align the front wheel with the fork, ensuring the brake rotor slides correctly into the brake caliper. Install the quick release axle and washer into the hub axle. Ensure the wheel is evenly positioned between the forks. Warning: Fully tighten the quick release front axle for safety.

Figure 4: The bike features front suspension and dual disc brakes for enhanced riding experience.
- Install Brake Caliper: Attach the brake caliper to the front fork and securely tighten the two screws.
- Install Front Fender and Headlight: Attach the front fender and headlight to the front fork using the provided screw. Connect the headlight cable.

Figure 5: A brighter LED headlight makes riding more convenient and safer.
- Install Rear Rack and Fender: Remove the rear fender screws from the rear rack. Install the rear fender onto the rack, securely tightening the two screws. Then, install the assembled rear rack and fender onto the bike frame using the four corresponding screws.
- Install Saddle and Seat Post: Loosen the seat's quick release clamp. Insert the seat post with the saddle attached into the frame. Adjust the height for comfortable riding (recommended for riders between 5'2" and 6'3"). Securely tighten the quick release clamp.
- Install Pedals: Install the right side pedal (marked 'R') in a clockwise direction. Install the left side pedal (marked 'L') in a counter-clockwise direction. Ensure they are tightly secured.
Operating Instructions
Powering On/Off:
- To activate the electricity, press the 'Main Power' switch (red button) on the handlebar.
- To activate the display, hold the 'Display Power' switch (center button on display) for 3 seconds.
- To turn off the display, hold the 'Display Power' switch for 3 seconds.
Working Modes:
Your Soumye Electric Mountain Bike offers four distinct riding modes:
- Pure Electric Mode: Ride using only the motor, controlled by a simple twist of the throttle.
- PAS (Pedal Assist) Mode: The motor assists your pedaling with a moderate power boost. There are 3 adjustable levels to suit your effort. Press the 'UP' switch to increase the pedal assist speed (up to Level 3).
- Booster Mode: Helps maintain a steady low speed, significantly reducing your effort when walking up hills. Activate by holding the 'Down' switch.
- Pedal Mode: Functions like a traditional bike, with no electric assistance.

Figure 6: The intuitive LCD screen displays essential riding information.
Gear Shifting:
The 7-speed gear shifter allows you to change gears for adapting to different terrains on demand. Use the twist grip shifter on the right handlebar to select your desired gear.

Figure 7: The 7-speed Shimano shifter and throttle twist design for versatile riding.
Maintenance
Battery Care:
- Charging: Connect the charger to a power source. The charger indicator will show green when ready. Plug the charger port into the battery. The charger indicator will turn red, indicating charging. It will turn green again when fully charged.
- Unplugging: Once fully charged, unplug the charger from the power source first, then from the battery.
- Storage: If storing the bike for an extended period, charge the battery to 50-70% and recharge every 2-3 months to maintain battery health.

Figure 8: The bike features a built-in, certified battery for safety and performance.
Tire Pressure:
Maintain recommended tire pressure for optimal performance and safety. Refer to the tire sidewall for specific PSI ranges. Regularly check and adjust pressure as needed.
Brake Inspection:
Regularly inspect the front and rear disc brakes for wear and proper function. Ensure brake pads are not excessively worn and that the brake levers provide firm and responsive stopping power.

Figure 9: Front and rear disc brakes provide reliable all-weather stopping power.
General Cleaning:
Clean your bike regularly with a damp cloth. Avoid using high-pressure water jets directly on electrical components. Lubricate the chain periodically to ensure smooth operation.
Troubleshooting
- Bike Not Powering On:
- Check if the main power switch is pressed.
- Ensure the battery is charged and properly seated.
- Verify all electrical connections are secure.
- Motor Not Assisting:
- Check the PAS level on the LCD display. Increase it if it's at 0.
- Ensure the throttle is engaged if using Pure Electric Mode.
- Verify the battery has sufficient charge.
- Brakes Squealing or Not Effective:
- Inspect brake pads for wear; replace if necessary.
- Check brake caliper alignment and rotor condition.
- Ensure brake cables are properly tensioned.
- Unusual Noises During Ride:
- Check for loose components, especially on the wheels, handlebars, and pedals.
- Inspect the chain for proper lubrication and tension.
If you encounter issues not covered here, please contact Soumye customer support for assistance.
Specifications
| Feature | Specification |
|---|---|
| Bike Type | Electric Mountain Bike |
| Model Name | M101-B |
| Wheel Size | 26 Inches |
| Motor | 350W Brushless (Peak 540W) |
| Battery | 360Wh Built-in Battery |
| Top Speed | 20 MPH |
| Gears | 7-Speed (Shimano) |
| Frame Material | Carbon Steel (Lightweight Aluminum eBike Frame mentioned in feature bullets) |
| Suspension Type | Front Shock Absorber |
| Brake Style | Disc Brakes (Front and Rear) |
| Max Load Capacity | 290 lbs |
| Recommended Rider Height | 5'2" - 6'3" |
| Assembly Required | Yes (90% pre-assembled) |

Figure 10: Recommended rider height and maximum load capacity.
Warranty and Support
Soumye provides a 1-Year Warranty for this product. For any inquiries or support needs, our professional service team operates directly from Los Angeles, California.
You can reach us at 626-328-6000 (Monday to Friday, 9:00 am - 6:00 pm PST). We are committed to providing prompt and efficient assistance to ensure your satisfaction.
For additional information and FAQs, please visit the Soumye Store on Amazon.