1. Product Overview
The VirtuFit Pull-up and Dip Rack is a versatile, multifunctional wall-mounted fitness station designed for comprehensive upper body workouts. It supports exercises such as pull-ups, dips, chin-ups, knee raises, and leg raises, helping to build strength and muscle mass in the back, arms, abs, and shoulders.
Key features include:
- Multifunctional Design: Allows for a variety of exercises such as pull-ups, dips, chin-ups, knee raises, and leg raises to work the entire upper body.
- Easy Exercise Transition: By simply rotating the rack, you can quickly and easily switch between exercises without having to reinstall the device.
- Comfortable Support: Soft pads provide comfortable support during dips, while ergonomic foam grips offer a secure and comfortable fit during all exercises.
- Easy Wall Mounting: The frame is easy to attach to the wall with the provided wall hooks, ensuring a stable and secure installation.
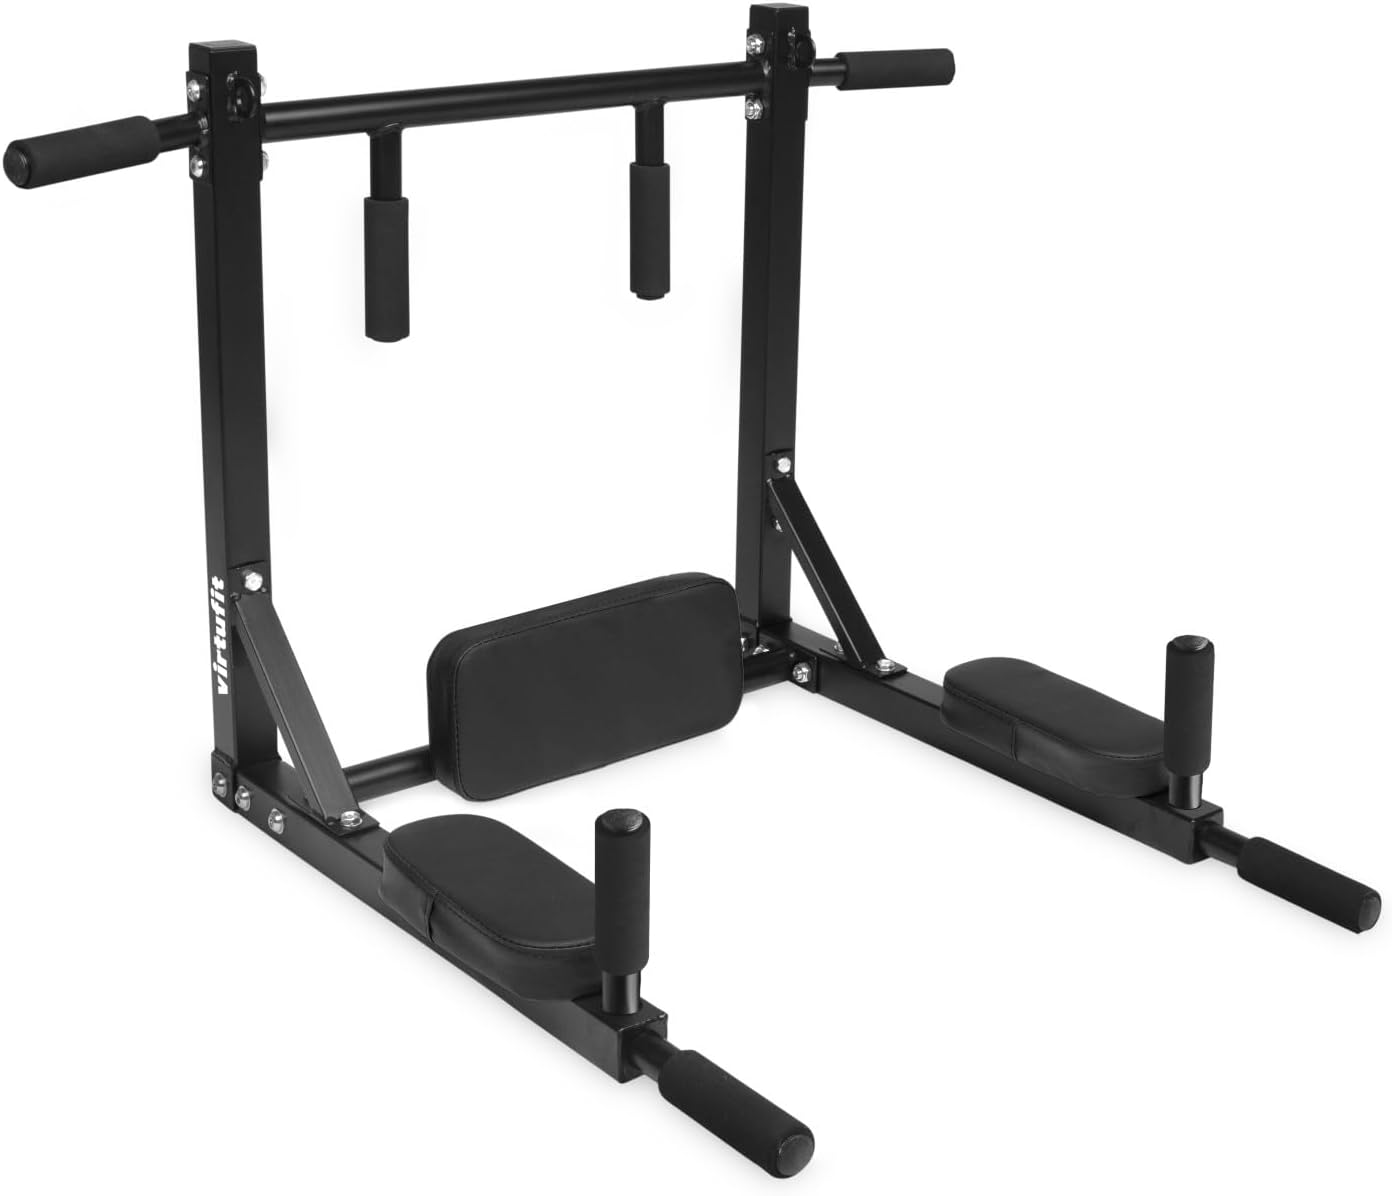
Figure 1: VirtuFit Pull-up and Dip Rack, front view.
2. Setup and Installation
2.1 Unpacking and Component Check
Carefully unpack all components from the packaging. Verify that all parts listed in the product's packing list are present and undamaged. If any parts are missing or damaged, contact customer support immediately.
2.2 Assembly Instructions
- Attach the main pull-up bar section to the vertical support arms using the provided bolts and washers. Ensure all connections are secure but do not fully tighten yet.
- Secure the dip handles and back pads to their respective positions on the frame. The soft pads should be positioned for comfortable support during dip exercises.
- Once all components are loosely assembled, ensure the frame is aligned correctly. Then, fully tighten all bolts using the appropriate tools. Do not overtighten.

Figure 2: Close-up of the comfortable dip pads and ergonomic foam grips.
2.3 Wall Mounting
The VirtuFit Pull-up and Dip Rack is designed for wall mounting. Proper installation is crucial for safety and stability. It is highly recommended to consult a professional for installation if you are unsure about your wall type or mounting procedures.
- Choose a Suitable Location: Select a solid, load-bearing wall (e.g., concrete, brick) that can safely support the weight of the rack and the user. Ensure there is sufficient clearance above and around the rack for exercises.
- Mark Drilling Points: Hold the assembled rack against the wall at the desired height. Use a pencil to mark the drilling points for the wall hooks. Ensure the marks are level and correctly spaced.
- Drill Holes: Using an appropriate drill bit for your wall type and the provided wall anchors, drill holes at the marked locations.
- Insert Anchors: Insert the wall anchors into the drilled holes.
- Mount the Rack: Align the rack with the installed anchors and secure it firmly to the wall using the provided screws or bolts. Ensure all fasteners are tightened securely.
Before first use, perform a stability test by applying your weight gradually to the rack to ensure it is securely mounted.
3. Operating Instructions
The VirtuFit Pull-up and Dip Rack offers multiple exercise options. Always warm up before exercising and cool down afterward. Consult a fitness professional for proper exercise techniques.
3.1 Pull-up and Chin-up Configuration
To perform pull-ups or chin-ups, ensure the rack is mounted with the main bar facing upwards. Grip the bar with your desired hand position (wide, narrow, overhand, underhand) and perform the exercise.
3.2 Dip and Core Exercise Configuration
To perform dips, knee raises, or leg raises, simply rotate the rack so the dip handles and back pads are positioned for use. The rack's design allows for quick and easy transition between these configurations without re-installation.

Figure 3: VirtuFit Pull-up and Dip Rack configured for dip exercises.
4. Maintenance
Regular maintenance ensures the longevity and safe operation of your VirtuFit Pull-up and Dip Rack.
- Cleaning: Wipe down the frame and grips with a damp cloth after each use to remove sweat and dirt. Avoid abrasive cleaners.
- Inspection: Periodically check all bolts, nuts, and wall mounts for tightness. Retighten if necessary. Inspect the foam grips and pads for wear and tear. Replace damaged parts immediately.
- Storage: If not in use for extended periods, ensure the rack is clean and stored in a dry environment.
5. Troubleshooting
If you encounter issues with your VirtuFit Pull-up and Dip Rack, refer to the following common solutions:
- Rack feels unstable: Ensure all mounting bolts are securely tightened to the wall and the rack components. Verify that the wall itself is suitable for mounting heavy fitness equipment.
- Squeaking noises: Check all bolted connections and tighten them. Applying a small amount of lubricant to moving parts (if any) might help, but ensure it does not affect grip safety.
- Difficulty switching configurations: Ensure no obstructions are preventing the rotation of the rack. Check for any loose parts that might be misaligning the frame.
If problems persist, contact VirtuFit customer support.
6. Specifications
| Feature | Detail |
|---|---|
| Brand | VirtuFit |
| Item Model Number | VF02110 |
| Color | Black |
| Material Type | Alloy Steel |
| Mounting Type | Wall Mount |
| Product Dimensions (L x W x H) | 100 x 70 x 59 cm |
| Item Weight | 9 Kilograms |
| Age Range (Description) | Adult |
| Batteries Included? | No |
7. Warranty and Support
For warranty information, please refer to the documentation provided with your purchase or visit the official VirtuFit website. For technical support, troubleshooting assistance, or to order replacement parts, please contact VirtuFit customer service through their official channels.


