Introduction
This manual provides instructions for the Disney Spiderman 3D Digital Alarm Clock with Nightlight, Model SPD3621. This device features an LED display for time and date, an alarm function, and a comforting nightlight. Please read these instructions carefully before use to ensure proper operation and to maximize the product's lifespan.
Package Contents
- 1 x Spiderman 3D Digital Alarm Clock with Nightlight (Model SPD3621)
- 1 x Instruction Manual (this document)
Note: Batteries are not included and must be purchased separately.
Safety Information
- Keep the device away from water and moisture.
- Do not expose to extreme temperatures or direct sunlight.
- Use only the recommended battery type and ensure correct polarity during installation.
- Remove batteries if the device will not be used for an extended period.
- Do not mix old and new batteries, or different types of batteries.
- This product is not a toy. Adult supervision is recommended for young children.
Setup
- Battery Installation: Locate the battery compartment on the underside of the alarm clock. Open the compartment cover. Insert the required batteries (e.g., 3 x AAA, specific type not provided in data) ensuring correct polarity (+/-). Close the battery compartment cover securely.
- Initial Power-On: Once batteries are installed, the LED display should illuminate, showing a default time.
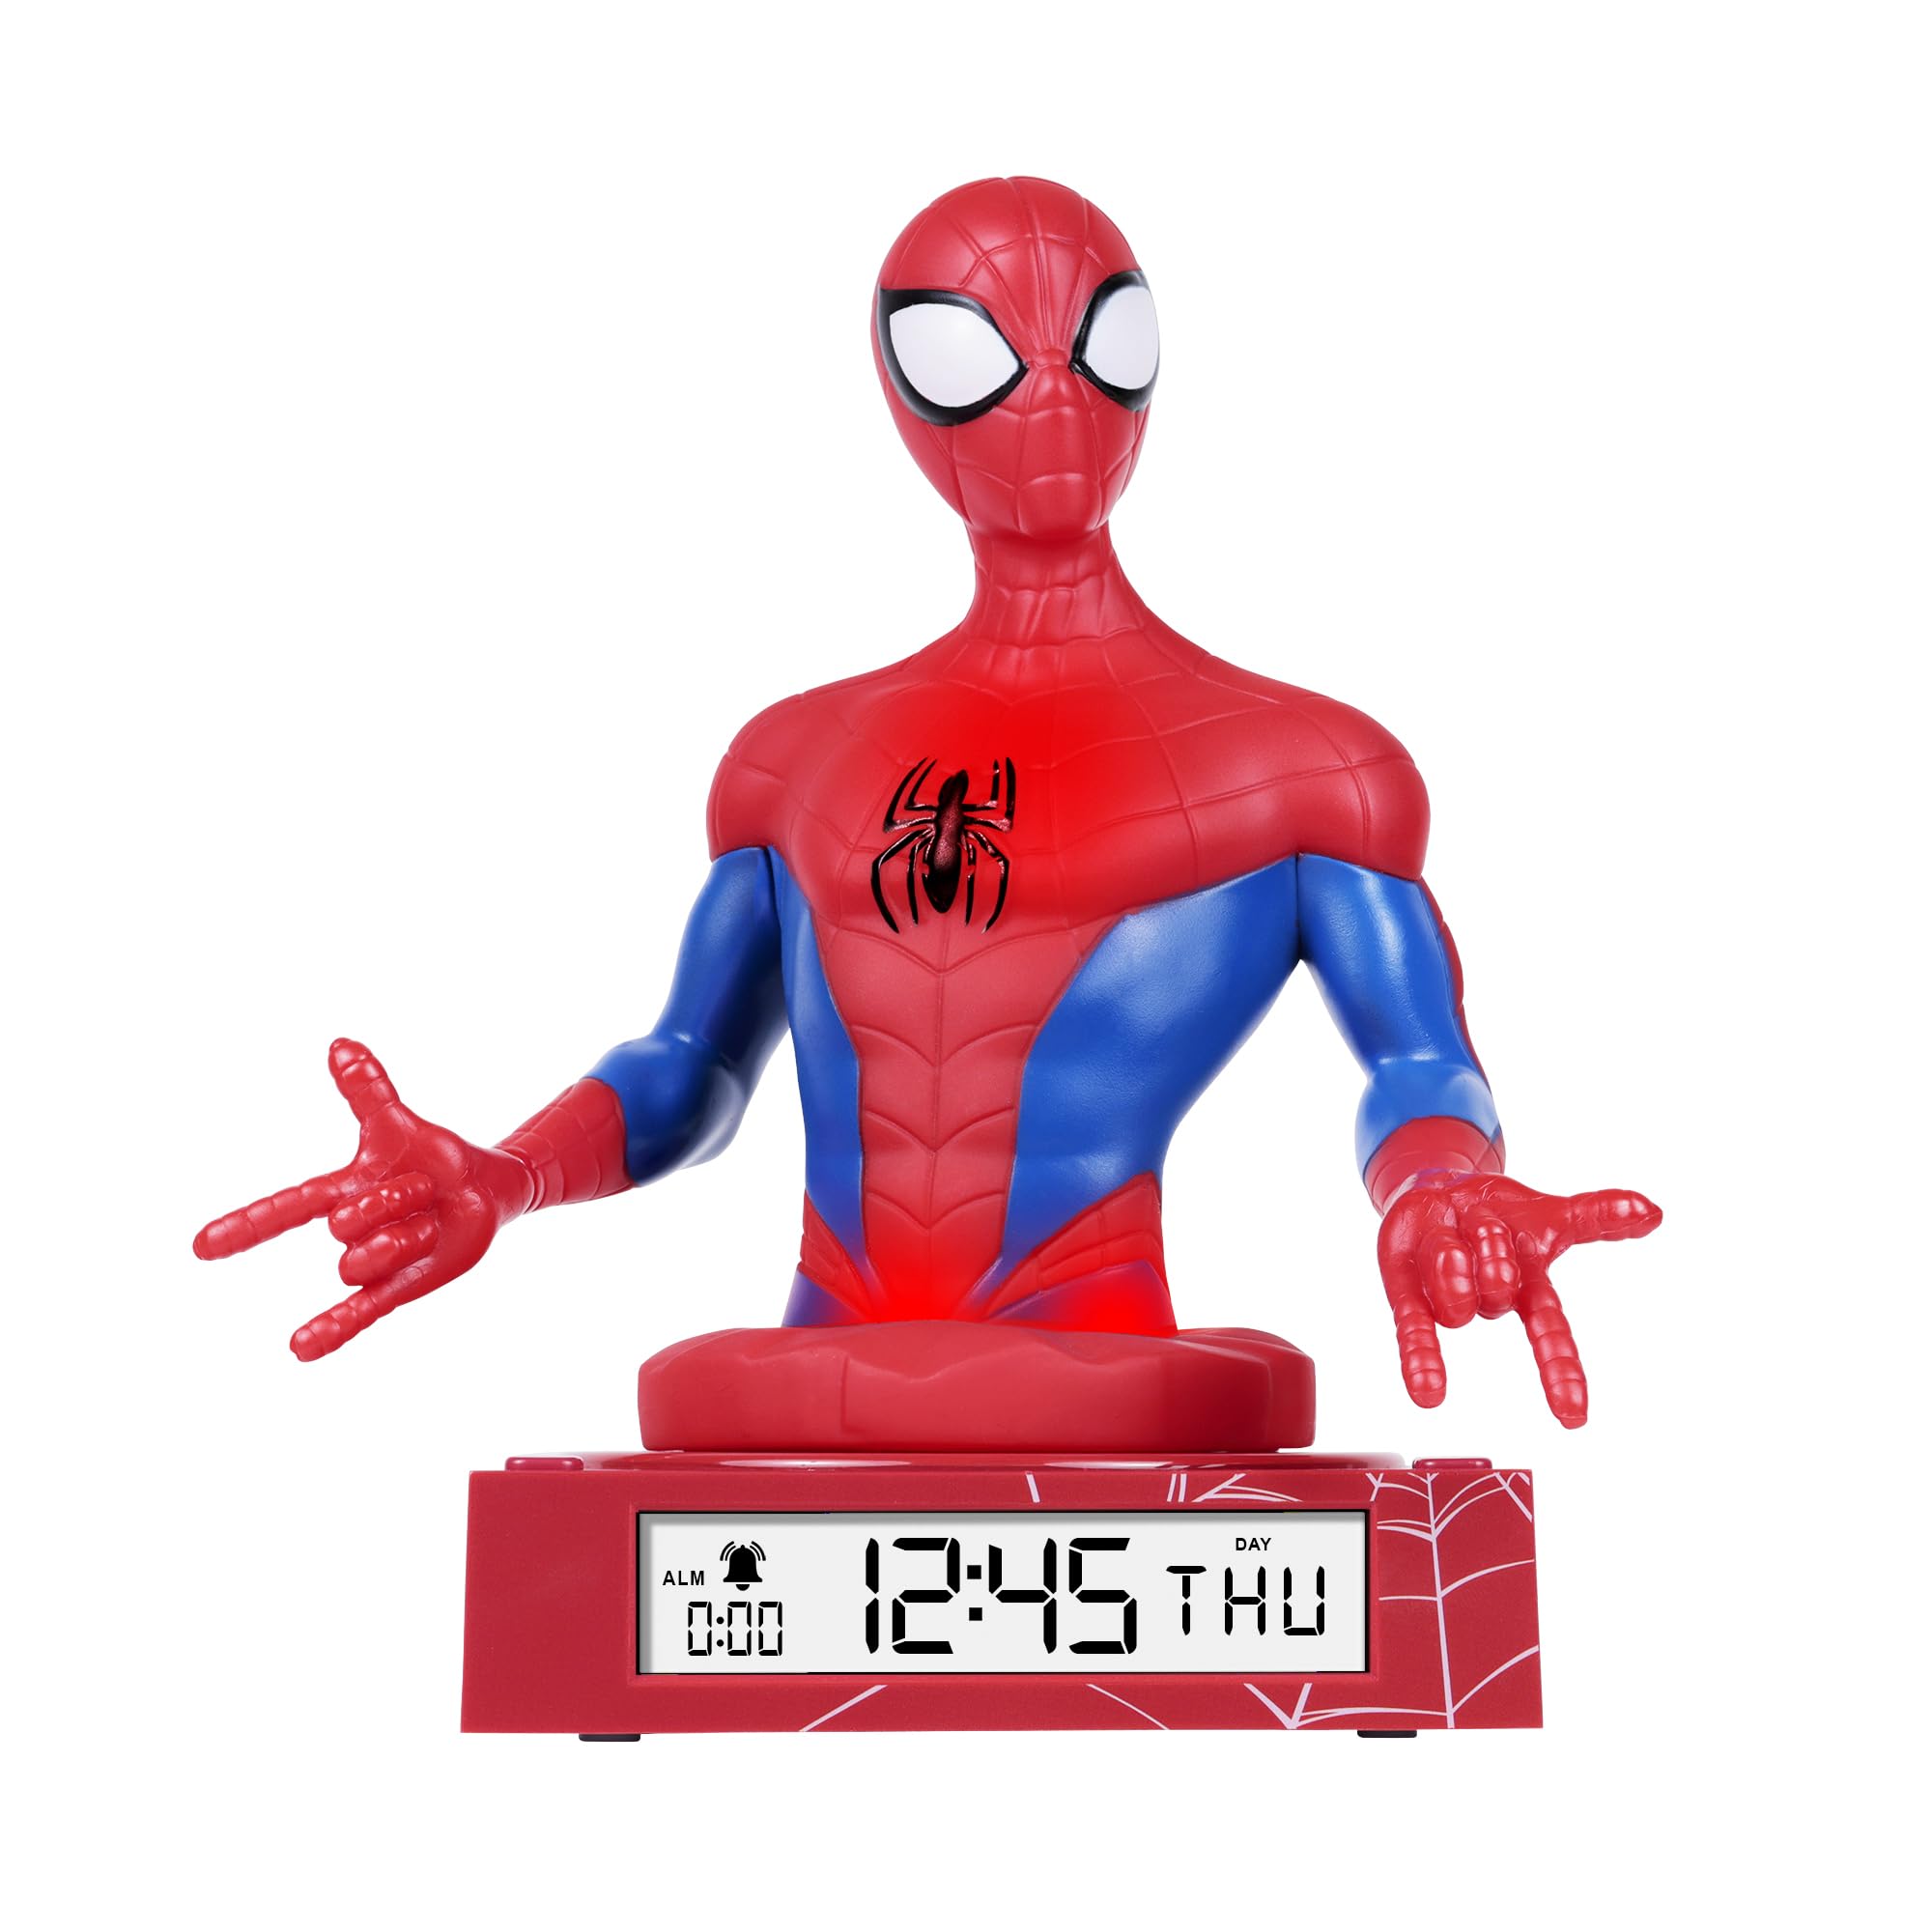
Figure 1: Spiderman 3D Digital Alarm Clock. The image displays the red and blue Spiderman figure on a red base, with the digital time '12:45 THU' visible on the LED display. The base also shows a spiderweb pattern.
Operating Instructions
The alarm clock features several buttons, typically located on the back or bottom of the unit, for setting time, date, and alarm functions. Refer to the labels on your specific unit for exact button identification.
Setting Time and Date
- Enter Time/Date Setting Mode: Press and hold the SET button (or similar, e.g., MODE) for a few seconds until the time display starts flashing.
- Adjust Hours: Use the UP and DOWN buttons (or similar, e.g., HOUR/MINUTE) to adjust the hour. Press SET again to confirm and move to minutes.
- Adjust Minutes: Use the UP and DOWN buttons to adjust the minutes. Press SET again to confirm and move to date settings (Year, Month, Day).
- Adjust Date: Follow the same procedure using UP/DOWN and SET buttons to set the Year, Month, and Day.
- Exit Setting Mode: After setting the day, press SET one last time, or wait a few seconds for the display to stop flashing automatically.
Setting the Alarm
- Enter Alarm Setting Mode: Press the ALARM SET button (or similar, e.g., ALM) once. The alarm time will be displayed, and the hour digits may flash.
- Adjust Alarm Hours: Use the UP and DOWN buttons to set the desired alarm hour. Press ALARM SET to confirm and move to minutes.
- Adjust Alarm Minutes: Use the UP and DOWN buttons to set the desired alarm minutes. Press ALARM SET to confirm.
- Activate/Deactivate Alarm: After setting the alarm time, there may be a separate switch or button (e.g., ALARM ON/OFF) to enable or disable the alarm. A bell icon on the display usually indicates the alarm is active.
- Snooze Function: When the alarm sounds, pressing the SNOOZE button (if available, often a large button on top) will temporarily silence the alarm for a few minutes.
- Stop Alarm: To stop the alarm completely, press any other button (e.g., ALARM OFF or SET). The alarm will reset for the next day.
Using the Nightlight
The Spiderman figure on the alarm clock functions as a nightlight. There is typically a dedicated button or switch to control this feature.
- Turn On/Off Nightlight: Press the NIGHTLIGHT button (or similar, e.g., LIGHT) to turn the nightlight on or off.
- The nightlight provides a soft glow, helping children feel secure in the dark.
Maintenance
- Cleaning: Wipe the surface of the alarm clock with a soft, dry cloth. Do not use abrasive cleaners or solvents, as these may damage the finish.
- Battery Replacement: When the display dims or the functions become erratic, it is time to replace the batteries. Follow the battery installation steps in the "Setup" section.
Troubleshooting
| Problem | Possible Cause | Solution |
|---|---|---|
| Display is blank or dim. | Batteries are low or incorrectly installed. | Replace batteries with new ones, ensuring correct polarity. |
| Alarm does not sound. | Alarm is not activated or set incorrectly. | Ensure the alarm is set and activated (check for bell icon on display). Verify alarm time. |
| Nightlight is not working. | Nightlight function is off or batteries are low. | Press the NIGHTLIGHT button to turn it on. Replace batteries if necessary. |
| Time is incorrect. | Time was not set correctly or batteries were removed. | Reset the time and date following the operating instructions. |
Specifications
- Brand: Disney
- Model Number: SPD3621
- Display Type: Digital LED
- Special Features: Alarm, 3D Spiderman Design, Nightlight Mode
- Power Source: Battery Operated (Batteries not included)
- Dimensions: Approximately 20 cm (L) x 17 cm (H)
- Material: Plastic
- Color: Red
Warranty and Support
This product comes with a one-year warranty from the date of purchase. This warranty covers manufacturing defects under normal use. It does not cover damage caused by misuse, accidents, unauthorized modifications, or normal wear and tear.
For warranty claims or technical support, please contact the retailer where the product was purchased. Please retain your proof of purchase for warranty validation.


