
HUPEJOS V7Plus Dash Cam
HUPEJOS V7Plus 4-Channel 360° Dash Cam User Manual
Model: V7Plus Dash Cam | Brand: HUPEJOS
1. Introduction
The HUPEJOS V7Plus Dash Cam is an advanced 4-channel recording system designed to provide comprehensive 360° protection for your vehicle. This mini dash cam features high-definition recording, 5G WiFi connectivity, GPS tracking, voice control, and enhanced night vision capabilities. It is engineered for ease of use and reliable performance, ensuring critical moments on the road are captured.
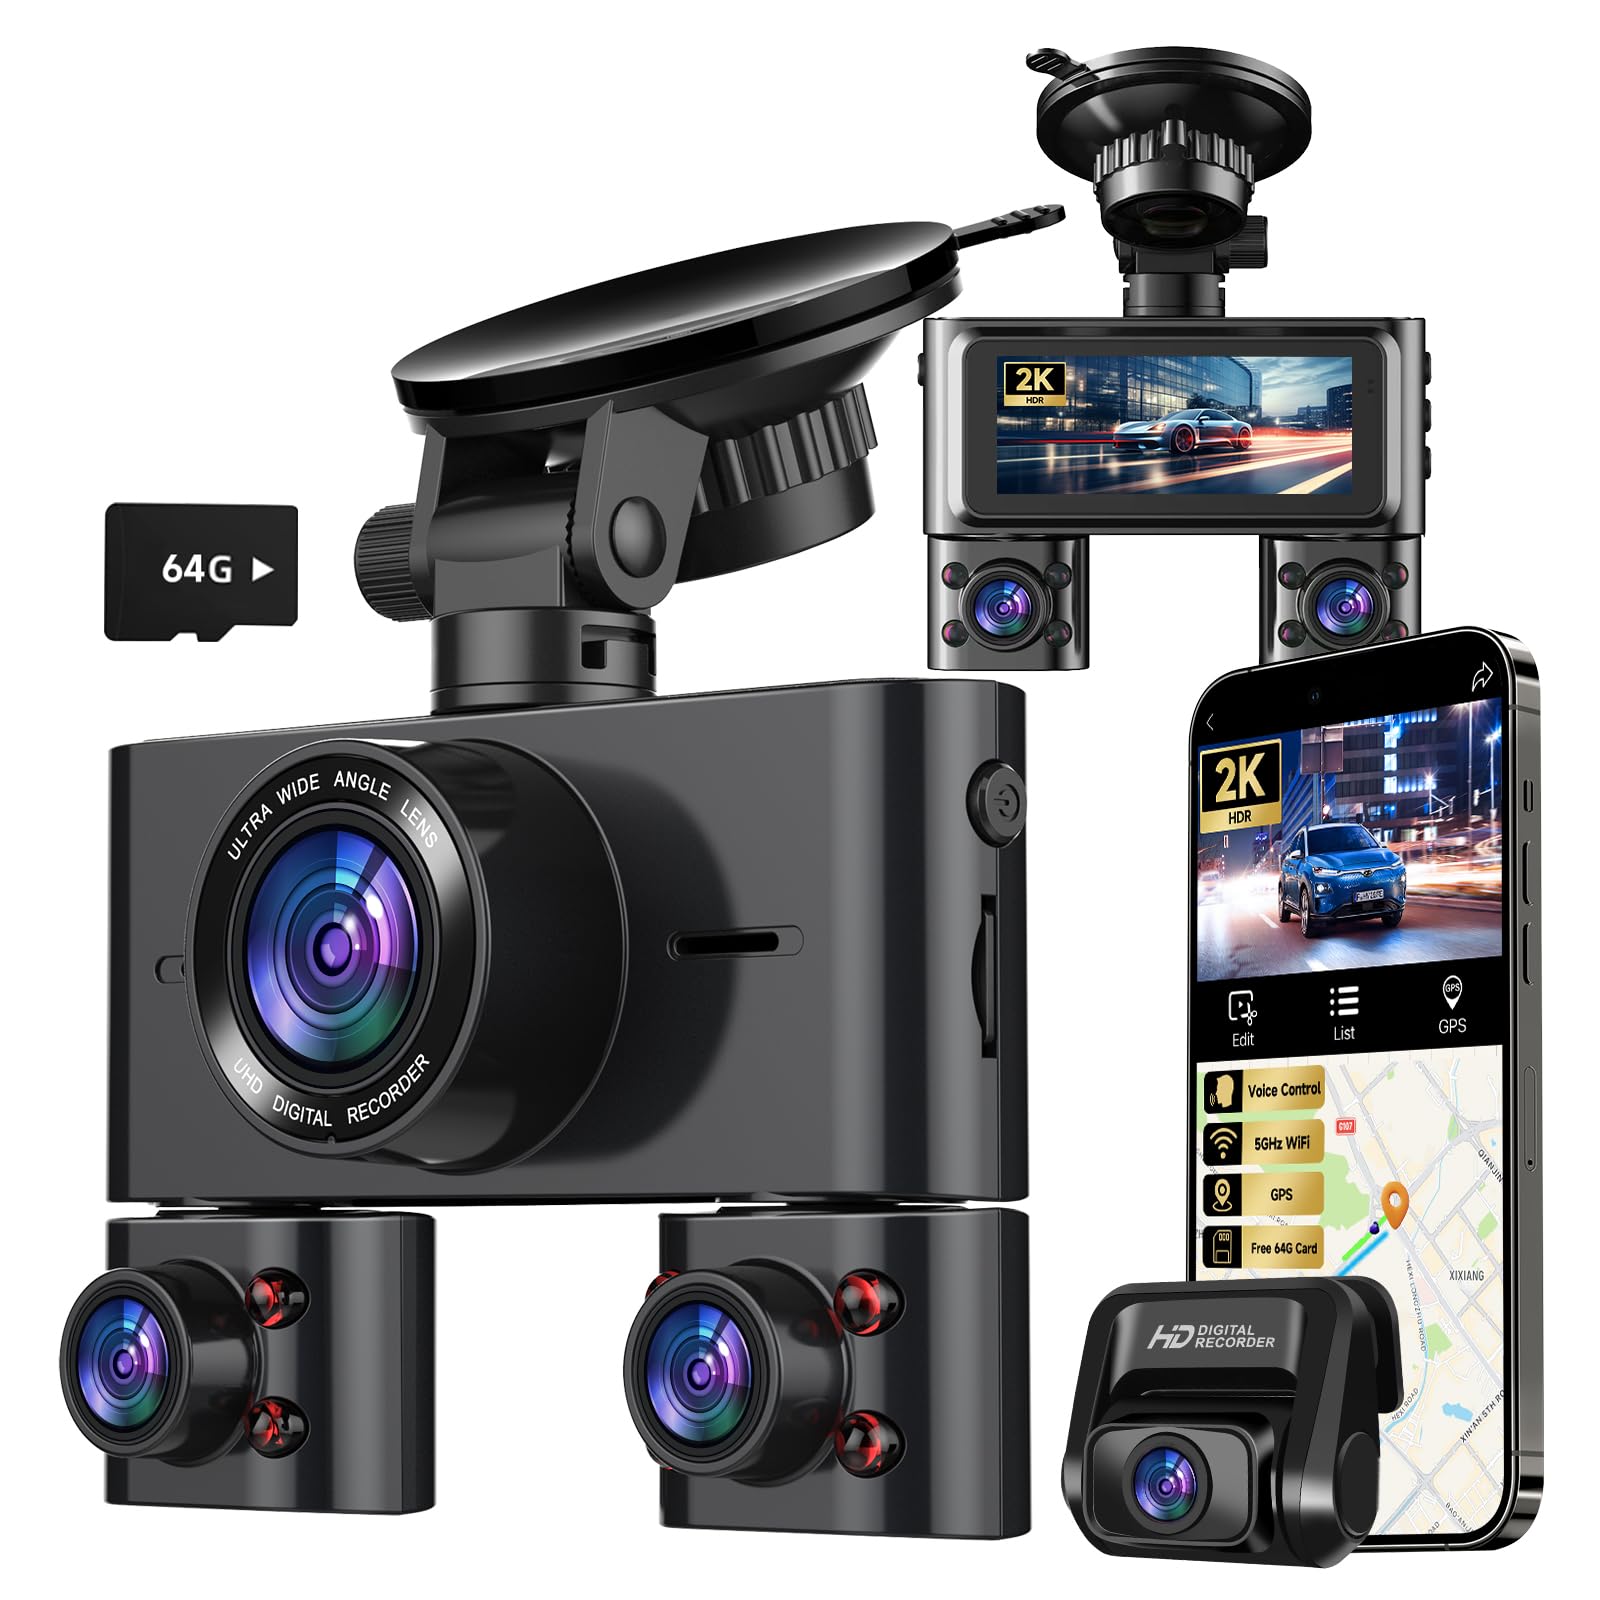
Image: The HUPEJOS V7Plus Dash Cam, showcasing its compact design and multiple camera lenses.
Key Features:
- 4-Channel 360° Recording: Captures front, rear, left, and right views with rotatable cameras for full coverage. Offers 4K Front + 1080P Rear or 2K Front + 1080P x3 resolutions.
- Loop Recording & G-Sensor: Automatically overwrites older files and locks footage during sudden impacts.
- 24-Hour Parking Mode: Provides continuous surveillance when parked (requires separate hardwire kit).
- Super Night Vision: F/1.8 aperture, 6-layer optical lens, HDR/WDR technology, and 8 IR lights for clear recordings in low light.
- 5GHz WiFi & App Control: Fast wireless connectivity for viewing, managing, and sharing videos via a smartphone app.
- GPS Tracking: Records driving routes and speed, providing crucial evidence.
- Voice Control: Hands-free operation for common functions using voice commands.
2. What's in the Box
Please check the package contents to ensure all items are present:
- V7Plus Mini Dash Cam
- 1080P Rear Camera
- User Manual
- Suction Cup Mount
- Car Wire Trim Tool
- Type-C Power Cable
- 19.6ft Rear Camera Cable
- Electrostatic Sticker (x2)
- GPS Module
- 64GB SD Card

Image: All components included in the HUPEJOS V7Plus Dash Cam package.
3. Setup and Installation
3.1 Mounting the Dash Cam
- Clean the windshield area where you intend to mount the dash cam. Ensure it does not obstruct your view.
- Attach an electrostatic sticker to the windshield first, then attach the suction cup mount to the sticker for easier removal and to prevent residue.
- Secure the dash cam to the suction cup mount. Adjust the angle to ensure optimal front, left, and right camera views.
3.2 Inserting the SD Card
- Locate the SD card slot on the dash cam.
- Insert the provided 64GB SD card (or a compatible card up to 256GB) into the slot until it clicks. Ensure the card is inserted correctly.
- It is recommended to format the SD card within the dash cam's settings before first use.
3.3 Connecting Power
- Connect the Type-C power cable to the dash cam's power input port.
- Plug the other end of the power cable into your vehicle's cigarette lighter socket.
- Route the cable neatly along the windshield and dashboard using the provided trim tool to conceal it.
- For 24-hour parking mode functionality, a separate hardwire kit (ASIN: B0BV2CJ5SW) is required and must be installed according to its instructions.
3.4 Installing the Rear Camera
- Mount the rear camera on the rear windshield, ensuring a clear view.
- Connect the rear camera cable to the main dash cam unit.
- Route the rear camera cable discreetly along the vehicle's interior trim.
3.5 GPS Module Connection
- Connect the external GPS module to the designated port on the dash cam.
- Position the GPS module on the dashboard or windshield where it has a clear view of the sky for optimal signal reception.

Image: Diagram illustrating the easy installation process of the dash cam, including power and rear camera connections.
4. Operating Instructions
4.1 Power On/Off
The dash cam will automatically power on and begin recording when your vehicle's ignition is turned on. It will power off automatically when the ignition is turned off.
4.2 Recording Modes
- Loop Recording: The dash cam records video in 3-minute segments. When the SD card is full, the oldest unlocked videos will be overwritten to make space for new recordings.
- G-Sensor (Emergency Recording): The built-in G-sensor automatically detects sudden shakes or collisions. In such an event, the current video footage is locked and saved to a separate folder, preventing it from being overwritten by loop recording.
- 24-Hour Parking Mode: With the optional hardwire kit (sold separately), the dash cam can monitor your vehicle 24/7. It uses a radar intelligent monitoring system to detect objects moving within 3-4 meters of the car, automatically recording a 1-minute video. If the object continues to move, recording continues until the object leaves the detection area.

Image: Visual representation of loop recording, G-sensor activation, and the 24-hour parking mode.
4.3 Display Modes and Resolution
The dash cam offers two main recording modes:
- 4K Front + 1080P Rear: Records the front view in 4K and the rear view in 1080P.
- 2K Front + 1080P x3: Records the front view in 2K, and the left, right, and rear views in 1080P. The left and right videos are combined into a single frame for easy viewing.

Image: Illustration of the 360° full protection provided by the 4-channel system and available recording modes.
4.4 Super Night Vision
Equipped with an F/1.8 large aperture, 6-layer optical lens, HDR (High Dynamic Range), and WDR (Wide Dynamic Range) technology, the dash cam automatically balances bright and dark areas in videos. Eight infrared (IR) lights ensure clear capture of details like road signs and license plates, even in low-light conditions. To enable/disable IR LEDs, navigate to the dash cam menu and select 'IR LED' (ON/OFF/Auto).

Image: Demonstrating the effectiveness of Super Night Vision with HDR and WDR technologies in various lighting conditions.
4.5 Voice Control
The dash cam supports voice commands (in English) for hands-free operation, allowing you to focus on driving. Supported commands include:
- "Take Photo"
- "Video Start"
- "Video Stop"
- "Turn on Wi-Fi"
- "Turn off Wi-Fi"
- "Turn on Screen"
- "Turn off Screen"
- "Turn on Audio"
- "Turn off Audio"

Image: A driver interacting with the dash cam using voice commands for safe, hands-free operation.
4.6 WiFi & App Control
The integrated 5GHz WiFi module provides faster video transfer speeds compared to 2.4GHz. Download the companion app (e.g., "TSCam" or "Viidure" as mentioned in reviews) to your smartphone to:
- View live footage from the dash cam.
- Manage and download recorded videos directly to your phone.
- Share videos on social media.
- Access GPS data, including driving routes and speed, which can be viewed on Google Maps within the app or on a PC using the GXPlayer software.
Note: The WiFi range is approximately 6-7 meters from the dash cam. This is not a cloud dash cam, and remote viewing beyond this range is not supported.

Image: Screenshot of the smartphone app interface, demonstrating video playback, GPS tracking, and sharing options.
5. Maintenance
5.1 Cleaning
- Regularly clean the dash cam lenses with a soft, lint-free cloth to ensure clear video quality.
- Wipe the screen and body with a dry or slightly damp cloth. Avoid using harsh chemicals.
5.2 SD Card Management
- Format the SD card periodically (e.g., once a month) through the dash cam's settings to maintain optimal performance and prevent data corruption.
- Ensure the SD card is a high-endurance Class 10 or U3 microSD card for reliable recording.
5.3 Firmware Updates
Check the manufacturer's website or the companion app for available firmware updates. Keeping the firmware updated ensures the best performance and access to new features.
6. Troubleshooting
| Problem | Possible Cause | Solution |
|---|---|---|
| Dash cam does not power on. | Loose power connection, faulty power cable, vehicle's power outlet issue. | Check if the power cable is securely connected to both the dash cam and the vehicle's power outlet. Test the power outlet with another device. If using a hardwire kit, ensure it is correctly installed. |
| Poor video quality / blurry images. | Dirty lenses, protective film still on lenses, incorrect resolution settings, low light conditions. | Clean the camera lenses with a soft cloth. Remove any protective film. Check video resolution settings in the menu. Ensure IR LEDs are enabled for night vision if needed. |
| SD card full / recording stops. | Loop recording not enabled, too many locked files, faulty SD card. | Ensure loop recording is enabled in settings. Regularly format the SD card. Check for and delete unnecessary locked files. Replace the SD card if it's old or damaged. |
| GPS speed/route inaccurate. | GPS module not properly connected, poor satellite signal, incorrect speed calibration. | Ensure the GPS module is securely connected and has a clear view of the sky. In settings, you can adjust the speed calibration (e.g., -3 MPH as per user feedback). |
| WiFi connection issues. | Out of range, incorrect app settings, interference. | Ensure your smartphone is within 6-7 meters of the dash cam. Restart both the dash cam and your phone. Check app permissions and settings. |
| Voice control not responding. | Incorrect language setting, background noise, speaking too softly. | Ensure the voice control language is set to English. Speak clearly and directly towards the dash cam. Reduce background noise if possible. |
7. Specifications
| Feature | Detail |
|---|---|
| Brand | HUPEJOS |
| Model Name | V7Plus Dash Cam |
| Automotive Service Type | Car |
| Connectivity Technology | Wi-Fi |
| Special Feature | 360 degrees |
| Vehicle Service Compatibility | Car |
| Recording Video Resolution | 2K+1080Px3 |
| Mounting Type | Dashboard Mount |
| Field of View | 360 Degrees |
| Control Method | Application |
| Screen Size Unit | 3.16 Inches |
| Optical Sensor Technology | CMOS |
| Flash Memory Type | microSD |
| Maximum Aperture | 1.8 f |
| Vehicle Part Position | Front, Rear |
| Batteries Included | No |
| Display | LCD |
| Supported Standards | MP4, JPG |
| Compatible Devices | Smartphone |
| Frame Rate | 30 FPS (1080P), 24 FPS (4K/2K) |
| Real Viewing Angle | 150 Degrees |
| Included Memory Card Size | 64 GB |
| Maximum Flash Memory Supported | 256 GB |
| Automatic Part Orientation | Front, Rear, and Interior Parts |
| Manufacturer | HUPEJOS |
| Manufacturer Part Number | V7Plus-4CH-64G |
| Color | Black |
| Item Dimensions (DxWxH) | 9.8D x 7W x 2H centimeters |
8. Warranty & Support
8.1 Product Warranty
The HUPEJOS V7Plus Dash Cam comes with an 18-month warranty after product activation. Please refer to the warranty card included in your package or contact customer support for details on activation and coverage.
8.2 Customer Support
For any questions, technical assistance, or support, please contact HUPEJOS customer service. You can typically find contact information (e.g., email address) in the product packaging or on the official HUPEJOS website. Customer support is available 24 hours.
8.3 Return Policy
This product is eligible for a 30-day free return. Please check the retailer's return policy for specific terms and conditions.

Image: Overview of the service plan, including warranty and support information.
Related documentsV7Plus Dash Cam


Ask a question about this manual
Ask about setup, troubleshooting, compatibility, parts, safety, or missing instructions. Manuals+ will review the question and use this page’s manual context to help answer it.