
Introduction
Thank you for choosing the Slochi 7-Inch Motion Sensor Ceiling Light. This manual provides essential information for the safe installation, operation, and maintenance of your new lighting fixture. Please read these instructions thoroughly before installation and retain them for future reference.
Safety Information
- Always turn off the power at the circuit breaker before beginning any electrical work.
- If you are unfamiliar with electrical wiring, consult a qualified electrician.
- Ensure all connections are secure and comply with local electrical codes.
- Do not install in locations exposed to direct water spray or submersion, despite its waterproof rating, for optimal longevity and safety.
- This product is designed for indoor use in areas such as closets, hallways, pantries, and basements.
Package Contents
Verify that all components are present before installation:
- 2 x PIR Motion Sensor Ceiling Light
- 4 x Connectors
- 4 x Screws
- 1 x Instruction Manual
Specifications
| Feature | Detail |
|---|---|
| Brand | slochi |
| Model Number | a8c1f7b4-d58f-49b9-a94f-597b56ee05e5 |
| Color | White |
| Material | Plastic |
| Light Source | LED |
| Wattage | 15 watts |
| Brightness | 1500 Lumens |
| Color Temperature | 3000K / 4000K / 6500K (Selectable) |
| Motion Sensor Angle | 120° |
| Motion Sensor Range | 3-4 meters |
| Mounting Height | 2-3 meters |
| Hold Time Settings | 30s / 60s / 120s |
| Power Source | AC (Hardwired) |
| Dimensions (L x W x H) | 7"L x 7"W x 0.72"H |
| Item Weight | 0.57 Kilograms |
| Lifespan | >25,000 hours |
| Water Resistance Level | Waterproof (IP67) |
Setup & Installation
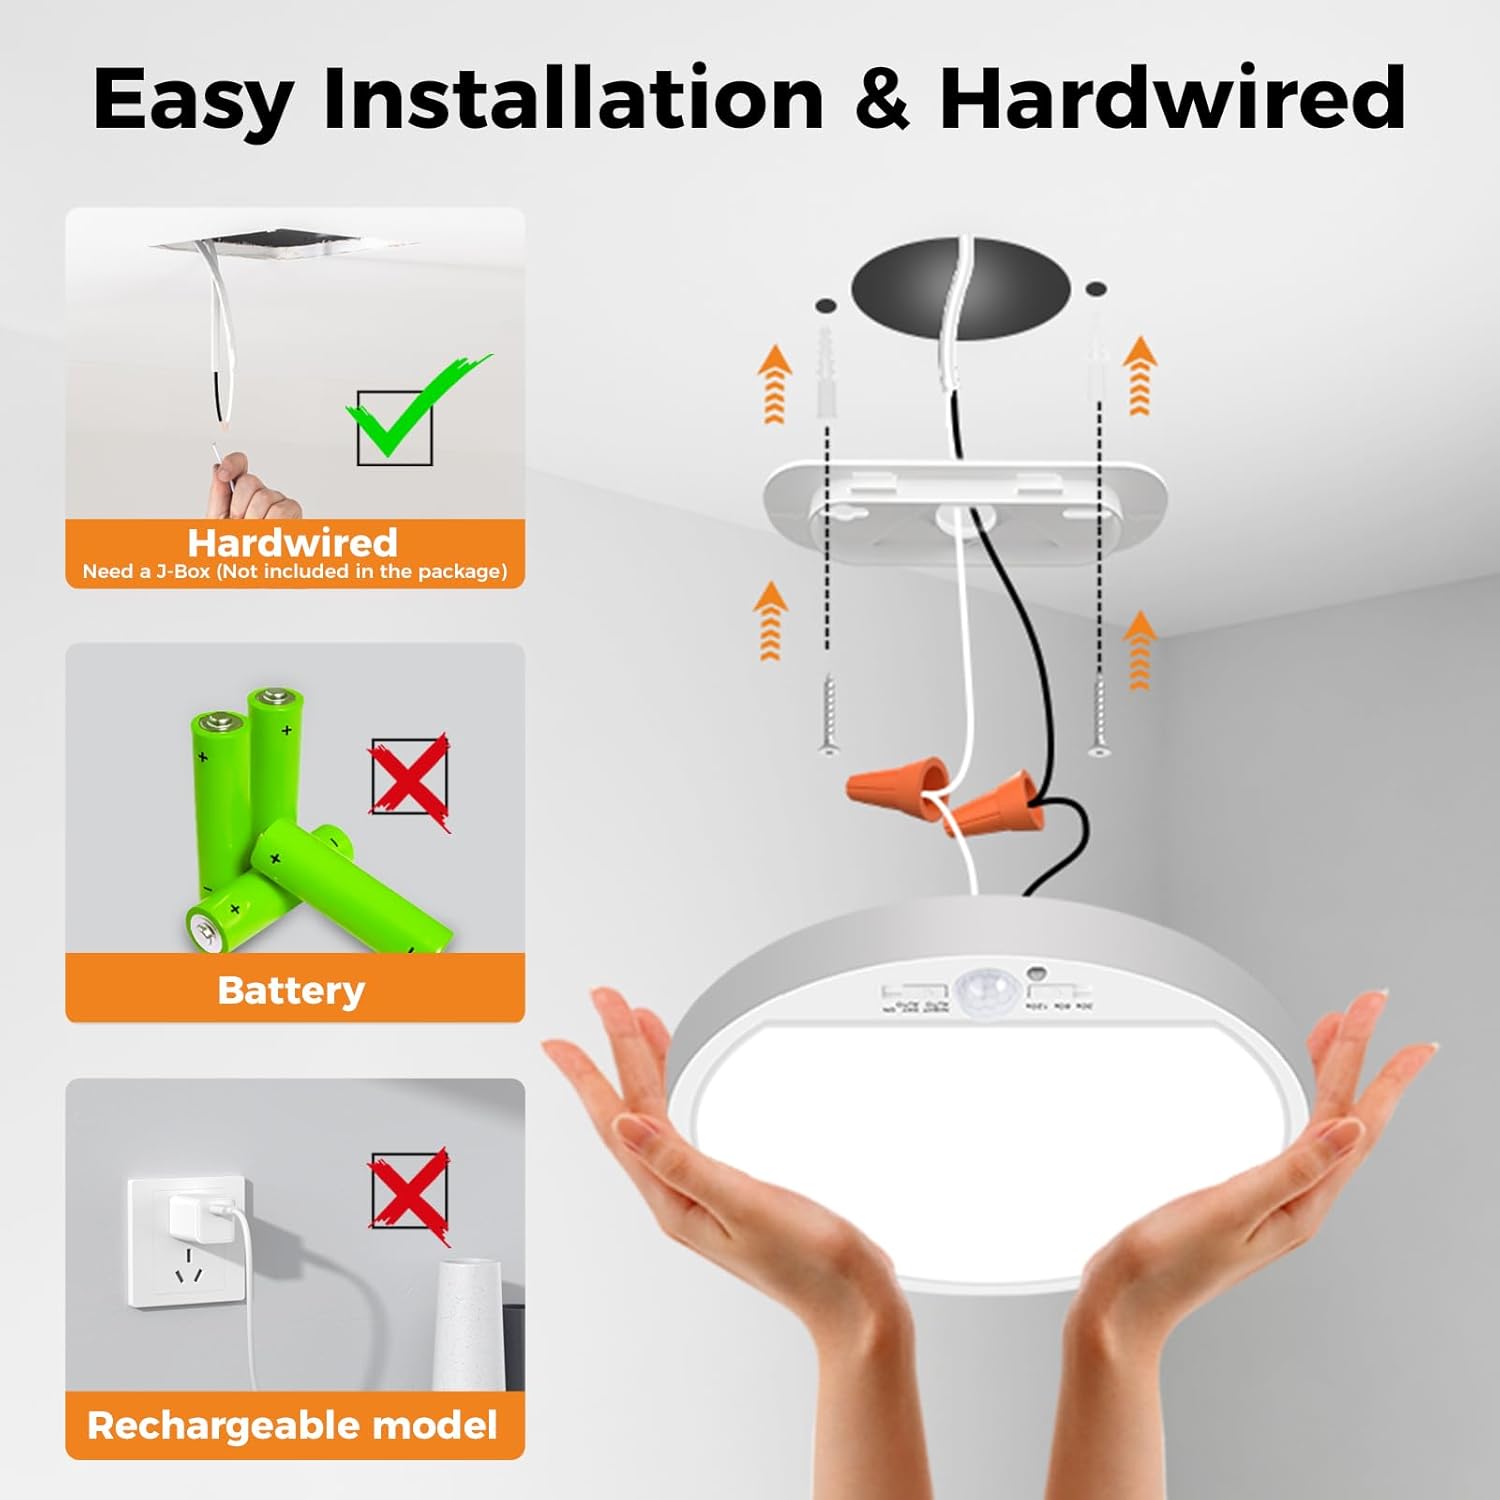
This motion sensor ceiling light is designed for hardwired installation. It can be mounted on a ceiling or a wall.
Installation Steps
- Prepare for Installation: Turn off power at the circuit breaker. Ensure the mounting surface is clean and stable.
- Remove Mounting Plate: Gently slide the back panel off the light fixture to detach the mounting plate. This plate will be secured to your ceiling or wall.
- Mount the Plate: Position the mounting plate over the electrical junction box (if applicable) or desired location. Mark the screw holes. Drill pilot holes if necessary and secure the plate using the provided screws.
- Connect Wiring: Connect the live (black) and neutral (white) wires from your electrical supply to the corresponding wires on the light fixture using the provided connectors. This fixture does not require an earth wire due to its insulated plastic housing.
- Secure the Light Fixture: Align the light fixture with the mounted plate and slide it into place until it locks securely.
- Restore Power: Turn the power back on at the circuit breaker.


Installation Video
Operating Instructions
Color Temperature Settings
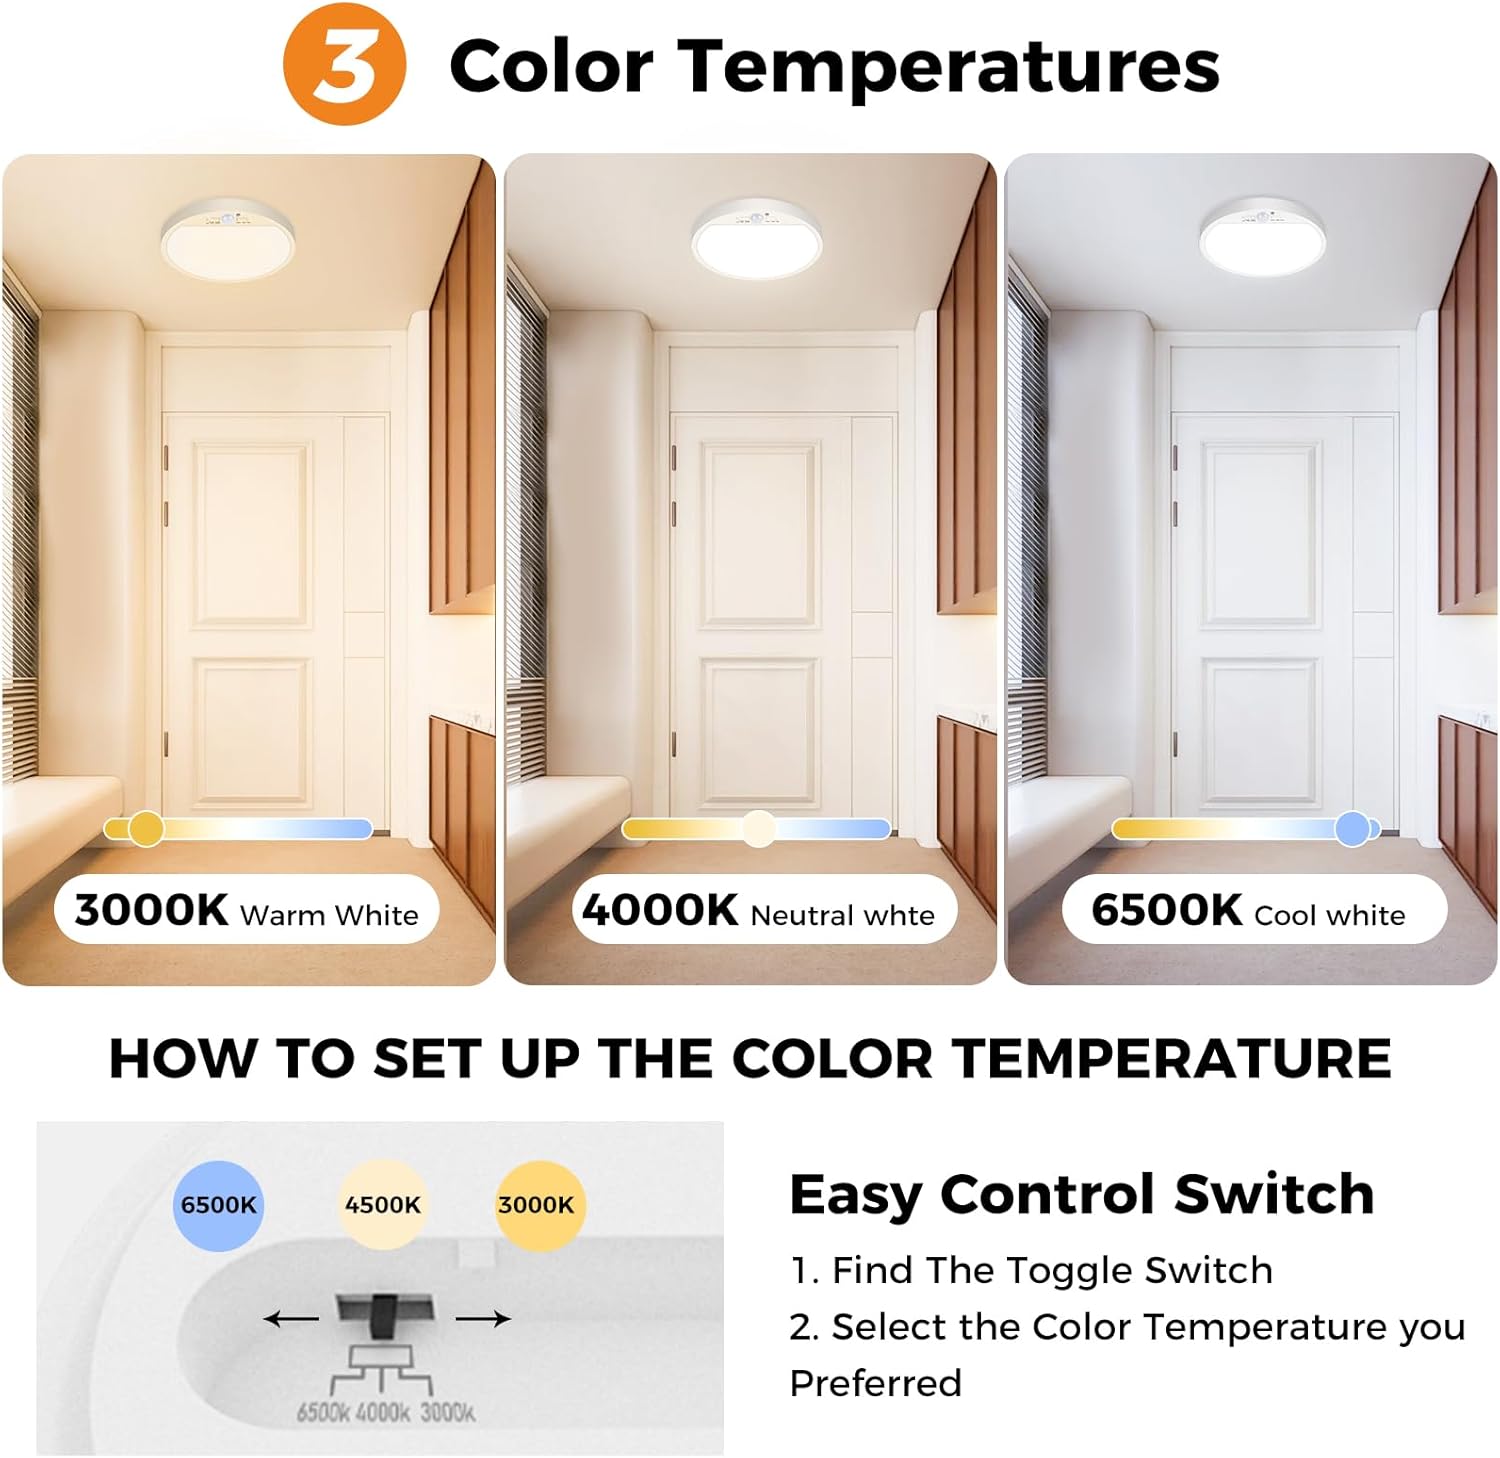
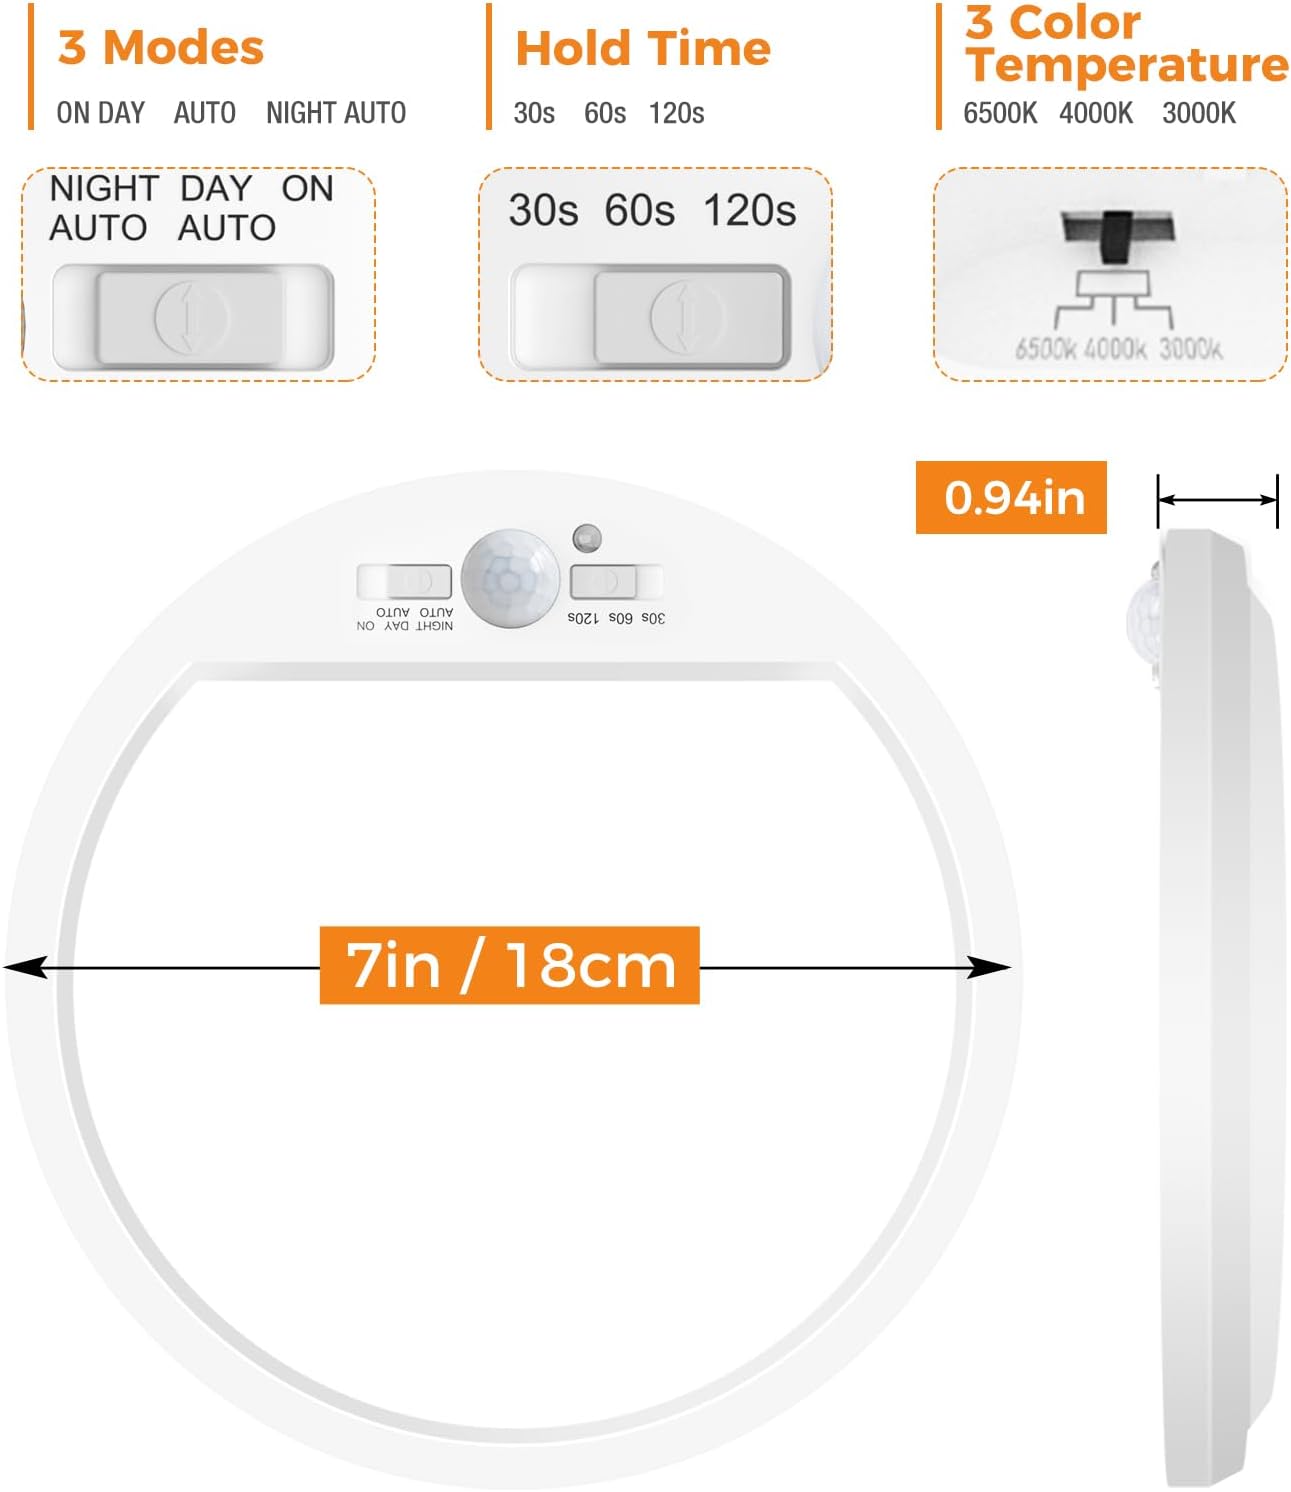
The light offers three selectable color temperatures: 3000K (Warm White), 4000K (Neutral White), and 6500K (Cool White). To adjust the color temperature, locate the small toggle switch on the back of the light fixture. Slide the switch to your desired setting before securing the light to its mounting plate.
- 3000K Warm White: Ideal for creating a cozy and inviting atmosphere, suitable for night lighting.
- 4000K Neutral White: A balanced light, good for general tasks and everyday use.
- 6500K Cool White: Bright and crisp, similar to daylight, excellent for task lighting in areas like closets.

Sensor Modes and Hold Times
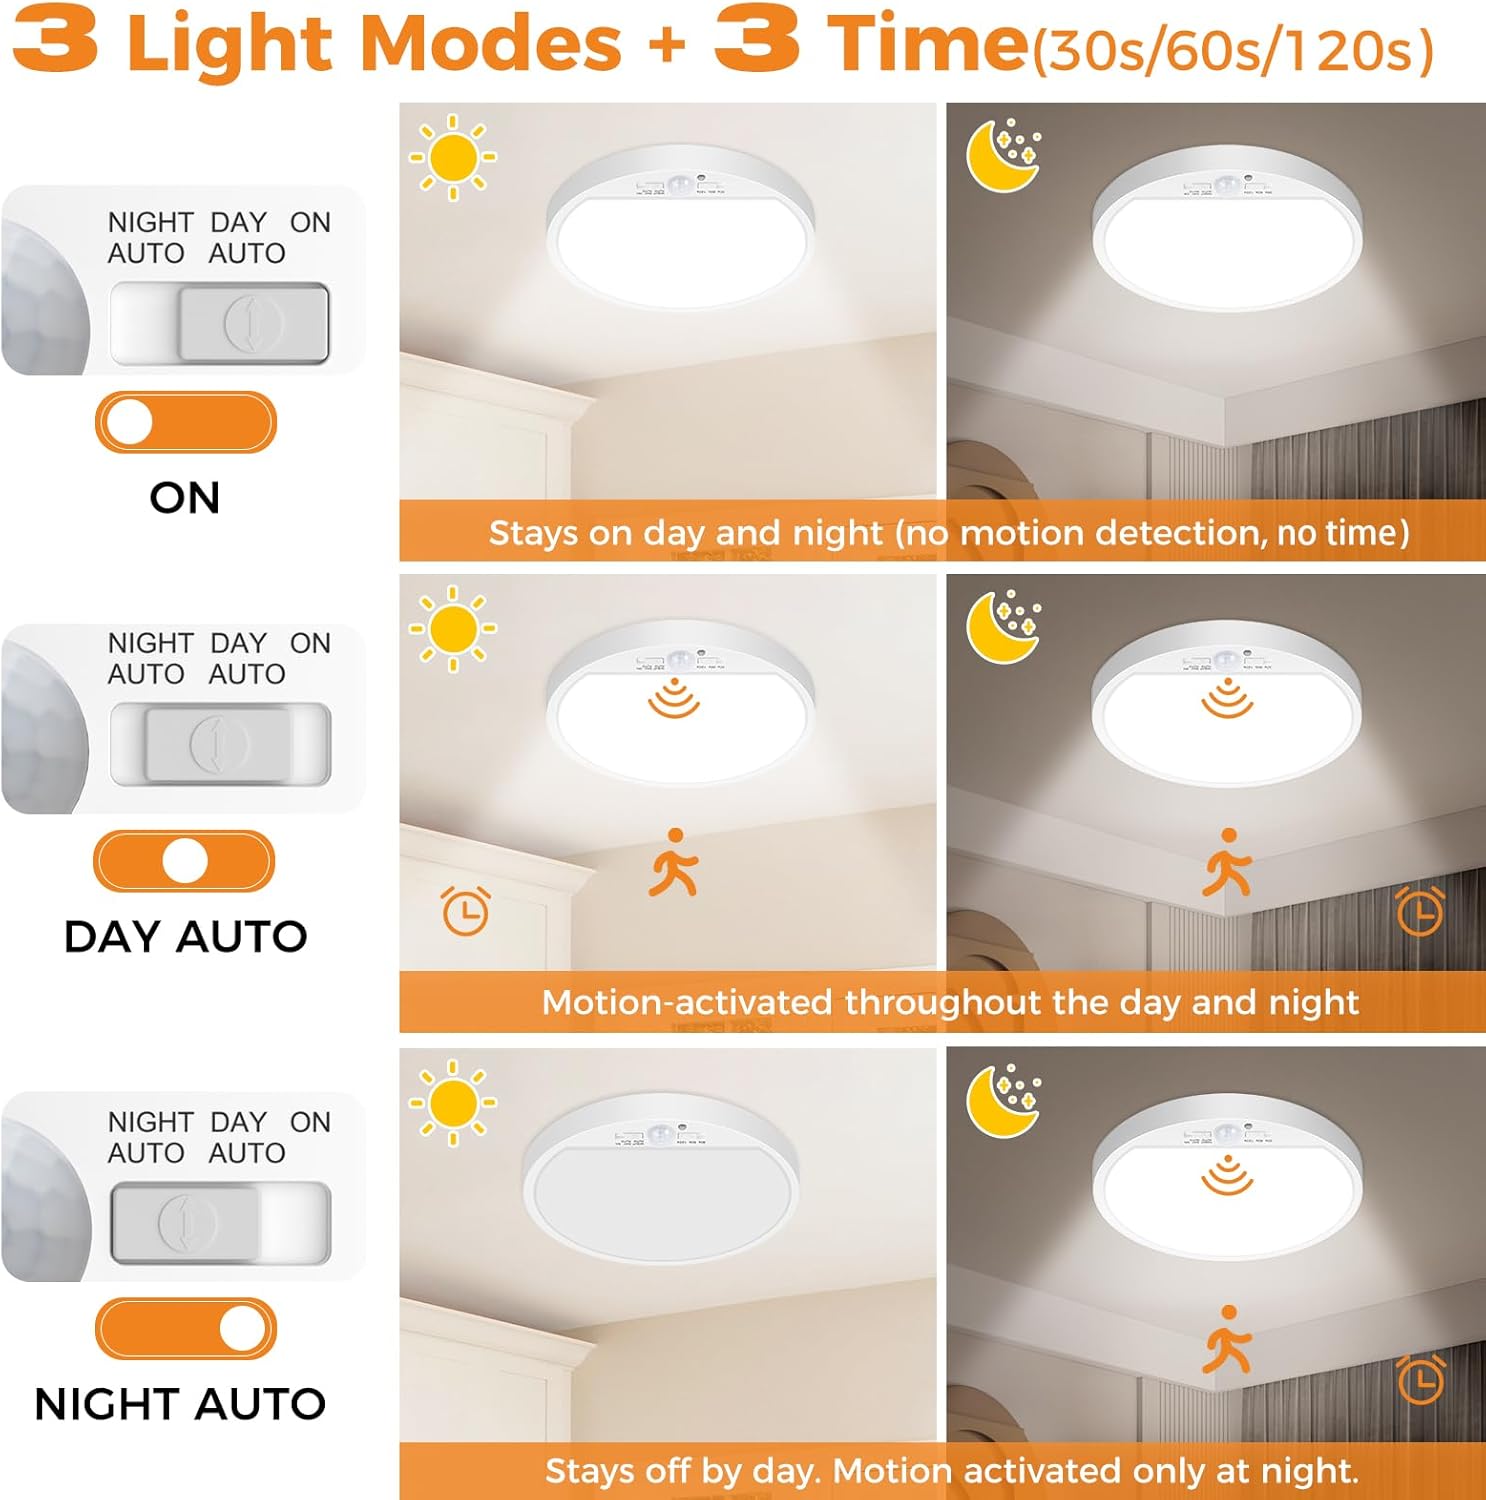
The light features a PIR motion sensor with adjustable operating modes and hold times. These settings are controlled by switches located on the light fixture.
Sensor Modes:
- ON: The light stays on continuously, day and night, without motion detection or timer functionality.
- DAY AUTO: The motion sensor is active throughout the day and night. The light will turn on when motion is detected, regardless of ambient light levels.
- NIGHT AUTO: The motion sensor is active only when ambient light is low (at night or in dark conditions). The light will turn on when motion is detected in low light.

Hold Times:
When the motion sensor is active (in DAY AUTO or NIGHT AUTO modes), you can set how long the light remains on after motion is no longer detected. Available hold times are 30 seconds, 60 seconds, and 120 seconds. Adjust this setting using the dedicated switch on the light fixture.
Note: The timer function does not apply when the light is set to 'ON' mode.

Maintenance
To ensure optimal performance and longevity of your Slochi Motion Sensor Ceiling Light, follow these simple maintenance guidelines:
- Cleaning: Gently wipe the surface of the light fixture with a soft, dry, or slightly damp cloth. Avoid using abrasive cleaners, solvents, or harsh chemicals, as these can damage the finish or electronic components.
- Inspection: Periodically check the light for any signs of damage or loose connections. If any issues are found, disconnect power and address them promptly.
- Sensor Area: Keep the motion sensor lens clean and free from obstructions to ensure accurate detection.
Troubleshooting
If you encounter issues with your Slochi Motion Sensor Ceiling Light, refer to the following common solutions:
| Problem | Possible Cause | Solution |
|---|---|---|
| Light does not turn on. | No power, incorrect sensor mode, or faulty wiring. | Check circuit breaker. Ensure 'ON' mode is selected or 'DAY AUTO'/'NIGHT AUTO' is appropriate for ambient light. Verify wiring connections. |
| Light stays on continuously. | Set to 'ON' mode, or constant motion detected. | Switch to 'DAY AUTO' or 'NIGHT AUTO'. Ensure no continuous motion in the detection area. |
| Motion sensor not detecting. | Obstruction, incorrect mounting height, or sensor dirty. | Clear obstructions. Verify mounting height (2-3m) and detection range (3-4m). Clean sensor lens. |
| Light flickers or dims. | Unstable power supply or internal component issue. | Ensure stable power. If problem persists, contact customer support. |
Warranty & Support
The Slochi Motion Sensor Ceiling Light comes with a 1-year manufacturer's warranty. This warranty covers defects in materials and workmanship under normal use.
For warranty claims, technical support, or any questions regarding your product, please contact Slochi customer service. Our friendly customer service team aims to provide fast support within 24 hours.
Contact information can typically be found on the product packaging or the official Slochi website.