Introduction
This manual provides detailed instructions for the safe installation, operation, and maintenance of your Maxxima 3 inch LED Cylinder Downlight, Model MRL-S3151005B. Please read this manual thoroughly before installation and retain it for future reference.
Safety Information
- Always turn off power at the circuit breaker before installation or servicing.
- Consult a qualified electrician if you are unsure about the installation process.
- Ensure all electrical connections comply with local codes and ordinances.
- Do not modify the fixture or its components.
- This product is designed for 120VAC operation.
- IC Rated for direct contact with insulation.
Package Contents
- 1x Maxxima 3 inch LED Cylinder Downlight
- 1x Junction Box (J-Box)
- 1x Foam Gasket
Setup and Installation
- Prepare the Installation Area: Turn off power at the circuit breaker. Mark and cut a 2.5-inch diameter hole in the ceiling drywall at the desired location. Ensure there are no obstructions like joists or pipes.
- Connect Wiring to J-Box: Open the junction box. Connect the household electrical wires (live, neutral, ground) to the corresponding wires in the J-box using appropriate connectors. Ensure secure connections.
- Select Color Temperature (CCT): Locate the CCT selection switch on the J-box. Choose your desired color temperature (2700K, 3000K, 3500K, 4000K, or 5000K) by sliding the switch. This setting can only be changed before the J-box is installed in the ceiling.
- Insert J-Box: Place the connected J-box into the ceiling beam or cavity through the cut hole. Ensure it is securely positioned and will not interfere with the downlight.
- Connect Downlight to J-Box: Connect the wire from the downlight fixture to the corresponding connector on the J-box. Ensure a firm connection.
- Install Downlight: Gently push the downlight fixture into the 2.5-inch ceiling hole. The spring clips on the sides of the fixture will secure it in place against the drywall. Ensure the foam gasket is properly seated for an airtight application.
- Restore Power: Once the fixture is securely installed, turn the power back on at the circuit breaker.

Image: The included junction box showing the CCT selection switch for adjusting light color temperature.

Image: The Maxxima LED Cylinder Downlight shown with its connected junction box, ready for installation.
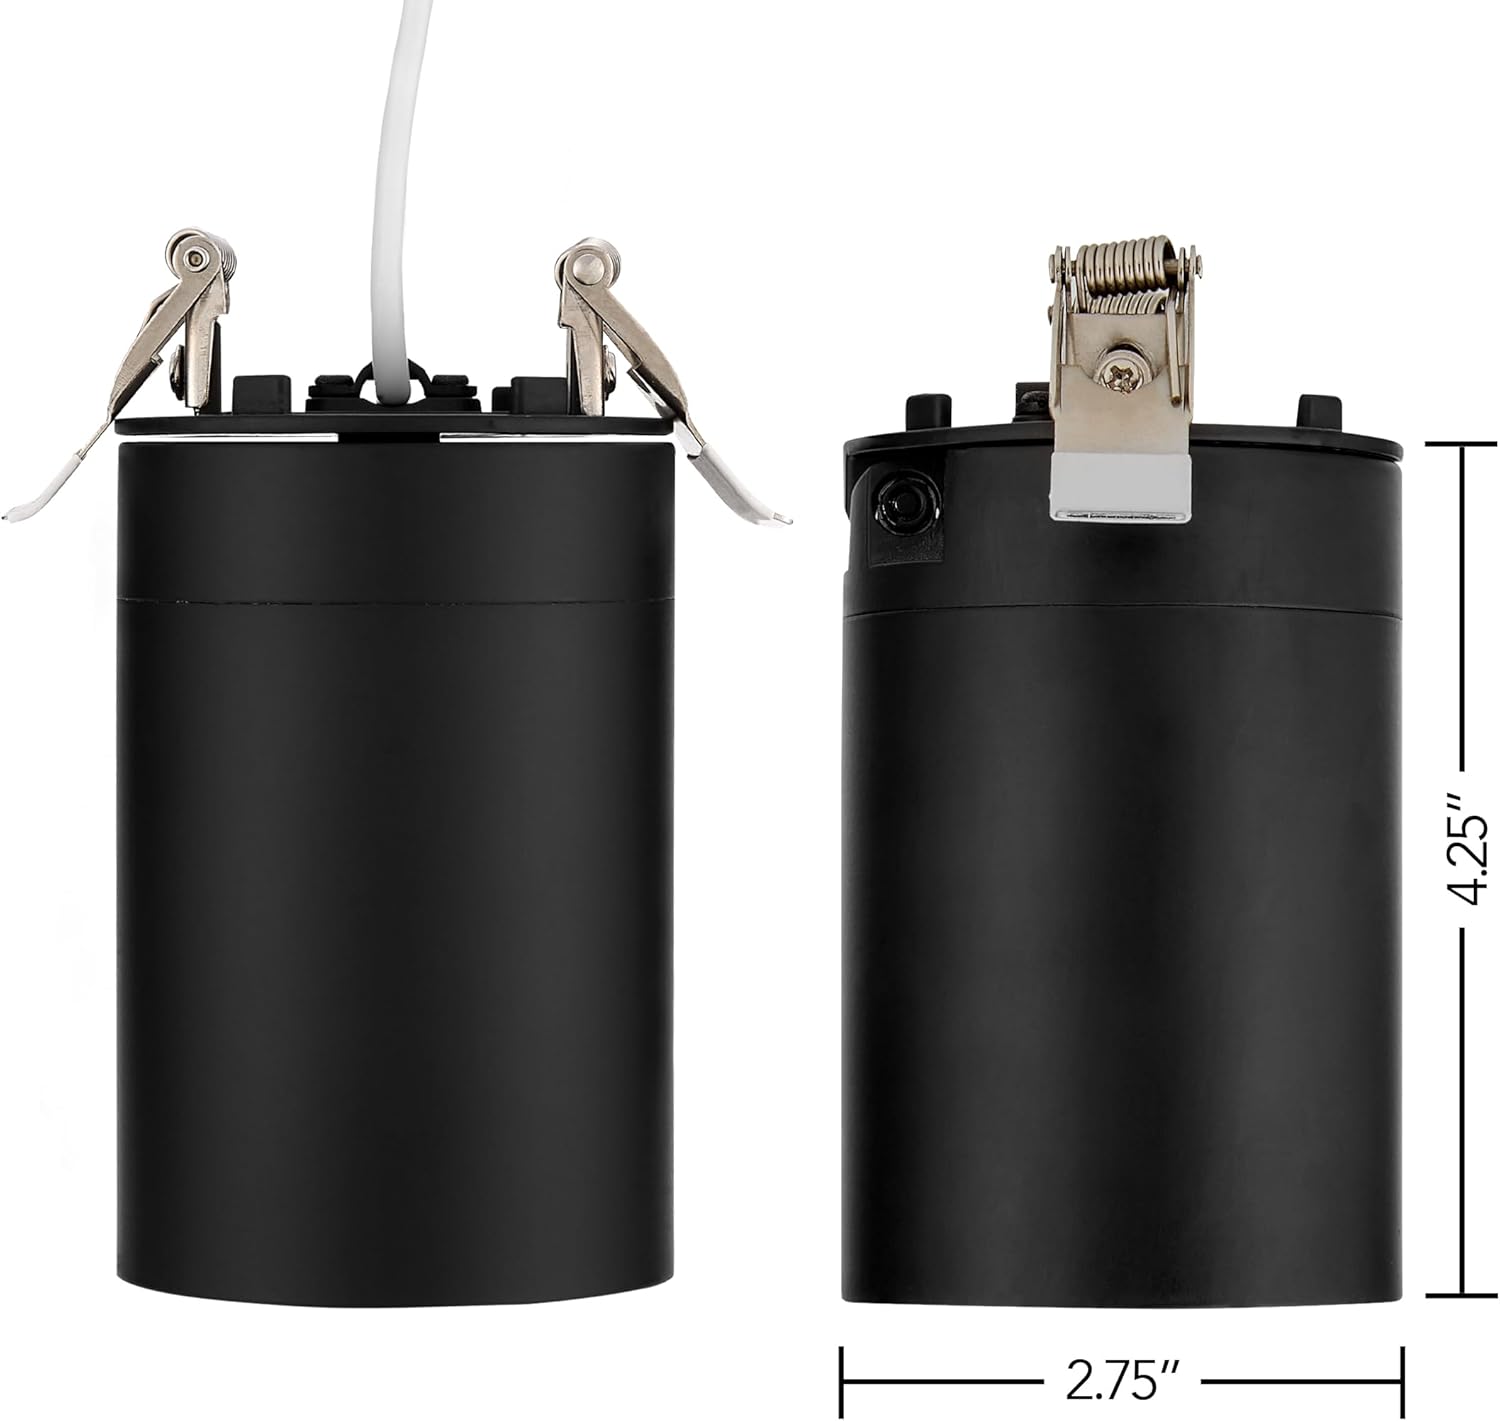
Image: Underside view of the Maxxima LED Cylinder Downlight, highlighting the spring clips used for secure ceiling installation.
Operating Instructions
Color Temperature Selection (CCT)
The color temperature of your downlight is selected via a switch on the junction box prior to installation. The available options are 2700K (Soft White), 3000K (Warm White), 3500K (Bright White), 4000K (Neutral White), and 5000K (Daylight). To change the CCT after installation, power must be turned off, the fixture removed, and the J-box accessed.

Image: Visual representation of the five selectable color temperatures (2700K to 5000K) and their corresponding light appearances.
Dimming Function
This downlight is dimmable from 10% to 100%. Ensure you use a compatible LED dimmer switch for optimal performance. Refer to your dimmer switch's instructions for proper operation.
Directional Adjustment
The downlight offers a directional adjustment with a 60° tilt. Gently adjust the light head to direct illumination as needed for targeted lighting.

Image: The Maxxima 3 inch LED Cylinder Downlight shown with its head tilted, demonstrating its directional adjustment capability.
Maintenance
- Cleaning: Ensure power is off before cleaning. Wipe the fixture with a soft, dry cloth. Do not use abrasive cleaners or solvents.
- LED Lifespan: The integrated LED light source is designed for long-term use and does not require bulb replacement.
Troubleshooting
| Problem | Possible Cause | Solution |
|---|---|---|
| Light does not turn on. | No power, loose wiring, faulty switch. | Check circuit breaker. Verify all wire connections. Test switch. |
| Light flickers or dims improperly. | Incompatible dimmer, loose wiring. | Ensure dimmer is LED compatible. Check wiring connections. |
| Incorrect color temperature. | CCT switch set incorrectly. | Turn off power, remove fixture, adjust CCT switch on J-box. |
| Light falls out of ceiling. | Improper hole size, clips not engaged. | Ensure hole is 2.5 inches. Verify spring clips are fully engaged. |
Specifications
| Model Number | MRL-S3151005B |
| Input Voltage | 120 Volts AC |
| Wattage | 15 Watts |
| Luminous Flux | 900 Lumens |
| Color Temperature (CCT) | 2700K / 3000K / 3500K / 4000K / 5000K Selectable |
| CRI | 90 |
| Dimming Range | 10% - 100% |
| Beam Angle | 38° |
| Tilt Adjustment | 60° |
| Material | Aluminum, Polycarbonate |
| Dimensions | Fixture: 5” long x 2.75” diameter; J-Box: 5.4” W x 2.2” L x 2.2” H |
| Certifications | ETL Listed, IC Rated |
Warranty Information
This Maxxima product is backed by a 3-year warranty from the date of purchase. For warranty claims or further details, please contact Maxxima customer support.
Customer Support
For technical assistance, troubleshooting, or general inquiries, please visit the official Maxxima website or contact their customer service department. Refer to the product packaging or Maxxima's official website for the most current contact information.
Maxxima Website: www.maxximastyle.com


