1. Introduction
This manual provides detailed instructions for the installation, operation, and maintenance of your EMPIRE GAMING CL-242 ARGB PC Gaming Case. Please read this manual thoroughly before beginning installation to ensure proper setup and safe use of your new PC case. Retain this manual for future reference.
2. Safety Information
Observe the following safety precautions during installation and operation:
- Always disconnect the power supply from the wall outlet before installing or removing any components.
- Wear an anti-static wrist strap to prevent electrostatic discharge (ESD) damage to components.
- Handle components carefully to avoid physical damage.
- Ensure all cables are properly routed and secured to prevent interference with fans or other moving parts.
- Do not block ventilation openings on the case.
- Keep the case away from liquids and excessive humidity.
3. Package Contents
Verify that all items are present in your package:
- EMPIRE GAMING CL-242 PC Gaming Case (White)
- 7 x 120mm ARGB Fans (pre-installed)
- ARGB Controller Hub
- Accessory Box (screws, cable ties, standoffs)
- User Manual (this document)
4. Product Overview
The EMPIRE GAMING CL-242 is a mid-tower PC gaming case designed for optimal cooling and aesthetic appeal. It features tempered glass panels and pre-installed ARGB fans.
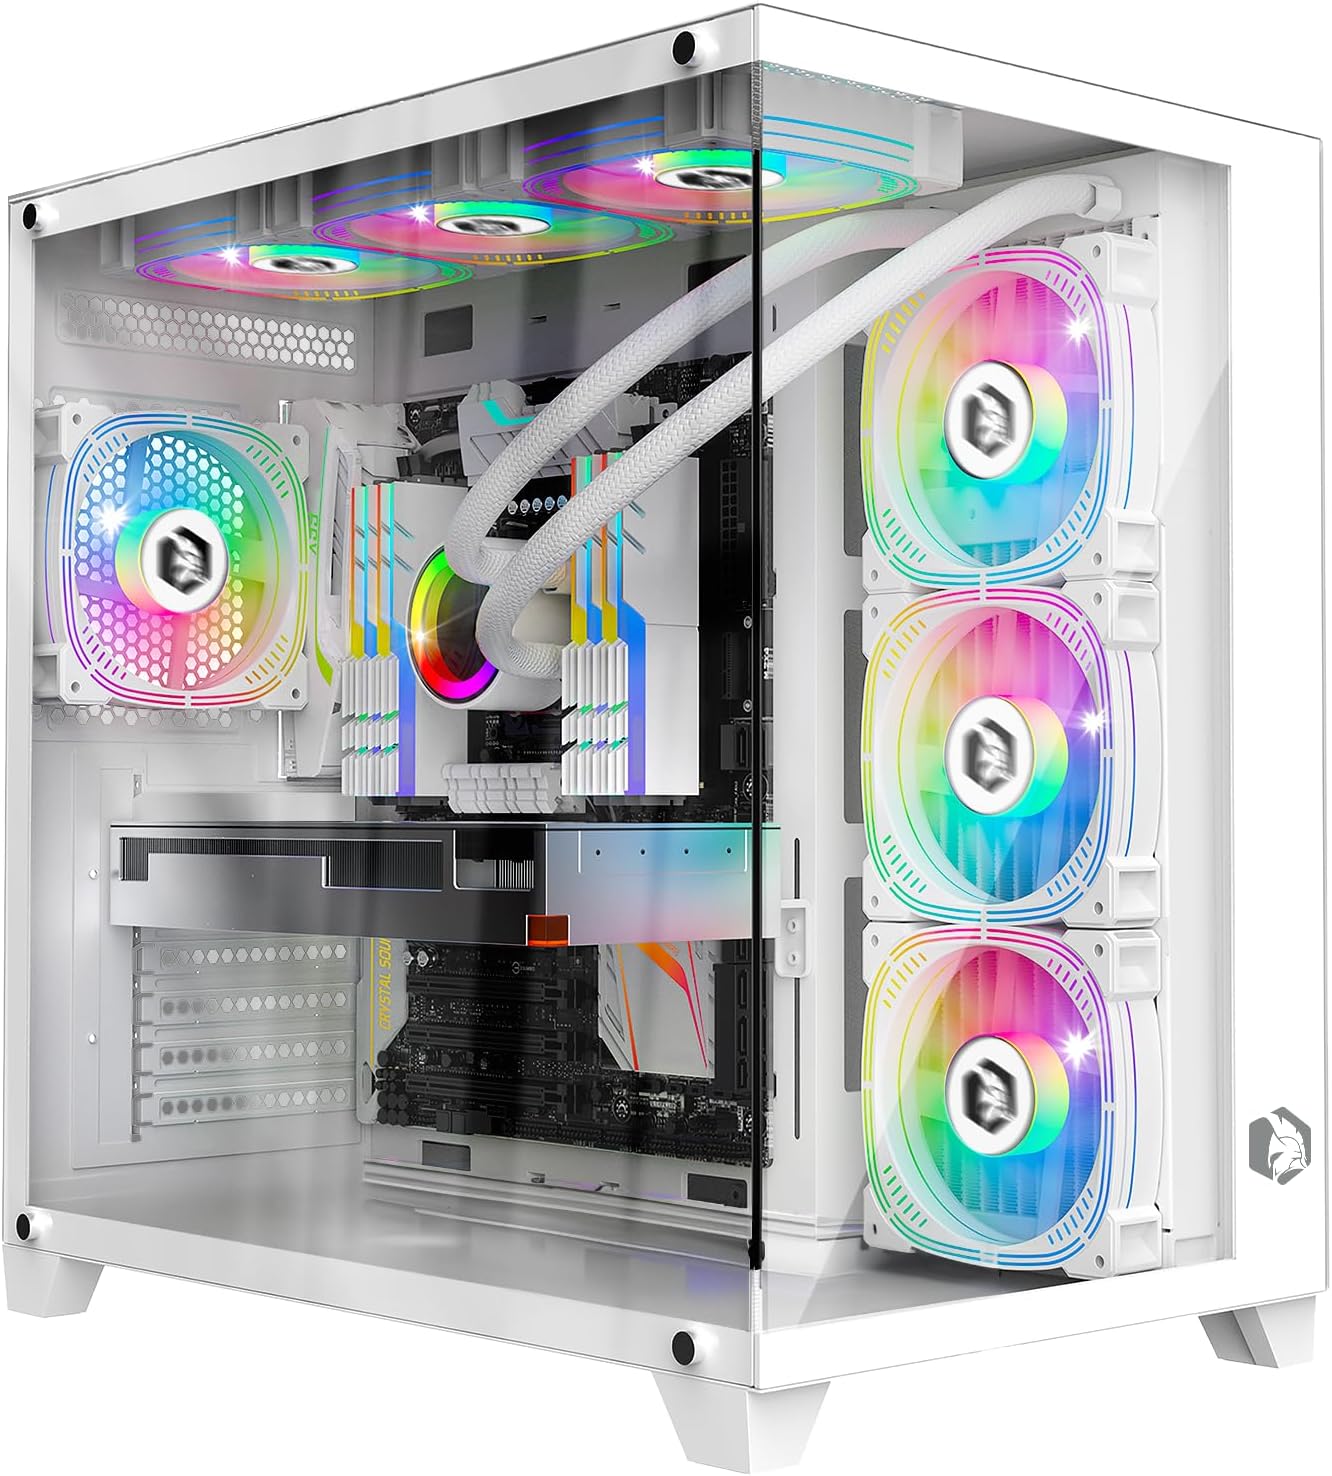
Image: Front-side view of the EMPIRE GAMING CL-242 PC Gaming Case, showcasing its tempered glass panels and pre-installed ARGB fans.

Image: Overview of the EMPIRE GAMING CL-242 case, highlighting key features such as fan support, RGB, storage, and compatibility with icons.
Front I/O Ports
The top panel of the case provides convenient access to essential ports and controls:
- 1 x USB 3.0 Port
- 2 x USB 2.0 Ports
- HD Audio Jacks (Headphone/Microphone)
- LED/Reset Button (for ARGB control or system reset)
- Power Button
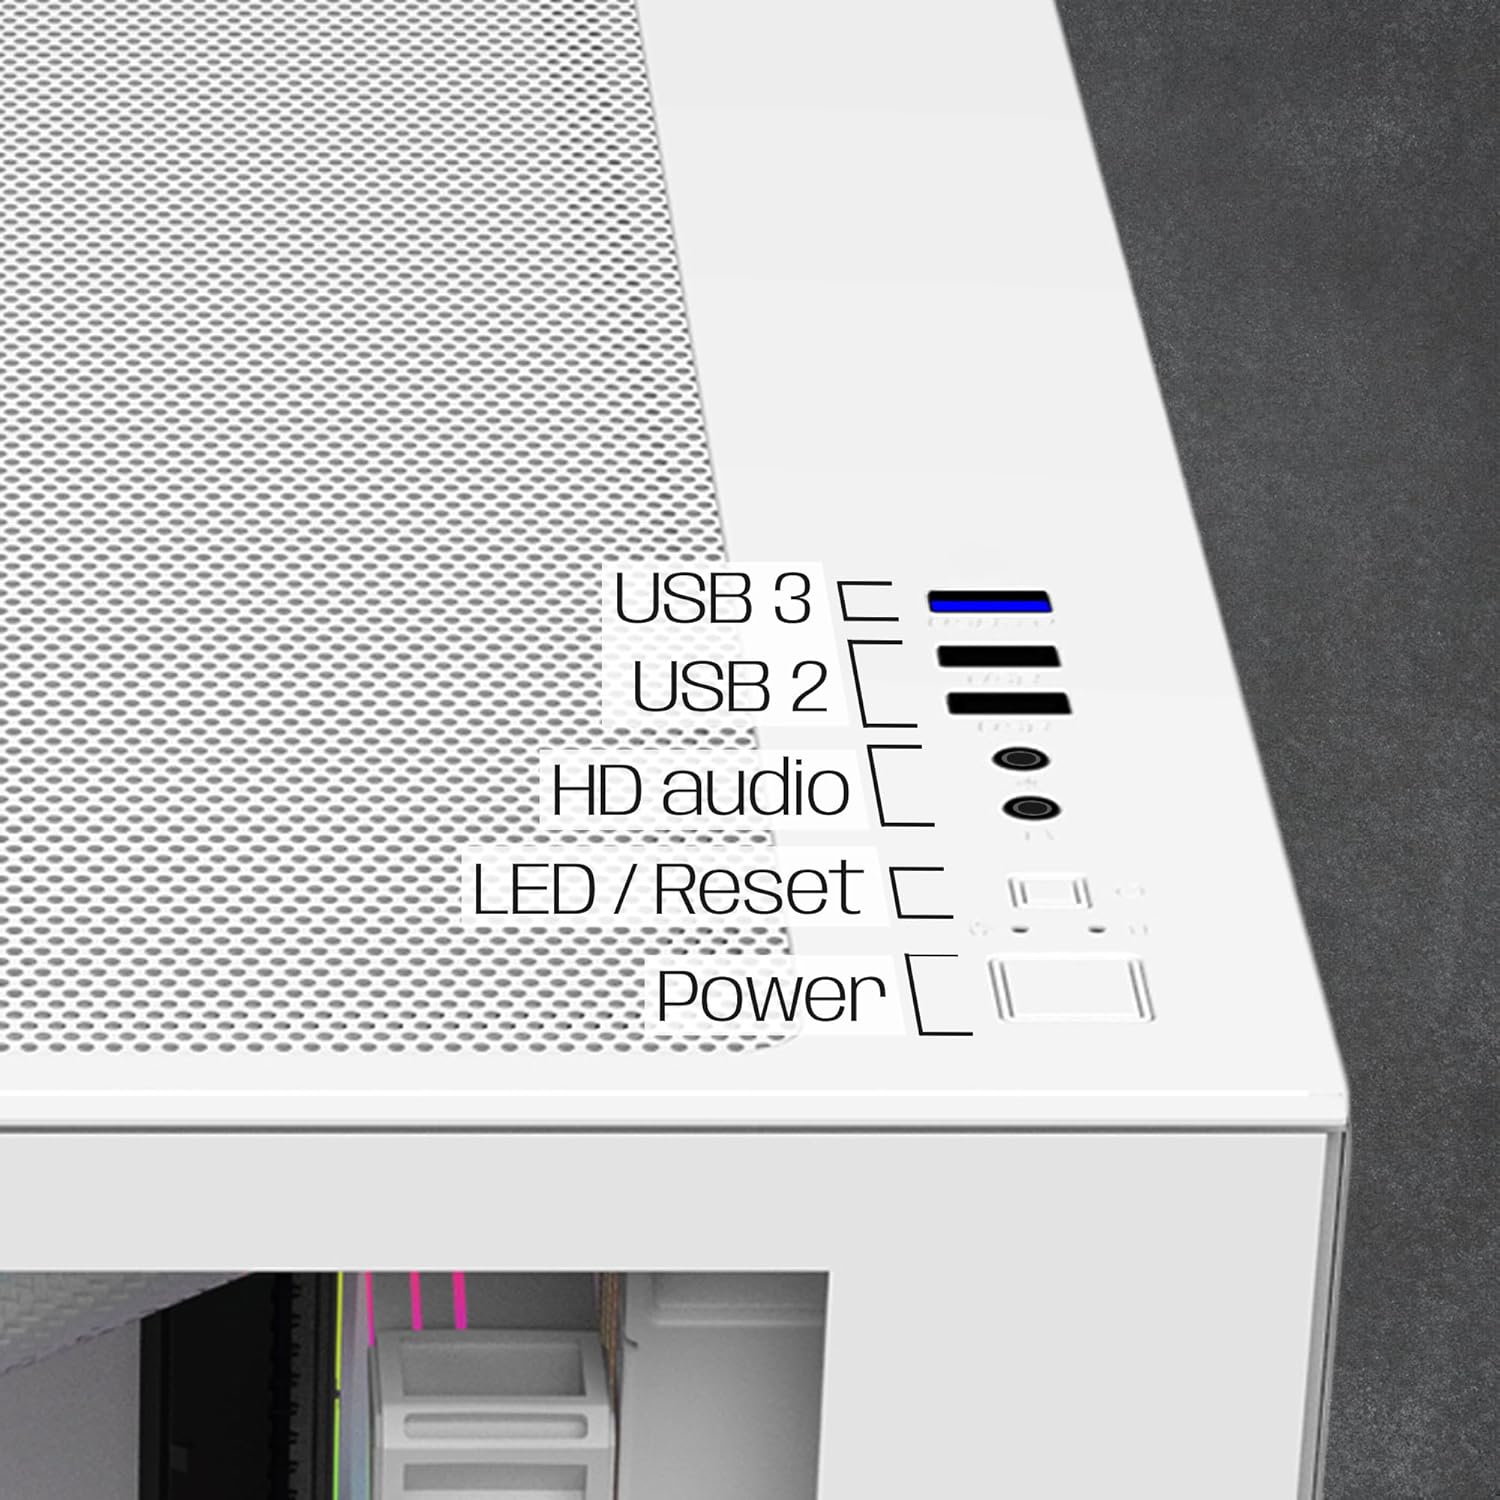
Image: Close-up view of the top I/O panel, indicating the USB 3.0, USB 2.0, HD Audio, LED/Reset, and Power buttons.
5. Setup Instructions
Follow these steps to install your PC components into the EMPIRE GAMING CL-242 case.
5.1. Preparing the Case
- Carefully remove the tempered glass side panels. Typically, these are secured with thumbscrews at the rear of the case.
- Lay the case on its side on a flat, stable surface.
5.2. Motherboard Installation
The CL-242 supports ATX, Micro-ATX, and ITX motherboards.
- Install the I/O shield (if not pre-attached to your motherboard) into the rear opening of the case.
- Ensure the correct standoffs are installed for your motherboard form factor. Adjust or add standoffs as needed using the included accessories.
- Carefully place your motherboard onto the standoffs, aligning the screw holes.
- Secure the motherboard with the appropriate screws. Do not overtighten.
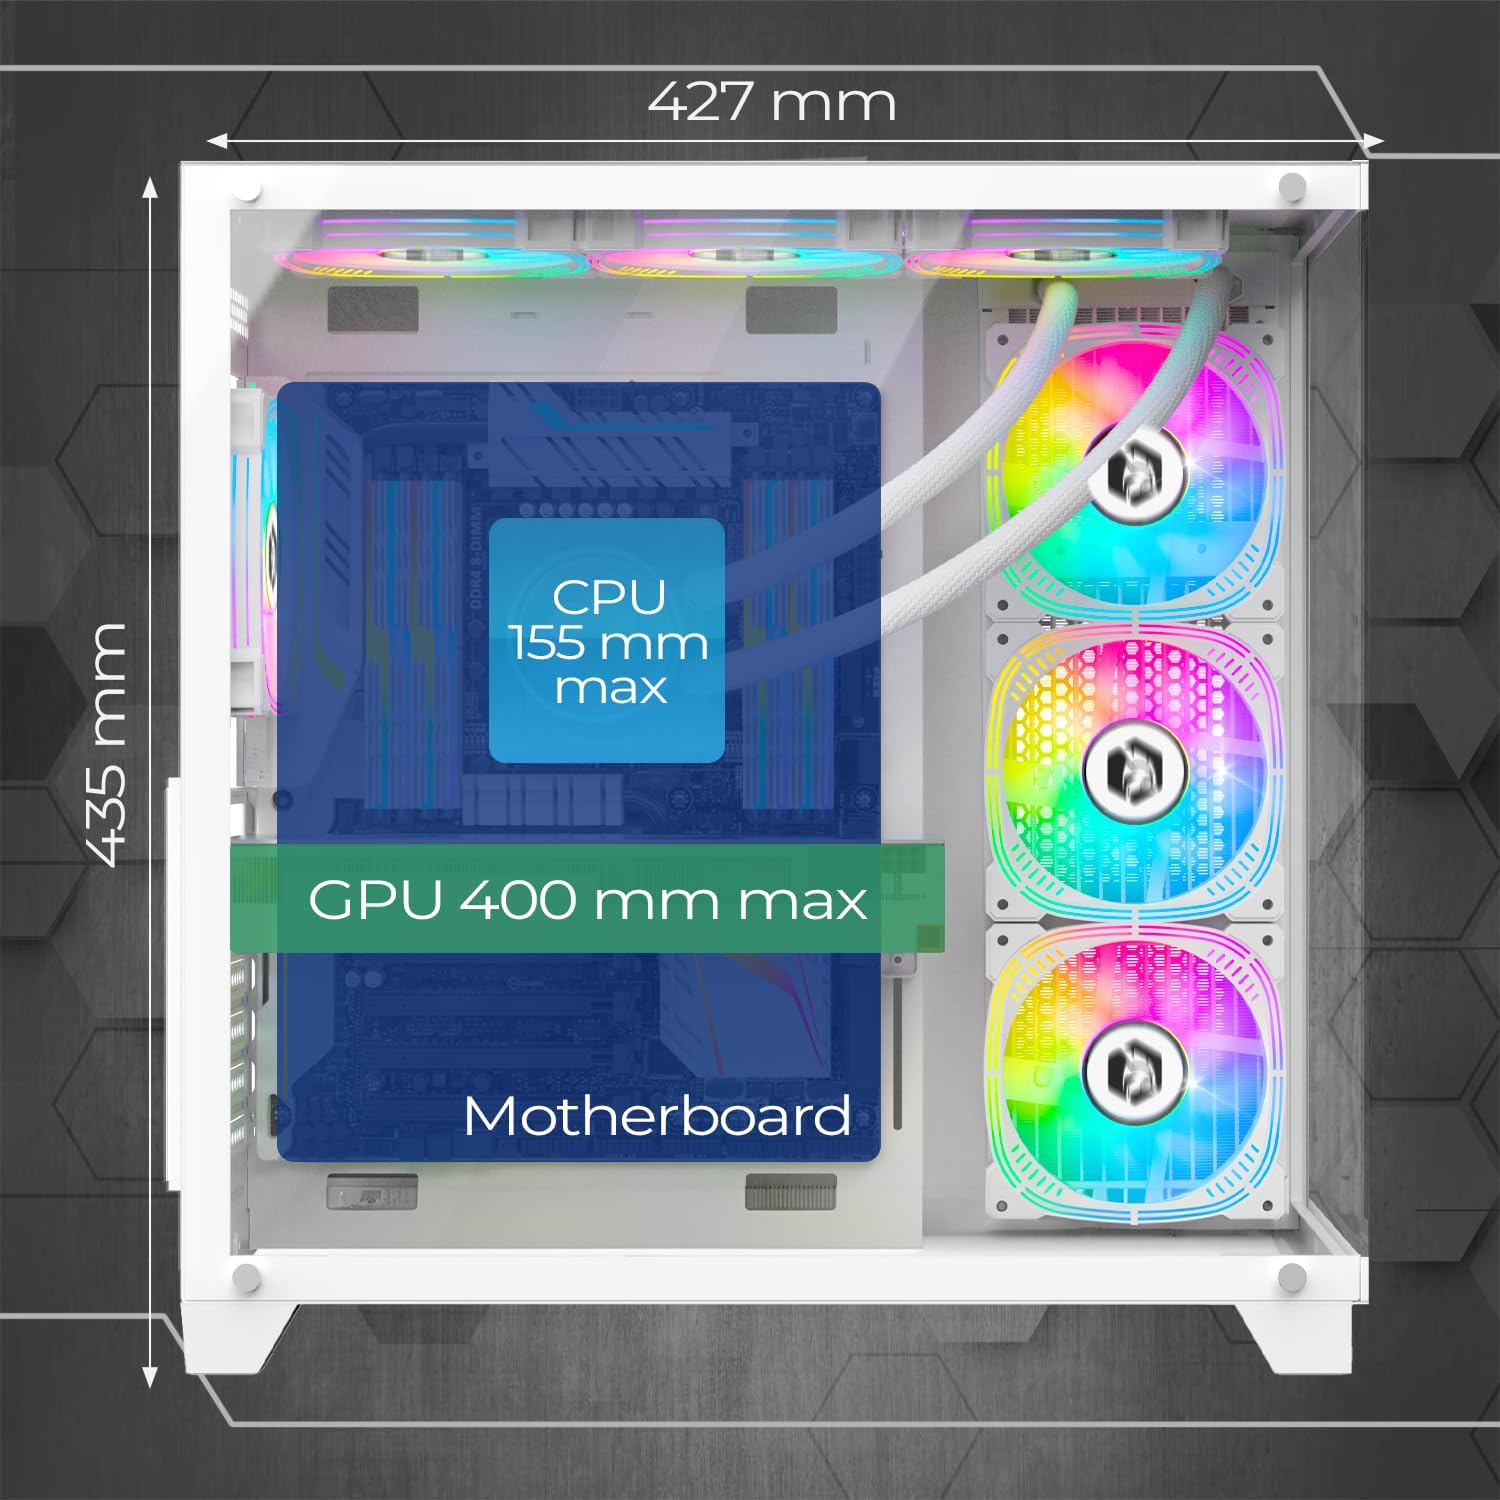
Image: Diagram illustrating the maximum CPU cooler height (155mm) and GPU length (400mm) compatibility within the case.
5.3. Storage Device Installation
The case provides 2 dedicated slots for HDDs and 1 slot for an SSD.
- Locate the drive bays/mounts for 3.5" HDDs and 2.5" SSDs. These are typically located behind the motherboard tray or in a dedicated drive cage.
- Mount your storage devices using the provided screws.
5.4. Power Supply Unit (PSU) Installation
The CL-242 supports a bottom-mounted PSU.
- Slide your PSU into the designated compartment at the bottom rear of the case.
- Secure the PSU to the case with screws from the rear.
- Route the necessary power cables through the cable management cutouts to reach your motherboard and components.
5.5. Graphics Card (GPU) Installation
The case supports graphics cards up to 400mm in length.
- Remove the necessary PCIe slot covers from the rear of the case.
- Insert your graphics card into the appropriate PCIe slot on your motherboard until it clicks into place.
- Secure the graphics card to the case with screws.
5.6. Fan and ARGB Controller Connection
The case comes with 7 pre-installed 120mm ARGB fans and an ARGB controller hub.

Image: Illustration of the seven 120mm ARGB fans and their 3-pin 5V connectors, highlighting the ARGB connectivity.

Image: Diagram of the ARGB controller hub, showing connection points for fans, power, reset button, and data synchronization.
- Ensure all 7 fans are connected to the ARGB controller hub. The fans use 3-pin 5V ARGB connectors.
- Connect the ARGB controller hub to your power supply via a SATA power connector.
- For motherboard synchronization (MB Sync), connect the data cable from the ARGB controller hub to a compatible 3-pin 5V ARGB header on your motherboard. Note: Do not connect to a 4-pin 12V RGB header, as this can damage the LEDs.
- Connect the case's front panel LED/Reset button cable to the "Reset" port on the ARGB controller hub to cycle through ARGB effects.
5.7. Cable Management
Utilize the cable management cutouts and tie-down points behind the motherboard tray to route and secure cables. This improves airflow and aesthetics.
5.8. Watercooling Installation (Optional)
The case supports watercooling radiators up to 360mm.
- Identify suitable mounting locations for your radiator (e.g., top, front, or side).
- Mount the radiator and its fans according to the watercooling system's instructions.
6. Operating Instructions
6.1. Powering On
- Ensure all components are correctly installed and all power cables are connected.
- Connect your monitor, keyboard, and mouse.
- Plug the power cable into your PSU and then into a wall outlet.
- Flip the power switch on the PSU to the "ON" position.
- Press the Power button on the top panel of the case to start your computer.
6.2. ARGB Lighting Control
The ARGB lighting of the pre-installed fans can be controlled in two ways:
- Via Case Button: If the LED/Reset button is connected to the ARGB controller hub, press it to cycle through various pre-programmed ARGB lighting effects.
- Via Motherboard Software (MB Sync): If the ARGB controller hub is connected to a compatible 3-pin 5V ARGB header on your motherboard, you can control the lighting effects using your motherboard's RGB software (e.g., ASUS Aura Sync, MSI Mystic Light Sync, Gigabyte RGB Fusion, ASRock Polychrome Sync). This allows for synchronized lighting across all compatible components.
7. Maintenance
Regular maintenance helps ensure optimal performance and longevity of your PC components.
7.1. Cleaning Dust Filters
The CL-242 case includes dust filters to prevent dust buildup inside your system. Regularly clean these filters:
- Power off your computer and disconnect it from the power outlet.
- Locate and remove the dust filters (e.g., top, bottom, front).
- Clean the filters using compressed air, a soft brush, or by rinsing them with water (ensure they are completely dry before reinstallation).
- Reinstall the dust filters.

Image: Diagram illustrating the airflow path within the EMPIRE GAMING CL-242 case, showing fresh air intake and hot air exhaust for efficient cooling.
7.2. General Cleaning
- Use a microfiber cloth to wipe down the exterior surfaces, including the tempered glass panels.
- For stubborn smudges on glass, use a mild glass cleaner applied to the cloth (not directly to the glass).
- Use compressed air to clear dust from internal components and fan blades periodically.
8. Troubleshooting
If you encounter issues with your EMPIRE GAMING CL-242 case, refer to the following common problems and solutions:
| Problem | Possible Cause | Solution |
|---|---|---|
| PC does not power on. | Loose power connections, faulty PSU, front panel connector issue. |
|
| Fans are not spinning or ARGB lighting is not working. | Loose fan/ARGB connections, incorrect ARGB header, faulty controller. |
|
| Poor airflow or overheating. | Blocked dust filters, incorrect fan orientation, poor cable management. |
|
9. Technical Specifications
| Model Name | CL-242 (OE-CA-F2402W) |
| Brand | EMPIRE GAMING |
| Case Type | Mid Tower |
| Color | White |
| Material | Metal, Tempered Glass |
| Dimensions (L x W x H) | 427 x 280 x 435 mm |
| Weight | 7 Kilograms |
| Motherboard Compatibility | ATX, Micro-ATX, ITX |
| Pre-installed Fans | 7 x 120mm ARGB Fans |
| ARGB Control | Integrated HUB controller (3-pin 5V compatible), MB Sync |
| Radiator Support | Up to 360mm |
| CPU Cooler Clearance | Max 155mm |
| GPU Length Clearance | Max 400mm |
| Drive Bays | 2 x 3.5" HDD, 1 x 2.5" SSD |
| Front I/O Ports | 1 x USB 3.0, 2 x USB 2.0, HD Audio, LED/Reset Button, Power Button |
| Special Features | LED control button, Dust filters, Integrated fan, RGB lighting |
10. Warranty Information
The EMPIRE GAMING CL-242 PC Gaming Case comes with a 2-year manufacturer's warranty. This warranty covers defects in materials and workmanship under normal use. It does not cover damage caused by improper installation, accident, abuse, misuse, natural disaster, or unauthorized modification.
Please retain your proof of purchase for warranty claims.
11. Customer Support
For technical assistance, troubleshooting beyond this manual, or warranty inquiries, please contact EMPIRE GAMING customer support through their official website or the retailer where you purchased the product.
When contacting support, please have your product model (CL-242 or OE-CA-F2402W) and proof of purchase readily available.