
1. Introduction
The RICOH G900 II is a heavy-duty digital camera engineered for demanding environments. It features enhanced resistance to water, dust, shock, and chemicals, making it suitable for construction sites, disaster relief operations, and medical facilities. This manual provides essential information for setting up, operating, maintaining, and troubleshooting your camera.
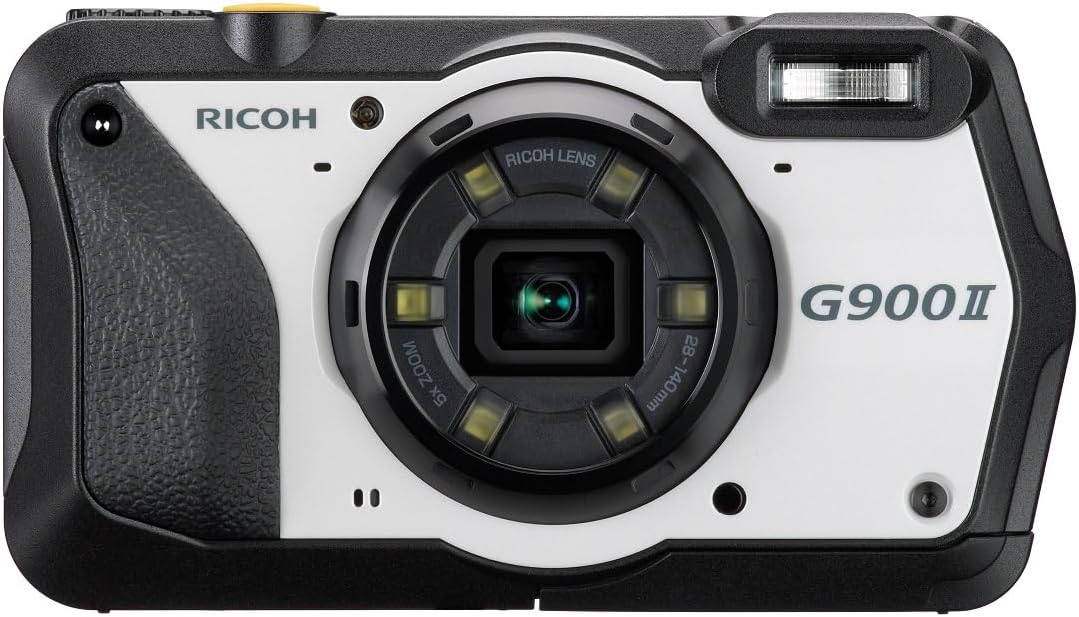
Figure 1.1: Front view of the RICOH G900 II Digital Camera, showcasing its robust design and integrated lens with ring light.

Figure 1.2: Back view of the RICOH G900 II Digital Camera, showing the LCD monitor and control buttons.
Key Features:
- Heavy-Duty Construction: Waterproof, dustproof, shock-resistant (up to 2.1 meters), and chemical-resistant body.
- High Image Quality: 20.0 effective megapixels CMOS sensor with ISO sensitivity up to 25600.
- Camera Memo Function: Simplifies data management post-shooting.
- Security Features: Password-protected camera lock function for high-security environments.
- Webcam Functionality: Easy to use for Full HD-resolution streaming at 30 frames per second.
- High-Resolution LCD: AR (Anti-Reflection) coating for clear viewing.
- Built-in GPS Module: Receives signals from GPS and GLONASS, with an electronic compass.
- Six-LED Ring Light: Assists in macro and close-up photography, and barcode scanning in low light.
- Transparency Guide: Allows using a previously captured image as a template for new shots.
2. Setup
Before using your RICOH G900 II camera, ensure it is properly set up.
2.1 Battery Installation and Charging
- Open the battery compartment cover located on the side of the camera.
- Insert the included Lithium Ion battery (DB-110) into the compartment, ensuring correct orientation.
- Close the battery compartment cover securely until it clicks.
- Connect the camera to a power source using the supplied USB cable to charge the battery. The charging indicator will illuminate.
2.2 Memory Card Insertion
- Locate the memory card slot, typically adjacent to the battery compartment.
- Insert a compatible SD/SDHC/SDXC memory card into the slot with the label facing the correct direction until it clicks into place.
- Close the cover securely.
3. Operating the Camera
This section details the primary functions and special features of your RICOH G900 II camera.
3.1 Basic Photography
- Power On/Off: Press the power button located on the top of the camera.
- Taking Photos: Frame your shot using the LCD monitor, then press the shutter button halfway to focus and fully to capture the image.
- Zoom: Use the zoom lever (T/W) to adjust the optical zoom (5x) and digital zoom (approx. 8.1x).
- Shooting Modes: Select from Automatic, Manual, Underwater, Macro, and Landscape modes via the menu.
3.2 Advanced Features
- Waterproof and Dustproof Performance: The camera is designed to be waterproof up to 1 meter and dustproof (IP6X). It can withstand splashes and submersion in shallow water.

Figure 3.1: The RICOH G900 II demonstrating its water-resistant capabilities under running water.
- Shock Resistance: The camera is built to withstand drops from up to 2.1 meters.
- Chemical Resistance: The G900 II can be cleaned with ethanol, sodium hypochlorite, and liquid chlorine dioxide disinfectants, making it suitable for medical and manufacturing environments.

Figure 3.2: The camera's chemical resistance allows for thorough cleaning with various disinfectants.
- Ring Light Unit: The six-LED ring light around the lens provides illumination for macro and close-up shots. It can also be activated in Barcode Scanning mode to assist in dimly lit areas.

Figure 3.3: The RICOH G900 II with its integrated LED ring light activated, ideal for close-up photography.
- Webcam Function: Connect the camera to a computer via USB to use it as a webcam for online meetings, delivering Full HD video.
- Camera Memo Function: This feature allows for efficient data management by attaching memos to images, reducing post-shooting workload.
- Transparency Guide: Recall a previously captured image on the LCD monitor to use as a template, ensuring consistent composition for new images.
- Optional Lens Filters: Third-party 37mm filters can be attached to the lens for protection against condensation and scratches.

Figure 3.4: Attaching a 37mm filter to the camera lens for added protection.
4. Maintenance
Proper maintenance ensures the longevity and performance of your RICOH G900 II camera.
4.1 Cleaning
- Body: Wipe the camera body with a soft, damp cloth. For disinfection, use a cloth moistened with ethanol, sodium hypochlorite, or liquid chlorine dioxide. Ensure all covers are securely closed before cleaning with liquids.
- Lens: Use a lens brush or a soft, clean microfiber cloth specifically designed for optics. Do not use harsh chemicals or abrasive materials.
- LCD Monitor: Gently wipe with a soft, dry cloth. For stubborn smudges, use a screen cleaner designed for electronics.
4.2 Storage
When not in use, store the camera in a cool, dry place away from direct sunlight and extreme temperatures. Remove the battery if storing for extended periods.
5. Troubleshooting
This section addresses common issues you might encounter with your RICOH G900 II camera.
5.1 Common Issues and Solutions
- Camera does not power on:
- Ensure the battery is fully charged and correctly inserted.
- Check if the battery is damaged or depleted.
- Poor image quality (noisy, blurry, inconsistent focus):
- Check lighting conditions; use the ring light in low light.
- Ensure the lens is clean and free from smudges or condensation.
- Verify that the correct shooting mode is selected for the scene.
- Ensure the camera is held steady or use a tripod to prevent camera shake.
- Check focus settings; ensure autofocus is engaged or manually adjust focus if needed.
- Memory card error:
- Ensure the memory card is inserted correctly.
- Try formatting the memory card (this will erase all data).
- Test with a different, compatible memory card.
- Camera not recognized by computer (webcam function):
- Ensure the USB cable is securely connected to both the camera and the computer.
- Check computer's device manager for driver issues.
- Restart both the camera and the computer.
If problems persist, refer to the official Ricoh support resources or contact customer service.
6. Specifications
Detailed technical specifications for the RICOH G900 II Digital Camera.
| Feature | Specification |
|---|---|
| Model Name | RICOH G900 II |
| Model Number | 01472 |
| Photo Sensor Resolution | 20 MP |
| Optical Zoom | 5x |
| Digital Zoom | Approx. 8.1x |
| Video Resolution | 2160p (4K) |
| Frame Rate | 30 fps (Full HD) |
| ISO Sensitivity (Max) | 25600 |
| Screen Size | 3 Inches LCD |
| Water Resistance Level | Water Resistant (1 meter depth) |
| Shock Resistance | Withstands drops from 2.1 meters |
| Dust Resistance | IP6X |
| Battery Type | Lithium Ion (DB-110) |
| Item Weight | 1.5 Pounds |
| Connectivity Technology | USB, Wi-Fi |
7. Warranty and Support
7.1 Warranty Information
The RICOH G900 II camera comes with a 1-year limited warranty from the manufacturer, Ricoh Imaging. This warranty covers defects in materials and workmanship under normal use. Please retain your proof of purchase for warranty claims.
7.2 Customer Support
For technical assistance, troubleshooting beyond this manual, or warranty service, please visit the official Ricoh support website or contact their customer service department. Contact information can typically be found on the Ricoh website or in the packaging materials.