
Introduction
This manual provides essential information for the safe and effective operation of your Hombasing 2500W Steam Cleaner. Please read all instructions carefully before use and retain for future reference. This powerful 2500W steam cleaner is designed for versatile cleaning tasks in your home and car, offering high-temperature steam for effective stain removal.
Important Safety Instructions
To reduce the risk of fire, electric shock, or injury, always follow basic safety precautions when using an electrical appliance.
- High Temperature Steam: The steam produced is extremely hot (up to 229°F / 105°C). Never direct steam at people, pets, or electrical appliances. Wear appropriate protective gloves and eyewear during operation.
- Electrical Safety: Ensure the power supply matches the voltage specified on the appliance. Do not immerse the appliance in water or other liquids. Always unplug the steam cleaner when not in use, before filling with water, or before cleaning and maintenance.
- Water Handling: Use only clean tap water. Do not add detergents, perfumes, or other chemicals to the water tank, as this can damage the unit or create hazardous fumes.
- Children and Pets: Keep the steam cleaner out of reach of children and pets. Do not allow them to operate or play near the appliance.
- Proper Use: Use the appliance only for its intended purpose as described in this manual. Do not operate if any part is damaged.
Package Contents
Verify that all items listed below are included in your package:
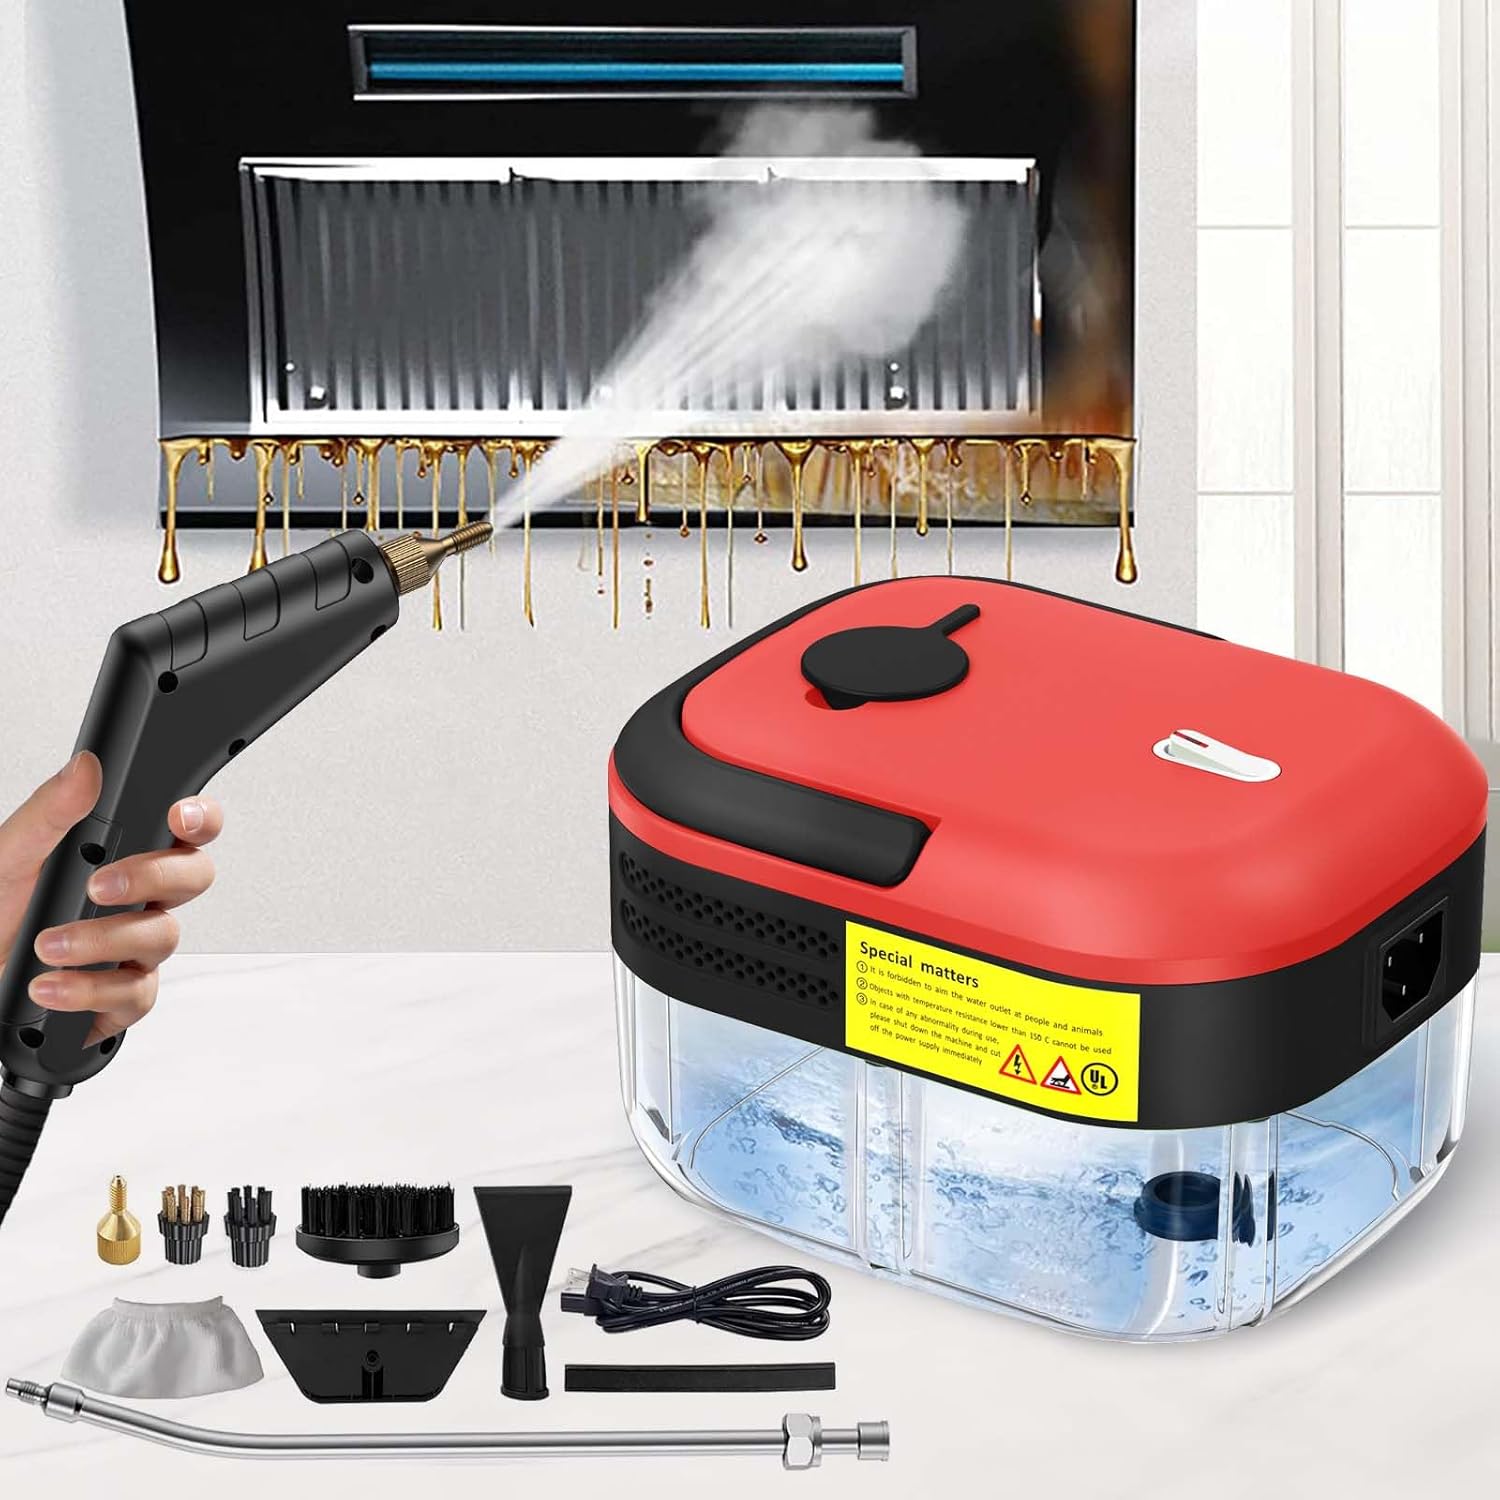
- 1 x Handheld Steam Cleaner Unit
- 1 x 2.2 meter long steam tube
- 1 x Extended sprayer rod
- 3 x Brush heads (various types)
- 1 x Steel brush
- 1 x Large capacity water tank (integrated)
- Instruction Manual
Setup
1. Attaching Accessories
- Ensure the steam cleaner is unplugged and cool before attaching any accessories.
- Select the desired brush head or extended sprayer rod.
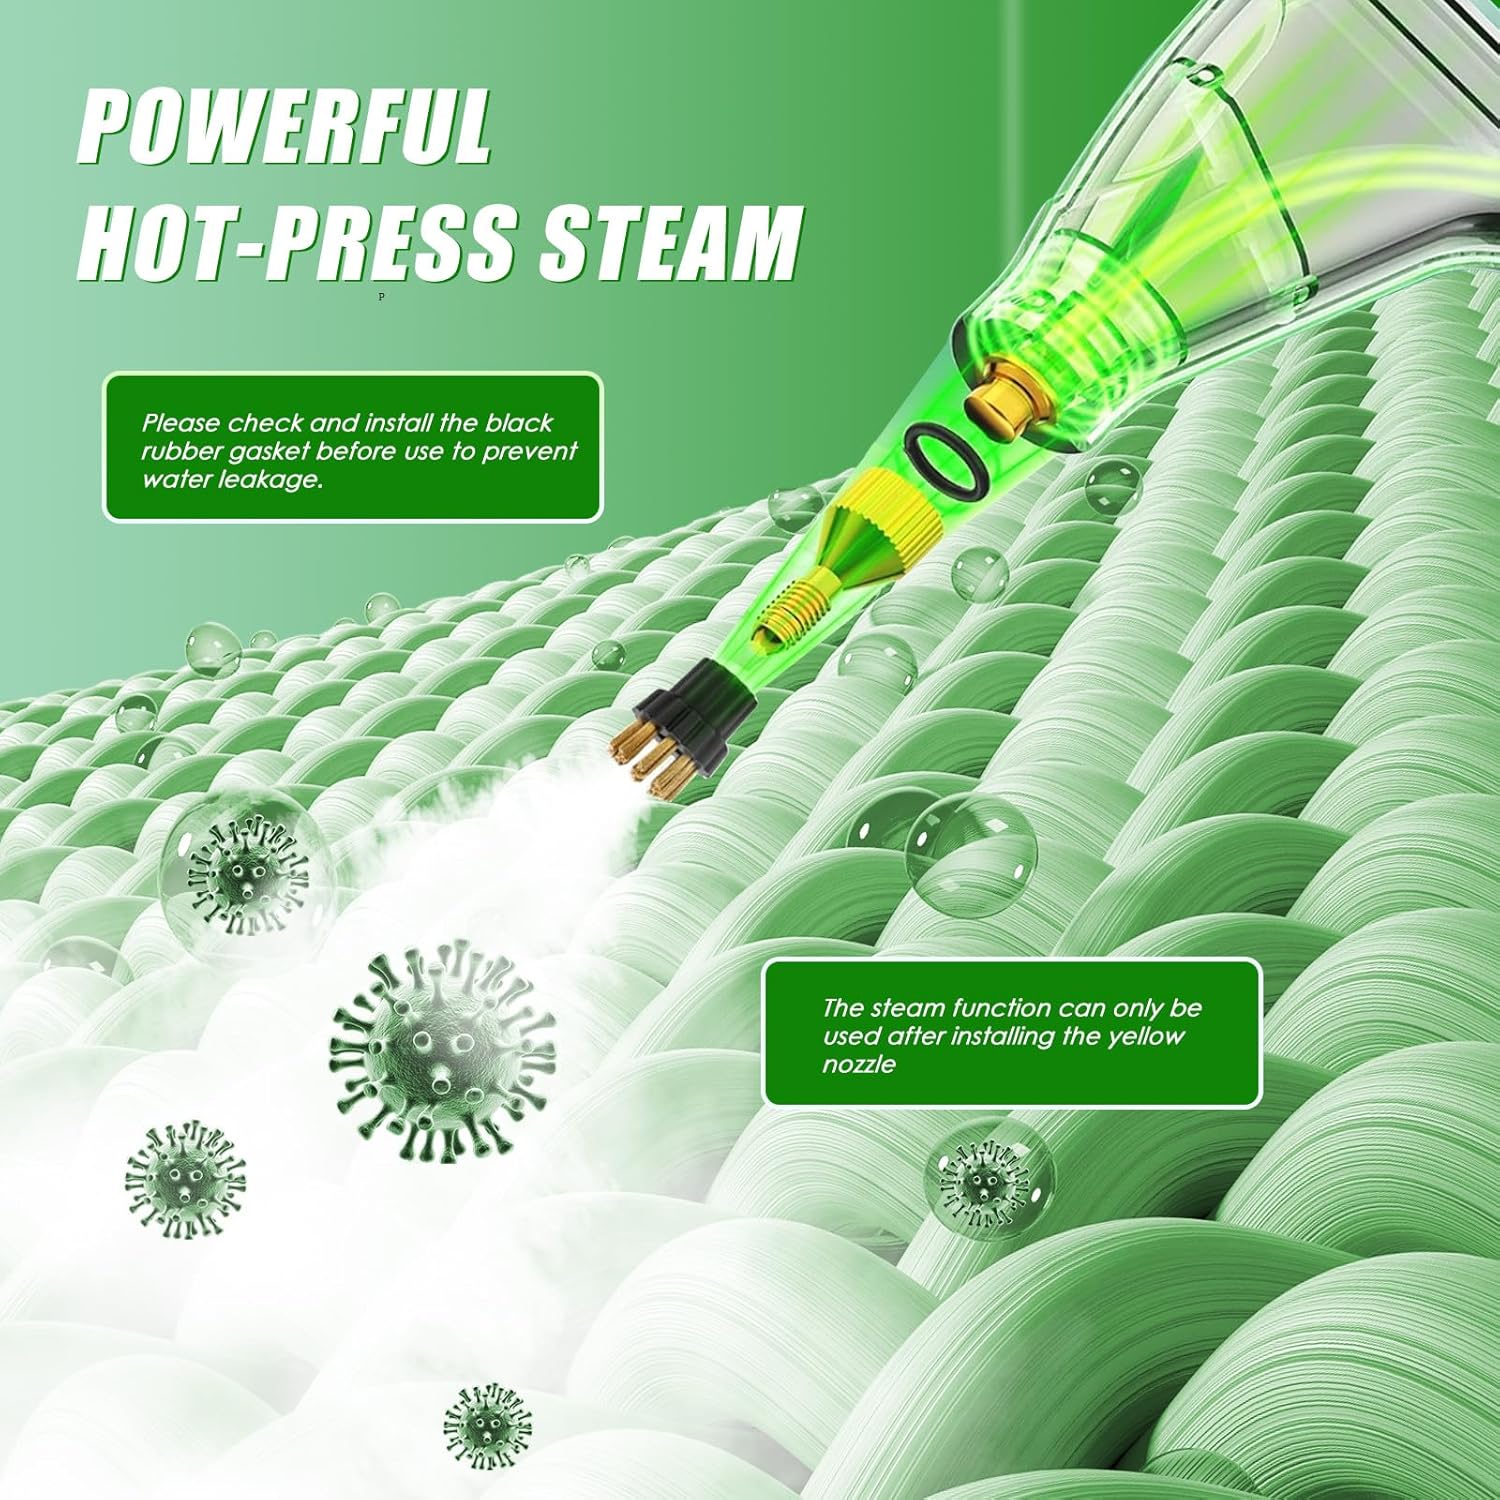
- Important: Before installing the extension rod or nozzle, ensure the black rubber gasket is properly seated to prevent water leakage. Securely twist the accessory onto the steam gun handle until tight.
2. Filling the Water Tank
- Open the top lid of the water tank.
- Fill the tank with up to 1000 ml (1.2L capacity) of clean tap water. Do not overfill.
- Close the lid securely.

3. Power Connection
- Plug the power cord into a suitable electrical outlet.
Operating Instructions
1. Powering On and Heating
- Flip the power switch to the 'ON' position. The indicator light will illuminate.
- The steam cleaner will heat up rapidly, typically within 10-15 seconds, reaching temperatures up to 229°F (105°C).
- When the machine is first turned on, a small amount of water may flow out before steam appears. This is normal.

2. Steam Control
The Hombasing Steam Cleaner features 6 levels of adjustable steam output. Rotate the steam control knob on the main unit to select your desired steam intensity, from gentle to powerful, to suit different cleaning tasks and surfaces.

3. Cleaning Surfaces
Direct the steam nozzle towards the surface to be cleaned. Move the nozzle slowly over the area, allowing the hot steam to penetrate and loosen dirt, grease, and grime. Use the appropriate brush head for optimal results on different textures.


4. Important Usage Notes
- Wear gloves to avoid being burned by the hot nozzle or steam.
- To stop the steam, turn off the power switch on the main unit. There is no trigger on the handle.
- For optimal performance and to extend machine life, it is recommended to stop working and allow the unit to cool down for 5 minutes after every 30 minutes of continuous use.
Maintenance
1. Emptying Water
- After each cleaning session, ensure the unit is unplugged and has cooled down.
- Carefully pour out any remaining water from the tank.
2. Cleaning the Unit
Wipe the exterior of the steam cleaner with a damp cloth. Do not use abrasive cleaners or solvents. Periodically check nozzles and brushes for blockages and clean as necessary.
3. Storage
Store the steam cleaner and its accessories in a cool, dry place, away from direct sunlight and extreme temperatures. Ensure the unit is completely dry before storing.
Troubleshooting
If you encounter any issues with your Hombasing Steam Cleaner, refer to the table below for common problems and solutions.
| Problem | Possible Cause | Solution |
|---|---|---|
| No steam or low steam output | Water tank empty; unit not heated sufficiently; nozzle blocked. | Refill water tank; allow 10-15 seconds for heating; clean nozzle. |
| Water leakage from nozzle connection | Gasket missing or improperly seated; accessory not tightened. | Ensure black rubber gasket is in place; securely tighten accessory. |
| Unit does not turn on | Power cord not plugged in; power switch off; electrical outlet issue. | Check power connection; ensure switch is ON; test outlet with another device. |
| Steam is not hot enough | Unit not fully heated; steam control set too low. | Allow more time for heating; adjust steam control to a higher setting. |
Specifications
| Feature | Detail |
|---|---|
| Brand | Hombasing |
| Model Name | Steam Cleaner |
| Item Model Number | W2-2500W |
| Wattage | 2200 watts |
| Tank Volume | 1.2 Liters (1200 Milliliters) |
| Heat Time | 10-20 Seconds |
| Maximum Temperature | 229 Degrees Fahrenheit (105°C) |
| Form Factor | Handheld |
| Power Source | Electric |
| Item Weight | 1.47 Kilograms (3.23 pounds) |
| Package Dimensions | 11.18 x 7.17 x 6.54 inches |
| UPC | 763271622905 |
Warranty and Support
Your Hombasing 2500W Steam Cleaner is covered by a manufacturer's warranty against defects in materials and workmanship. Please refer to the warranty card included in your package for specific terms and conditions.
For technical support, troubleshooting assistance, or to inquire about replacement parts, please contact Hombasing customer service through the retailer where the product was purchased or visit the official Hombasing website.