
1. Setup
1.1 What's in the Box
- Body Camera x1
- 64GB MicroSD Card (pre-installed)
- USB Cable x1
- User Manual x1
1.2 Inserting the MicroSD Card
The camera comes with a pre-installed 64GB MicroSD card. If you need to remove or reinsert it, gently push the card into the slot until it clicks, then release to eject. Ensure the camera is powered off before inserting or removing the card.

Image: Side view of the mini body camera, highlighting the MicroSD card slot and charging port.
1.3 Charging the Device
Connect the camera to a USB power source using the provided USB cable. The LED indicator will turn solid red while charging and turn off when fully charged. A full charge typically takes approximately 3 hours.
Video: Demonstrates the charging process and general use of the mini body camera.
2. Operating Instructions
2.1 Power On/Off
To power on the camera, long-press the power button (usually the main button on the side). The blue LED will illuminate steadily, indicating standby mode. To power off, long-press the power button again until the LED turns off.
2.2 Video Recording
From standby mode (solid blue LED), short-press the video record button (often the right-first button). The blue LED will flash, indicating that video recording has started. Short-press the button again to stop recording and return to standby mode (solid blue LED).
2.3 Motion Detection Recording
To activate motion detection recording, long-press the video record button from standby mode. The green LED will illuminate steadily, indicating motion detection mode is active. The camera will automatically begin recording when motion is detected and stop when motion ceases for a period. It will record for 1 minute until no movement is detected under the lens. Long-press the button again to exit motion detection mode.

Image: Illustration of the mini body camera's motion detection capability, capturing movement.
2.4 Night Vision Mode
To activate night vision, short-press the power button once from standby mode. The yellow LED will flash, indicating night vision is ON. Short-press the power button again to turn off night vision (yellow LED OFF).

Image: The mini body camera's night vision feature in action, showing a clear image in low light.
2.5 Taking Photos
From standby mode, short-press the photo button (often a separate button or a quick double-press of the video button, refer to the user manual for exact button mapping). The LED will flash briefly to indicate a photo has been taken.
2.6 Timestamp Setting
To ensure accurate timestamps on your recordings, connect the camera to a computer. Locate the 'time' text file on the camera's storage. Open this file and modify the date and time to the current settings. Save the file and safely eject the camera. New recordings will now have the correct timestamp. For a detailed visual guide, please refer to the video below.
Video: Step-by-step instructions on how to set and correct the timestamp on your mini body camera recordings.
3. Data Transfer and Playback
3.1 Connecting to a Computer
To access your recorded files, connect the camera to your computer using the provided USB cable. The camera will appear as a removable disk. You can then browse the folders (e.g., VIDEO, PHOTO) to view or transfer your files.

Image: Visual guide on connecting the camera to a computer or phone for data transfer.
3.2 Using the Card Reader
Alternatively, you can remove the MicroSD card from the camera and insert it into the included card reader. Plug the card reader into your computer's USB port to access the files directly.
4. Mounting and Application
4.1 Attaching the Camera
The mini body camera features a versatile clip that allows it to be securely attached to pockets, bags, belts, or clothing. This design makes it ideal for various activities such as daily records, cycling, delivery jobs, or personal security.
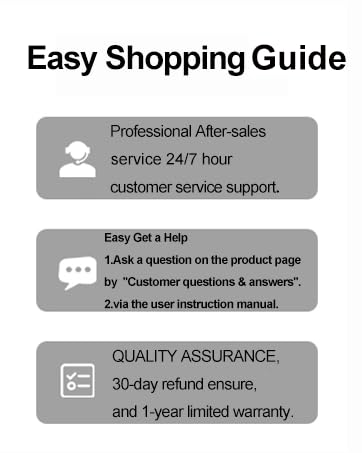
Image: The mini body camera's clip design for easy attachment to clothing.
Video: A demonstration of how to use and wear the mini body camera in various scenarios.
5. Specifications
| Brand Name | KSADBOSSBO |
| Item Weight | 3.2 ounces |
| Product Dimensions | 3.5 x 1.2 x 1.2 inches |
| Item Model Number | KSAD-A18 64GB |
| Batteries | 1 Lithium Ion batteries required (included) |
| Special Features | Lightweight, Night Vision |
| Photo Sensor Technology | CMOS |
| Video Capture Resolution | 1080p |
| Flash Memory Type | Micro SD |
| Video Capture Format | AVI |
| Supported Audio Format | AAC |
| Connectivity Technology | USB |
6. Maintenance
6.1 Cleaning
Use a soft, dry cloth to clean the camera lens and body. Avoid using liquid cleaners or solvents, as they may damage the device.
6.2 Storage
Store the camera in a cool, dry place away from direct sunlight and extreme temperatures. If storing for extended periods, ensure the battery is partially charged (around 50%) to prolong its lifespan.
7. Troubleshooting
7.1 Camera Not Turning On
- Ensure the battery is charged. Connect the camera to a power source and check the charging indicator.
- If the camera does not respond, try resetting it by pressing and holding the power button for 10-15 seconds.
7.2 Recording Issues (e.g., blurry video, no recording)
- Check if the MicroSD card is properly inserted and has sufficient free space.
- Ensure the lens is clean and free from obstructions.
- Verify that the camera is in the correct recording mode (video, motion detection, or night vision).
7.3 Incorrect Timestamp
If your recordings show an incorrect date or time, follow the instructions in Section 2.6 (Timestamp Setting) to update the time file on the camera via a computer.
8. Warranty and Support
Your KSADBOSSBO Mini Body Camera comes with a 1-year warranty. We also offer a 30-day refund policy. For any product-related inquiries, technical support, or warranty claims, please contact us:
- Email: ksadbossbo@163.com
- Phone/WhatsApp: 1(626)601-0307
For additional video instructions and FAQs, scan the QR code below:

Scan this QR code for more video tutorials.


