1. Introduction
The Raddy N80 Smart Wi-Fi Weather Station provides comprehensive weather data and environmental monitoring for both indoor and outdoor conditions. Featuring an 8-inch large color display and seamless integration with the Tuya smart application, it offers real-time updates and convenient control from your smartphone. This manual will guide you through the setup, operation, and maintenance of your new weather station.
2. Safety Information
- Do not expose the device to extreme temperatures, direct sunlight, or excessive moisture.
- Use only the provided DC cable and adapter for the main unit.
- Ensure correct battery polarity when installing batteries in the remote sensor.
- Keep the device and its components out of reach of children.
- Avoid disassembling or modifying the device, as this will void the warranty.
3. Package Contents
Please verify that all items are present in your package:
- 1 x N80 Weather Station (Main Unit)
- 1 x Remote Sensor
- 1 x DC Cable with Adapter
- 1 x User Manual
4. Setup
4.1. Powering On and Battery Installation
The main weather station unit is powered by the included DC cable and adapter. The remote sensor requires batteries for operation.
- Main Unit: Connect the DC cable to the weather station and plug the adapter into a power outlet. The display will light up.
- Remote Sensor: Open the battery compartment on the back of the remote sensor. Insert two AAA batteries (not included), ensuring correct polarity. Close the compartment.

Figure 4.1: Powering the Main Unit and Remote Sensor
4.2. App Download and Wi-Fi Connection
To unlock the full features of your Raddy N80, download the Tuya app and connect the station to your Wi-Fi network. The app allows for remote monitoring and advanced settings.
- Download the Tuya app from your smartphone's app store (available on Apple App Store and Google Play Store).
- Register or log in to your Tuya account.
- Follow the in-app instructions to add a new device. Ensure your Wi-Fi network is 2.4GHz, as the device is only compatible with this frequency.
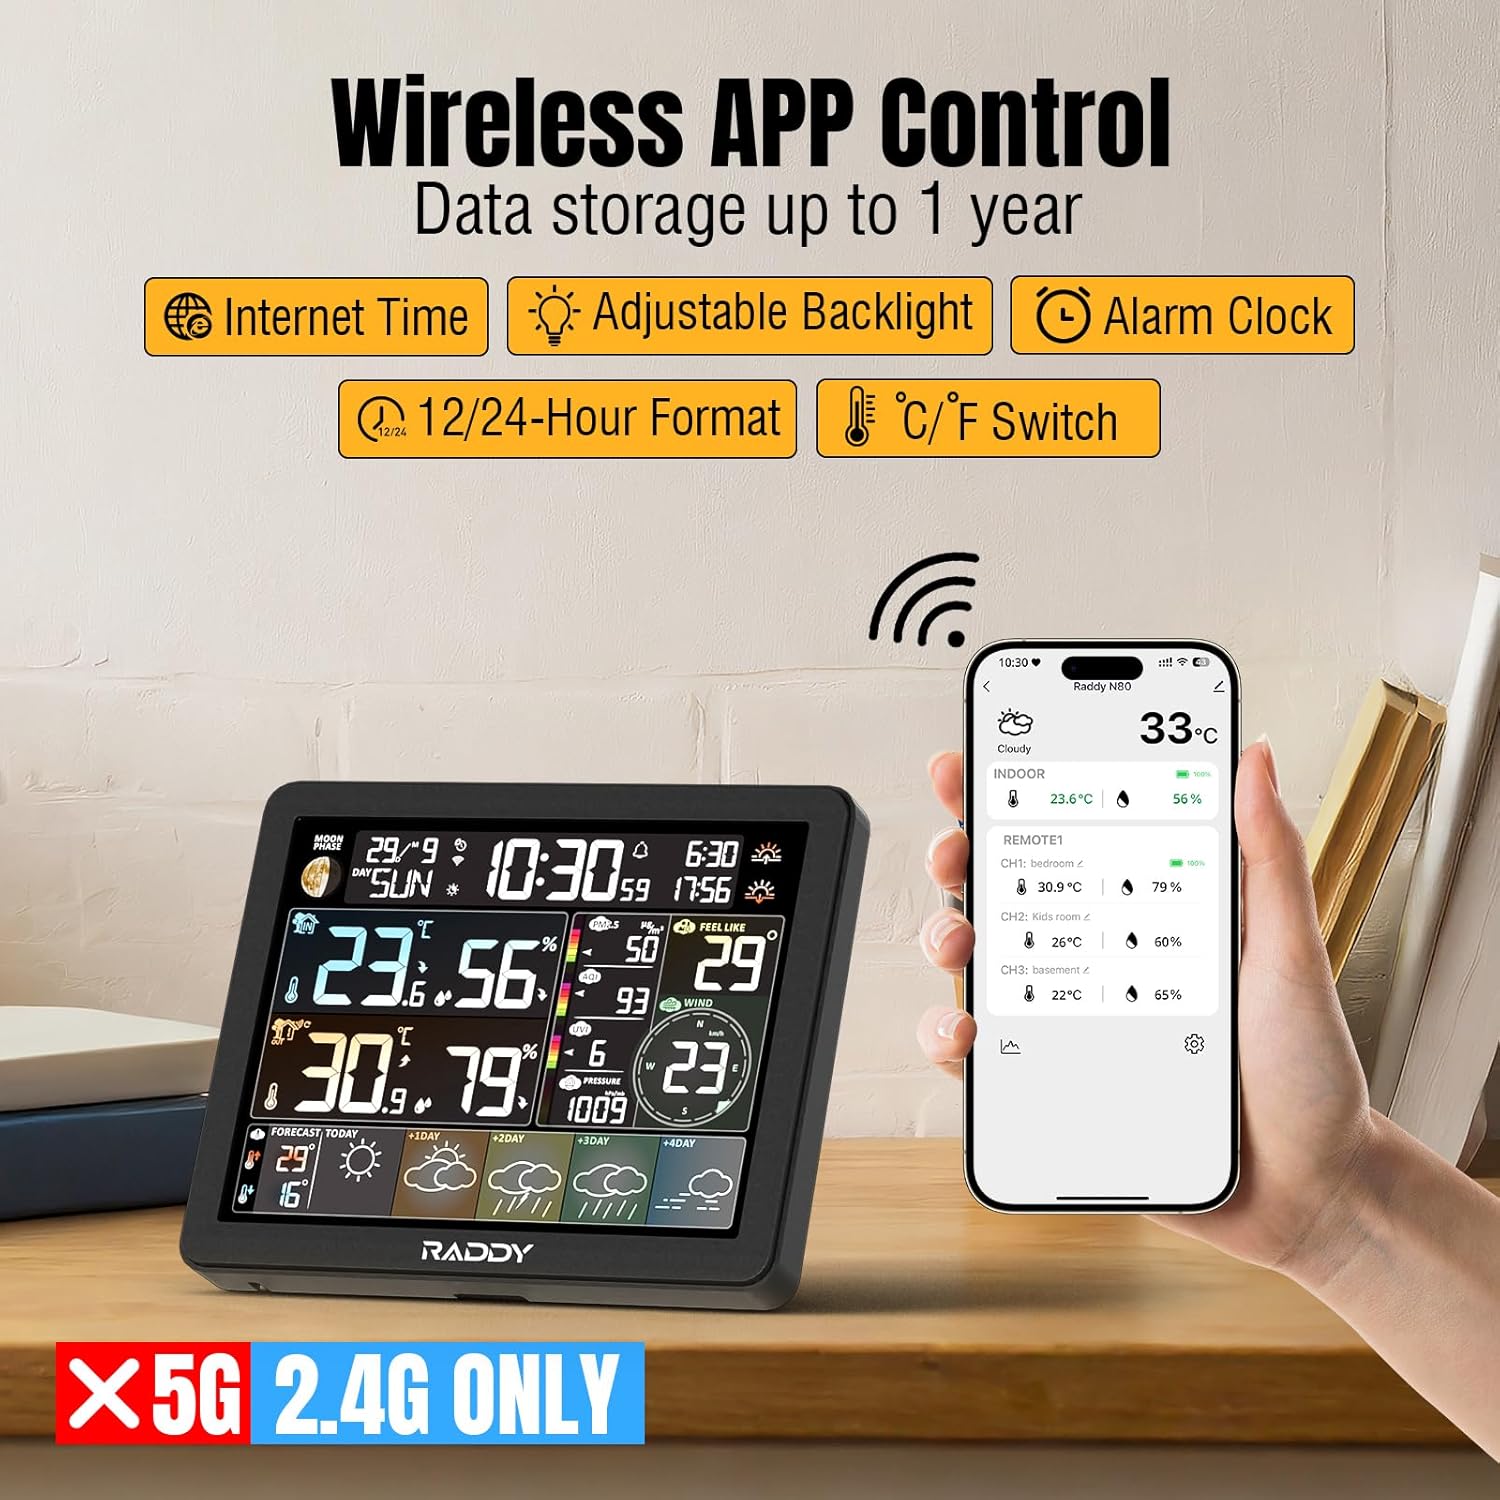
Figure 4.2: Wireless App Control and Wi-Fi Connectivity
4.3. Sensor Pairing and Initial Settings
Once the main unit is powered on and connected to Wi-Fi, the remote sensor should automatically pair. You can then customize display settings via the app.
- Place the remote sensor within range of the main unit. The sensor's readings (temperature and humidity) will appear on the main unit's display.
- In the Tuya app, navigate to the settings to adjust preferences such as:
- Time Format (12Hr/24Hr)
- Date Format (Month/Date or Date/Month)
- Temperature Unit (°C/°F)
- Pressure Unit (hPa/mb)
- Wind Speed Unit (km/h, mph, m/s, knots)

Figure 4.3: Main Unit and Remote Sensor
Video 4.1: Overview of the Raddy N80 Smart Wi-Fi Weather Station with APP Control, demonstrating setup and features.
5. Operating the Weather Station
5.1. Display Overview
The 8-inch color display provides a wealth of information at a glance:
- Moon Phase: Displays the current lunar phase.
- Network Time: Automatically updated via Wi-Fi for accuracy.
- Sunrise/Sunset Time: Calculated based on your location.
- PM2.5/AQI & UVI: Air quality and UV Index data, updated hourly via network.
- Indoor/Outdoor Temperature & Humidity: Real-time readings from the main unit and remote sensor.
- Feels Like Temperature: Perceived temperature based on current conditions.
- Wind Direction/Speed: Displays current wind conditions.
- Barometric Pressure: Current atmospheric pressure.
- 5-Day Weather Forecast: Provides a forecast for the current day and the next four days, updated automatically via Wi-Fi.

Figure 5.1: Comprehensive Display Layout
5.2. Backlight Control
The display features five backlight levels and an automatic light sensing function for optimal readability in various lighting conditions.
- Adjust backlight levels manually using the buttons on the back of the unit or through the Tuya app settings.
- The automatic light sensing feature adjusts brightness based on ambient light.

Figure 5.2: Backlight Adjustment Options
5.3. Alarm Settings
Set up to four customizable alarms to help you stay on schedule. Each alarm includes a convenient snooze function.
- Access alarm settings via the Tuya app.
- Set individual alarm times and enable/disable them as needed.
- The snooze function can be activated by pressing the snooze button on the top of the main unit when an alarm sounds.

Figure 5.3: Customizable Alarm Clocks
5.4. Weather Forecast
The weather station automatically updates its 5-day forecast based on your Wi-Fi connection and location data.
- The forecast section at the bottom of the display shows weather icons and high/low temperatures for the current day and the next four days.
- Ensure your location is correctly set within the Tuya app for accurate local forecasts.

Figure 5.4: Real-Time Weather Updates and Forecast
6. Maintenance
- Cleaning: Wipe the display and unit surfaces with a soft, dry cloth. Do not use abrasive cleaners or solvents.
- Remote Sensor Placement: For accurate outdoor readings, place the remote sensor in a shaded area, protected from direct sunlight and precipitation. Ensure it is within the wireless range of the main unit.
- Battery Replacement: Replace batteries in the remote sensor when the low battery indicator appears on the main unit's display or the sensor's screen.
7. Troubleshooting
- No Display/Power: Ensure the DC adapter is securely plugged into both the unit and a working power outlet.
- Remote Sensor Not Connecting:
- Check that batteries are correctly installed in the remote sensor and are not depleted.
- Ensure the sensor is within the specified wireless range (up to 60 meters in an open area) and free from major obstructions.
- Try re-pairing the sensor by removing and reinserting its batteries, then restarting the main unit if necessary.
- Wi-Fi Connection Issues:
- Confirm your Wi-Fi network is 2.4GHz. The device does not support 5GHz networks.
- Ensure your Wi-Fi password is entered correctly in the Tuya app.
- Move the weather station closer to your Wi-Fi router.
- Inaccurate Forecast/Time:
- Verify that the weather station is successfully connected to Wi-Fi.
- Check the location settings within the Tuya app to ensure it matches your current geographical area.
8. Specifications
| Feature | Detail |
|---|---|
| Model Number | 426900992 |
| Display Size | 8 Inch |
| Connectivity Technology | Wi-Fi (2.4GHz only) |
| Power Source (Main Unit) | DC 5V Adapter |
| Power Source (Remote Sensor) | Battery Powered (AAA, not included) |
| Special Feature | Alarm |
| Color | Black |
| Manufacturer | Raddy |
| First Available Date | August 2, 2024 |
9. Warranty and Support
This product includes a user manual for detailed instructions. For information regarding warranty coverage, technical support, or service, please refer to your purchase documentation or contact Raddy customer support directly. Contact details can typically be found on the manufacturer's official website or on the product packaging.