Introduction
This manual provides essential information for the safe and efficient operation of your Commercial CHEF 5-in-1 Countertop Microwave Air Fryer Combo. This appliance combines the functions of a microwave, air fryer, convection oven, and offers bake and roast capabilities. Please read these instructions thoroughly before use and retain them for future reference.
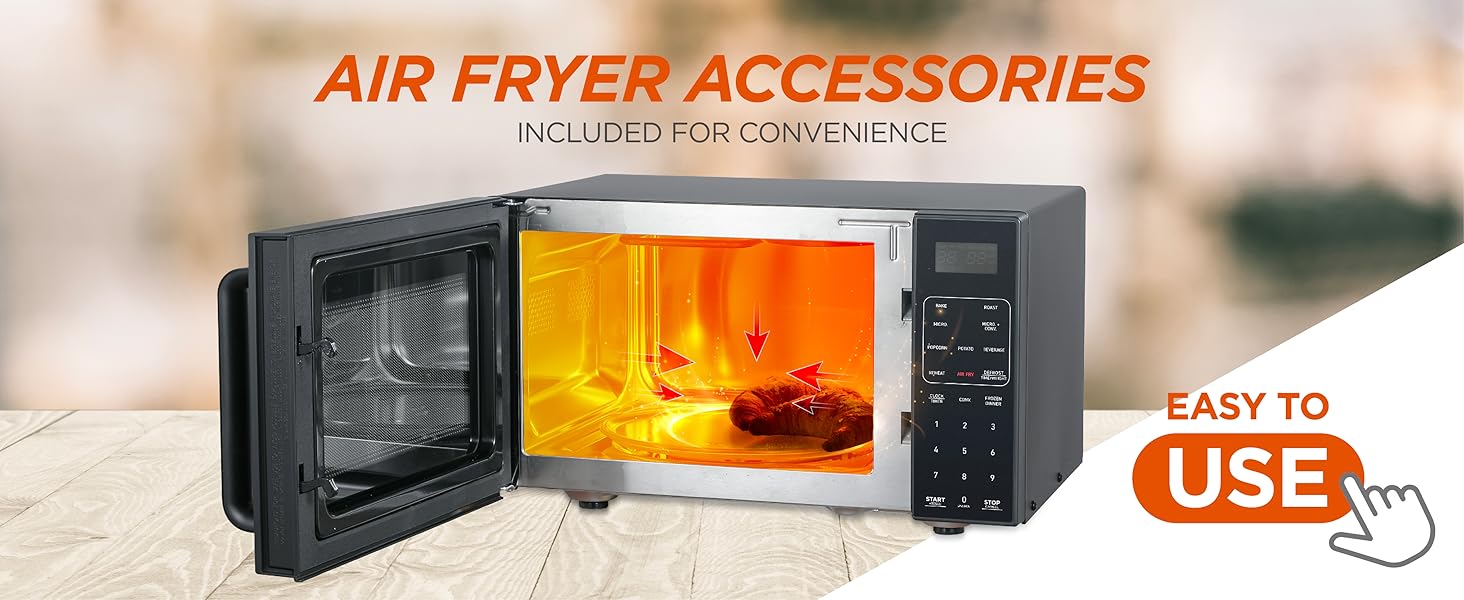
Image: The Commercial Chef 5-in-1 appliance highlighting its multi-functional design for various cooking needs.
Important Safety Instructions
When using electrical appliances, basic safety precautions should always be followed to reduce the risk of fire, electrical shock, burns, or injury to persons.
- Read all instructions before using the appliance.
- Do not operate the oven if it has a damaged cord or plug, if it is not working properly, or if it has been damaged or dropped.
- Do not heat liquids or other foods in sealed containers as they are liable to explode.
- Do not use corrosive chemicals or vapors in this appliance.
- Close supervision is necessary when the appliance is used by or near children.
- Ensure the appliance is properly grounded.
- Only use utensils suitable for microwave ovens.
- Do not overcook food.
Product Overview
Familiarize yourself with the components of your 5-in-1 appliance.

Image: The main unit of the Commercial Chef 5-in-1 appliance, showcasing its design and the accompanying air fry basket and baking pan.
Components:
- Main Unit: The primary appliance housing the microwave, air fryer, and convection oven functions.
- Control Panel: Digital touch panel with LED display for setting functions, time, and power levels.
- Door with Pull Handle: Features a 2-step child lock for safety.
- Glass Turntable: For even microwave cooking.
- Air Fry Kit: Includes an air fry basket and rack for optimal air frying results.
- Baking Pan: For use with convection and baking functions.
- Stainless Steel Interior: Durable and easy to clean cavity.

Image: The appliance displayed with a summary of its features, including the pull handle door, air fry kit, 10 power levels, digital touch control panel, LED display, 10.6" turntable, cooking temperature up to 450°F, defrost by time/weight, clock/timer, and one-button express 30-second cooking.
Setup
- Unpacking: Carefully remove all packaging materials and accessories. Inspect the oven for any damage, such as dents or a broken door. Do not operate if damaged.
- Placement: Place the oven on a flat, stable surface that can support its weight and the heaviest food item likely to be cooked in it. Ensure adequate ventilation by leaving at least 4 inches of space around the sides, top, and rear of the oven. Do not block air vents.
- Power Connection: Plug the power cord into a standard 3-prong grounded electrical outlet. Ensure the voltage matches the rating label on the appliance.
- Initial Cleaning: Before first use, wipe the interior and exterior with a damp cloth.
Operating Instructions
Control Panel Overview:

Image: A detailed view of the digital control panel, illustrating the 10 power levels and dedicated buttons for functions like Bake, Roast, Micro, Air Fry, Reheat, Popcorn, Potato, Beverage, Defrost, and Frozen Dinner.
1. Setting the Clock:
- Press the 'CLOCK/TIMER' button once.
- Use the number pad to enter the current time (e.g., 1-2-3-0 for 12:30).
- Press 'CLOCK/TIMER' again to confirm.
2. Microwave Cooking:
- Place food in a microwave-safe container on the glass turntable.
- Close the door.
- Enter desired cooking time using the number pad.
- To adjust power level (default is 100%): Press 'POWER LEVEL', then enter a number from 1 to 10.
- Press 'START' to begin cooking.

Image: The appliance shown with examples of meals and beverages it can prepare, including pasta, baked potatoes, popcorn, vegetables, fish, and reheated dishes.
3. Air Fryer Function:
- Place food on the air fry basket within the baking pan.
- Insert the baking pan with the air fry kit into the oven.
- Press the 'AIR FRY' button.
- Use the number pad to set the desired cooking time and temperature (up to 450°F).
- Press 'START'.

Image: The interior of the appliance with the door open, showing the air fry accessories in place and indicating the air circulation for cooking.
4. Convection Oven / Bake / Roast:
- Place food on the baking pan or an oven-safe dish.
- Press 'BAKE' or 'ROAST' button.
- Set desired temperature and cooking time using the number pad.
- Press 'START'.
5. Preset Cooking Options:
The appliance includes preset options for common foods:
- Popcorn: For pre-packaged microwave popcorn.
- Potato: For baking potatoes.
- Beverage: For heating drinks.
- Reheat: For warming up cooked food.
- Frozen Dinner: For heating pre-packaged frozen meals.
To use: Press the desired preset button, then press 'START'. Some presets may require selecting quantity.
6. Child Lock:
To activate the child lock, press and hold the 'STOP' button for 3 seconds. The display will show a lock indicator. To deactivate, press and hold 'STOP' again for 3 seconds.
Maintenance and Cleaning
Regular cleaning helps maintain the performance and longevity of your appliance.
- Interior: Wipe the stainless steel interior with a damp cloth after each use. For stubborn stains, use a mild detergent and rinse thoroughly. Do not use abrasive cleaners or scouring pads.
- Exterior: Clean the exterior surface with a soft, damp cloth. Avoid getting water into the ventilation openings.
- Turntable and Accessories: The glass turntable, air fry kit, and baking pan can be washed in warm, soapy water or in a dishwasher.
- Door Seal: Keep the door seal clean to ensure proper closure and efficient operation.
Troubleshooting
| Problem | Possible Cause | Solution |
|---|---|---|
| Oven does not start | Power cord not plugged in; Door not closed properly; Fuse blown or circuit breaker tripped. | Ensure plug is firmly in outlet; Close door securely; Check household fuse or reset circuit breaker. |
| Food not heating | Door not closed properly; Cooking time not set; Power level too low. | Close door securely; Set appropriate cooking time; Increase power level. |
| Unusual noise during operation | Turntable not correctly placed; Food container touching oven walls. | Ensure turntable is seated correctly; Adjust food container position. |
| Smoke or burning smell | Food residue inside; Overcooked food. | Clean oven interior thoroughly; Adjust cooking times to prevent overcooking. |
Specifications

Image: The appliance with key specifications overlaid, including 10.6" turntable radius, 900 Watts power, 0.9 Cu. Ft. capacity, and 10 power levels.
- Model: CHMF9GB
- Capacity: 0.9 Cu. Ft.
- Wattage: 900 Watts
- Power Levels: 10
- Functions: Microwave, Air Fryer, Convection Oven, Bake, Roast
- Dimensions (D x W x H): 16.8 x 19 x 11.1 inches
- Item Weight: 34 pounds
- Interior Material: Stainless Steel
- Voltage: 120 Volts (AC)
Warranty and Support
For warranty information or technical support, please refer to the warranty card included with your purchase or visit the official Commercial CHEF website. Do not attempt to repair the appliance yourself.


