
Introduction
The NEEWER S102-400W Pro Studio Flash Strobe is a high-power lighting solution designed for professional photography, including advertising, portraiture, weddings, and still life. It features a 400Ws flash output, a guide number of GN62 (at 1m, ISO100), and an enhanced 30W LED modeling lamp with a stable 5600K color temperature. This manual provides comprehensive instructions for the safe and effective use of your flash unit.
What's in the Box
Please check the contents of your package to ensure all items are present:
- 1x S102-400W PRO Monolight (with modeling lamp)
- 1x 2.4G Wireless Trigger
- 1x Standard Reflector
- 1x Power Cable
- 1x User Manual

Image: The package contents, showing the S102-400W Pro flash unit, standard reflector, power cable, and 2.4G trigger.
Product Overview
Familiarize yourself with the main components and controls of the S102-400W Pro flash unit.
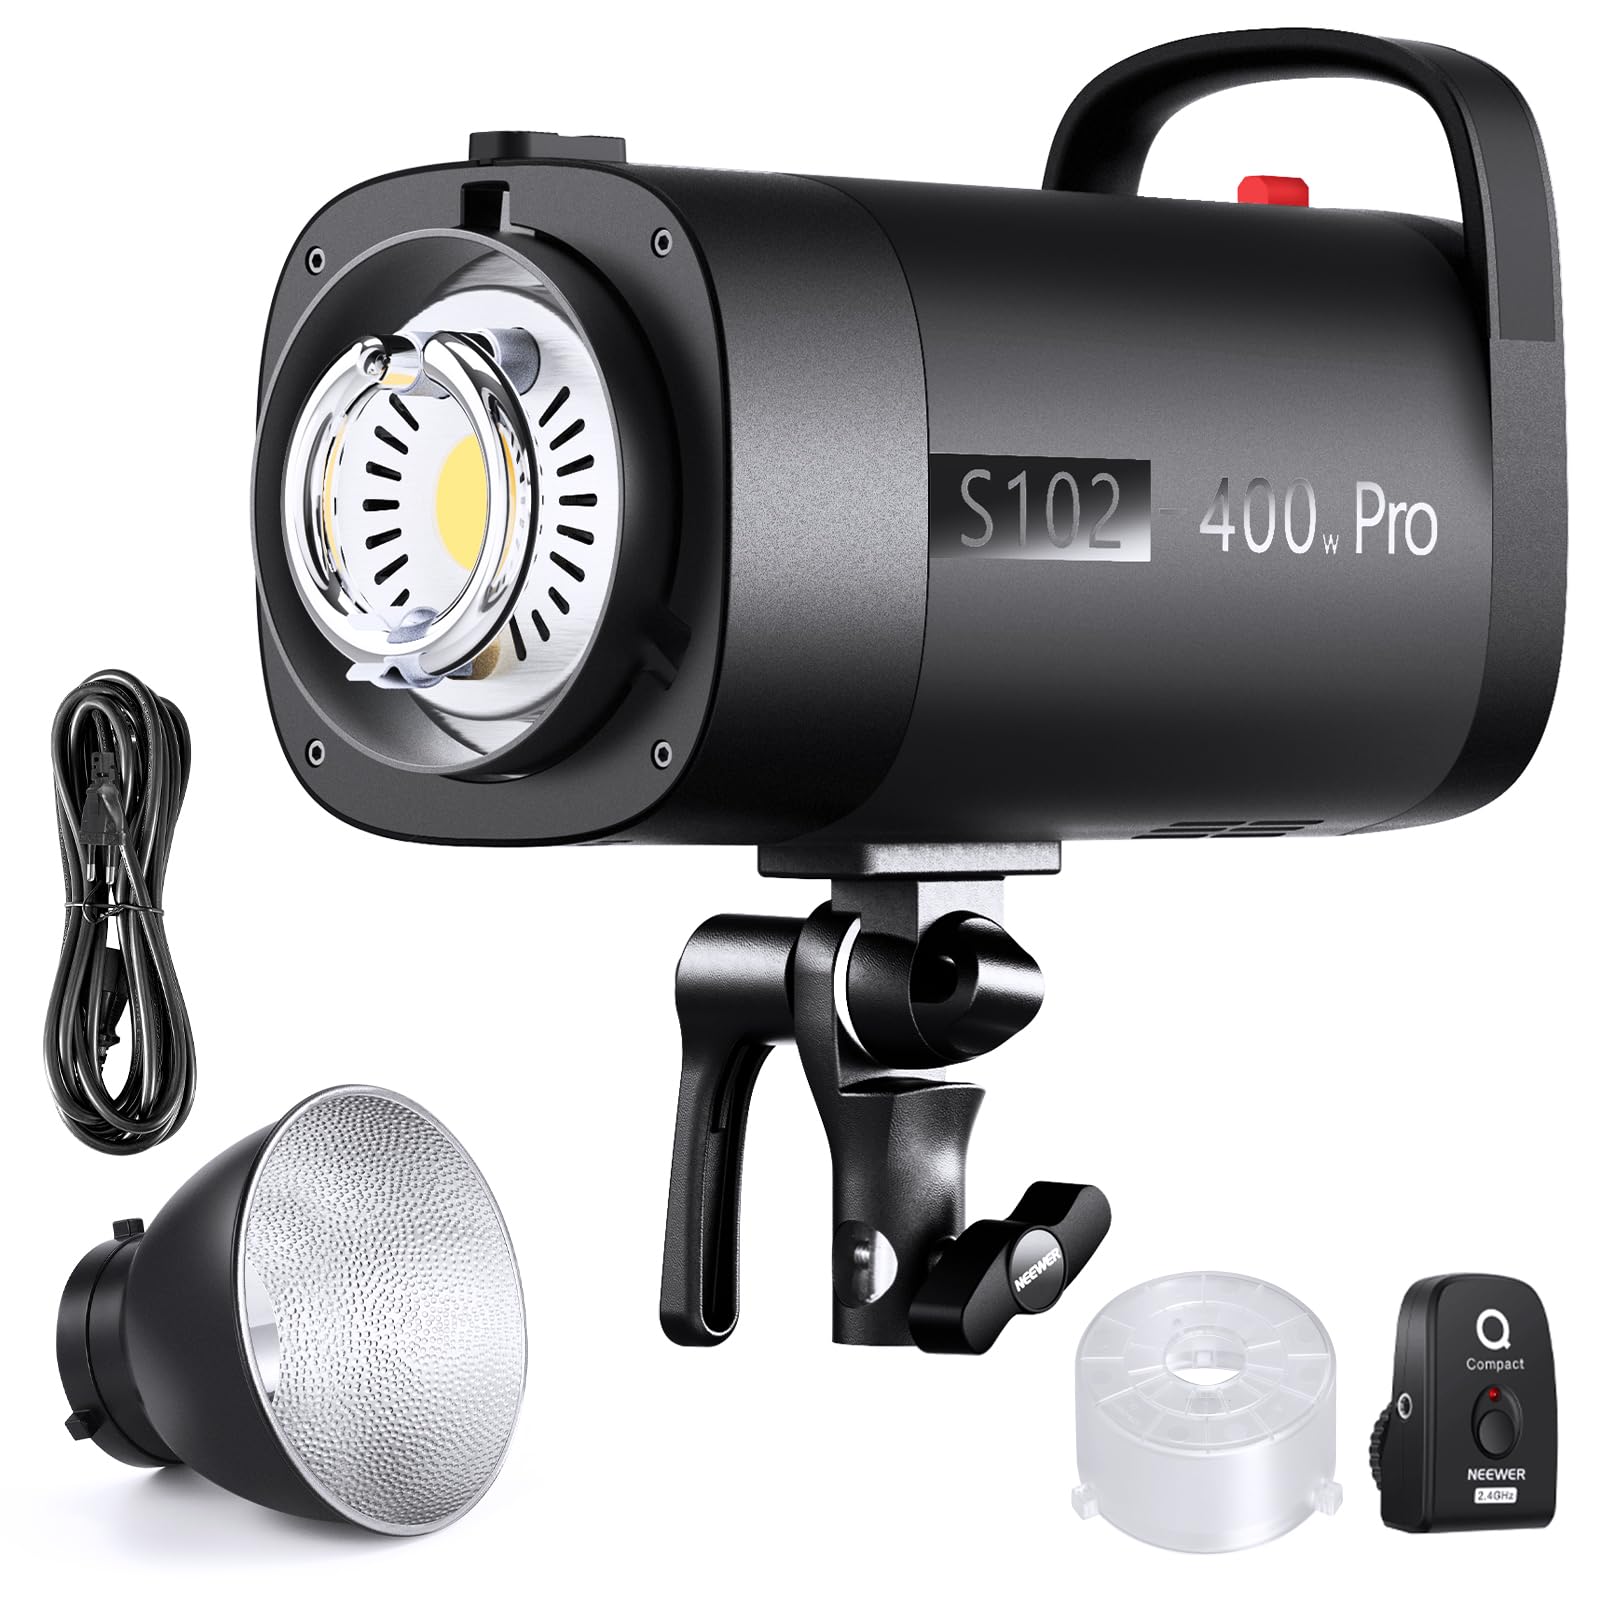
Image: The NEEWER S102-400W Pro flash unit with its standard reflector, showcasing its compact design.

Image: Close-up of the control panel, showing the LCD screen, buttons for group/channel, S1/S2 modes, and power adjustment dial.
- Control Panel: Features an HD display for visual reference and quick adjustments.
- Bowens Mount: Standard mount for attaching various light modifiers.
- Umbrella Mount: Integrated base for attaching a photographic umbrella.
- Power Input: Connects to the included power cable.
- Sync Port: For wired synchronization.
- Cooling Fan: Integrated silent fan for efficient heat dissipation.
Setup
- Mounting the Flash Unit:
Attach the S102-400W Pro flash unit to a compatible light stand using the integrated mounting bracket. Secure it firmly by tightening the locking knob.
- Attaching the Reflector:
Align the standard reflector (or other Bowens mount modifier) with the Bowens mount on the front of the flash unit. Rotate it clockwise until it clicks into place. To remove, press the release button and rotate counter-clockwise.

Image: Illustration of the universal Bowens mount, compatible with various light modifiers like softboxes, beauty dishes, and snoots.
- Connecting Power:
Connect the included power cable to the power input port on the flash unit and then to a suitable AC power outlet.
- Installing the 2.4G Trigger:
Slide the 2.4G wireless trigger onto your camera's hot shoe. Ensure it is securely seated. Power on the trigger.

Image: The 2.4G wireless trigger connected to a camera, ready for wireless flash control.
Operating Instructions
Power On/Off
Locate the power switch on the rear of the flash unit and toggle it to the "ON" position. The LCD screen will illuminate.
Adjusting Flash Power
Rotate the power adjustment dial on the control panel to set the desired flash output. The power can be adjusted from 1/64 to 1/1 in precise increments.
Modeling Lamp Operation
The 30W LED modeling lamp can be used to preview lighting effects. Its brightness can be adjusted from 10% to 100% (in 10% increments) via the control panel. The modeling lamp operates at a stable 5600K color temperature.

Image: Visual representation of the modeling lamp's adjustable brightness, from 10% to 100% output.
Wireless Triggering (2.4G System)
The flash unit supports 2.4G wireless triggering. Ensure the flash unit and the 2.4G trigger are set to the same channel and group. The trigger provides high-speed synchronization up to 1/200s within a 30m range. For faster synchronization or advanced control, optional QPRO triggers (sold separately) can be used, offering 1-99 wireless IDs and 32 channels.
Optical Slave Modes (S1/S2)
- S1 Mode: The flash will fire in response to the first flash from a manual master unit.
- S2 Mode: The flash will ignore the first pre-flash from a TTL master unit and fire on the second flash, suitable for TTL systems.
Select the desired mode using the S1/S2 button on the control panel.
High-Speed Sync (HSS)
The flash supports high-speed synchronization up to 1/200s with the included 2.4G trigger. For higher sync speeds (e.g., 1/8000s), a compatible QPRO trigger (sold separately) is required.

Image: The flash's ability to capture dynamic motion with a flash duration of 1/100-1/1000s and a fast recovery time of 0.1-1.5s.
Maintenance
- Cleaning: Use a soft, dry cloth to clean the exterior of the flash unit. Do not use abrasive cleaners or solvents.
- Cooling System: The S102-400W Pro features an advanced cooling system with a silent fan to prevent overheating. Ensure the ventilation openings are not obstructed during operation to maintain optimal performance and longevity.
- Storage: When not in use, store the flash unit in a dry, dust-free environment, away from direct sunlight and extreme temperatures.

Image: Internal view of the flash unit highlighting the advanced heat dissipation system and silent fan.
Troubleshooting
| Problem | Possible Cause | Solution |
|---|---|---|
| Flash not firing wirelessly. | Incorrect channel/group settings; trigger not compatible; trigger battery low. | Ensure flash and trigger are on the same channel and group. Check trigger compatibility with your camera. Replace trigger battery if necessary. |
| Flash not recycling quickly. | High power setting; unit overheating. | Reduce flash power. Allow the unit to cool down. Ensure ventilation is not blocked. |
| Modeling lamp not working. | Lamp setting too low; lamp failure. | Increase modeling lamp brightness. If still not working, contact customer support. |
| Flash output inconsistent. | Power fluctuations; unit overheating; internal issue. | Ensure stable power supply. Allow unit to cool. If problem persists, contact customer support. |
Specifications
| Feature | Detail |
|---|---|
| Brand | NEEWER |
| Model Number | S102-400W PRO |
| Flash Power | 400Ws |
| Guide Number (GN) | 62 (at 1m, ISO100) |
| Color Temperature | 5600K ± 200K |
| Modeling Lamp | 30W LED (5600K, 4370 lux/m) |
| Flash Duration | 1/100 - 1/1000s |
| Recycle Time | ≤ 1.5s |
| Power Adjustment | 4.0-10 (1/64-1/1) |
| Wireless Connectivity | 2.4G Wireless System (32 channels, 1-99 IDs with QPRO) |
| Sync Speed | Up to 1/200s (with included trigger), up to 1/8000s (with QPRO trigger) |
| Mount Type | Bowens Mount |
| Optical Slave Modes | S1, S2 |
| Cooling | Silent Fan, Advanced Heat Dissipation |
| UPC | 191073097087 |

Image: Detailed technical specifications and dimensions of the S102-400W Pro flash unit.
Warranty and Support
The NEEWER S102-400W Pro Studio Flash Strobe comes with a manufacturer's 1-year warranty. For technical support, warranty claims, or service inquiries, please contact NEEWER customer support through their official website or the retailer where the product was purchased. Please retain your proof of purchase for warranty validation.
For more information, visit the official NEEWER website: www.neewer.com


