1. Introduction and Overview
The GOXAWEE Portable Inverter Welder is a versatile 3-in-1 machine designed for welding various metallic materials, including copper, iron sheets, iron pipes, galvanized pipes, and stainless steel. It supports three primary welding methods: Manual Metal Arc (MMA), Lift Tungsten Inert Gas (TIG), and Gas-shielded Metal Inert Gas/Metal Active Gas (MIG/MAG). This welder is suitable for both professional and home use, offering stable welding arcs, minimal spatter, and clean weld joints.
Key features include advanced IGBT inverter technology for stable output current, a high-power cooling fan for efficient heat dissipation, and a portable design weighing only 4.6 kg for easy transport. The clear digital display and intuitive control panel simplify operation for both beginners and experienced welders.
2. Included Components
The following items are typically included with your GOXAWEE 3-in-1 Inverter Welder:
- 1 x MIG Welding Machine
- 1 x 175mm Welding Torch (MIG)
- 1 x 164mm Electric Welding Pliers (Electrode Holder)
- 1 x 118mm Earth Cable Clamp
- 1 x Pair of Gloves
- 1 x Welding Mask
- 1 x Welding Lens
- 2 x Brushes
- 2 x 0.8mm / 0.5kg Welding Wire
- 5 x Conductive Nozzles (3 x 0.8mm + 2 x 1.0mm)
- 5 x Electrodes (various sizes)
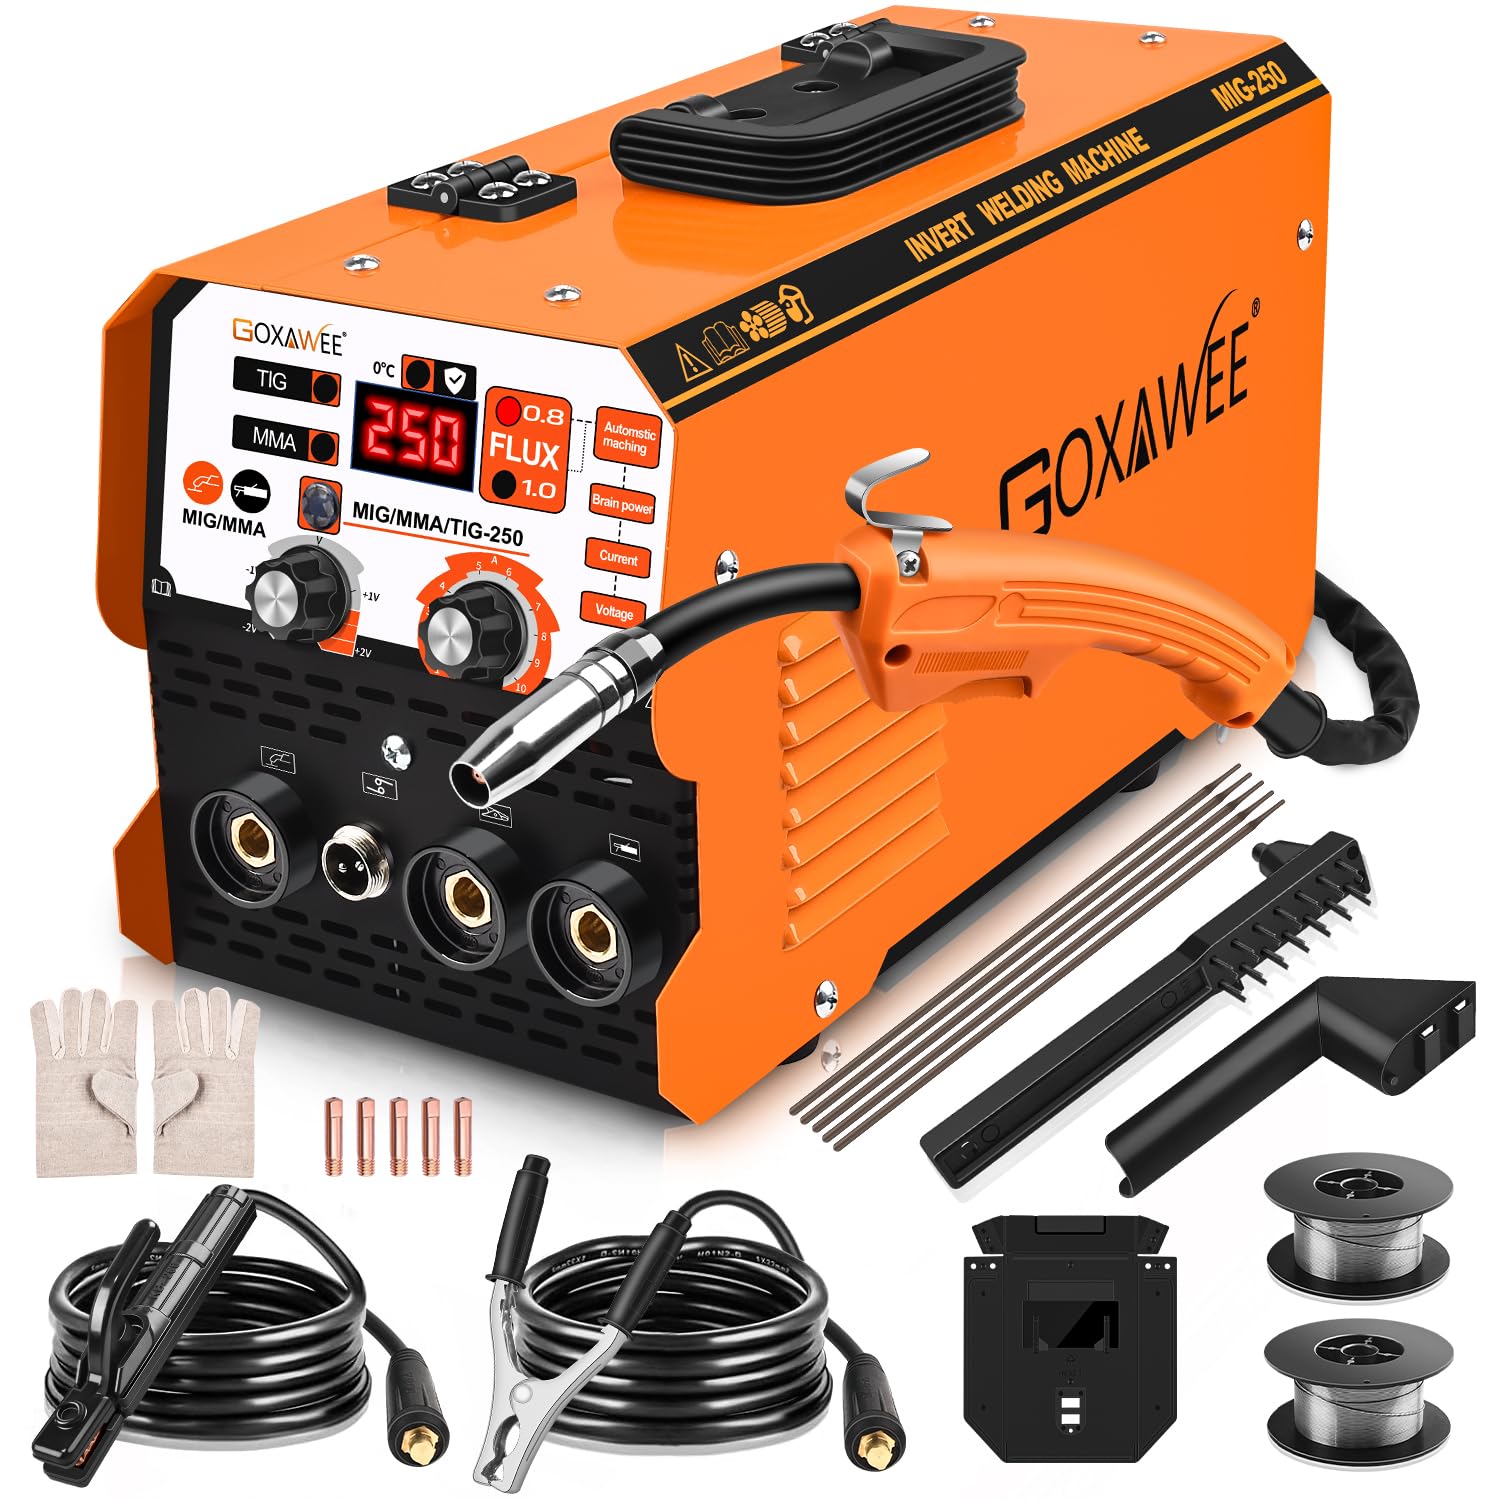
This image displays the GOXAWEE 3-in-1 Inverter Welder along with its various components and their dimensions. Key parts include the MIG torch, earth clamp, electrode holder, welding rods, hand shield, wire brush, and flux-cored wire.
3. Safety Precautions
Always prioritize safety when operating welding equipment. Failure to follow safety guidelines can result in serious injury or damage to the equipment.
- Personal Protective Equipment (PPE): Always wear a safety mask, welding gloves, protective clothing, and other appropriate personal protective equipment when operating the welding machine.
- Ventilation: Ensure adequate ventilation in your work area to disperse welding fumes.
- Overload Protection: To ensure product longevity, regularly check performance. It is recommended to rest the machine for 10-15 minutes after 20-30 minutes of continuous operation to prevent overheating and overloading. The machine has built-in protection against overcurrent, overvoltage, and overheating.
- Electrical Safety: Ensure the power supply matches the machine's requirements (110V). Do not operate the machine with damaged cables or connections.
- Flammable Materials: Keep flammable materials away from the welding area.
4. Setup Instructions
4.1. Power Connection
- Ensure the welder's power switch is in the OFF position.
- Connect the power cable to a grounded 110V power outlet.
- Turn on the power switch located at the rear of the machine. The digital display will illuminate.
4.2. MMA (Manual Metal Arc) Welding Setup
- Connect the electrode holder cable to the positive (+) terminal on the front panel of the welder.
- Connect the earth clamp cable to the negative (-) terminal on the front panel.
- Securely attach the earth clamp to the workpiece or welding table.
- Insert the appropriate electrode (1.6-3.2 mm) into the electrode holder.
- Select the MMA mode using the control panel. Adjust the current (amperage) as needed for your welding task.
This video demonstrates the setup and operation of the GOXAWEE 3-in-1 Inverter Welder in MMA mode, showing how to connect the electrode holder and earth clamp, and perform welding.

A close-up of a welder performing Manual Metal Arc (MMA) welding, demonstrating the arc and molten metal.
4.3. MIG (Metal Inert Gas) Welding Setup
- Connect the MIG welding torch cable to the designated MIG connector on the front panel.
- Connect the earth clamp cable to the negative (-) terminal on the front panel.
- Securely attach the earth clamp to the workpiece or welding table.
- Open the side panel of the welder to access the wire feed mechanism.
- Install the 0.8mm or 1.0mm flux-cored welding wire onto the spool holder, ensuring it feeds smoothly through the guide rollers and into the torch liner.
- Select the MIG mode on the control panel.
- Adjust the wire feed speed and voltage. The machine offers collaborative control, where these parameters adjust automatically based on wire diameter, or manual control for custom settings.
This video illustrates the connection of the MIG torch and earth clamp to the GOXAWEE 3-in-1 Inverter Welder, demonstrating the initial setup for MIG welding.

An internal diagram of the welder, detailing the innovative design of the wire feed mechanism, including the spool lock, spring, spool, and spool spacer, for easy wire adjustment.
4.4. LIFT TIG Welding Setup
Note: A TIG welding torch (argon arc welding gun) is required and sold separately.
- Connect the TIG torch cable to the designated TIG connector on the front panel.
- Connect the earth clamp cable to the negative (-) terminal on the front panel.
- Securely attach the earth clamp to the workpiece or welding table.
- Select the LIFT TIG mode on the control panel. Adjust the current (amperage) as needed.

An image showing Lift TIG welding, illustrating the precise arc and clean weld pool.
5. Operating Instructions
5.1. General Operation
The GOXAWEE welder features a clear digital display and a voltage adjustment knob on the control panel. This allows for precise control over welding parameters. The maximum current capacity is 250A with a 110V input.
5.2. MMA Welding
For MMA welding, the machine provides a one-click arc starting feature and is designed to prevent electrodes from sticking to the workpiece. Adjust the amperage based on the electrode type and material thickness.
This video demonstrates the MMA welding process, highlighting the ease of arc starting and the quality of the weld.
5.3. MIG Welding
In MIG mode, the machine offers two control options:
- Collaborative Control: The wire feed speed and voltage are automatically adjusted by simply setting the welding wire diameter. This simplifies operation for consistent results.
- Manual Control: The current can be adjusted manually according to your specific welding habits and requirements, offering greater flexibility.

This image illustrates MIG Fluxcore welding, suitable for tasks like automotive bodywork and automatic carriages, emphasizing its versatility.
5.4. LIFT TIG Welding
For Lift TIG welding, ensure the separate TIG torch is connected and the appropriate mode is selected. Adjust the current for precise welding of thinner materials or for applications requiring high-quality, clean welds.
6. Maintenance
Proper maintenance ensures the longevity and optimal performance of your GOXAWEE welder.
- Cleaning: Regularly clean the exterior of the machine and all welding accessories to prevent dust and debris buildup. The fan cooling system is designed to reduce dust entry, but external cleaning is still important.
- Cable Inspection: Periodically inspect all cables and connections for signs of wear, cuts, or damage. Replace any damaged components immediately.
- Ventilation Grilles: Keep the ventilation grilles clear of obstructions to ensure proper airflow and heat dissipation.
- Storage: Store the welder in a dry, clean environment when not in use.
7. Troubleshooting
If you encounter issues with your welder, refer to the following common problems and solutions:
- No Power: Check the power cable connection, ensure the power switch is ON, and verify the power outlet is functional.
- Welder Overheating: The machine has built-in thermal protection. If it overheats, it will automatically shut down. Allow it to cool down for 10-15 minutes before resuming operation. Ensure proper ventilation and avoid continuous operation beyond recommended duty cycles.
- Poor Arc Starting/Stability:
- MMA: Ensure the electrode is dry and of the correct size. Check the earth clamp connection for good contact.
- MIG: Verify the welding wire is feeding smoothly and the contact tip is clean. Check gas flow (if using shielded MIG) or ensure flux-cored wire is appropriate.
- TIG: Ensure the tungsten electrode is properly sharpened and the gas flow is correct.
- Micro-wire Mode Not Functioning (MIG): If the micro-wire (MIG) mode is not advancing wire or producing an arc, but MMA works, check the wire feed mechanism for blockages, ensure the wire spool is correctly installed, and verify the MIG torch connection.
- Protection Mechanism Activated: If the machine is overloaded or short-circuited, the protection mechanism will activate. Disconnect power, inspect for any issues, and allow the machine to reset before restarting.
For persistent issues, please contact customer support.
8. Specifications
| Specification | Value |
|---|---|
| Current Range | 20A-250A |
| Input Voltage | 110V |
| Welding Wire Diameter | 0.8-1.0 mm |
| Applicable Electrode Size | 1.6-3.2 mm |
| Rated Input Capacity | 6.6KVA |
| Maximum Welding Thickness | 6 mm |
| Weight | 4.6 KG |
| Product Dimensions (L x W x H) | 36 cm x 16 cm x 18.5 cm |
| Welding Methods | MIG (Flux-cored), Lift TIG, ARC (MMA) |
| Technology | Advanced IGBT Inverter Technology |
9. Warranty and Support
GOXAWEE is committed to providing high-quality products and customer satisfaction. If you have any questions about this product, require technical assistance, or need to address any concerns, please do not hesitate to contact our customer support team. We aim to respond within 24 hours and provide a satisfactory solution.
For information regarding returns, please refer to the retailer's return policy where the product was purchased.


