1. Introduction
Thank you for choosing the Techwood TAS-669 Corded 2-in-1 Stick Vacuum Cleaner. This appliance is designed for efficient and versatile cleaning of various surfaces in your home. Its 2-in-1 design allows it to function as a powerful stick vacuum for floors and carpets, and easily convert into a handheld vacuum for hard-to-reach areas. Please read this manual carefully before use to ensure safe operation and optimal performance.
2. Safety Instructions
Always follow basic safety precautions when using electrical appliances to reduce the risk of fire, electric shock, or injury.
- Ensure the voltage indicated on the appliance matches your local mains voltage before connecting.
- Do not use the vacuum cleaner on wet surfaces or to pick up liquids.
- Do not pick up burning or smoking objects, such as cigarettes, matches, or hot ashes.
- Keep hair, loose clothing, fingers, and all parts of the body away from openings and moving parts.
- Do not use without the dust cup and filter in place.
- Unplug from the outlet when not in use and before cleaning or servicing.
- Do not pull or carry by cord, use cord as a handle, close a door on cord, or pull cord around sharp edges or corners.
- This appliance is for household use only.
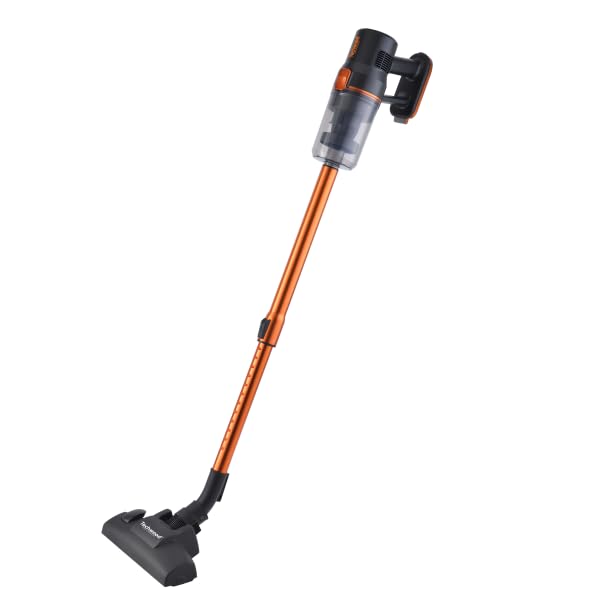
3. Product Components
Familiarize yourself with the parts of your Techwood TAS-669 vacuum cleaner.
- Main Unit: Contains the motor, dustbin, and handle.
- Telescopic Aluminum Tube: Extends the reach for floor cleaning.
- Floor Brush (2 positions): For cleaning hard floors and carpets.
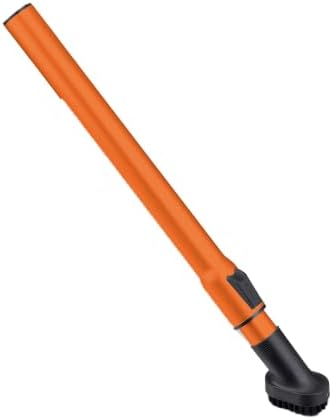
- Crevice Tool: Ideal for narrow spaces and corners.
- Mini Brush: For upholstery and delicate surfaces.


4. Setup and Assembly
Follow these steps to assemble your vacuum cleaner for first use.
4.1. Assembling the Stick Vacuum
- Unpack all components from the box.
- Attach the telescopic aluminum tube to the main unit by aligning the connectors and pushing until it clicks into place.
- Attach the floor brush to the other end of the telescopic tube, ensuring it is securely fastened.
- Ensure the dustbin and filter are correctly installed in the main unit.
4.2. Converting to Handheld Vacuum
To use as a handheld vacuum:
- Detach the telescopic tube from the main unit by pressing the release button (if present) and pulling apart.
- Attach your desired accessory (crevice tool or mini brush) directly to the main unit's suction opening.

5. Operating Instructions
5.1. Powering On/Off
Plug the power cord into a suitable electrical outlet. Press the power button located on the main unit to turn the vacuum cleaner on. Press it again to turn it off.
5.2. Using the Floor Brush
The floor brush has two positions for different surfaces:
- Hard Floor Setting: Use for tiles, wood, laminate, and other hard surfaces.
- Carpet Setting: Use for carpets and rugs.
Adjust the brush setting by pressing the foot pedal on the floor brush.
5.3. Using Accessories
- Crevice Tool: Ideal for cleaning corners, edges, between sofa cushions, and other tight spaces.
- Mini Brush: Use for cleaning upholstery, car interiors, stairs, and delicate surfaces.
Attach these tools directly to the main unit for handheld use, or to the telescopic tube for extended reach.
6. Maintenance
Regular maintenance ensures optimal performance and extends the life of your vacuum cleaner.
6.1. Emptying the Dustbin
Empty the dustbin regularly, preferably after each use, or when the dust level reaches the 'MAX' indicator line.
- Ensure the vacuum cleaner is unplugged.
- Press the dustbin release button and remove the dustbin from the main unit.
- Open the dustbin lid and empty the contents into a waste bin.
- Close the dustbin lid and reattach the dustbin to the main unit until it clicks securely.
6.2. Cleaning the HEPA Filter
The HEPA filter should be cleaned regularly to maintain suction power. It is recommended to clean it every 3-4 uses, or more frequently depending on usage.
- Unplug the vacuum cleaner and remove the dustbin.
- Carefully remove the HEPA filter from the dustbin.
- Tap the filter gently over a waste bin to remove loose dust.
- If heavily soiled, rinse the filter under cold running water. Do not use detergent.
- Allow the filter to air dry completely for at least 24 hours before reinserting. Do not use the vacuum cleaner with a wet filter.
- Reassemble the filter and dustbin, then reattach to the main unit.
6.3. Cleaning Attachments
Wipe down the telescopic tube, floor brush, crevice tool, and mini brush with a damp cloth. Ensure they are dry before storage or reattachment.
6.4. Storage
Store the vacuum cleaner in a cool, dry place, away from direct sunlight and out of reach of children.
7. Troubleshooting
If you encounter any issues, refer to the following table for common problems and solutions.
| Problem | Possible Cause | Solution |
|---|---|---|
| Vacuum cleaner does not turn on. | Not plugged in correctly. No power from outlet. | Check power cord connection. Test outlet with another appliance. |
| Loss of suction. | Dustbin full. Filter clogged. Obstruction in nozzle/hose. | Empty dustbin. Clean/replace filter. Check for and remove obstructions. |
| Unusual noise. | Obstruction in brush roll or hose. Motor issue. | Check for and remove obstructions. If noise persists, contact customer support. |
| Dust escaping from vacuum. | Dustbin not properly closed. Filter not installed correctly or damaged. | Ensure dustbin is securely closed. Check filter installation and condition. |
If the problem persists after attempting these solutions, please contact customer support.
8. Specifications
- Model: TAS-669
- Brand: Techwood
- Power: 600W
- Dustbin Capacity: 0.5 Liters
- Filter Type: HEPA Filter
- Power Source: Corded Electric
- Special Features: Multi-cyclonic, 2-in-1 (Stick & Handheld)
- Weight: Approximately 2.58 Kilograms
- Color: Orange
- Included Components: Telescopic Aluminum Tube, 1 Crevice Tool, 1 Mini Brush, 1 2-position Floor Brush
9. Warranty and Support
Warranty information for this product is not provided in the available details. For any support inquiries, warranty claims, or spare parts information, please contact your retailer or the manufacturer directly using the contact details provided at the point of purchase.
Information regarding the availability of spare parts is currently unavailable.