1. Introduction
This manual provides detailed instructions for the setup, operation, and maintenance of your Facmogu BT-298 Pro Home Audio Amplifier. Please read this manual thoroughly before using the product to ensure proper function and to maximize your audio experience.

Figure 1: Facmogu BT-298 Pro Home Audio Amplifier. This image displays the front and top view of the amplifier, showcasing its compact design, front panel controls, and extended FM antenna.
2. Safety Information
- Power Supply: Ensure the amplifier is connected to a power source that matches the specified voltage (110V AC / 12V DC).
- Ventilation: Do not block ventilation openings. Ensure adequate airflow around the unit to prevent overheating.
- Moisture: Keep the amplifier away from water, moisture, and high humidity environments.
- Cleaning: Disconnect power before cleaning. Use a dry, soft cloth. Do not use liquid cleaners or aerosols.
- Servicing: Do not attempt to open or service the unit yourself. Refer all servicing to qualified personnel.
- Speaker Impedance: Connect speakers with an impedance rating between 4-16 ohms. Connecting speakers outside this range may damage the amplifier or speakers.
3. Package Contents
Verify that all items are present in the package:
- Facmogu BT-298 Pro Home Audio Amplifier
- Remote Control
- User Manual (this document)
4. Product Overview
4.1 Front Panel Controls and Inputs

Figure 2: Front Panel Layout. This diagram labels the various controls and input ports on the front panel of the amplifier.
- USB Port: For connecting USB storage devices.
- SD/MMC Card Slot: For inserting SD or MMC memory cards.
- Treble Control: Adjusts high-frequency audio levels.
- Bass Control: Adjusts low-frequency audio levels.
- Echo Control: Adjusts the reverberation effect for microphone inputs.
- MIC 1 Input: 6.35mm jack for microphone connection.
- MIC 2 Input: 6.35mm jack for a second microphone connection.
- MIC/VOL Control: Adjusts the volume level of connected microphones.
- Mode Button: Selects input source (Bluetooth, USB, SD, FM, AUX).
- Song Control Buttons: Play/Pause, Previous Track, Next Track (for USB/SD/Bluetooth modes).
- Volume Control: Adjusts the master output volume.
- Digital Display: Shows current mode, track information, or FM frequency.
4.2 Rear Panel Connections
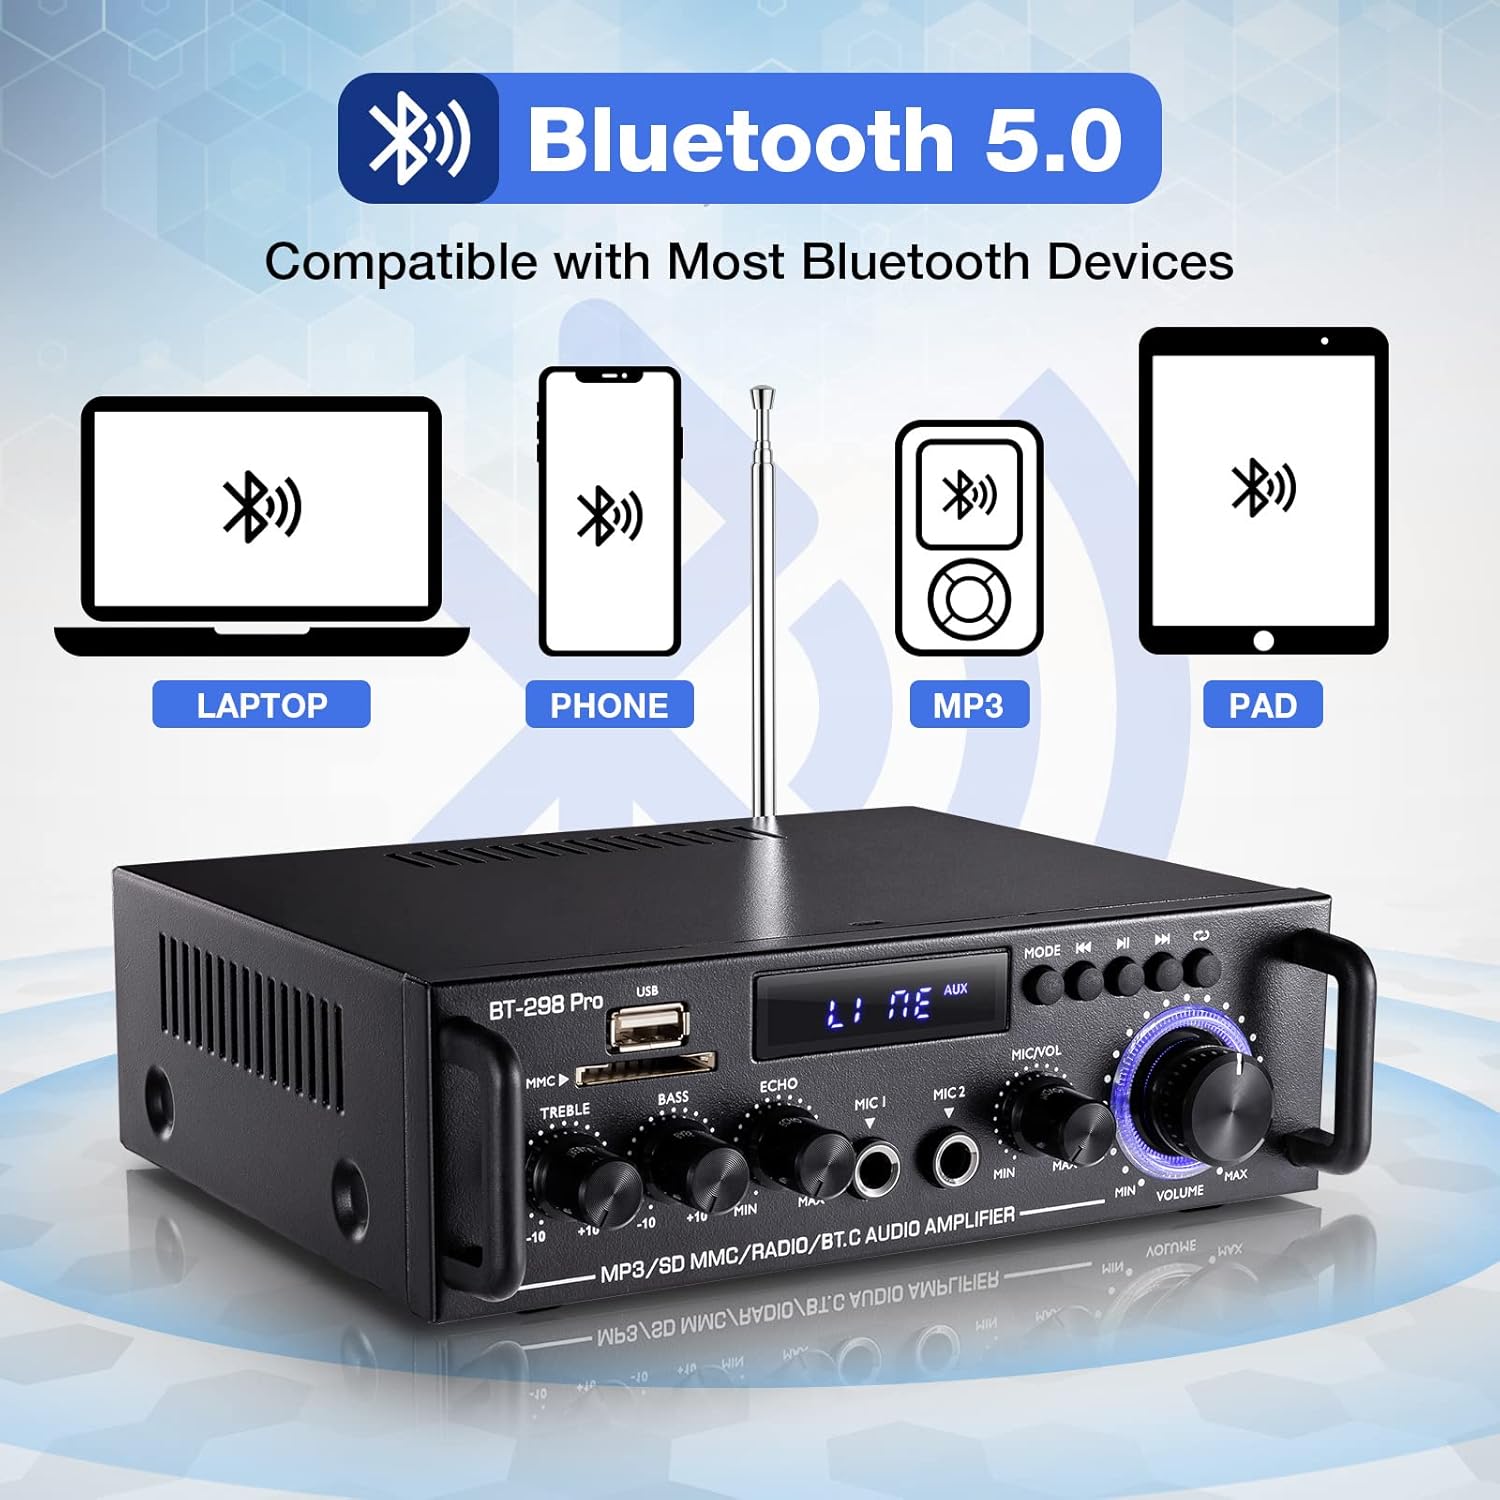
Figure 3: Rear Panel Layout. This diagram illustrates the rear panel connections.
- Radio Antenna: Connection for the FM radio antenna (87.5-108MHz).
- Audio Input (RCA): Stereo RCA jacks for connecting external audio sources (e.g., CD player, TV).
- Speaker Outputs (L/R): Terminals for connecting passive left and right speakers (4-16Ω).
- DC 12V Power Input: For connecting a 12V DC power supply.
- 110V Power Cord Input: For connecting the AC power cord.
- Power Switch: Turns the amplifier on or off.
5. Setup
5.1 Connecting Speakers
- Ensure the amplifier is powered off.
- Connect your passive speakers to the Speaker Outputs (L/R) on the rear panel. Ensure correct polarity (positive to positive, negative to negative).
- The amplifier supports speakers with an impedance of 4-16 ohms. Using speakers outside this range may result in damage.

Figure 4: Speaker Terminals. A detailed view of the speaker output terminals on the rear panel, designed for connecting passive speakers.
5.2 Connecting Audio Sources
- RCA Input: Use an RCA cable to connect external audio devices (e.g., DVD player, TV, turntable with pre-amp) to the Audio Input (RCA) jacks.
- USB/SD/TF: Insert a USB drive or SD/TF card into the respective slots on the front panel.
- Bluetooth: For wireless connection, refer to the Bluetooth Connection section.
5.3 Power Connection
- Connect the 110V AC power cord to the 110V Power Cord Input on the rear panel, then plug it into a wall outlet.
- Alternatively, for DC power, connect a 12V DC power supply to the DC 12V Power Input.
6. Operating Instructions
6.1 Power On/Off
Flip the Power Switch on the rear panel to the 'ON' position to power on the amplifier. Flip it to 'OFF' to power off.
6.2 Input Selection
Press the Mode Button on the front panel or the remote control to cycle through available input sources: Bluetooth (BLUE), USB, SD, FM, and AUX (RCA).
6.3 Bluetooth Connection

Figure 5: Bluetooth Compatibility. This image highlights the Bluetooth 5.0 connectivity feature.
- Press the Mode Button until the digital display shows "BLUE".
- On your mobile device (phone, tablet, laptop), enable Bluetooth and search for available devices.
- Select "BT" from the list to connect. A confirmation sound will indicate a successful connection.
- Note: The amplifier cannot connect to Amazon Echo devices.
- Distance: Maintain a distance of within 16.4ft (5m) between the device and amplifier without obstacles. For PC connections, keep within 6.5ft (2m).
- Simultaneous Connections: The amplifier supports only one Bluetooth connection at a time. Connecting multiple devices will disrupt the audio stream.
- Bluetooth and Wired Connections: Bluetooth and wired functions cannot operate simultaneously. If using Bluetooth, ensure no devices are connected to the wired input jacks. If switching from wired to Bluetooth, disconnect wired devices, restart the amplifier, and then reconnect Bluetooth.
6.4 USB/SD/TF Playback
Insert a USB drive or SD/TF card into the corresponding slot. The amplifier will automatically switch to USB/SD mode and begin playback. Use the Song Control Buttons for play/pause, previous, and next track functions.
6.5 FM Radio Operation
- Press the Mode Button until the digital display shows "FM".
- Press the Play/Pause button (often labeled with a play/pause icon) to initiate an automatic search for FM stations. The amplifier will scan and store available stations. Noise may be present during the scanning process.
- Use the Previous/Next Track buttons to navigate through the stored stations.
- Note: The amplifier does not retain the last tuned radio station after being powered off. You will need to re-select your desired station upon powering on.
6.6 Microphone and Echo Control

Figure 6: Echo Control. A close-up view of the Echo adjustment knob.

Figure 7: Microphone Volume Controls. A close-up of the Microphone Volume and Master Volume controls.
- Connect up to two microphones to the MIC 1 and MIC 2 input jacks.
- Adjust the microphone volume using the MIC/VOL Control.
- Rotate the Echo Control knob to add or reduce the reverberation effect to the microphone audio.
6.7 Tone Controls

Figure 8: Tone Controls. A detailed view of the Treble, Bass, and Echo rotary knobs.
- Use the Treble Control knob to adjust the high-frequency response of the audio.
- Use the Bass Control knob to adjust the low-frequency response of the audio.
6.8 Master Volume Control
Rotate the large Volume Control knob to adjust the overall output volume of the amplifier.
6.9 Remote Control Usage
The included mini remote control allows for convenient adjustment of audio settings from a distance. Ensure the plastic insulating sheet is removed from the remote's battery compartment upon receipt for it to function.
7. Maintenance
- Cleaning: Use a soft, dry cloth to clean the exterior of the amplifier. Avoid abrasive cleaners or solvents.
- Storage: When not in use for extended periods, store the amplifier in a cool, dry place away from direct sunlight and extreme temperatures.
- Ventilation: Periodically check that the ventilation openings are clear of dust and debris.
8. Troubleshooting
Refer to the following solutions for common issues:
- Loose Components/Rattling Sound: If you hear rattling, check and tighten any loose screws on the rear panel. This can occur due to transit.
- Bluetooth Connection Issues:
- Ensure the amplifier is in Bluetooth mode ("BLUE" displayed).
- Verify Bluetooth is enabled on your device and search for "BT".
- If unstable, ensure no obstacles (especially metal) are blocking the signal.
- Turn off the amplifier, disconnect and clear the Bluetooth connection on your transmitting device, then restart the amplifier and reconnect.
- Keep the amplifier's LED indicator side facing your phone and maintain distance within 16.4ft (5m) for phones, or 6.5ft (2m) for TVs/PCs.
- No Sound or Distorted Sound:
- Check all cable connections, ensuring they are fully inserted and secure. Incomplete connections can cause distortion.
- Verify speaker polarity (positive to positive, negative to negative).
- Ensure speaker wattage is compatible (rated power below 50W). Overdriving the amplifier with high-wattage speakers can cause clipping and damage.
- Adjust the master volume and input source volume.
- Noise (e.g., electrical current noise):
- Try replacing the audio input cable and/or the input device. Inferior cables can introduce noise.
- Ensure speakers' power ratings are matched with the amplifier.
- Confirm that surrounding electrical signals are not causing interference.
- Ensure there is spacing between the positive and negative speaker wires; being too close can cause noise or channel loss.
- FM Radio Stations Not Stored:
- Switch to FM mode. Press the Play/Pause button to start an automatic channel search. This process stores the channels.
- The amplifier does not offer manual preset saving for FM stations.
9. Specifications

Figure 9: Product Dimensions and Specifications. This image provides the physical dimensions and a table detailing key product specifications.
| Feature | Specification |
|---|---|
| Model | BT-298 Pro |
| RMS Power | 50W x 2 |
| Peak Power | 400W x 2 |
| Signal-to-Noise Ratio (SNR) | >92dB |
| Impedance | 4-8Ω |
| Power Supply | 110V AC / 12V DC |
| Channel Configuration | 2 Channel Stereo |
| Distortion Rate | 0.2% |
| Resolution | 47K |
| Frequency Response | 10-20KHz |
| FM Radio Frequency | 87.5-108MHz |
| Connectivity Technology | Auxiliary, Bluetooth |
| Item Weight | 2.7 pounds |
| Package Dimensions | 8.27 x 8.19 x 3.19 inches |
10. Warranty and Support
For warranty information or technical support, please refer to the documentation provided at the time of purchase or contact Facmogu customer service through their official channels. Keep your purchase receipt for warranty claims.


