Introduction
This manual provides comprehensive instructions for the installation, operation, and maintenance of your ARTOCT ME82 LED 7 Smart Touchscreen Thermostat. This device is designed to efficiently control electric floor heating systems, offering advanced features such as app control and programmable 7-day routines. Please read this manual thoroughly before installation and use to ensure proper function and safety.
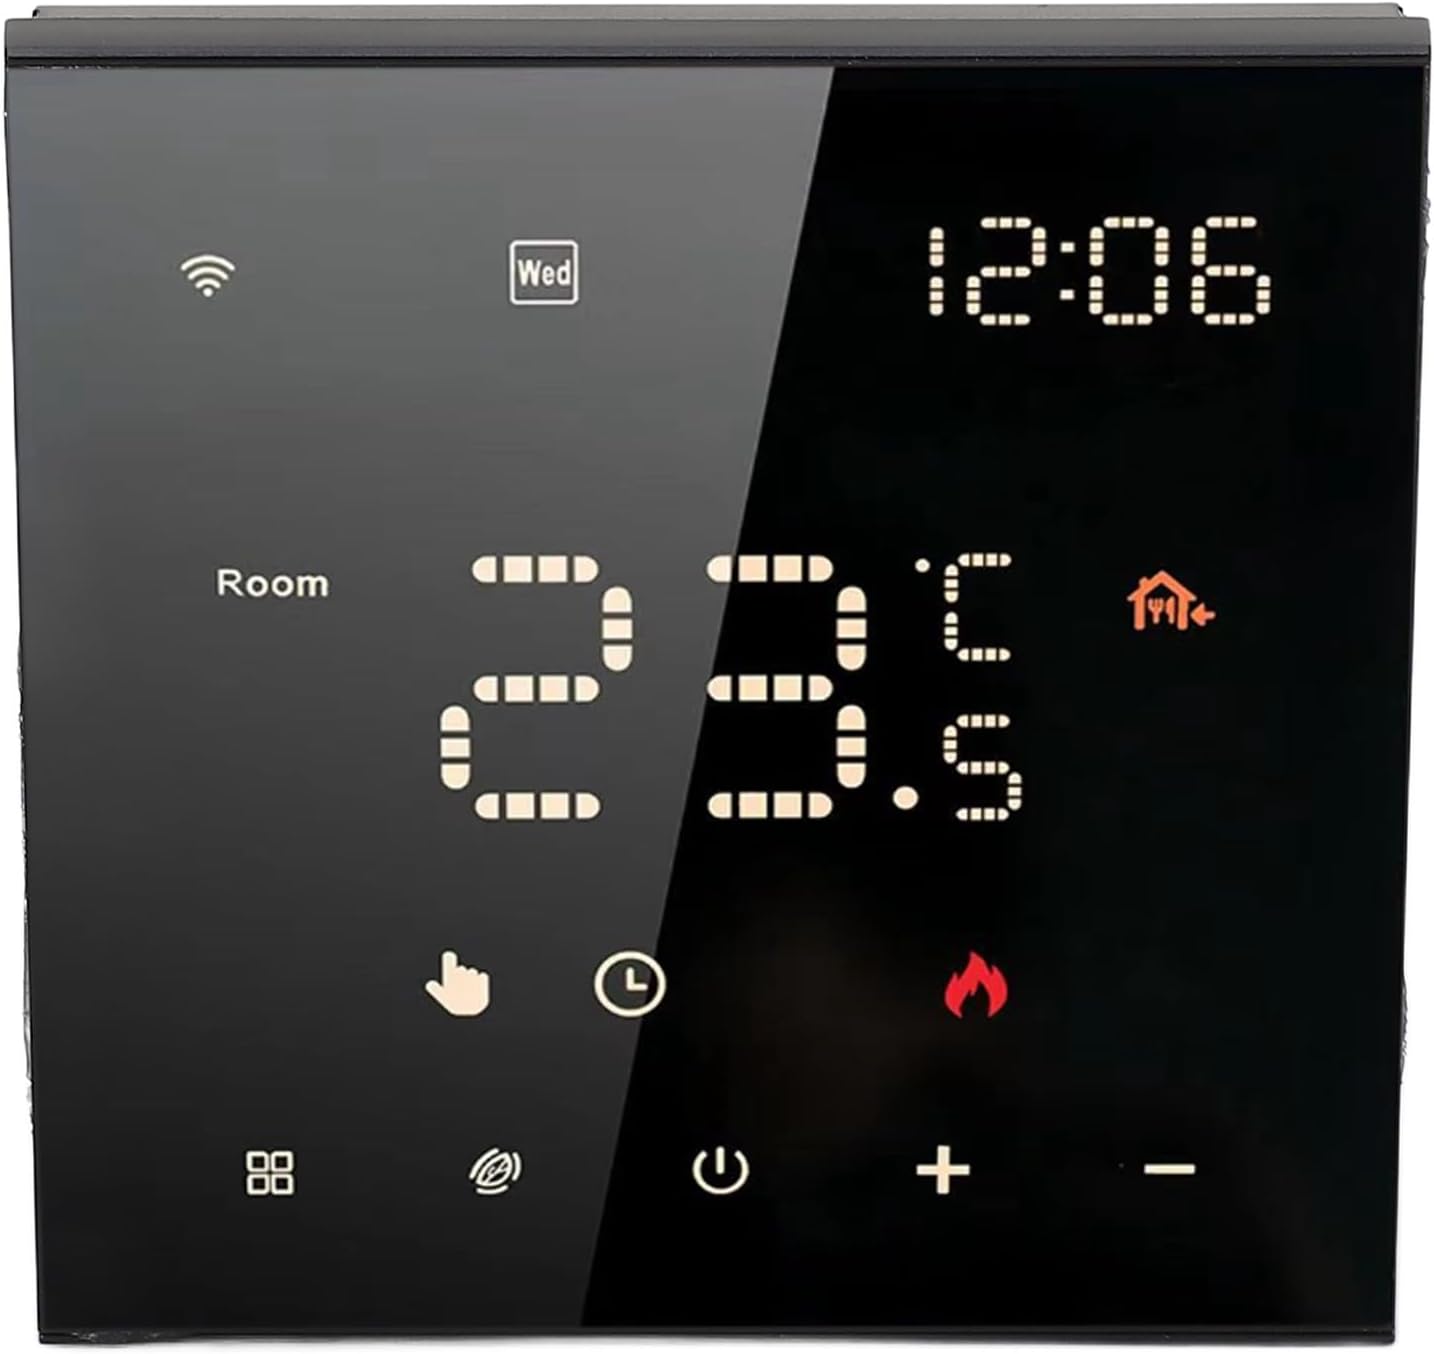
Figure 1: Front view of the ARTOCT ME82 LED 7 Smart Thermostat, displaying current temperature, time, and various icons.
Package Contents
- Thermostat Unit (ME82 LED 7)
- User Manual
- Mounting Screws (2)
- External Sensor Cable (for models with external sensor)

Figure 2: The thermostat unit shown alongside its accessories, including the external sensor cable and mounting screws.
Setup and Installation
Important Safety Information: Installation should only be performed by a qualified electrician. Ensure power is disconnected at the main circuit breaker before beginning any wiring work.
1. Wiring Diagram
Refer to the wiring diagram below for correct connection. This thermostat is designed for electric floor heating systems.

Figure 3: Detailed wiring diagram illustrating connections for the load, live wire, neutral wire, and sensor. Ensure all connections match your specific heating system and local electrical codes.
- Terminals 1 & 2: Connect to the heating load (e.g., electric floor heating mat).
- Terminal N: Connect to the Neutral wire (N).
- Terminal L: Connect to the Live wire (L).
- Sensor Terminals: Connect the external floor temperature sensor (if applicable).
2. Mounting
- Ensure the electrical box is properly installed in the wall.
- Connect the wires according to the wiring diagram (Figure 3).
- Secure the thermostat base to the electrical box using the provided screws.
- Attach the front panel of the thermostat to the base.

Figure 4: Rear view of the thermostat, highlighting the wiring terminals and model information. This view is crucial during installation for correct wire connections.

Figure 5: A close-up image of the wiring terminals on the back of the thermostat, showing the clear labeling for L, N, and sensor connections.
Operating Instructions
1. Display Overview

Figure 6: The thermostat display with key features numbered for easy identification. This includes icons for Wi-Fi, current time, day of the week, room temperature, and various mode indicators.
- Wi-Fi Icon: Indicates Wi-Fi connection status.
- Time/Day: Displays current time and day of the week.
- Room Temperature: Shows the current ambient temperature.
- Set Temperature: Displays the desired temperature.
- Heating Indicator: Flame icon indicates when heating is active.
- Mode Icons (1-6): Represent different programmed routines (Wake-up, Leave, Return(am), Leave(pm), Return(pm), Sleep).
2. Basic Operation
- Power On/Off: Press the power button (⏻) to turn the thermostat on or off.
- Adjust Temperature: Use the + and - buttons to manually adjust the desired temperature.
- Mode Selection: Press the mode button (often represented by a hand icon or similar) to cycle through available operating modes or programmed routines.

Figure 7: A hand interacting with the touchscreen interface of the thermostat, demonstrating its touch-sensitive controls for temperature adjustment and mode selection.
3. App Control and Smart Features
The ARTOCT ME82 LED 7 thermostat supports app control, allowing you to manage your heating system remotely.
- Download App: Search for the compatible smart home app (e.g., Tuya Smart or Smart Life) on your smartphone's app store.
- Pairing: Follow the in-app instructions to pair your thermostat with your Wi-Fi network. Ensure your Wi-Fi network is 2.4GHz.
- Remote Control: Once paired, you can adjust temperature, set schedules, and monitor your heating from anywhere using your phone.
- 7-Day Routines: Create personalized daily routines for different times (e.g., Wake-up, Leave, Return, Sleep) to automate temperature adjustments and optimize energy usage. This eliminates the need for constant manual adjustments.
The thermostat is designed to be compatible with most home heating systems. For specific compatibility checks, refer to the app or manufacturer's website.
Maintenance
- Cleaning: Wipe the thermostat screen and body with a soft, dry cloth. Do not use abrasive cleaners or solvents.
- Avoid Liquids: Prevent liquids from entering the thermostat to avoid damage.
- Regular Checks: Periodically check wiring connections for any signs of wear or looseness. Ensure power is off before inspection.
Troubleshooting
| Problem | Possible Cause | Solution |
|---|---|---|
| Thermostat not powering on. | No power supply; incorrect wiring. | Check circuit breaker. Verify wiring connections according to Figure 3. |
| Heating not activating. | Set temperature is below room temperature; wiring issue; thermostat in OFF mode. | Increase set temperature. Check wiring. Ensure thermostat is ON and in an active heating mode. |
| Wi-Fi connection unstable or failing. | Incorrect Wi-Fi password; router too far; 5GHz Wi-Fi network. | Re-enter Wi-Fi password. Move router closer or use a Wi-Fi extender. Ensure you are connecting to a 2.4GHz network. |
| Inaccurate temperature reading. | Sensor issue; thermostat placed near heat source/draft. | Check external sensor connection. Relocate thermostat if exposed to direct heat or cold drafts. |
Specifications
| Feature | Detail |
|---|---|
| Model | ME82LED7 |
| Material | Flame-retardant PC |
| Power Supply | 100-250VAC 50/60Hz |
| Ambient Temperature Range | 5 to 70 ℃ |
| Temperature Display Accuracy | ± 0.5 ℃ |
| Operating Environment Temperature | 0 ℃ to 50 ℃ |
| Protection Level | IP20 |
| Storage Environment Temperature | -10 ℃ to 60 ℃ |
| Dimensions | 10 x 10 x 7 cm |
| Weight | 265 g |
Warranty and Support
For warranty information, please refer to the purchase documentation or contact your retailer. ARTOCT products are typically covered by a limited warranty against manufacturing defects.
For technical support, troubleshooting assistance, or further inquiries, please contact ARTOCT customer service through their official website or the contact information provided with your purchase.
Please retain your proof of purchase for warranty claims.


