
1. Introduction
The MekedeTech M6 Plus is an advanced Android 13 car radio designed specifically for Hyundai I20 (2015-2018) Left Hand Drive vehicles. This head unit features a high-resolution 2000x1200 QLED IPS touch screen, an Octa-core UIS7862S 2.0GHz processor, 8GB RAM, and 128GB internal storage. It integrates modern connectivity options such as wireless CarPlay, Android Auto, Bluetooth 5.1, and 4G LTE support, enhancing your driving experience with advanced navigation, entertainment, and communication capabilities.
2. Setup and Installation
This Android stereo replacement kit is designed for plug-and-play installation in compatible Hyundai I20 models. While the system is designed for ease of installation, professional installation is recommended to ensure proper wiring and functionality.
2.1 Pre-Installation Steps
- Ensure the vehicle's ignition is off and disconnect the negative terminal of the car battery to prevent electrical shorts.
- Carefully remove the existing factory car radio and trim panels. Refer to your vehicle's service manual for specific instructions on panel removal.
2.2 Connecting the Head Unit
- Connect the provided wiring harness from the MekedeTech M6 Plus to the vehicle's factory wiring harness. Ensure all connections are secure.
- Connect the GPS antenna and 4G antenna to their respective ports on the head unit. Position the antennas in a location that provides clear signal reception, away from metal obstructions.
- If installing an ADAS DVR front camera or AHD rear camera, connect them according to their specific instructions.
- Carefully route all cables to avoid pinching or interference.
2.3 Mounting and Final Steps
- Mount the MekedeTech M6 Plus head unit into the dashboard opening, securing it with the appropriate brackets and screws.
- Reinstall any removed trim panels.
- Reconnect the negative terminal of the car battery.
- Turn on the vehicle's ignition and power on the head unit to test functionality.

3. Operating Instructions
3.1 Power On/Off and Basic Controls
Press and hold the power button (usually located on the front panel) to turn the unit on or off. Use the volume knob or on-screen controls to adjust audio levels. Screen brightness can be adjusted in the system settings.
3.2 Touch Screen Interface
The 2000x1200 QLED touch screen provides a responsive interface. Navigate through menus, launch applications, and control functions by tapping, swiping, and pinching gestures. The unit supports various UI display themes (UI08, UI22, UI29, UI34) which can be selected from settings to customize the appearance.

3.3 Wireless CarPlay and Android Auto
The M6 Plus supports both wireless CarPlay and Android Auto. To connect:
- Ensure Bluetooth and Wi-Fi are enabled on your smartphone.
- On the head unit, open the CarPlay or Android Auto application.
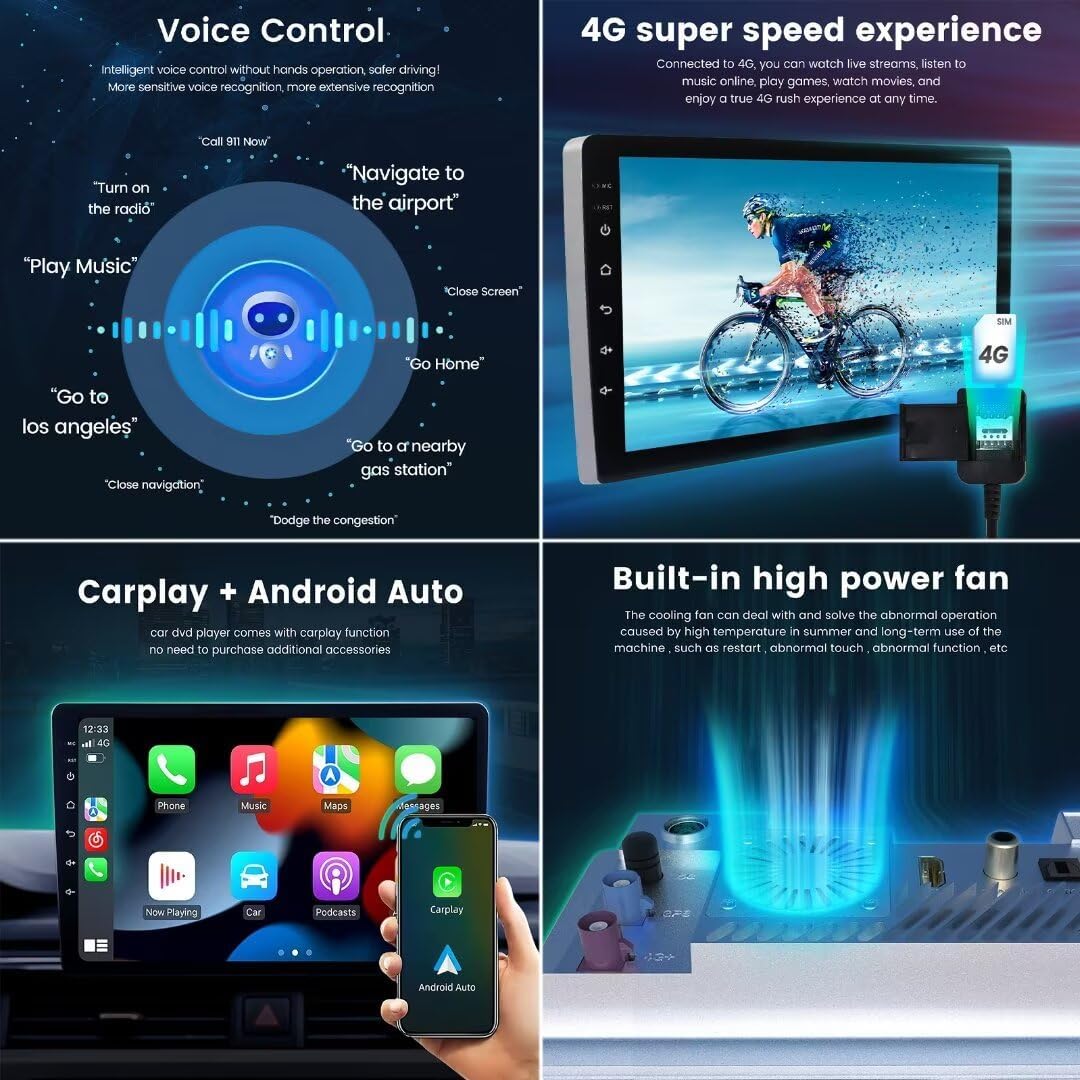
- Follow the on-screen prompts to pair your phone via Bluetooth. Once paired, the system will automatically establish a Wi-Fi connection for wireless CarPlay/Android Auto functionality.
3.4 Bluetooth 5.1 Connectivity
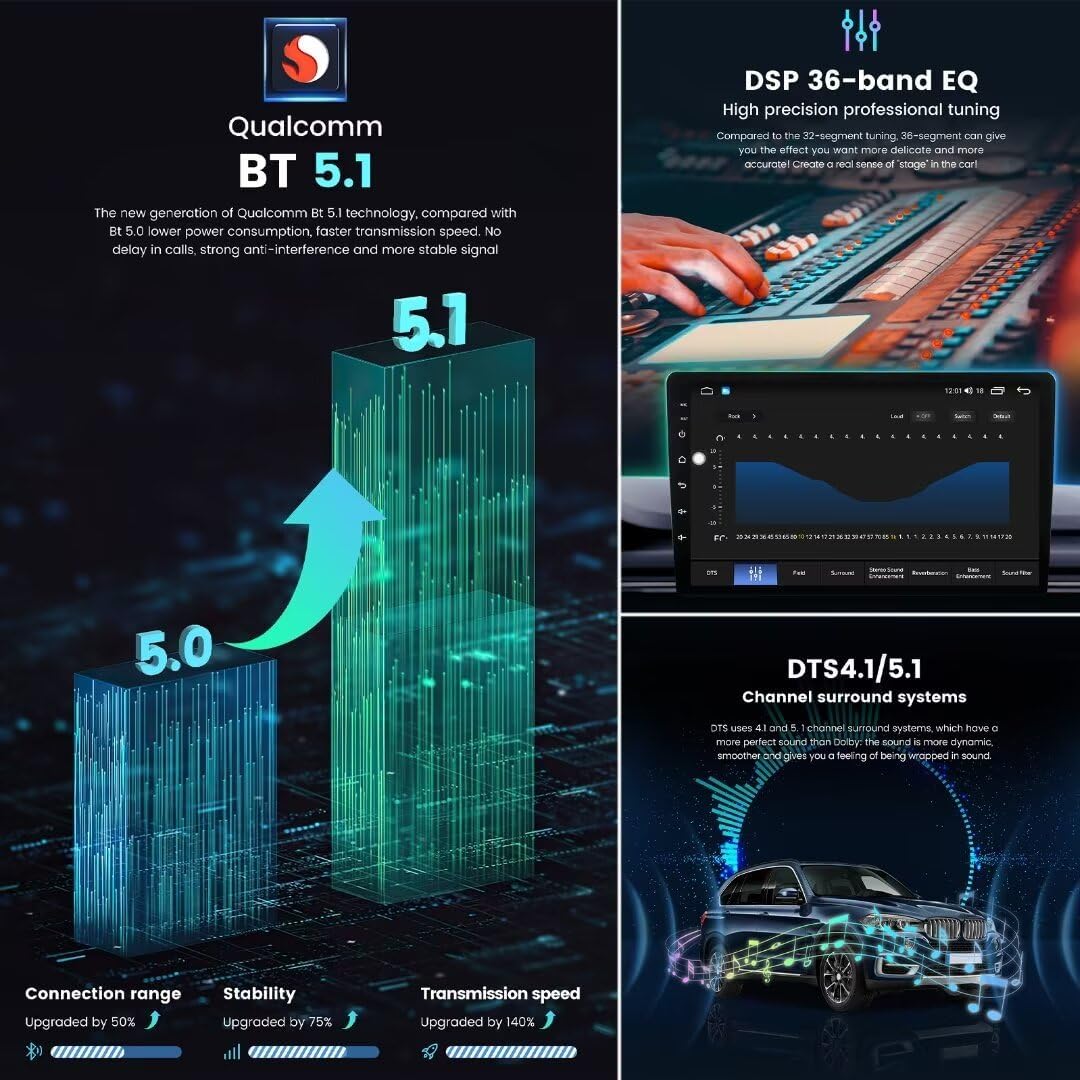
The unit features a Qualcomm 3031 Bluetooth 5.1 chip for stable and fast connections.
- Go to the Bluetooth settings on the head unit.
- Enable Bluetooth and search for available devices.
- Select your smartphone from the list and confirm the pairing code.
- Once connected, you can make hands-free calls, stream audio, and access phone contacts.
3.5 Radio (FM/AM RDS)
Access the Radio application to tune into FM or AM stations. The unit supports RDS (Radio Data System) for displaying station information. You can manually tune, auto-scan, and save your favorite stations.

3.6 Voice Control
The M6 Plus supports intelligent voice control for hands-free operation. Activate voice commands by saying a designated wake word or pressing a voice control button (if available). You can use commands for navigation, music playback, calls, and system functions.
3.7 Split Screen Functionality
The split-screen feature allows you to run two applications simultaneously, such as navigation and music playback. To activate, drag an app icon to one side of the screen or use the dedicated split-screen button in the recent apps menu.
3.8 GPS Navigation
The unit comes with a Fakra GPS antenna for accurate positioning. You can use pre-installed navigation apps or download others from the Google Play Store. Ensure the GPS antenna is properly installed for optimal signal reception.

3.9 4G LTE Connectivity
Insert a compatible 4G SIM card into the designated slot to enable mobile data connectivity. This allows for online navigation, streaming, and app downloads directly on the head unit.
4. Features Overview
- High-Resolution QLED Screen: 2000x1200 QLED full-fit screen provides excellent display effect under sunlight with high light transmittance, reducing light reflection by 40%.
- Powerful Processor: Equipped with a UIS7862S 2.0GHz Octa-core CPU (2 cores ARM Cortex A75 + 6 cores ARM Cortex A55) for fast and efficient performance.
- Advanced Audio Processing: Features DSP 36-band EQ for precise audio tuning and DTS 4.1/5.1 channel surround sound systems for an immersive audio experience.
- Enhanced Cooling: Built-in powerful cooling fan to manage heat and ensure stable long-term operation.
- Optimized Antennas: Improved Fakra GPS Antenna and Fakra 4G Antenna for reliable signal reception.
- Expandable Connectivity: Supports ADAS DVR front camera and AHD rear camera for enhanced safety features.
- Customizable Interface: Allows customization of the main interface and icon positions for a personalized user experience.
- Multi-language Support: Supports various languages including English, German, French, Spanish, Italian, Portuguese, Russian, Dutch, Polish, Japanese, Simplified and Traditional Chinese, Arabic, etc.

5. Maintenance
5.1 Screen Cleaning
To clean the touch screen, power off the unit and gently wipe it with a soft, lint-free cloth. For stubborn smudges, slightly dampen the cloth with a screen cleaner solution designed for electronics. Avoid using harsh chemicals or abrasive materials.
5.2 Software Updates
Periodically check for software updates provided by MekedeTech. Updates can improve performance, add new features, and fix bugs. Follow the instructions provided with the update package for proper installation.
5.3 Cooling Fan
The unit includes a built-in cooling fan. Ensure that the ventilation openings are not obstructed to allow for proper airflow and prevent overheating.
6. Troubleshooting
| Problem | Possible Cause | Solution |
|---|---|---|
| Unit does not power on | Loose power connection, blown fuse, vehicle battery issue. | Check all power connections. Verify vehicle battery voltage. Check the unit's fuse and the vehicle's fuse box. |
| No sound | Volume too low, mute activated, speaker wiring issue, incorrect audio output settings. | Increase volume. Check if mute is active. Verify speaker connections. Check audio settings in the system. |
| GPS signal loss or inaccuracy | GPS antenna improperly installed or obstructed, poor satellite reception. | Ensure GPS antenna is securely connected and placed in a clear line of sight to the sky. Move the vehicle to an open area. |
| Bluetooth connection issues | Phone not discoverable, incorrect pairing, interference. | Ensure Bluetooth is enabled on both devices. Delete previous pairings and re-pair. Restart both devices. |
| CarPlay/Android Auto not connecting | Wi-Fi/Bluetooth issues, phone software outdated, app permissions. | Verify Wi-Fi and Bluetooth are active. Update phone OS and CarPlay/Android Auto apps. Check app permissions on your phone. |
| Touch screen unresponsive | System freeze, temporary software glitch. | Restart the unit. If the issue persists, perform a factory reset (note: this will erase all user data). |
7. Specifications
| Feature | Specification |
|---|---|
| Model Name | M6Plus8+128G |
| Operating System | Android 13 |
| CPU | UIS7862S 2.0GHz 8-core (2 cores ARM Cortex A75 + 6 cores ARM Cortex A55) |
| Memory (RAM) | 8GB |
| Storage (ROM) | 128GB |
| Display Resolution | 2000x1200 |
| Display Type | QLED IPS Touch Screen |
| Bluetooth Version | BT 5.1 (Qualcomm 3031 chip) |
| Wi-Fi | 5GHz Wi-Fi Support |
| Connectivity Technology | Wireless (4G LTE, Wi-Fi, Bluetooth) |
| Audio Processor | DSP 36-band EQ, DTS 4.1/5.1 |
| Power Amplifier IC | TDA7850/7851 |
| Radio IC | TDA7708 (Supports RDS) |
| Special Features | Wireless CarPlay, Wired Android Auto, Voice Control, Built-in Cooling Fan, Fakra GPS/4G Antennas, ADAS DVR/AHD Camera Support |
| Human Interface Input | Buttons, Keyboard, Microphone, Touchscreen |
8. Warranty Information
The MekedeTech M6 Plus car radio comes with a 1 Year Warranty from the date of purchase. This warranty covers manufacturing defects and malfunctions under normal use. Please retain your proof of purchase for warranty claims. The warranty does not cover damage caused by improper installation, misuse, accidents, or unauthorized modifications.
9. Support
For technical assistance, troubleshooting beyond this manual, or warranty inquiries, please contact MekedeTech customer service. Refer to the contact information provided with your product packaging or visit the official MekedeTech website for support resources.
