
1. Introduction
This manual provides detailed instructions for the installation, operation, and maintenance of your MekedeTech M7 Plus Android 13 Car Radio. Please read this manual thoroughly before using the product to ensure proper functionality and safety. This unit is specifically designed for Hyundai i20 models manufactured between 2015 and 2018, for right-hand drive vehicles only.

Figure 1: MekedeTech M7 Plus Android 13 Car Radio. This image displays the main head unit with its 9.5-inch QLED touchscreen, showing a navigation map and media player interface.
2. Setup and Installation
The MekedeTech M7 Plus is designed for a plug-and-play installation in compatible Hyundai i20 vehicles. Professional installation is recommended to ensure correct wiring and secure mounting.
2.1 Compatibility
- Vehicle Model: Hyundai i20
- Model Years: 2015, 2016, 2017, 2018
- Drive Type: Right Hand Drive (RHD) only
2.2 Pre-Installation Check
Before beginning installation, ensure all components are present and undamaged. Verify the vehicle's existing wiring harness matches the provided connectors.
2.3 Installation Steps (General Guide)
- Disconnect Battery: For safety, disconnect the vehicle's negative battery terminal.
- Remove Existing Head Unit: Carefully remove the factory car radio and dashboard trim. Refer to your vehicle's service manual for specific instructions.
- Connect Wiring Harness: Connect the provided wiring harness to the vehicle's factory harness. Ensure all connections are secure.
- Connect Antennas: Attach the Fakra GPS Antenna and Fakra 4G Antenna to their respective ports on the M7 Plus unit. Position antennas in locations with clear signal reception.
- Mount the Unit: Securely mount the M7 Plus unit into the dashboard opening.
- Reconnect Battery: Reconnect the vehicle's negative battery terminal.
- Test Functionality: Power on the unit and test all functions (radio, navigation, Bluetooth, etc.) before reassembling the dashboard trim.

Figure 2: Installation comparison. This image shows the dashboard of a Hyundai i20 before and after the installation of the MekedeTech M7 Plus car radio, demonstrating the integrated fit.
3. Operating Instructions
The MekedeTech M7 Plus operates on Android 13, offering a user-friendly interface and a wide range of features.
3.1 Power On/Off
Press and hold the power button (usually located on the front panel or side) to turn the unit on or off. A short press typically mutes audio or puts the screen into standby mode.
3.2 Touchscreen Navigation
The 9.5-inch QLED touchscreen supports multi-touch gestures. Swipe, tap, and pinch to navigate menus, applications, and maps.
3.3 Wireless CarPlay & Android Auto
Connect your compatible smartphone wirelessly to access navigation, music, calls, and messages directly on the car radio display.
- Ensure Bluetooth and Wi-Fi are enabled on your smartphone.
- On the M7 Plus, open the CarPlay or Android Auto application.
- Follow the on-screen prompts to pair your device.
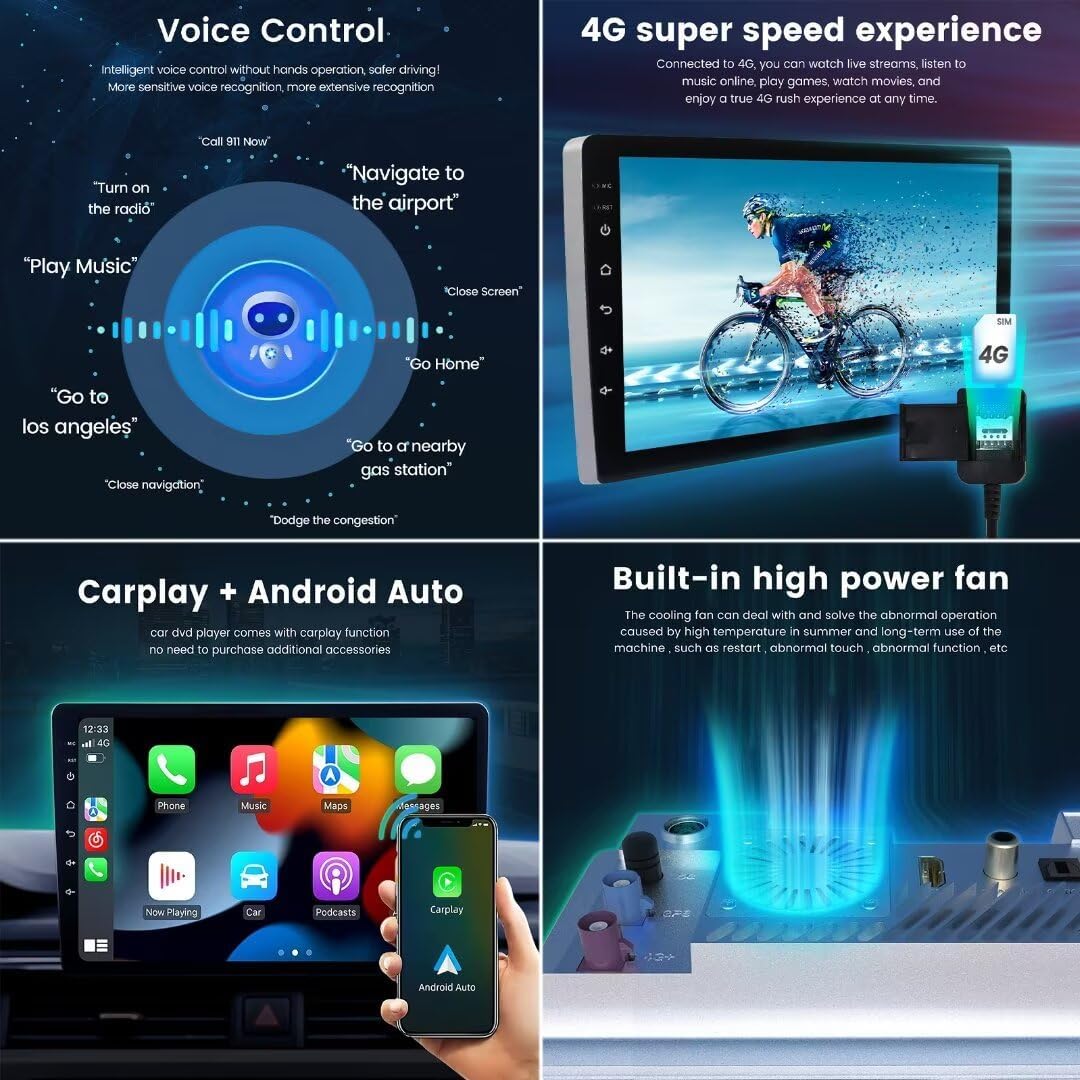
Figure 3: Wireless CarPlay and Android Auto. This image shows the user interface for both Apple CarPlay and Android Auto running on the M7 Plus screen, displaying common apps like Phone, Music, Maps, and Messages.
3.4 Bluetooth 5.1 Connectivity
The unit features a Qualcomm 3031 chip for Bluetooth 5.1, providing stable and fast connections for hands-free calling and audio streaming.
- Go to the Bluetooth settings on the M7 Plus.
- Enable Bluetooth on your phone and search for available devices.
- Select the M7 Plus from the list and confirm the pairing code.
3.5 Voice Control
The M7 Plus supports intelligent voice control for hands-free operation, enhancing driving safety and convenience.
- Activate voice control by saying a designated wake-up phrase or pressing the voice command button.
- Issue commands such as "Navigate to [destination]", "Play music", "Call [contact]", or "Turn on the radio".

Figure 4: Voice Control and 4G Connectivity. This image illustrates the voice control functionality with example commands and the 4G network connectivity for online services.
3.6 Radio (FM/AM RDS)
Access FM/AM radio stations with RDS support for station information.
- Open the Radio application.
- Use the scan function to find available stations or manually tune.
- Save favorite stations for quick access.

Figure 5: Radio, Split Screen, and Language Settings. This image displays the FM/AM radio interface, the split-screen multitasking feature, and the multi-language support settings.
3.7 GPS Navigation
The unit features accurate GPS positioning with support for GLONASS and BDS, providing real-time traffic conditions and precise navigation.
- Open the Navigation application.
- Enter your destination or select from saved locations.
- Follow the on-screen and voice prompts for directions.

Figure 6: GPS Navigation and Internal Board Design. This image highlights the accurate GPS positioning system with a map display and provides a view of the specially designed internal M6 Pro board.
3.8 Audio Settings (DSP, EQ, DTS)
Customize your audio experience with the built-in Digital Sound Processor (DSP), 36-band equalizer, and DTS 4.1/5.1 channel surround sound systems.
- Access the Sound or Audio settings menu.
- Adjust the 36-band equalizer for precise sound tuning.
- Utilize features like low-pass filter, tone compensation, balanced mode, and surround sound mode.
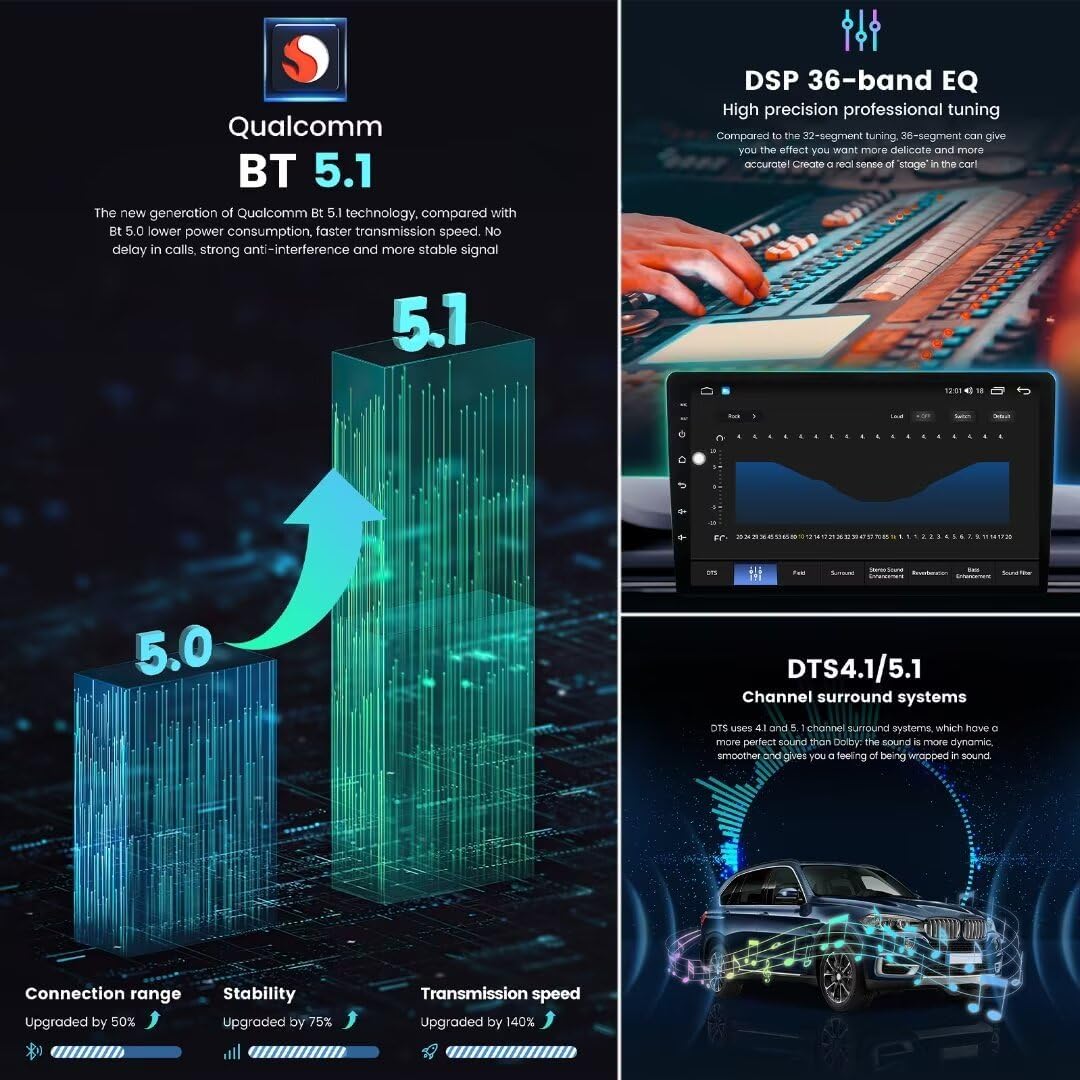
Figure 7: DSP 36-band EQ and DTS 4.1/5.1 Surround Sound. This image details the high-precision professional tuning capabilities of the 36-band equalizer and the immersive DTS 4.1/5.1 channel surround sound system.
3.9 Split Screen Functionality
The split-screen feature allows you to run two applications simultaneously, such as navigation and music, for enhanced multitasking.
- Open an application.
- Long-press the recent apps button or drag an app to one side of the screen to activate split-screen mode.
- Select a second application to fill the other half of the screen.
4. Maintenance
Proper maintenance ensures the longevity and optimal performance of your MekedeTech M7 Plus car radio.
4.1 Screen Cleaning
Use a soft, lint-free cloth slightly dampened with water or a screen-cleaning solution to gently wipe the QLED touchscreen. Avoid abrasive materials or harsh chemicals that could damage the screen surface.
4.2 Software Updates
Periodically check for software updates through the unit's settings menu to ensure you have the latest features and performance enhancements. Connect to a stable Wi-Fi network for updates.
4.3 Cooling System
The unit features a built-in powerful cooling fan to manage internal temperatures. Ensure that the ventilation areas around the unit are not obstructed to allow for proper airflow.
5. Troubleshooting
If you encounter issues with your M7 Plus unit, refer to the following common troubleshooting steps.
- No Power:
Check all power connections and fuses. Ensure the vehicle's battery is charged. If the unit still does not power on, consult a professional installer. - No Sound:
Verify that the volume is not muted or set to zero. Check speaker connections. Ensure the correct audio source is selected. - GPS Signal Loss:
Ensure the GPS antenna is securely connected and positioned in an area with a clear view of the sky. Move the vehicle to an open area if signal is weak. - Bluetooth Connection Issues:
Ensure Bluetooth is enabled on both the M7 Plus and your device. Try unpairing and re-pairing the device. Restart both devices if necessary. - Touchscreen Unresponsive:
Restart the unit. If the issue persists, a factory reset might be necessary (note: this will erase all user data). - System Slow or Unresponsive:
Close unnecessary background applications. Clear cache from apps. If the issue persists, consider a factory reset.
6. Specifications
Detailed technical specifications for the MekedeTech M7 Plus Android 13 Car Radio.
| Feature | Specification |
|---|---|
| Operating System | Android 13 |
| CPU | UIS7862S 2.0GHz Octa-core (2x ARM Cortex A75 + 6x ARM Cortex A55) |
| Screen | 9.5-inch 2000x1200 QLED IPS Touch Screen |
| Memory (RAM+ROM) | 6GB RAM + 128GB Storage (as per current model) |
| Connectivity | 4G LTE, 5GHz WiFi |
| Bluetooth | BT 5.1 (Qualcomm 3031 chip) |
| Power Amplifier | TDA7850/7851 |
| Radio IC | TDA7708 (with RDS) |
| Audio Processing | DSP, DTS 4.1/5.1, 36-band Equalizer |
| Navigation | GPS, GLONASS, BDS |
| Smartphone Integration | Wireless CarPlay, Android Auto |
| Voice Control | Supported |
| Cooling | Built-in powerful cooling fan |
| Antennas | Improved Fakra GPS Antenna, Fakra 4G Antenna |
| Compatible Devices | Mobile Phone |
7. Warranty and Support
For warranty information and technical support, please refer to the documentation provided with your purchase or contact the seller directly. Keep your proof of purchase for warranty claims.