1. Introduction
The Pet Deluxe Automatic Chicken Coop Door (Model SPD-01139) is designed to provide automated access for poultry, enhancing convenience and security for your flock. This device features solar power, a built-in rechargeable battery, and multiple operating modes including timer and light sensor functions. Its robust construction ensures reliable performance in various weather conditions.
2. Safety Information
- Installation: Do not over-tighten screws during installation to prevent frame distortion, which can impede door operation.
- Anti-Pinch Feature: The door is equipped with anti-pinch technology. If pressure is detected during closing, the door will stop and reopen. An alarm will sound if the door does not fully close.
- Predator Protection: A flashing red light and siren activate if predators attempt to force the door open.
- Emergency Override: An emergency button is included to manually override the system during power outages or malfunctions, ensuring immediate access or closure.
3. Product Components
Verify that all components are present before beginning installation.
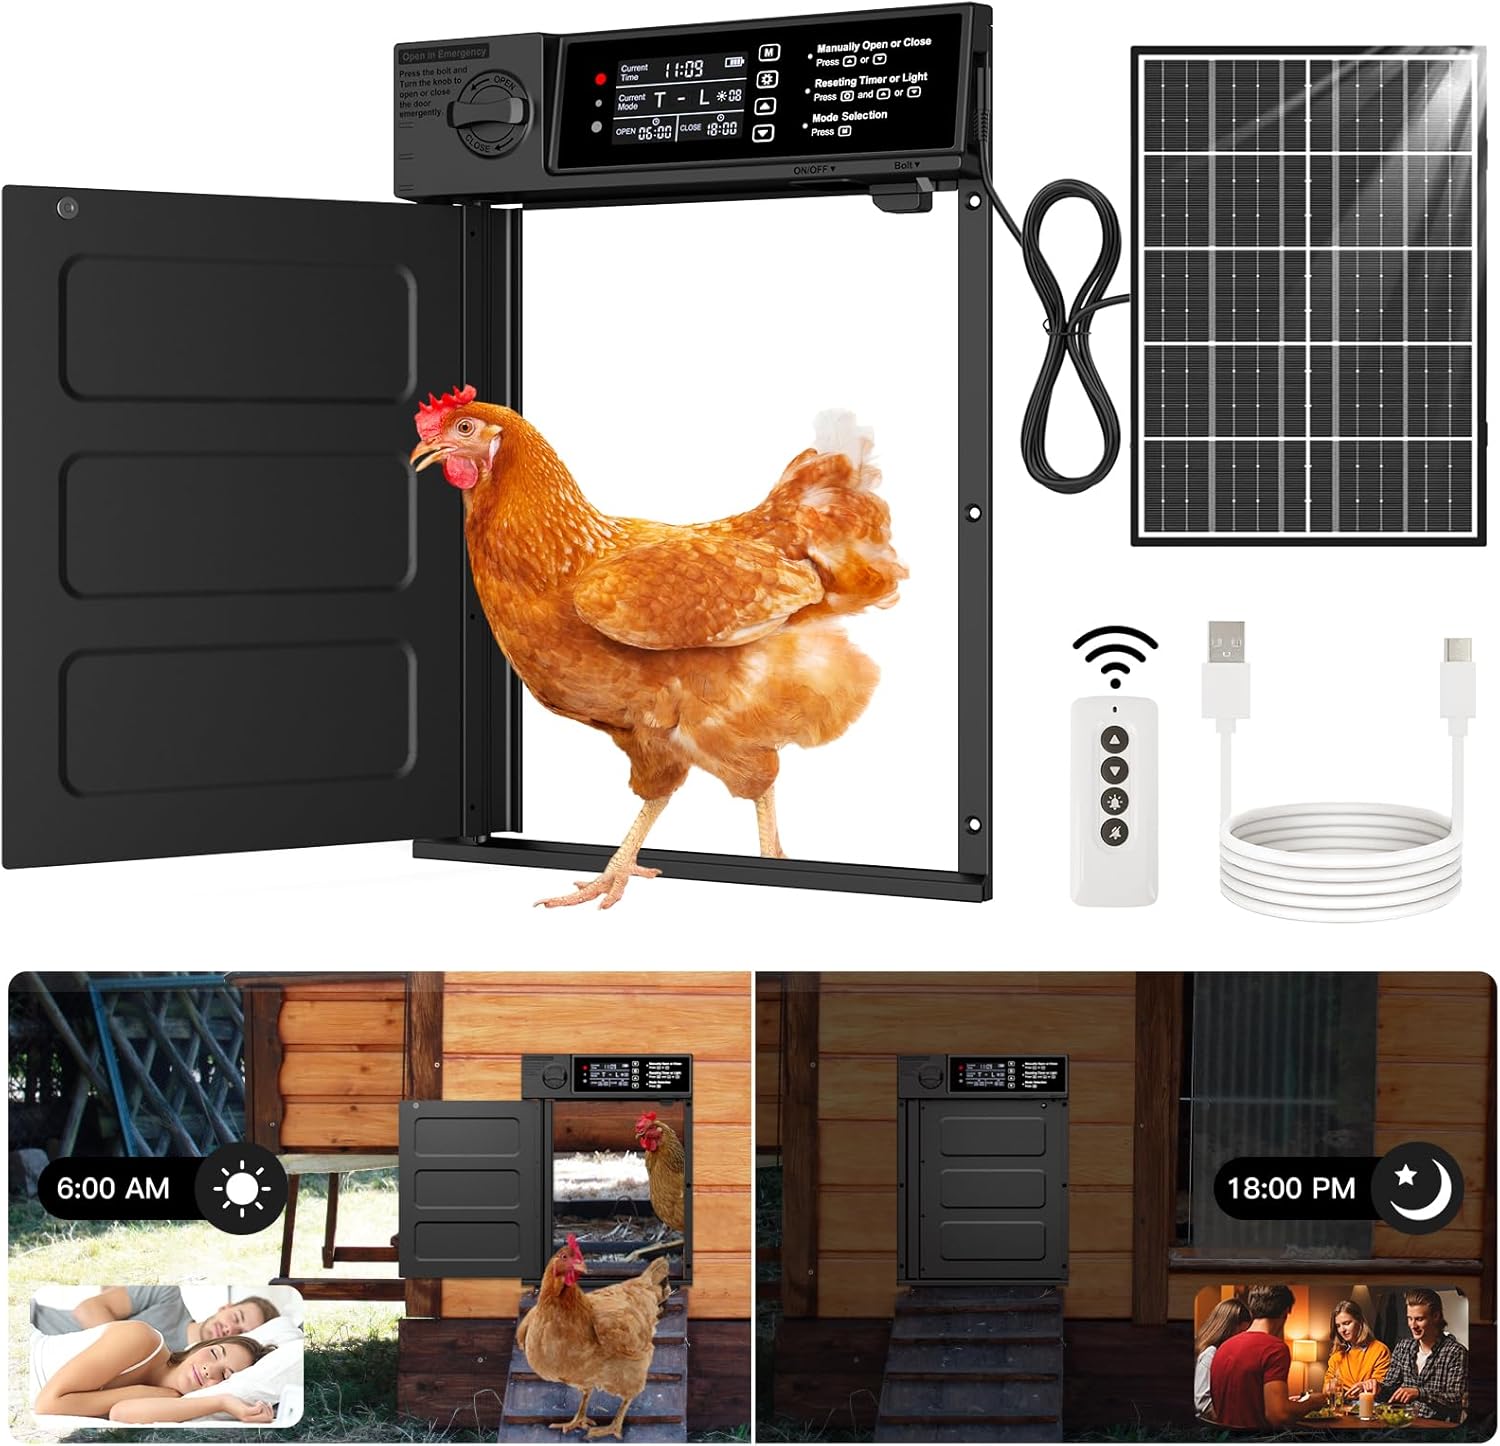
- 1 x Automatic Chicken Door Unit
- 1 x 7W Solar Panel
- 1 x Remote Control
- 1 x Type-C Power Charging Cable
- 8 x Screws for installation
4. Setup and Installation
Installation of the Pet Deluxe Automatic Chicken Coop Door is designed to be straightforward. Follow these steps for proper setup:
- Prepare the Opening: Measure and cut an opening in your chicken coop wall. The door entrance size is 11.4 inches high by 9 inches wide. Ensure the opening is clean and free of obstructions.
- Mount the Door Unit: Position the automatic door unit over the prepared opening. Use the provided screws to securely fasten the unit to the coop wall. Ensure the unit is level and that the door can pivot freely without obstruction. Remember not to over-tighten the screws.
- Install the Solar Panel: Choose a location for the 7W solar panel where it will receive maximum direct sunlight throughout the day. Mount the solar panel securely using appropriate hardware (not included for panel mounting). Connect the solar panel cable to the charging port on the automatic door unit.
- Initial Charge (Optional but Recommended): For optimal initial performance, connect the door unit to a power source using the included Type-C charging cable to fully charge the built-in 4000mAh battery before relying solely on solar power.

5. Operating Instructions
The automatic chicken coop door offers multiple operating modes for flexible control.
5.1 Powering and Charging
The unit is powered by a built-in 4000mAh rechargeable battery, primarily charged by the 7W solar panel. A Type-C USB port is also available for charging, especially useful during prolonged cloudy periods or for initial setup.
5.2 Operating Modes
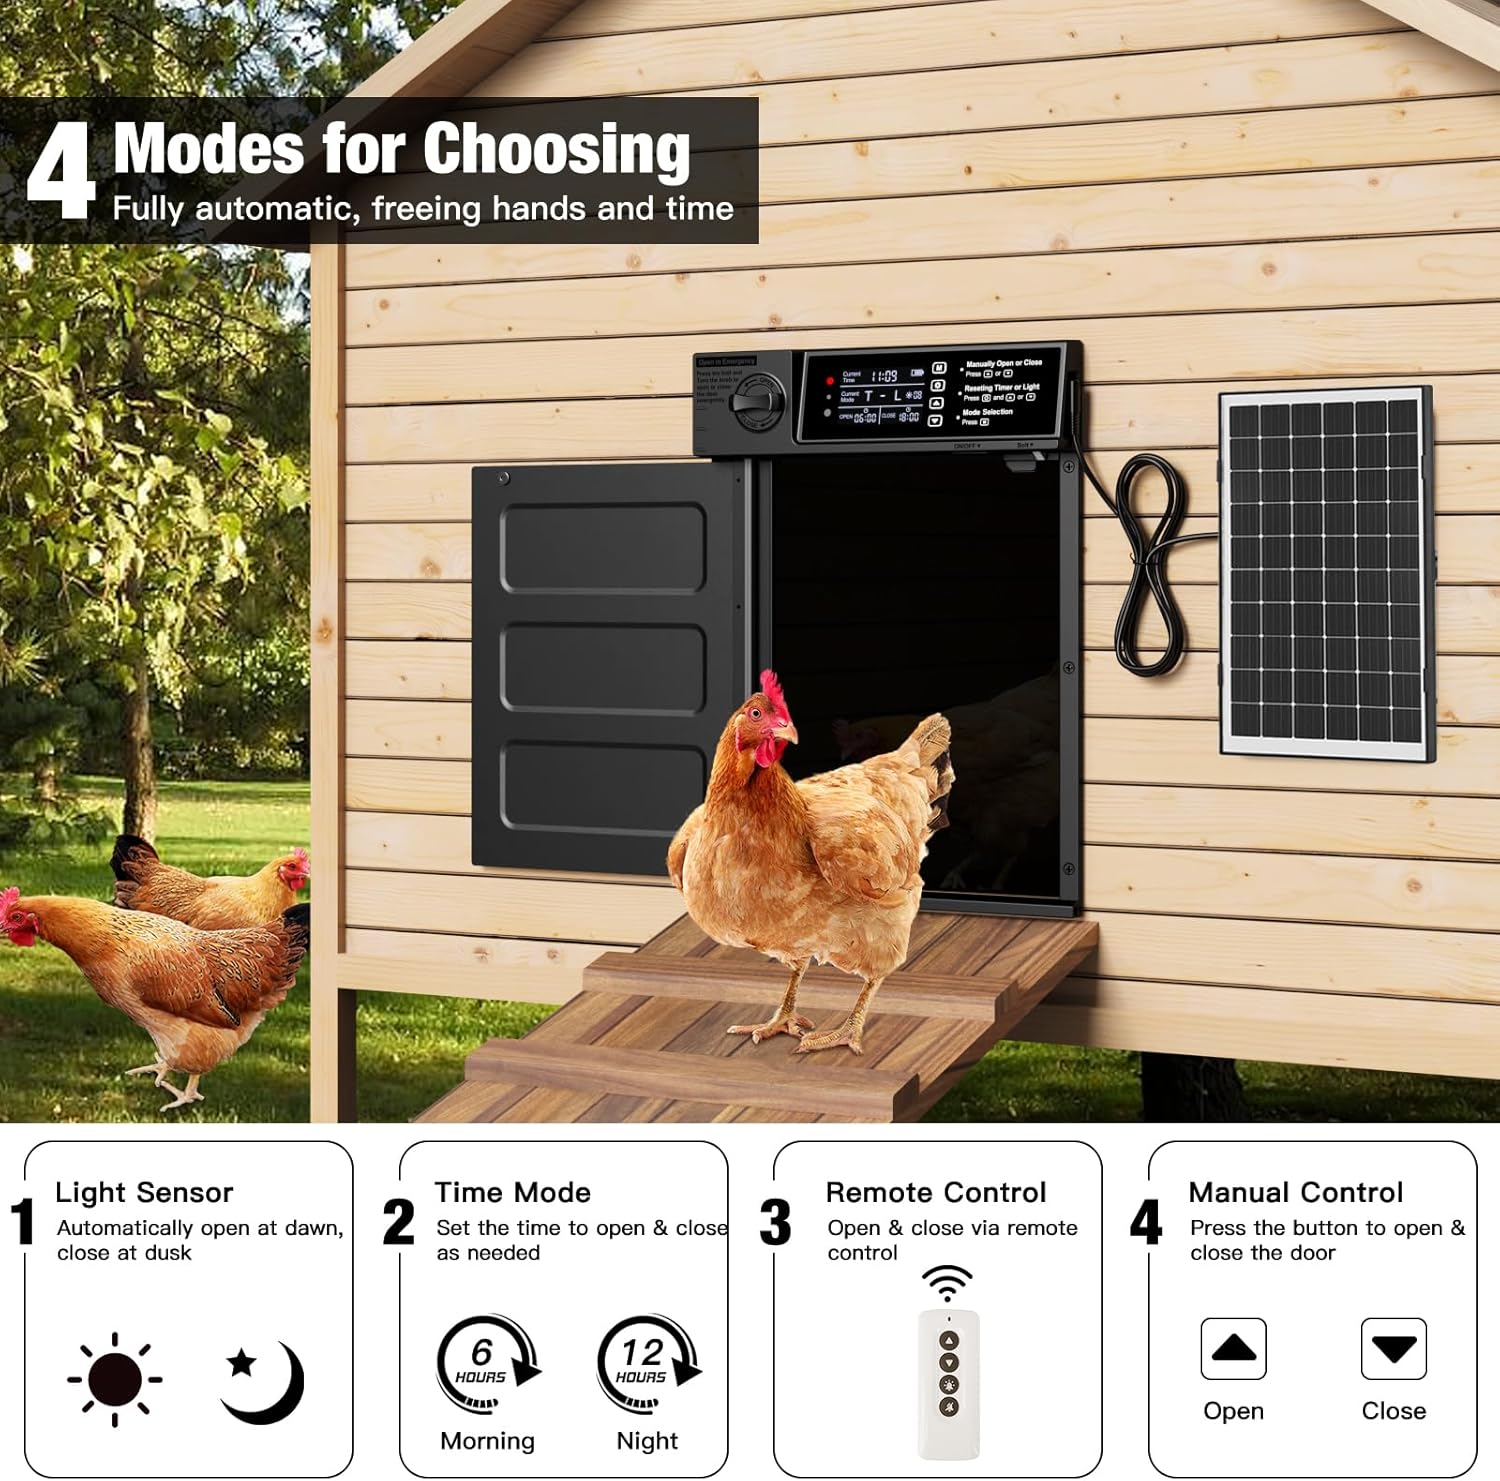
Choose from four modes to automate your coop door:
- Light Sensor Mode: The door automatically opens at dawn and closes at dusk based on ambient light levels.
- Timer Mode: Set specific opening and closing times.
- Remote Control: Use the included remote to open or close the door manually from a distance (up to 49ft).
- Manual Control: Use the buttons on the control panel to open or close the door directly.

5.3 Setting Time and Light Sensitivity
The control panel allows for precise adjustments:
- Current Local Time: Set the current time for accurate timer operations.
- Current Mode: Select between Time, Light, or combined modes.
- Open/Close Times: In Timer Mode, set the desired opening and closing times.
- Light Sensitivity Value: Adjust the light sensor's sensitivity for opening and closing. The default values are 60 for opening and 30 for closing (these values represent relative light intensity, not minutes).

5.4 Emergency Override
In case of power failure or system malfunction, press the bolt and turn the knob on the control panel to manually open or close the door. This ensures your flock's safety at all times.
6. Maintenance
Regular maintenance ensures the longevity and optimal performance of your automatic chicken coop door.
- Cleaning: Periodically clean the door unit, especially the moving parts and sensors, to prevent debris buildup that could hinder operation. Use a soft, damp cloth.
- Solar Panel: Keep the solar panel clean from dust, dirt, and snow to ensure efficient charging.
- Battery: While the battery is designed for durability, ensure it receives adequate charge, especially during winter months or prolonged cloudy periods, by utilizing the Type-C charging option if necessary.
- Inspection: Regularly inspect the door for any signs of wear, loose screws, or obstructions.
7. Troubleshooting
If you encounter issues with your automatic chicken coop door, refer to the following common problems and solutions:
- Door Not Opening/Closing:
- Check battery level. Recharge via solar panel or Type-C cable if low.
- Verify operating mode settings (Timer, Light Sensor). Ensure times or light sensitivity are correctly configured.
- Inspect for physical obstructions around the door's path.
- Ensure screws are not over-tightened, causing frame distortion.
- Anti-Pinch Alarm Sounds Frequently:
- Check for debris or obstructions in the door's closing path.
- Ensure the door frame is not distorted, allowing the door to close smoothly.
- Solar Panel Not Charging:
- Ensure the solar panel is clean and free of dirt, snow, or leaves.
- Verify the solar panel is positioned to receive maximum direct sunlight.
- Check the connection cable between the solar panel and the door unit.
- Remote Control Not Working:
- Ensure the remote control has working batteries.
- Confirm you are within the effective range (up to 49ft).
- Gearbox Issues: In rare cases, internal gearbox components may experience wear. If the door swings freely or the motor runs without moving the door, contact customer support.
8. Specifications
| Feature | Detail |
|---|---|
| Model Name | SPD-01139 |
| Brand | Pet Deluxe |
| Item Weight | 3.98 pounds |
| Product Dimensions (LxWxH) | 10.43 x 2.76 x 13.78 inches |
| Door Entrance Size (HxW) | 11.4 x 9 inches |
| Material | Acrylonitrile Butadiene Styrene (ABS), Aluminum |
| Solar Panel Power | 7W |
| Battery Capacity | 4000mAh (Built-in, Rechargeable) |
| Protection Level | IP45 (Waterproof, Snowproof, Dustproof) |
| Operating Temperature | -26°C to 60°C (-14.8°F to 140°F) |
| Included Components | Automatic Chicken Door, 7W Solar Panel, Remote Control, Type-C Charging Cable, Screws |
| Target Audience | Chicken, Ducks, Geese, Rabbits, Turkeys |
9. Warranty and Support
Pet Deluxe offers a 90-day warranty and a 30-day money-back guarantee for this product. For technical support, warranty claims, or any questions regarding the operation of your automatic chicken coop door, please refer to the contact information provided with your purchase or visit the official Pet Deluxe website.


