1. Introduction
This manual provides detailed instructions for the safe and effective use of your Zoom H1 XLR Handy Recorder. The H1 XLR is a portable audio recording device designed for musicians, podcasters, filmmakers, and content creators, featuring 32-bit float recording technology and versatile input options. Please read this manual thoroughly before operating the device to ensure proper functionality and to prevent damage.
2. Product Overview
2.1. Components and Controls
Familiarize yourself with the various parts and controls of your H1 XLR recorder.

Figure 2.1: Front View of Zoom H1 XLR
This image displays the front of the Zoom H1 XLR, highlighting the two XLR/TRS combo input jacks at the top, the monochrome OLED display in the center, and the main control buttons including Record, Play/Pause, Stop, Menu, and navigation buttons.
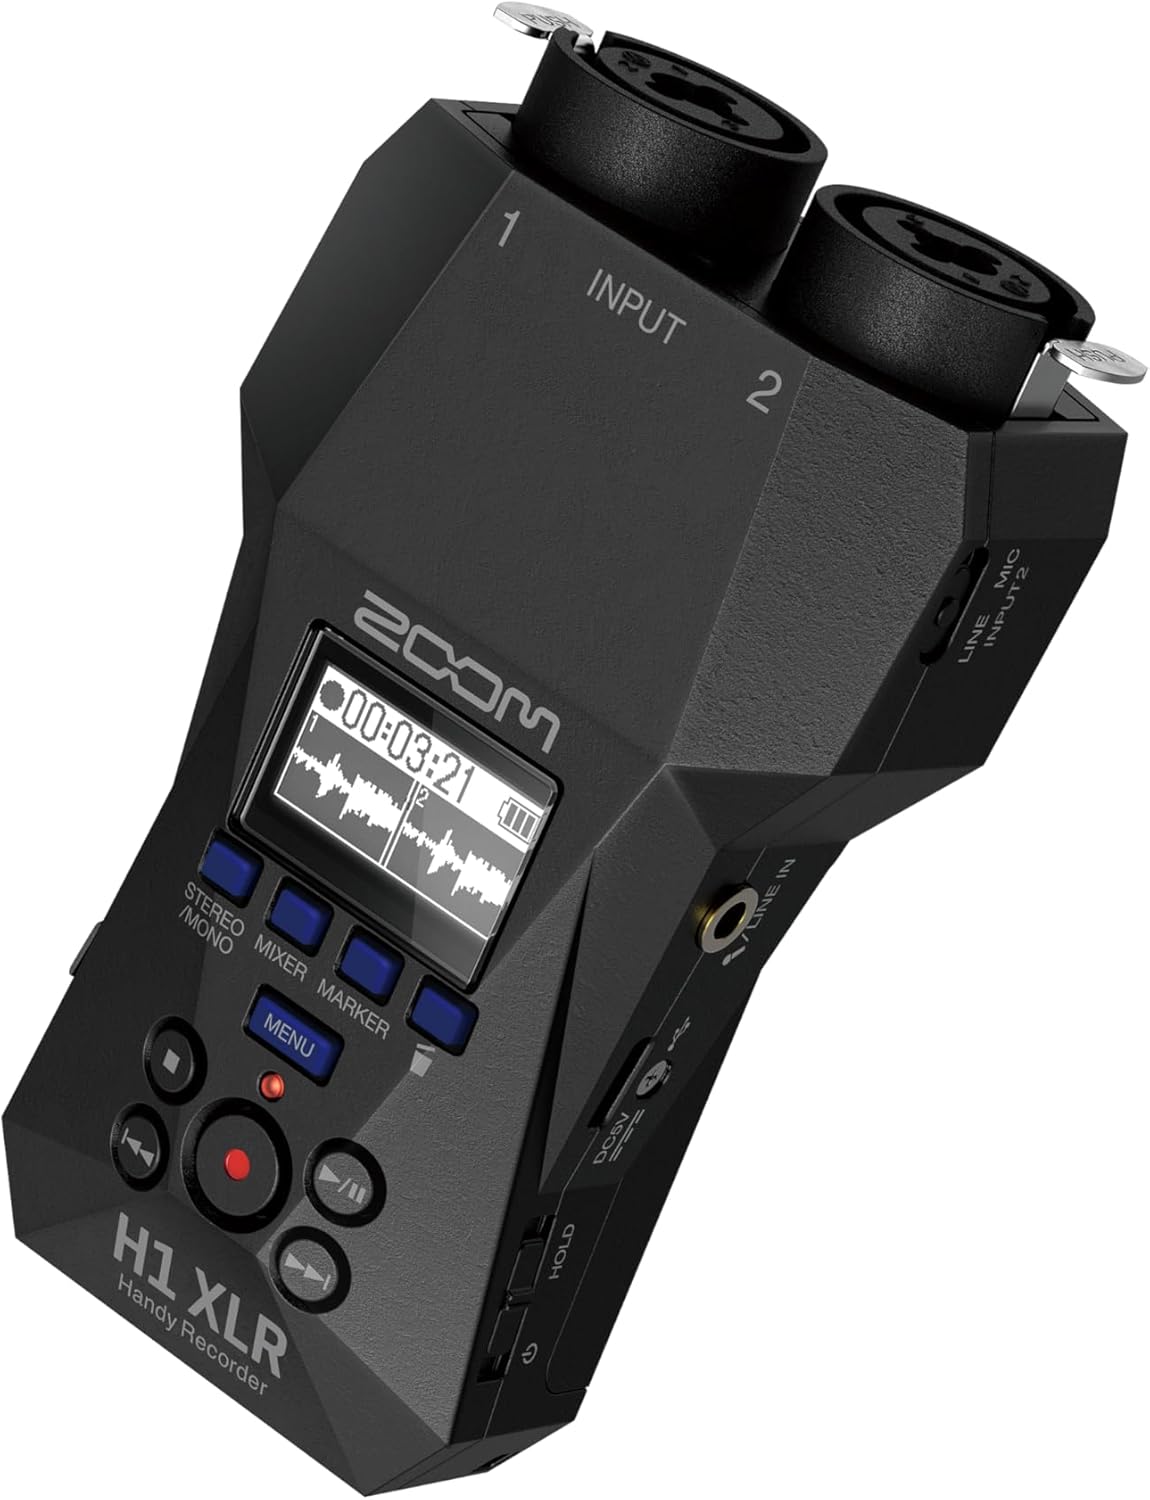
Figure 2.2: Angled View with Side Controls
This angled view of the H1 XLR shows the side panel, which includes the LINE IN/MIC IN switch, gain adjustment knobs for inputs 1 and 2, the USB-C port, and the power/hold switch.
- XLR/TRS Combo Inputs (1 & 2): Connect XLR microphones or 1/4" TRS line-level devices.
- OLED Display: Shows recording levels, battery status, time, and menu options.
- Record Button: Initiates and stops recording.
- Menu Button: Accesses system settings and options.
- Navigation Buttons: Used for menu navigation and playback control.
- LINE IN / MIC IN Switch: Selects input type for the 3.5mm stereo jack.
- Gain Knobs: Adjust input sensitivity for each channel.
- USB-C Port: For data transfer, power, and use as an audio interface.
- 3.5mm Stereo Jack: For connecting external microphones or line-level sources.
- Headphone Output: 3.5mm stereo jack for monitoring audio.
- Power/Hold Switch: Turns the unit on/off and locks controls.
3. Setup
3.1. Battery Installation
- Ensure the unit is powered off.
- Open the battery compartment cover on the back of the unit.
- Insert two AA batteries, observing the correct polarity (+/-) as indicated inside the compartment.
- Close the battery compartment cover securely.
The H1 XLR supports alkaline, NiMH, and lithium AA batteries. Battery life is approximately 10 hours with alkaline batteries.
3.2. MicroSD Card Installation
- Ensure the unit is powered off.
- Locate the microSD card slot on the side of the unit.
- Insert a microSD card (up to 1TB capacity supported) into the slot until it clicks into place. Ensure the card is inserted in the correct orientation.
- To remove, gently push the card until it clicks out, then pull it from the slot.
A microSD card is required for recording audio. Format the card using the H1 XLR's menu before first use.
3.3. Powering On/Off
- To Power On: Slide the Power/Hold switch upwards and hold for a few seconds until the display illuminates.
- To Power Off: Slide the Power/Hold switch upwards and hold for a few seconds until the display turns off.
- Hold Function: Slide the Power/Hold switch downwards to the 'HOLD' position to lock all buttons and prevent accidental operation during recording or transport.
4. Basic Operation
4.1. Connecting Microphones and Line Devices
- XLR Microphones: Connect XLR cables from your microphones to the XLR/TRS combo inputs (1 and 2) at the top of the unit. Ensure the cables lock securely.
- 1/4" TRS Line Devices: Connect 1/4" TRS cables from line-level sources to the XLR/TRS combo inputs (1 and 2).
- 3.5mm Stereo Input: For external stereo microphones or line-level devices, connect to the 3.5mm stereo jack. Use the LINE IN / MIC IN switch to select the appropriate input level.

Figure 4.1: Connecting XLR Cables
This image shows a user holding the H1 XLR with two XLR cables securely connected to the top input jacks, demonstrating the device's readiness for external microphone input.
4.2. Recording Audio
- Connect your audio source(s).
- Power on the H1 XLR.
- Adjust the input gain for each channel using the dedicated gain knobs. Monitor the levels on the OLED display to ensure they are not clipping. The 32-bit float recording feature provides significant headroom, reducing the risk of clipping.
- Press the Record button once to enter record-standby mode. The record indicator will flash.
- Press the Record button again to start recording. The record indicator will illuminate steadily.
- To stop recording, press the Stop button. The recorded file will be saved to the microSD card.
4.3. Monitoring Audio
Connect headphones to the 3.5mm headphone output jack to monitor your audio in real-time during recording or playback. Adjust the headphone volume using the dedicated volume controls.
4.4. Playback
- Navigate to the desired file using the navigation buttons.
- Press the Play/Pause button to start playback.
- Press the Play/Pause button again to pause playback.
- Press the Stop button to stop playback.
5. Advanced Features
5.1. USB Audio Interface Functionality
The H1 XLR can function as a 2-input/2-output USB audio interface for your computer or mobile device. Connect the H1 XLR to your computer or smartphone via the USB-C port. Select 'Audio Interface' mode from the device's menu. This allows you to record directly to your digital audio workstation (DAW) or use the H1 XLR as a high-quality microphone input for live streaming or video conferencing.

Figure 5.1: H1 XLR as an Audio Interface
This image illustrates the Zoom H1 XLR connected to a smartphone, showcasing its capability to serve as an external audio interface for mobile recording or streaming setups.
5.2. 32-Bit Float Recording
The H1 XLR utilizes 32-bit float recording technology, which captures audio with an extremely wide dynamic range. This virtually eliminates the need to set input gain levels precisely, as clipping is prevented even with very loud signals. You can adjust the volume of your recordings in post-production without introducing noise or distortion.
6. Maintenance
- Keep the unit dry and clean. Avoid exposure to extreme temperatures, humidity, or direct sunlight.
- Use a soft, dry cloth to clean the exterior. Do not use abrasive cleaners or solvents.
- Remove batteries if the unit will not be used for an extended period to prevent leakage.
- Handle the microSD card with care to prevent data loss.
7. Troubleshooting
- Unit does not power on: Check battery installation and charge level. Ensure the Power/Hold switch is not in the 'HOLD' position.
- No audio recorded: Verify a microSD card is inserted and formatted. Check input connections and gain levels. Ensure the correct input type (LINE IN/MIC IN) is selected.
- Poor audio quality: Check microphone connections. Ensure gain levels are appropriate (though 32-bit float minimizes clipping, extremely low levels can introduce noise). Try a different microphone or cable.
- Buttons unresponsive: Check if the Power/Hold switch is in the 'HOLD' position.
For further assistance, refer to the official Zoom support resources.
8. Specifications
| Feature | Specification |
|---|---|
| Model Number | H1 XLR |
| Recording Format | WAV (32-bit float) |
| Inputs | 2 x XLR/TRS Locking Combo Jacks, 1 x 3.5mm Stereo Mini Jack |
| Outputs | 1 x 3.5mm Headphone/Line Output |
| Display | 0.96" Monochrome OLED |
| Power Source | 2 x AA Batteries (Alkaline, NiMH, Lithium) or USB-C |
| Battery Life | Approx. 10 hours (Alkaline) |
| Storage Media | microSD/microSDHC/microSDXC card (up to 1 TB) |
| USB Interface | USB Type-C (for data transfer, power, and audio interface) |
| Dimensions (W x D x H) | 5.8 x 3.8 x 1.9 inches (approximate) |
| Weight | 6.4 ounces / 0.4 pounds (without batteries) |
9. Safety Information
- Do not attempt to disassemble or modify the unit.
- Avoid dropping or subjecting the unit to strong impacts.
- Keep out of reach of children.
- Dispose of batteries according to local regulations.
- Use only specified power sources and accessories.
10. Warranty and Support
For warranty information and technical support, please refer to the official Zoom website or contact your local distributor. Keep your purchase receipt as proof of purchase.


