
VekAuto 944603R000
VekAuto Fuel Tank Float Gauge Sending Unit Instruction Manual
Model: 944603R000
1. Introduction
This manual provides instructions for the VekAuto Fuel Tank Float Gauge Sending Unit, Model 944603R000. This unit is designed to accurately measure the fuel level within the vehicle's fuel tank and transmit this information to the fuel gauge on the dashboard. It ensures clear fuel level indication, assisting the driver in monitoring fuel consumption and planning refueling stops.
This product is an aftermarket replacement part and is not an original equipment manufacturer (OEM) component.
2. Vehicle Compatibility
The Fuel Tank Float Gauge Sending Unit (OE Number: 944603R000) is compatible with the following vehicle models:
- For Hyundai Azera: Base, Limited 3.3L (2012-2017)
- For Kia Optima:
- EX, LX, SX 2.0L 2.4L (2011-2013)
- EX, LX, Limited, SX 2.0L 2.4L (2014-2015)
Important: Before purchasing and installing, please confirm your vehicle's model, year, and the original equipment (OE) number to ensure proper fitment.
3. Product Specifications
| Feature | Detail |
|---|---|
| OE Number | 944603R000 |
| Material | Plastic, Metal |
| Color | Black, White, Silver Tone |
| Dimensions (L x W x H) | 17 x 7.5 x 6 cm (6.69" x 2.95" x 2.36") |
| Mounting Type | Flange Mount |
| Output Type | Analog |
| Item Weight | 2.56 ounces |
4. Package Contents
The package includes:
- 1 x Fuel Tank Float Gauge Sending Unit

Figure 4.1: Package contents, showing the single fuel tank gauge sending unit.
5. Setup and Installation
Installation of a fuel tank sending unit typically involves working with the vehicle's fuel system, which can be complex and requires specific tools and safety precautions. Professional installation by a qualified mechanic is highly recommended.
General Installation Overview (Consult Service Manual for Specifics):
- Safety First: Ensure the vehicle is turned off, the battery is disconnected, and appropriate safety measures are taken to prevent fuel spills or ignition. Work in a well-ventilated area.
- Access the Fuel Tank: Depending on the vehicle model, access to the fuel tank sending unit may require removing the rear seats, accessing from underneath the vehicle, or other specific procedures.
- Disconnect Wiring and Hoses: Carefully disconnect the electrical connector and any fuel lines or hoses attached to the existing sending unit. Be prepared for potential fuel leakage.
- Remove Old Unit: Unfasten the retaining ring or bolts that secure the old sending unit to the fuel tank. Carefully extract the old unit, ensuring no debris falls into the tank.
- Install New Unit: Insert the new VekAuto Fuel Tank Float Gauge Sending Unit into the fuel tank opening. Ensure the gasket is properly seated to prevent leaks. Secure the unit with the retaining ring or bolts.
- Reconnect: Reconnect the electrical connector and any fuel lines or hoses. Double-check all connections for security.
- Test: Reconnect the battery. Turn the ignition to the 'ON' position (without starting the engine) and check the fuel gauge for proper operation. Inspect for any fuel leaks.
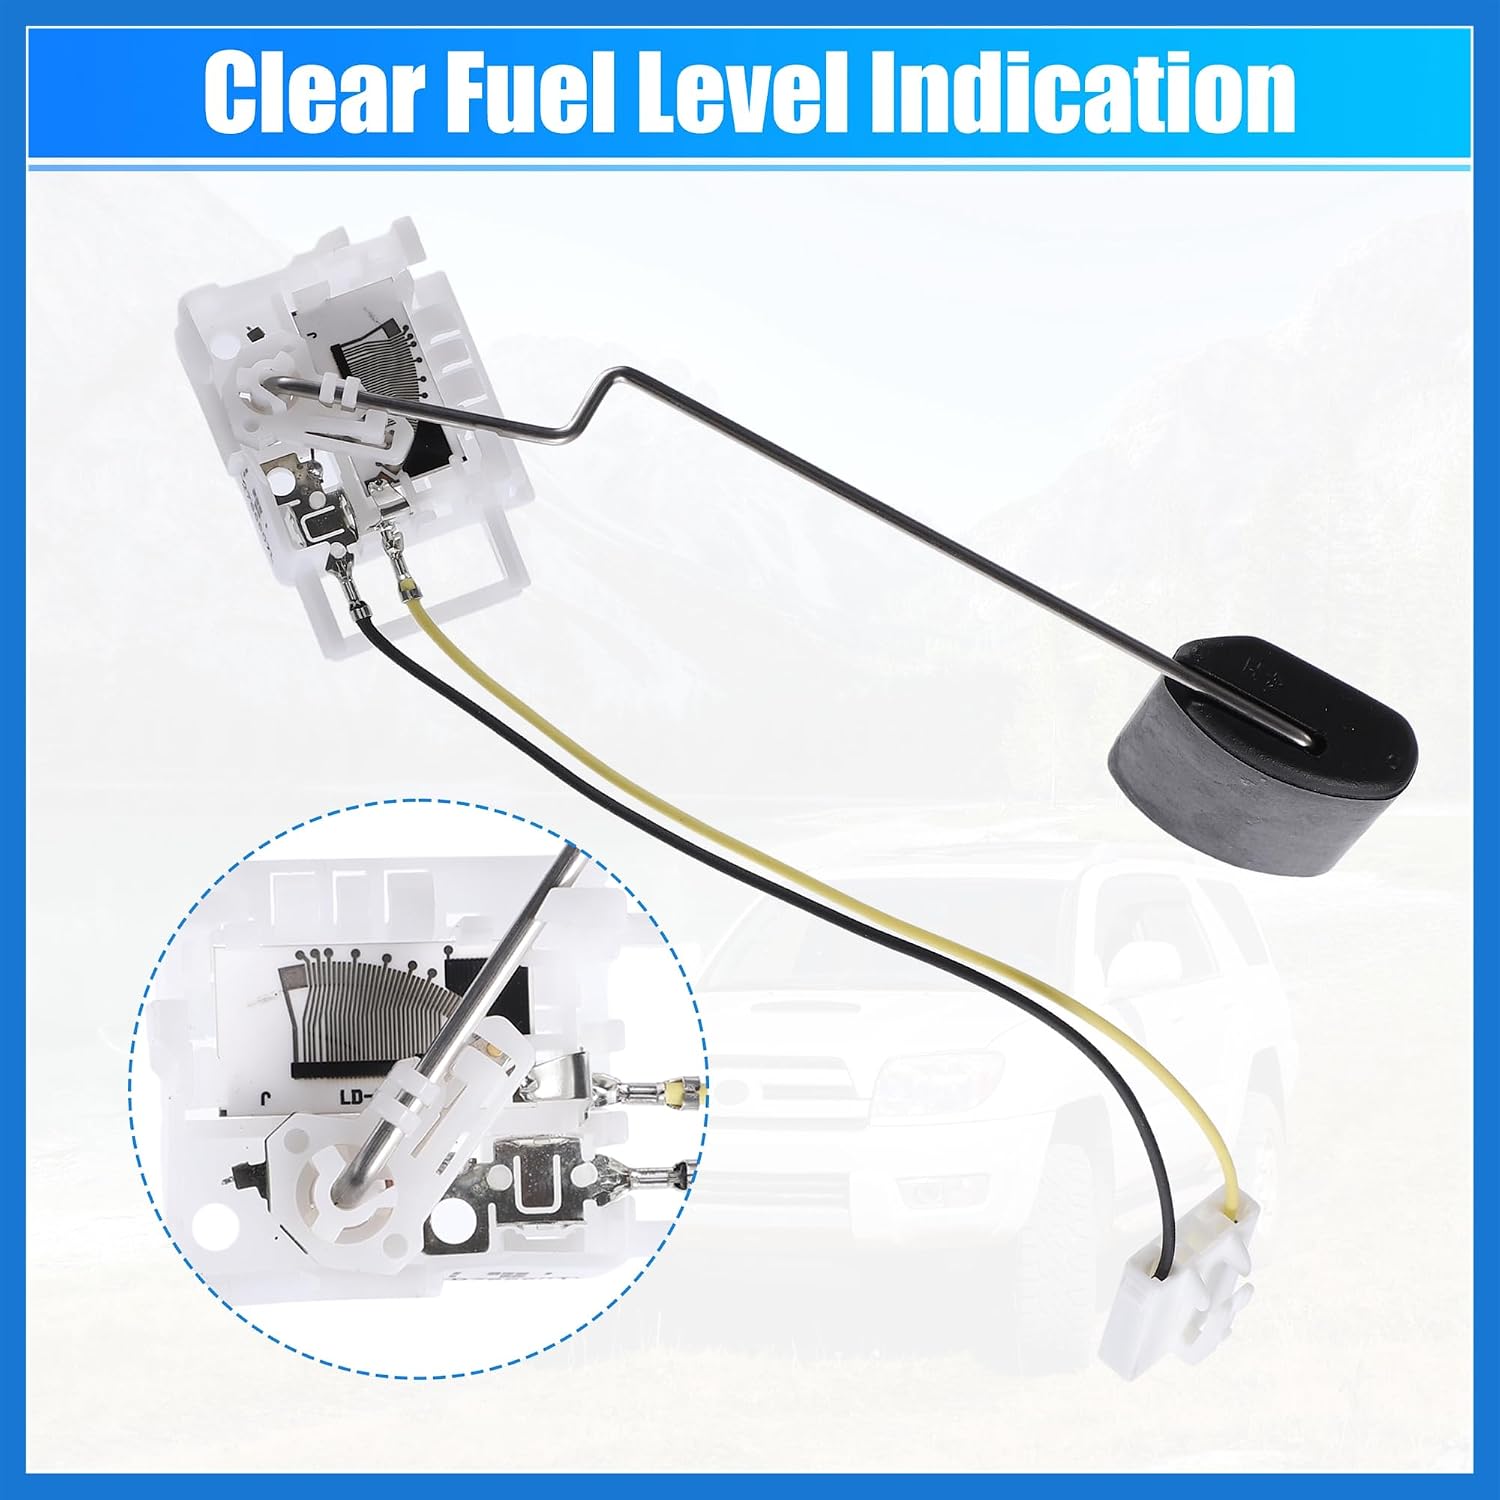
Figure 5.1: Detailed view of the sending unit's mechanism, showing the float arm and electrical contacts.

Figure 5.2: The unit's robust construction, including the electrical connector and float.
6. Operation
Once correctly installed, the Fuel Tank Float Gauge Sending Unit operates automatically. The float arm, which is connected to a variable resistor, moves up and down with the fuel level in the tank. This movement changes the electrical resistance, which is then interpreted by the vehicle's fuel gauge to display the current fuel level.

Figure 6.1: The complete fuel tank sending unit, illustrating its components.

Figure 6.2: The sending unit in an automotive context, highlighting its OE number.
7. Maintenance
The VekAuto Fuel Tank Float Gauge Sending Unit is designed for long-term reliability and typically requires no routine maintenance. However, it is advisable to:
- Avoid using fuel additives that are not recommended by your vehicle manufacturer, as these could potentially affect the unit's materials.
- Ensure the fuel tank cap is always securely fastened to prevent contaminants from entering the fuel system.
8. Troubleshooting
If you experience issues with your fuel gauge after installation, consider the following common problems and potential solutions:
- Fuel gauge reading empty when the tank is full: This could indicate a faulty sending unit, an open circuit in the wiring, or an issue with the fuel gauge itself.
- Fuel gauge stuck on full: This might suggest a short circuit in the sending unit's wiring or a problem with the gauge.
- Fuel gauge fluctuates erratically between empty and full: This can be caused by a faulty sending unit, loose electrical connections, or corrosion.
If these issues persist, it is recommended to consult a professional mechanic for diagnosis and repair.

Figure 8.1: The sending unit addresses common fuel gauge reading inaccuracies.
9. Warranty and Support
For information regarding product warranty, returns, or technical support, please refer to the seller's policies or contact the VekAuto customer service directly through the platform where the product was purchased.
Related Documents - 944603R000
 |
Hyundai Azera Owner's Manual: Operation, Maintenance, and Specifications Comprehensive owner's manual for the Hyundai Azera, covering operation, maintenance, safety features, and specifications. Includes guidance on fuel requirements, break-in procedures, and instrument cluster symbols. |
 |
Compustar Installation Guide for 2012-2015 Scion IQ: Remote Start System This Compustar installation guide provides detailed instructions for the 2012-2015 Scion IQ, including wiring diagrams, component locators, and testing procedures for remote start system installation. Essential for certified technicians. |
 |
Harley Sportster XL Oil Temperature Gauge Installation Manual (2004-2019) Product manual for installing the oil temperature gauge on Harley Sportster XL models from 2004 to 2019. Includes safety warnings and manufacturer information. |
 |
Dynojet Power Commander 6 Installation Guide for Moto Guzzi Griso 1200 (PC6-26003) Comprehensive installation guide for the Dynojet Power Commander 6 (PC6-26003) on 2009-2017 Moto Guzzi Griso 1200 models. Includes parts list, accessory input guide, and step-by-step installation instructions. |
 |
Dirty Diesel Customs 2011-2019 Powerstroke FTP SOTF Switch Installation Instructions Step-by-step guide for installing the Fuel Temp (FTP) SOTF Switch on 2011-2019 Ford Powerstroke diesel trucks by Dirty Diesel Customs. |
 |
iDatalink Maestro & Rockford Fosgate DSR1 Amplifier Installation Guide for Ford Vehicles This guide provides detailed instructions for installing the iDatalink Maestro and Rockford Fosgate DSR1 amplifier replacement solution in various Ford vehicles (2011-2017). It includes wiring diagrams, vehicle-specific wire charts, and installation steps for a seamless aftermarket audio upgrade. |
Ask a question about this manual
Ask about setup, troubleshooting, compatibility, parts, safety, or missing instructions. Manuals+ will review the question and use this page’s manual context to help answer it.