
ACASIS B0DBLBHG7H
ACASIS USB C Hub with SSD Enclosure User Manual
Model: B0DBLBHG7H
1. Product Overview
The ACASIS USB C Hub with SSD Enclosure is a versatile 10-in-1 docking station designed to expand the connectivity of your USB-C enabled devices, including laptops, Macs, and iPads. It integrates multiple essential ports and features a built-in M.2 NVME/SATA SSD enclosure for convenient storage expansion.

Image 1.1: The ACASIS USB C Hub with SSD Enclosure and included HDMI cable.
Key Features:
- 10-in-1 Connectivity: Expands a single USB-C/Thunderbolt 3 port into 10 versatile ports.
- Integrated M.2 SSD Enclosure: Supports M.2 NVME and SATA SSDs for high-speed storage expansion.
- 4K@60Hz HDMI Output: Connect to external displays for crisp, high-resolution video.
- High-Speed Data Transfer: Features USB 3.1 (10Gbps) and USB 3.0 (5Gbps) ports for rapid data transfer.
- 100W Power Delivery: Provides pass-through charging for your host device.
- Gigabit Ethernet: Ensures stable and fast wired network connectivity (1000Mbps).
- SD/Micro SD Card Readers: Convenient access for memory cards.
- 3.5mm Audio Jack: For headphones or microphones.
- Wide Compatibility: Works with Windows, Mac OS, Linux, and Chromebook OS.

Image 1.2: Detailed view of the 10-in-1 hub highlighting each port and the SSD enclosure.
2. Setup Instructions
Follow these steps to set up your ACASIS USB C Hub and install an M.2 SSD.
2.1. SSD Installation (Optional)
The ACASIS hub features a tool-free M.2 SSD enclosure. It supports M.2 NVME and SATA SSDs of various lengths (2230, 2242, 2260, 2280).
- Locate the "OPEN" latch on the side of the hub, near the M.2 SSD slot.
- Gently push the latch to open the SSD enclosure cover.
- Carefully insert your M.2 NVME or SATA SSD into the slot, ensuring it is properly aligned with the connector.
- Press down the SSD gently until it clicks into place or is secured by the retention mechanism.
- Close the enclosure cover until it latches securely.

Image 2.1: Illustration of supported M.2 NVME and SATA SSD sizes (2230, 2242, 2260, 2280).
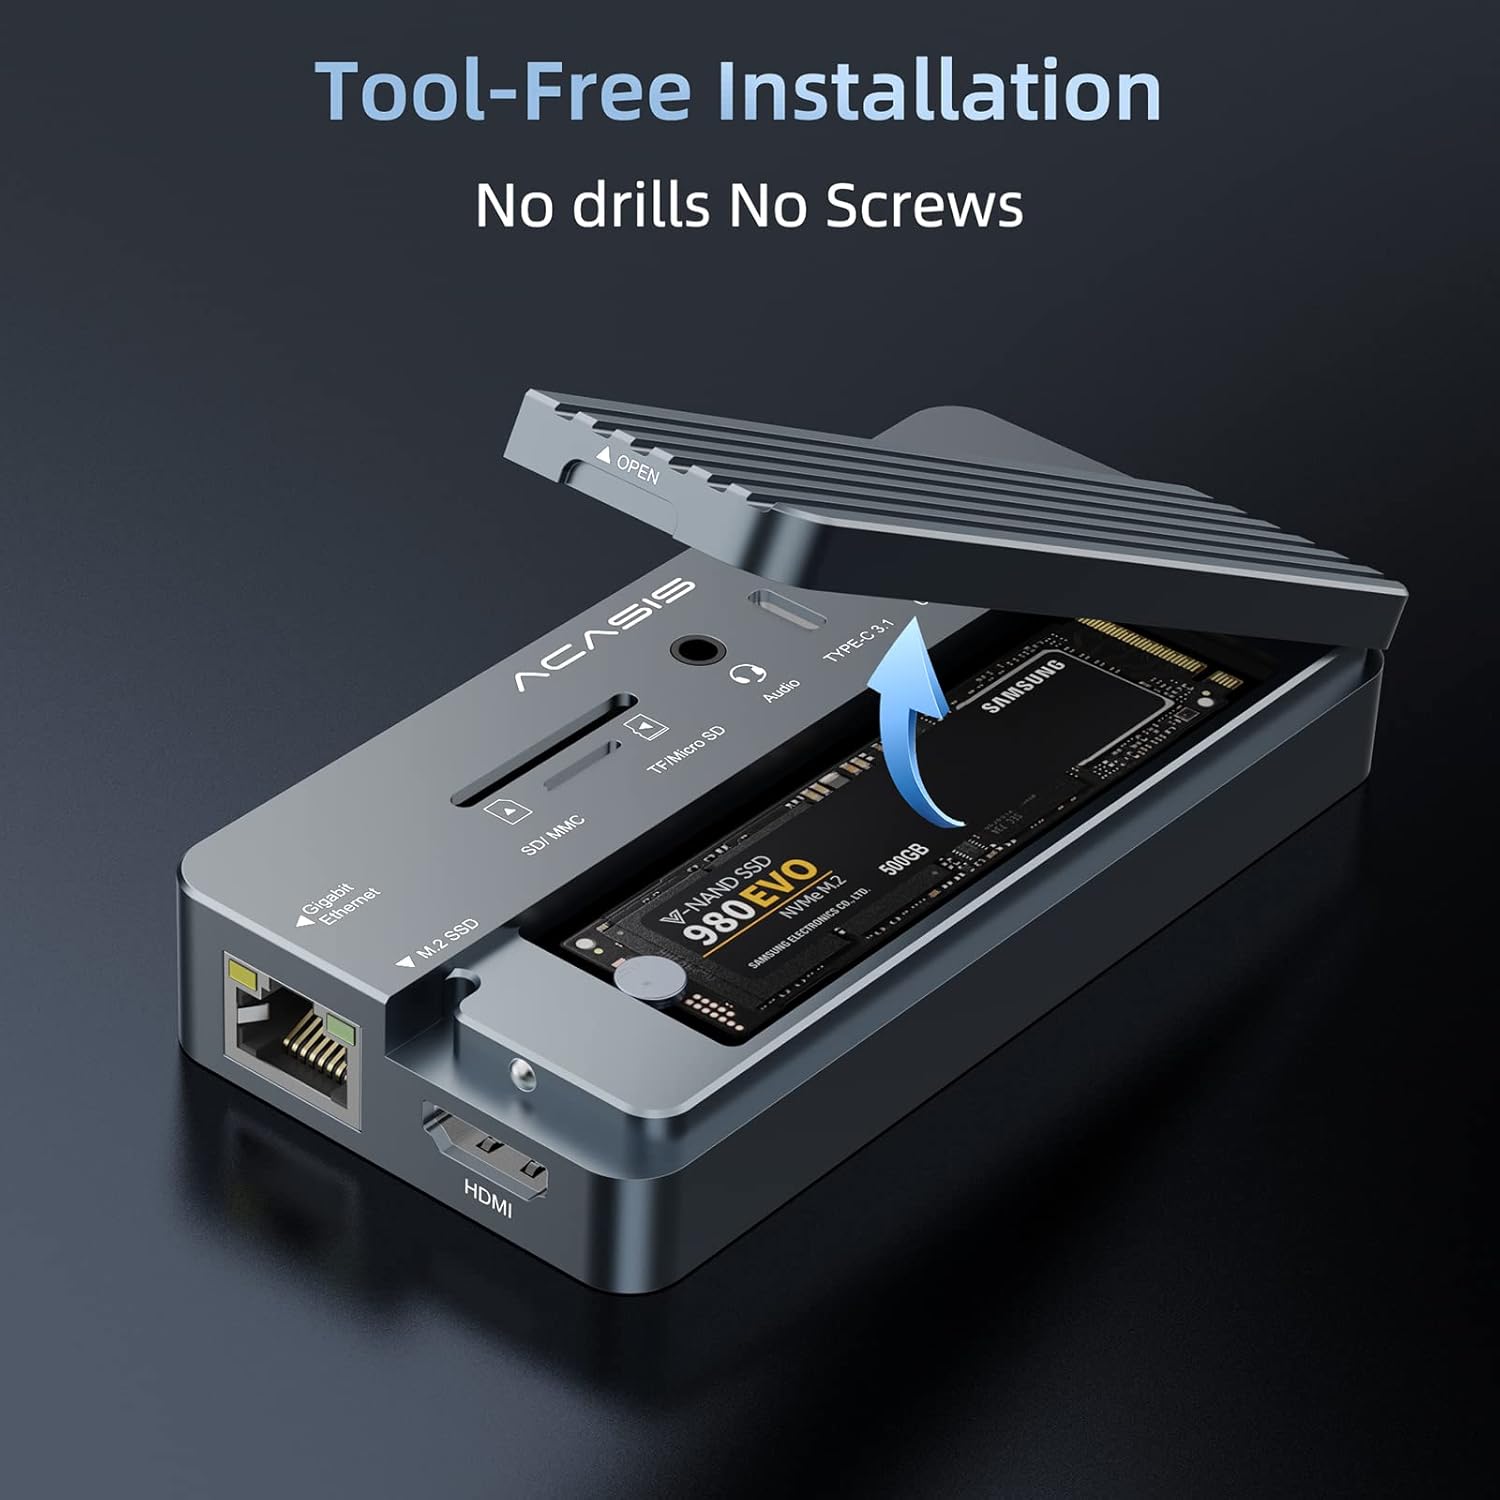
Image 2.2: Demonstrating the tool-free installation of an M.2 SSD into the enclosure.
2.2. Connecting to Your Device
Connect the ACASIS hub to your host device (laptop, tablet, etc.) using the integrated USB-C cable.
- Plug the USB-C connector of the hub into an available USB-C or Thunderbolt 3 port on your computer or device.
- The hub is plug-and-play and should be recognized automatically by your operating system.
- For optimal performance and to charge your host device, connect a USB-C power adapter (not included) to the "PD 100W" USB-C port on the hub.
3. Operating Instructions
This section details how to use the various ports and features of your ACASIS USB C Hub.
3.1. HDMI Video Output
Connect an external monitor, TV, or projector to the HDMI port for video output.
- Use the included 4K@60Hz HDMI cable or another high-quality HDMI cable.
- Plug one end of the HDMI cable into the HDMI port on the hub and the other end into your display device.
- Your operating system should automatically detect the external display. You may need to configure display settings (e.g., extend, duplicate) in your system preferences.
- Supports resolutions up to 4K (3840x2160) at 60Hz.

Image 3.1: The included HDMI cable is compatible with a wide range of devices including gaming consoles, streaming devices, and monitors.
3.2. USB Data Ports
The hub provides multiple USB ports for connecting peripherals and transferring data.
- USB 3.1 Type-A (10Gbps): For high-speed devices like external SSDs or flash drives.
- USB 3.0 Type-A (5Gbps): For standard USB devices such as keyboards, mice, or printers.
- USB 3.1 Type-C Data (10Gbps): For connecting USB-C peripherals or transferring data to/from USB-C devices.

Image 3.2: The hub supports high-speed data transfer up to 10Gbps.
3.3. Gigabit Ethernet Port
Connect to a wired network for stable and fast internet access.
- Plug a standard RJ45 Ethernet cable into the Gigabit Ethernet port on the hub.
- Connect the other end of the Ethernet cable to your router or modem.
- The hub supports 10/100/1000Mbps network speeds.
3.4. SD/Micro SD Card Readers
Access data from your camera or phone memory cards.
- Insert your SD or Micro SD card into the corresponding slot.
- The card will appear as a removable drive on your computer.
- Supports simultaneous reading and writing for both SD and Micro SD cards.
3.5. 3.5mm Audio Jack
Connect headphones, speakers, or a microphone.
- Plug your 3.5mm audio device into the audio jack.
- Ensure your operating system's audio output/input settings are configured to use the hub's audio device.

Image 3.3: The ACASIS hub is designed to work seamlessly with various USB-C enabled devices, including laptops, smartphones, and tablets.
4. Maintenance
Proper care and maintenance will extend the lifespan of your ACASIS USB C Hub.
- Cleaning: Use a soft, dry, lint-free cloth to clean the exterior of the hub. Do not use liquid cleaners or aerosols.
- Storage: Store the hub in a cool, dry place away from direct sunlight and extreme temperatures.
- Handling: Avoid dropping the device or subjecting it to strong impacts. Do not attempt to disassemble the hub.
- Connectivity: Always grasp the plug, not the cable, when disconnecting the hub or any connected cables.
5. Troubleshooting
If you encounter issues with your ACASIS USB C Hub, refer to the following common problems and solutions.
5.1. No Display Output via HDMI
- Check Connections: Ensure the HDMI cable is securely connected to both the hub and the display.
- Display Input: Verify that your display is set to the correct HDMI input source.
- Host Device Compatibility: Confirm your host device's USB-C port supports video output (DisplayPort Alternate Mode). Not all USB-C ports support this feature.
- Resolution Settings: Try lowering the display resolution or refresh rate in your computer's display settings.
- Restart: Disconnect and reconnect the hub, or restart your computer.
5.2. SSD Not Recognized
- Secure Installation: Ensure the M.2 SSD is fully seated in its slot within the enclosure.
- SSD Type: Verify that your SSD is either an M.2 NVME or M.2 SATA type. The enclosure supports both.
- Disk Management: For new SSDs, you may need to initialize and format the drive in your operating system's Disk Management (Windows) or Disk Utility (macOS).
- Power: Ensure sufficient power is supplied to the hub, especially if using a high-power SSD. Connect a PD charger to the hub.
5.3. USB Devices Not Working
- Power Supply: Some high-power USB devices may require external power or a PD charger connected to the hub.
- Driver Issues: Ensure your computer's USB drivers are up to date.
- Try Different Port: Test the USB device in a different port on the hub or directly on your computer.
6. Specifications
| Specification | Value |
|---|---|
| Model (ASIN) | B0DBLBHG7H |
| Brand | ACASIS |
| Number of Ports | 10 |
| Total USB Ports | 3 (1x USB 3.1 Type-A, 1x USB 3.0 Type-A, 1x USB 3.1 Type-C Data) |
| Total HDMI Ports | 1 (4K@60Hz) |
| Power Delivery | Up to 100W via USB-C PD port |
| Ethernet | Gigabit (10/100/1000Mbps) |
| Card Readers | SD, Micro SD |
| Audio Jack | 3.5mm |
| SSD Enclosure | M.2 NVME/SATA (2230, 2242, 2260, 2280) |
| Compatible Devices | Windows Computers, Mac Computers, Linux Computers, Chromebooks, Laptops, Macs, iPads, iPad Pros, Keyboards, Mice, Printers, Hard Drives |
| Hardware Interface | USB |
| Date First Available | July 30, 2024 |
| Manufacturer | ACASIS |
7. Warranty and Support
ACASIS products are designed for reliability and performance. For specific warranty details, please refer to the warranty card included with your product or visit the official ACASIS website.
If you require technical assistance or have questions not covered in this manual, please contact ACASIS customer support through their official channels. Keep your purchase receipt or order number handy for faster service.
For more information, you can visit the ACASIS Store on Amazon.
Related documentsB0DBLBHG7H


Ask a question about this manual
Ask about setup, troubleshooting, compatibility, parts, safety, or missing instructions. Manuals+ will review the question and use this page’s manual context to help answer it.