1. Product Overview
This manual provides instructions for the installation, operation, and maintenance of the 20 SECOND SOAP LEC6646AQ0 Dryer Heating Element. This component is designed as a replacement part for compatible Whirlpool dryer models, ensuring efficient and consistent heating for optimal drying performance.
The heating element is crucial for generating the heat required to dry clothes. Proper installation and maintenance are essential for the safe and effective operation of your dryer.
2. Safety Information
WARNING: Risk of Electric Shock, Fire, or Injury.
- Always disconnect power to the dryer before attempting any installation, maintenance, or repair. Failure to do so can result in serious injury or death.
- Wear appropriate personal protective equipment, such as gloves and safety glasses, during installation.
- If you are not comfortable performing this repair, seek assistance from a qualified appliance technician.
- Ensure all connections are secure and correctly wired before restoring power.
- Keep children and pets away from the work area.
- This heating element is designed for specific dryer models. Verify compatibility before installation.
3. Installation
3.1. Tools Required
- Screwdriver set (Phillips and flathead)
- Nut driver set (typically 1/4", 5/16", 1/2")
- Pliers
- Work gloves
- Safety glasses
- Multimeter (optional, for testing components)
3.2. Pre-Installation Steps
- Disconnect Power: Unplug the dryer from the electrical outlet or turn off the circuit breaker supplying power to the dryer.
- Move Dryer: Pull the dryer away from the wall to access the rear panel.
- Remove Vent Hose: Disconnect the exhaust vent hose from the back of the dryer.
3.3. Accessing the Heating Element
- Remove Rear Panel: Use a nut driver or screwdriver to remove the screws securing the rear access panel of the dryer. Carefully set the panel aside.
- Locate Heating Element Housing: The heating element is typically housed in a metal chamber, often located at the bottom or side of the dryer's blower housing.
- Disconnect Wires: Carefully disconnect the electrical wires attached to the heating element terminals. Note their positions for reassembly. It may be helpful to take a photo.
- Remove Mounting Screws: Remove any screws or clips that secure the heating element housing or the element itself within the dryer.
- Extract Old Element: Carefully slide the old heating element assembly out of its position.
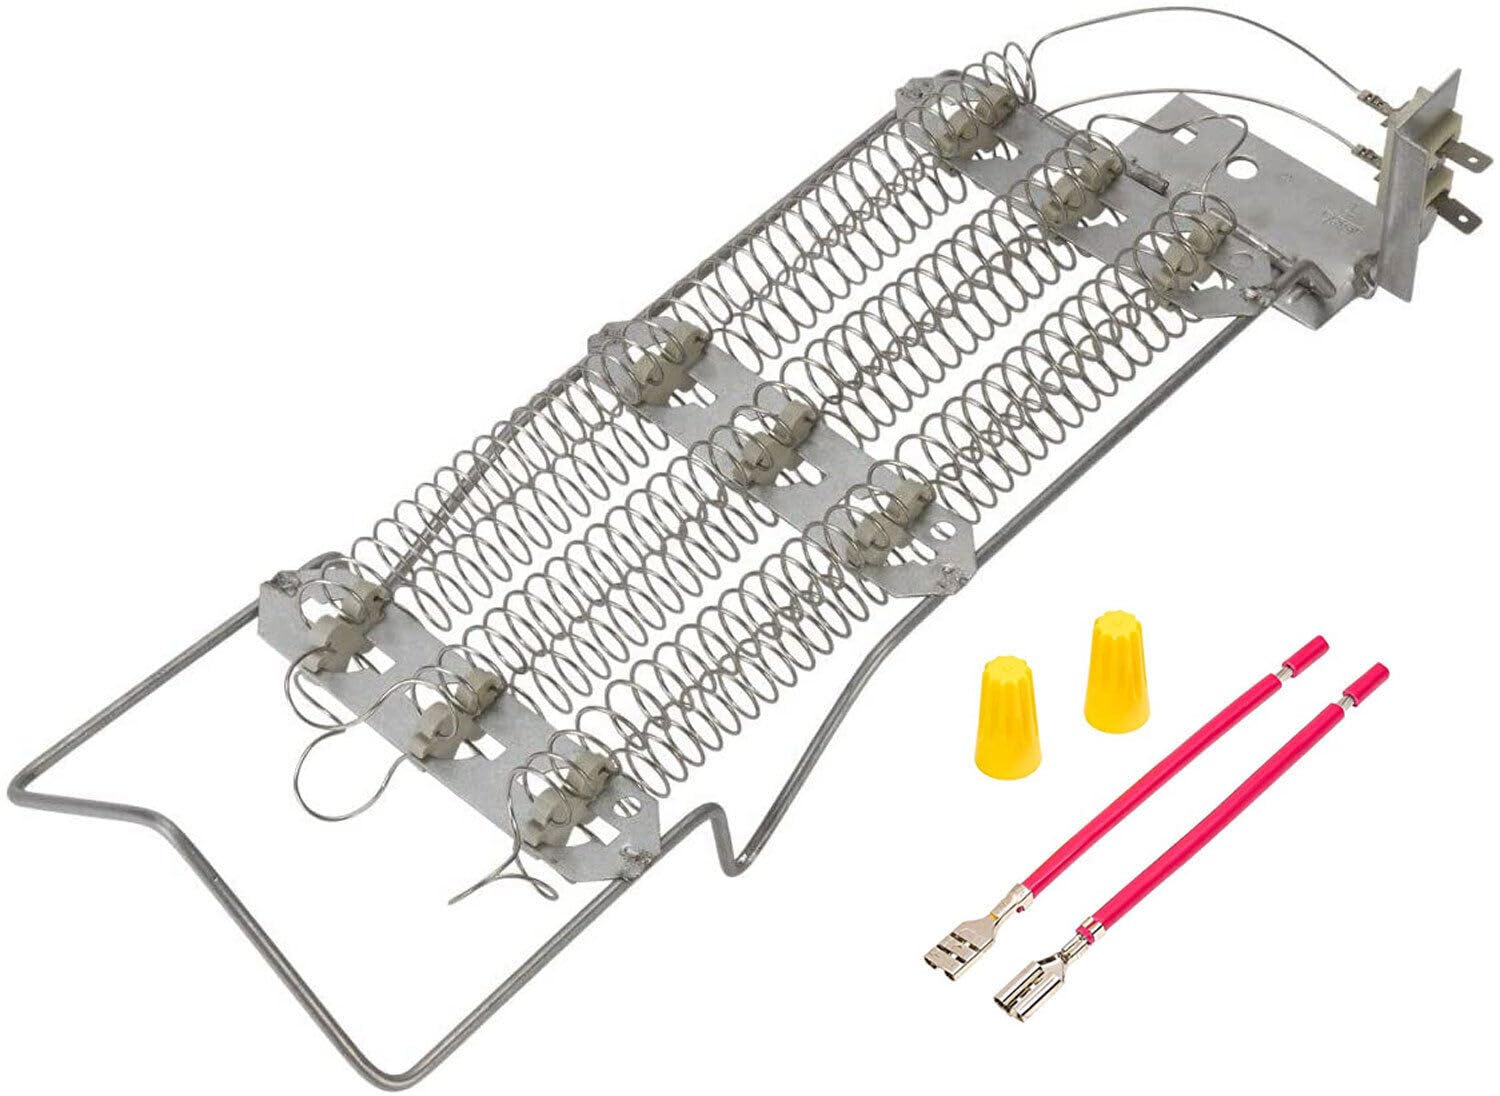
Image 1: The 20 SECOND SOAP LEC6646AQ0 Dryer Heating Element. This image shows the heating coil and ceramic insulators, which are key components for heat generation in a dryer.
3.4. Installing the New Heating Element
- Insert New Element: Carefully slide the new 20 SECOND SOAP LEC6646AQ0 heating element into the housing, ensuring it seats correctly.
- Secure Element: Reinstall any mounting screws or clips to secure the heating element in place.
- Reconnect Wires: Reattach the electrical wires to the terminals of the new heating element. Ensure connections are tight and match the original configuration.
3.5. Reassembly and Testing
- Replace Rear Panel: Position the rear access panel back onto the dryer and secure it with the screws.
- Reconnect Vent Hose: Reattach the exhaust vent hose to the dryer and ensure it is securely fastened and not kinked.
- Restore Power: Plug the dryer back into the electrical outlet or turn on the circuit breaker.
- Test Dryer: Run a short cycle with no load to verify that the dryer heats up properly and operates without unusual noises or smells. Monitor for the first few minutes.
4. Operation
Once the 20 SECOND SOAP LEC6646AQ0 heating element is correctly installed, the dryer should resume normal operation, providing consistent heat for drying clothes. Refer to your dryer's original user manual for specific operating instructions, cycle selections, and care recommendations.
- Ensure the dryer vent is clear and unobstructed for optimal performance and safety.
- Avoid overloading the dryer, as this can reduce drying efficiency and put strain on components.
5. Maintenance
While the heating element itself requires no specific user maintenance, regular dryer maintenance is crucial for its longevity and efficient operation.
- Clean Lint Filter: Clean the lint filter before or after every load to maintain airflow and prevent fire hazards.
- Inspect Vent System: Periodically inspect and clean the entire dryer vent system (from the dryer to the exterior vent cap) to remove lint buildup. This improves drying efficiency and reduces fire risk.
- Check for Obstructions: Ensure no foreign objects are blocking the dryer's internal airflow paths.
6. Troubleshooting
If your dryer is experiencing issues after installing the new heating element, consider the following:
| Problem | Possible Cause | Solution |
|---|---|---|
| Dryer runs but produces no heat. |
|
|
| Dryer takes too long to dry. |
|
|
| Burning smell. |
|
|
If issues persist, it is recommended to consult a qualified appliance repair technician.
7. Specifications
- Model: LEC6646AQ0
- Brand: 20 SECOND SOAP
- Part Type: Dryer Heating Element
- Compatibility: Designed for various Whirlpool dryer models. Please verify compatibility with your specific dryer model before purchase and installation.
- Material: Durable heating coil with ceramic insulators.
8. Warranty & Support
For information regarding warranty coverage or technical support for your 20 SECOND SOAP LEC6646AQ0 heating element, please refer to the product packaging or contact the retailer from whom the product was purchased. Keep your proof of purchase for warranty claims.


