
FRIZZLIFE PX600
Frizzlife PX600 600 GPD Tankless Reverse Osmosis Water Filter System
User Manual
1. Introduction
Thank you for choosing the Frizzlife PX600 600 GPD Tankless Reverse Osmosis Water Filter System. This advanced filtration system is designed to provide your household with clean, safe, and great-tasting water by effectively removing a wide range of contaminants. This manual provides essential information for the proper installation, operation, and maintenance of your new system.
The PX600 system features a high 600 Gallons Per Day (GPD) water production rate, a 2:1 pure to drain ratio for significant water savings, and a compact tankless design to save under-sink space. Its intelligent LED display provides real-time TDS monitoring and filter life reminders, ensuring consistent water quality.
2. Safety Information
Please read all safety instructions carefully before installing or operating the Frizzlife PX600 system. Failure to follow these instructions could result in property damage, personal injury, or system malfunction.
- Always turn off the main water supply before performing any installation or maintenance.
- Ensure all connections are secure to prevent leaks.
- Do not expose the system to freezing temperatures, as this can cause damage.
- Use only genuine Frizzlife replacement filters to maintain system performance and warranty.
- Keep the system away from direct sunlight and heat sources.
- If you are unsure about any installation step, consult a qualified plumber.
- The system operates under water pressure; ensure your household water pressure is within the specified range (20-80 PSI).
3. Product Overview
3.1 Key Features
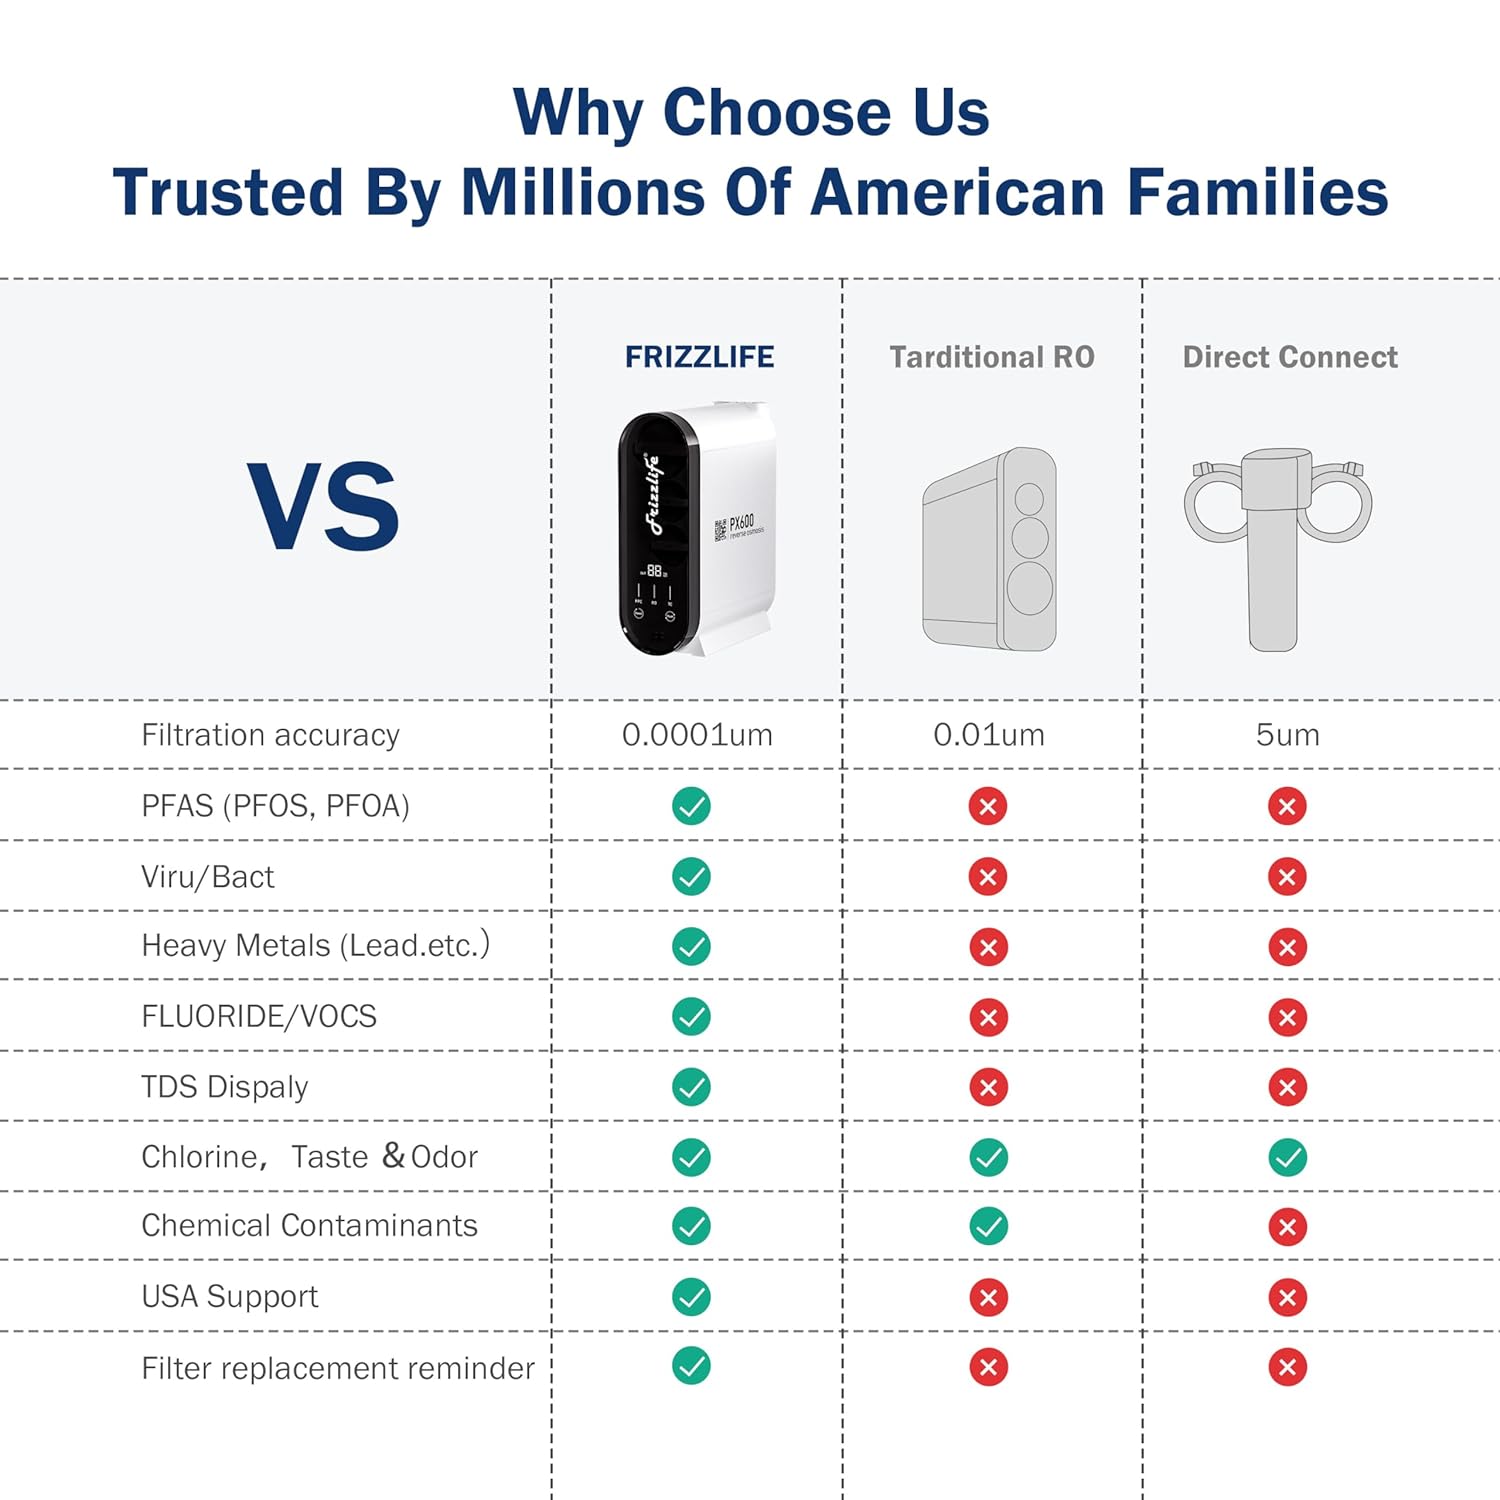
- Advanced 8-Stage Filtration: Utilizes 0.0001 micron RO membrane to remove over 1000 contaminants, including chlorine, fluoride, lead, heavy metals, arsenic, chloramine, TDS, PFAS, PFOA, and PFOS.
- High Water Flow: Produces 600 GPD (Gallons Per Day) of purified water, filling a 330ml cup in approximately 10 seconds.
- Water-Saving Design: Achieves a 2:1 pure to drain ratio, significantly reducing wastewater compared to traditional RO systems.
- Tankless & Compact: Eliminates the need for a bulky storage tank, saving up to 70% of under-sink space and preventing secondary contamination.
- Smart LED Display: Provides real-time Total Dissolved Solids (TDS) readings and intelligent filter life reminders.
- Easy DIY Installation & Maintenance: Designed for quick installation (approx. 30 minutes) and tool-free filter replacement in seconds.
3.2 Components Included
The Frizzlife PX600 system typically includes the following components:
- Frizzlife PX600 Main Unit
- 8-Stage Filter Cartridges (PPC, RO, TC)
- Brushed Nickel Faucet
- Inlet/Outlet Hoses
- Drain Saddle
- TDS Meter (integrated or separate)
- Instruction Manual
- Screws and mounting hardware
3.3 Filtration Process
The PX600 system employs a multi-stage filtration process to ensure comprehensive water purification.


4. Setup and Installation
The Frizzlife PX600 system is designed for DIY installation, typically taking around 30 minutes. Ensure you have all components and necessary tools before starting.
4.1 Pre-Installation Checklist
- Verify all parts are present as listed in Section 3.2.
- Ensure adequate space under your sink for the compact unit. Dimensions: 22.5L x 51W x 58H cm.
- Confirm your water supply lines are 3/8" or 1/2" compatible.
- Gather tools: adjustable wrench, drill (if drilling a new faucet hole), screwdriver, utility knife.
4.2 Installation Steps
- Turn off Water Supply: Locate and turn off the cold water supply valve under your sink.
- Install Faucet: If a new hole is needed, drill a 1-inch hole in your countertop. Install the brushed nickel faucet according to the instructions provided with the faucet.
- Connect Water Inlet: Connect the inlet hose from the PX600 unit to your cold water supply line using the provided adapter.
- Install Drain Saddle: Attach the drain saddle to the drain pipe under your sink. Ensure it is positioned above the P-trap. Connect the drain line from the PX600 unit to the drain saddle.
- Connect Faucet Line: Connect the purified water line from the PX600 unit to the new faucet.
- Insert Filters: Ensure the filter cartridges (PPC, RO, TC) are correctly inserted into their respective slots in the main unit. Twist to lock them into place.
- Power Connection: Plug the power adapter into a grounded electrical outlet.
- Turn on Water Supply: Slowly turn on the cold water supply valve. Check for any leaks.
- Initial Flush: Open the RO faucet and let the water run for 15-30 minutes to flush the system and new filters. This removes air and carbon fines.
5. Operating Instructions
5.1 Dispensing Water
To dispense purified water, simply open the dedicated RO faucet. The system will automatically activate and begin producing water. Close the faucet to stop the flow.

5.2 Smart LED Display
The Frizzlife PX600 features an intelligent LED display that provides crucial information about your water quality and filter status.

- Real-time TDS: The display shows the TDS (Total Dissolved Solids) level of the purified water, indicating its purity. Lower TDS values signify purer water.
- Filter Life Indicators: Separate indicators for PPC, RO, and TC filters will illuminate or change color to remind you when a filter needs replacement.
- Flush Button: Use the flush function as indicated in the manual or during initial setup to optimize filter performance.
- Reset Button: After replacing a filter, press the corresponding reset button to reset its timer.
6. Maintenance
Regular maintenance, particularly filter replacement, is crucial for the optimal performance and longevity of your Frizzlife PX600 system.
6.1 Filter Replacement
The PX600 system features a quick-change filter design, allowing for tool-free replacement in seconds.

- Turn off Water Supply: Close the cold water supply valve to the system.
- Release Pressure: Open the RO faucet to release any residual pressure in the system.
- Remove Old Filter: Gently twist the old filter cartridge counter-clockwise and pull it downwards to remove.
- Install New Filter: Insert the new filter cartridge into the corresponding slot. Twist clockwise until it locks securely into place.
- Turn on Water Supply: Slowly open the cold water supply valve. Check for leaks.
- Flush New Filter: Open the RO faucet and let water run for 5-10 minutes to flush the new filter.
- Reset Filter Life: Press and hold the reset button for the replaced filter on the LED display until the indicator resets.
6.2 Recommended Filter Replacement Schedule
- PPC Filter: Every 6 months
- TC Filter: Every 12 months
- RO Membrane: Every 24 months
Note: Filter lifespan may vary based on local water quality and usage. Always refer to the smart LED display for accurate reminders.
7. Troubleshooting
This section addresses common issues you might encounter with your Frizzlife PX600 system. For problems not listed here, please contact customer support.
| Problem | Possible Cause | Solution |
|---|---|---|
| No Water Flow / Very Slow Flow |
|
|
| Water Leaks |
|
|
| Poor Water Taste / High TDS Reading |
|
|
| LED Display Not Working |
|
|
8. Specifications
| Feature | Detail |
|---|---|
| Brand | FRIZZLIFE |
| Model Name/Number | PX600 |
| Dimensions (L x W x H) | 22.5L x 51W x 58H cm |
| Material | Stainless Steel |
| Capacity | 600 Gallons Per Day (GPD) |
| Purification Method | Reverse Osmosis |
| Power Source | Manual (water pressure) |
| Minimum Temperature Range | 4 Degrees Celsius |
| Operating Pressure Range | 20-80 PSI |
| Maximum Supported TDS | 1000 PPM |
| Special Features | 2:1 Pure to Drain Ratio, Integrated TDS Meter, High Water Flow, Filter Change Indicator, Tankless Design |
9. Warranty and Support
Frizzlife is committed to providing high-quality products and customer satisfaction. For warranty information, technical support, or any questions regarding your PX600 system, please contact Frizzlife customer service.
Please have your model number (PX600) and purchase details ready when contacting support to ensure efficient service.
You can find more information and contact details on the official Frizzlife website: www.frizzlife.com
Related documentsPX600


Ask a question about this manual
Ask about setup, troubleshooting, compatibility, parts, safety, or missing instructions. Manuals+ will review the question and use this page’s manual context to help answer it.