1. Introduction
This manual provides detailed instructions for the installation, configuration, and operation of your UeeVii WR3000K WiFi6 AX3000 Dual Band Wireless Router. Please read this manual thoroughly before using the device to ensure proper setup and optimal performance. The UeeVii WR3000K is designed to provide high-speed, stable wireless connectivity for various home and office environments, supporting WiFi 6 technology and dual-band operation.
2. Package Contents
Verify that all items listed below are present in your package. If any item is missing or damaged, please contact customer support.
- UeeVii WR3000K WiFi6 AX3000 WiFi Router
- Power Adapter
- Ethernet Cable
- User Manual (this document)

Image: Contents of the UeeVii WR3000K package, including the router, power adapter, Ethernet cable, and user manual.
3. Product Overview
The UeeVii WR3000K router features a robust design with multiple antennas and essential ports for network connectivity.

Image: Front view of the UeeVii WR3000K WiFi6 AX3000 Router, showcasing its six external antennas and sleek design.
3.1. Ports and Buttons
The rear panel of the router contains all necessary ports and buttons for connection and control.

Image: Detailed view of the router's rear panel, indicating the WPS/Reset button, LAN ports, WAN port, and DC power input.
- WPS/Reset Button: Press briefly for WPS function. Press and hold for 5-10 seconds to reset the router to factory default settings.
- LAN Ports (LAN1, LAN2, LAN3): Connect wired devices such as computers, gaming consoles, or network printers.
- WAN Port: Connect to your modem or main internet source. This port supports 2Gbps speeds.
- DC Power Input: Connect the provided power adapter here.

Image: A close-up highlighting the 2Gbps WAN/LAN port, indicating its high-speed capability.
3.2. LED Indicators
The router features an LED indicator on its top surface to show operational status. A green light typically indicates normal operation and internet connectivity.
4. Setup Guide
4.1. Basic Connection
- Power On: Connect the power adapter to the router's DC Power Input and plug it into a power outlet.
- Connect to Modem: Use the provided Ethernet cable to connect your modem's LAN port to the router's WAN port.
- Connect Devices (Optional): For wired connections, use Ethernet cables to connect your computers or other devices to the router's LAN ports.

Image: A diagram illustrating the basic connection of the router to the internet source and various client devices like phones, computers, and cameras.
4.2. Initial Configuration (Web Interface)
- Connect to Router: Connect your computer or mobile device to the router's default Wi-Fi network (SSID and password usually found on a label on the router) or via an Ethernet cable.
- Access Web Interface: Open a web browser and enter the default IP address, typically http://192.168.100.1, into the address bar.
- Login: Enter the default username and password (usually 'admin' for both, or as specified on the router label).
- Follow Setup Wizard: The router's web interface will guide you through the initial setup, including setting up your internet connection type, Wi-Fi network name (SSID), and password.

Image: A smartphone displaying the router's web interface login page, accessible via the default IP address, with the router visible in the background.
4.3. WPS (Wi-Fi Protected Setup)
The WPS button allows for quick and secure connection of WPS-compatible devices without entering the Wi-Fi password.
- Press the WPS button on the router (located on the rear panel).
- Within two minutes, activate WPS on your client device (e.g., a wireless adapter, printer).
- The devices will automatically establish a secure connection.

Image: A close-up of the WPS/Reset button on the router, illustrating its dual functionality for PBC (Push Button Connect) and MESH network setup.
4.4. MESH Function
The MESH function allows for easy network expansion, eliminating Wi-Fi dead zones and providing seamless coverage throughout your home or office. This function can be activated via the WPS button (as shown in the image above) or through the router's web interface.
4.5. Wireless Bridge Mode
The router can be configured to operate in Wireless Bridge mode to extend your network wirelessly to another location.

Image: A diagram illustrating the setup for connecting the UeeVii WR3000K router with a wireless bridge (Master CPE and Slave CPE) to extend network coverage.
4.6. Access Point (AP) Mode
The router can function as an Access Point, converting a wired network connection into a wireless one.

Image: A diagram showing how to connect the UeeVii WR3000K router in Access Point (AP) mode, extending wireless connectivity from a wired network.
5. Operating Instructions
5.1. Dual Band WiFi Operation
The UeeVii WR3000K supports dual-band operation (2.4GHz and 5.8GHz) for flexible and high-performance wireless connectivity. The 2.4GHz band offers wider coverage, while the 5.8GHz band provides faster speeds and less interference.

Image: Visual representation of the 2.4GHz and 5.8GHz dual-band capabilities, showing typical speed ranges for each band.

Image: Depicts users enjoying seamless internet activities like browsing and gaming, highlighting the smooth performance of the router's dual-band WiFi.
5.2. Wide Coverage
Equipped with a 6-antenna design and WiFi 6 technology, the router provides enhanced signal coverage, ensuring stable connections across your home or office.
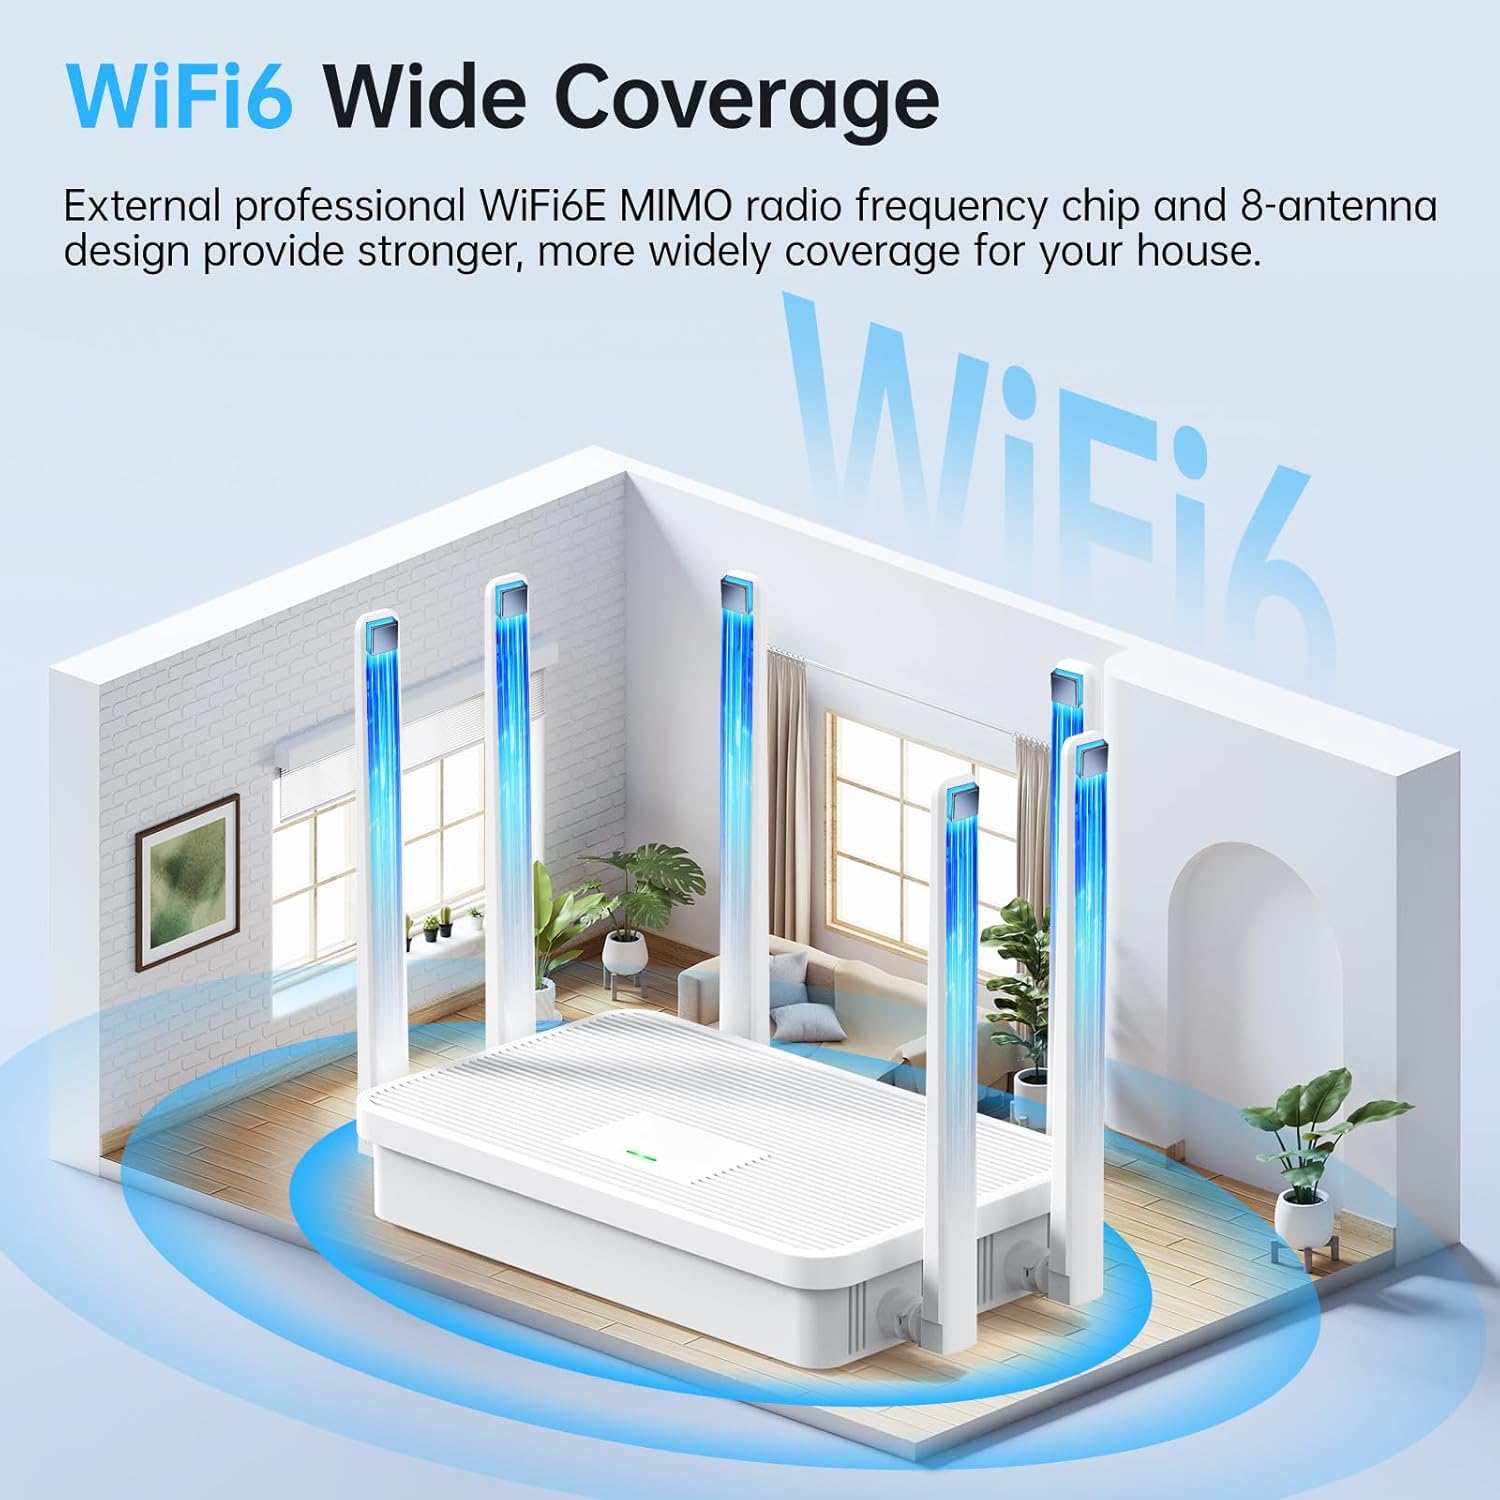
Image: An illustration demonstrating the wide coverage provided by the WiFi6 router with its six antennas, extending signal throughout a multi-room environment.
5.3. Connecting Multiple Devices
The UeeVii WR3000K router is capable of connecting up to 128 devices simultaneously, making it suitable for households with numerous smart devices.

Image: A visual representation of the router's capacity to connect up to 128 devices, including laptops, smartphones, and tablets, to the internet.
5.4. Network Security
The router incorporates multiple security features to protect your network and data:
- WPS: For secure, one-touch device connection.
- WPA/WPA2/WPA3 Encryption: Advanced wireless encryption protocols to secure your Wi-Fi network.
- SSID Hiding: Option to hide your Wi-Fi network name for added privacy.
- Guest Network: Create a separate network for guests, isolating them from your main network.
- Anti-DDOS Protection: Helps protect against Denial-of-Service attacks.

Image: An abstract illustration representing the multiple layers of security features, including encryption and protection mechanisms, provided by the router.
6. Maintenance
6.1. Heat Dissipation
The router features a four-sided heat dissipation design to ensure optimal cooling and long-term stable operation, even under high network loads.

Image: An illustration showing the router's excellent heat dissipation design, with airflow indicated to maintain optimal operating temperature.
6.2. Firmware Updates
Periodically check the manufacturer's website for firmware updates. Keeping your router's firmware up-to-date ensures access to the latest features, security patches, and performance improvements. Follow the instructions provided with the firmware update carefully.
6.3. Cleaning
To clean the router, gently wipe its exterior with a soft, dry cloth. Do not use liquid cleaners or abrasive materials, as they may damage the device.
7. Troubleshooting
If you encounter issues with your UeeVii WR3000K router, refer to the following common troubleshooting steps:
- No Internet Connection:
- Check all cable connections (power, Ethernet from modem to WAN port).
- Restart your modem and router by unplugging them for 30 seconds and then plugging them back in.
- Verify your internet service provider (ISP) connection is active.
- Access the router's web interface to check WAN status and configuration.
- Weak Wi-Fi Signal or Dead Zones:
- Relocate the router to a central location, away from obstructions and interference sources (e.g., microwaves, cordless phones).
- Ensure antennas are positioned vertically for optimal signal.
- Consider using the MESH function or additional access points to extend coverage.
- Cannot Access Router's Web Interface:
- Ensure your device is connected to the router's network (wired or wireless).
- Verify you are using the correct IP address (http://192.168.100.1) and login credentials.
- Try clearing your browser's cache or using a different browser.
- If all else fails, perform a factory reset (see WPS/Reset Button section) and reconfigure.
8. Specifications
| Feature | Description |
|---|---|
| Model Name | WR3000K |
| Brand | UeeVii |
| Wireless Standard | 802.11a, 802.11ac, 802.11ax (WiFi 6), 802.11g, 802.11n |
| Frequency Band Class | Dual-Band (2.4GHz & 5.8GHz) |
| Antennas | 6-Antenna Design |
| WAN Port Speed | 2Gbps |
| Special Features | Internet Security, LED Indicator, WPS, MESH Function |
| Security Protocols | WPS, WPA/WPA2/WPA3 encryption, SSID hiding, Guest Network, Anti-DDOS |
| Compatible Devices | Gaming Console, Personal Computer, Smart Television, Smartphone, Tablet |
| Recommended Use | Indoor |
| Item Weight | 1.68 pounds |
| Package Dimensions | 10.35 x 10.35 x 2.32 inches |
9. Warranty and Support
For warranty information and technical support, please refer to the documentation included with your product or visit the official UeeVii website. Keep your purchase receipt for warranty claims.