
1. Introduction
This manual provides instructions for the safe and efficient use of your HELESIN 7.5ft 310 LED Christmas Tree Lights. Please read all instructions thoroughly before installation and operation to ensure proper function and longevity of the product.
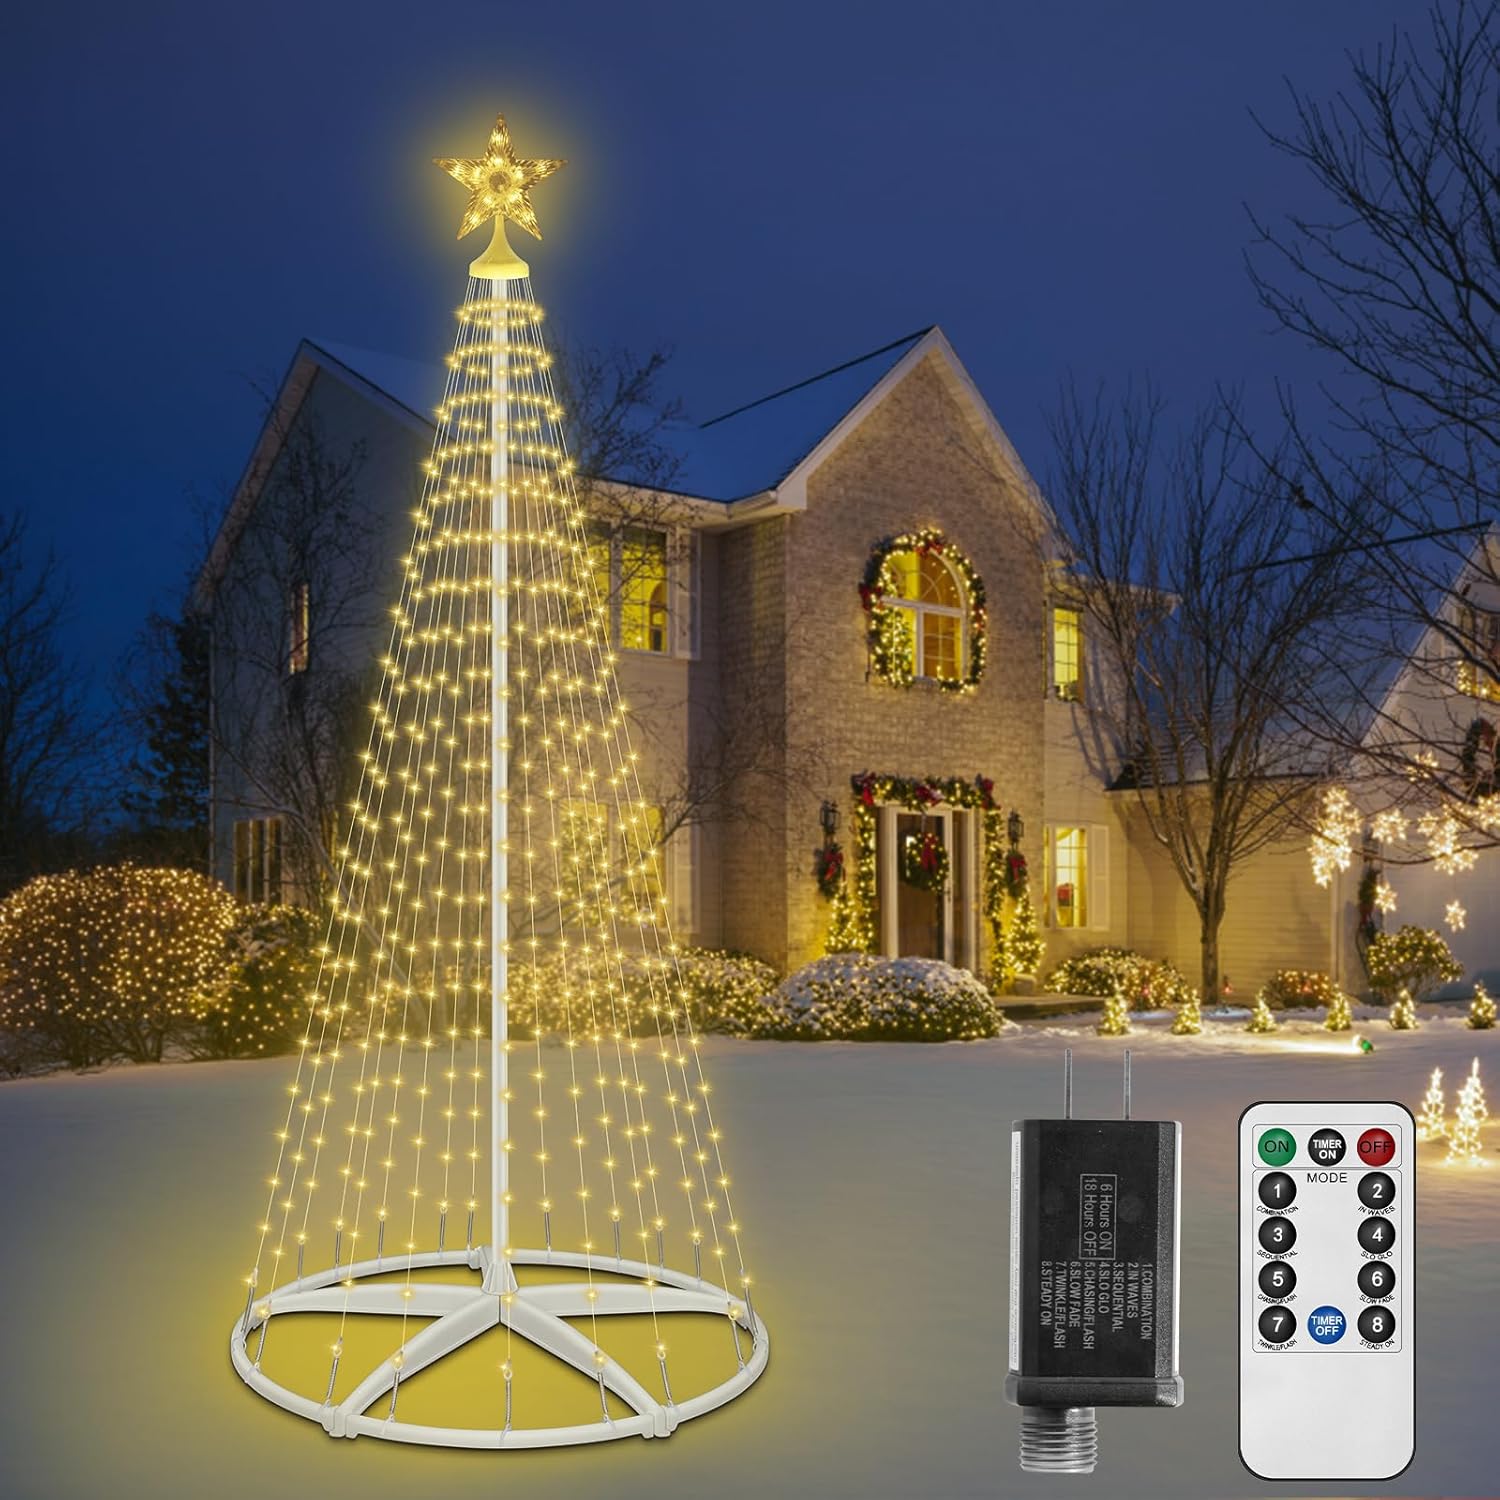
Image 1.1: The HELESIN 7.5ft 310 LED Christmas Tree Lights illuminated outdoors.
2. Safety Information
- Read and understand all instructions before installing or operating the lights.
- For outdoor use, ensure all connections are secure and the UL certified low-voltage adapter is protected from direct water exposure, despite the IP44 waterproof rating.
- Use only the provided UL certified low-voltage adapter. Using an unapproved adapter may cause damage or safety hazards.
- Do not attempt to modify the product or its components. Unauthorized modifications can void the warranty and create safety risks.
- Keep the lights away from heat sources, open flames, and flammable materials.
- Unplug the lights from the power outlet when not in use, during installation, or during severe weather conditions such as heavy rain, snow, or strong winds.
- Ensure the product is securely anchored when used outdoors to prevent it from falling over in windy conditions.
- The LED beads remain cool to the touch even after prolonged use, ensuring safe handling.
3. Package Contents
Verify that all components listed below are included in your package:
- LED Light String Body with Star Topper (7.5ft, 310 LEDs)
- Detachable Base Bracket
- Connecting Rods (for vertical support)
- Spring Hooks (for securing light strings)
- Metal Ground Inserts (stakes)
- UL Certified Low-Voltage Adapter
- Remote Control

Image 3.1: Overview of all included components.
4. Setup and Installation
Follow these steps to assemble and install your HELESIN Christmas Tree Lights:
- Assemble the Base: Connect the curved sections of the detachable base bracket to form a stable circular base. (Refer to step 1 and 2 in Image 4.1)
- Insert Connecting Rods: Insert the straight connecting rods into the designated slots on the base. Ensure they are firmly connected. (Refer to step 3 in Image 4.1)
- Attach Star Topper: Place the star topper onto the top of the assembled connecting rods. The LED light strings should hang down from the star. (Refer to step 4 in Image 4.1)
- Secure Light Strings: Distribute the LED light strings evenly around the base. Use the provided spring hooks to attach the bottom of each light string to the base bracket. (Refer to step 5 and 6 in Image 4.1)
- Ground Anchoring (Outdoor Use): For outdoor installation, use the metal ground inserts (stakes) to secure the base firmly into the ground, preventing movement due to wind.
- Connect Power: Plug the UL certified low-voltage adapter into a standard power outlet.
Image 4.1: Step-by-step assembly guide for the Christmas tree lights.
5. Operating Instructions
5.1 Power On/Off
Once the adapter is plugged into a power outlet, the lights will turn on. To turn off, unplug the adapter or use the remote control.
5.2 Control Methods
The lights can be controlled using either the included remote control or the mode button located on the adapter.
5.3 Lighting Modes
The lights feature 8 distinct lighting modes. Press the 'MODE' button on the remote or the button on the adapter to cycle through them:
- Combination
- In Waves
- Sequential
- Slow Glow
- Chasing/Flash
- Slow Fade
- Twinkle/Flash
- Steady On

Image 5.1: Remote control with buttons for 8 lighting modes and timer.
5.4 Timer Function
The lights include a built-in timer function. When activated, the lights will automatically stay ON for 8 hours and then turn OFF for 16 hours, repeating the cycle. Activate the timer using the remote control.

Image 5.2: Illustration of the scheduled timer function.
5.5 Memory Function
The lights are equipped with a memory function. This means they will remember the last selected lighting mode even after being powered off and then back on.
6. Maintenance
- Cleaning: Gently wipe the lights and components with a soft, dry cloth. Do not use harsh chemicals or abrasive cleaners.
- Storage: When not in use, disassemble the lights and store them in their original packaging or a suitable container in a cool, dry place, away from direct sunlight and moisture.
- Inspection: Before each use, inspect the light strings, adapter, and all connections for any signs of damage, fraying, or loose parts. Do not use if any damage is found.
7. Troubleshooting
If you encounter issues with your HELESIN Christmas Tree Lights, refer to the following troubleshooting guide:
| Problem | Possible Cause | Solution |
|---|---|---|
| Lights do not turn on. | No power supply. Adapter not properly connected. Remote control battery depleted. | Ensure the adapter is securely plugged into a working power outlet. Check all connections. Replace the remote control battery. Try using the mode button on the adapter. |
| Remote control is not working. | Remote battery depleted. Obstruction between remote and receiver. Remote out of range. | Replace the remote control battery. Ensure a clear line of sight to the adapter. Move closer to the adapter (within 2 feet for optimal performance). |
| Lights are flickering or malfunctioning. | Loose connection. Water ingress (if outdoor). Damaged light string. | Check all connections, especially where the light strings meet the adapter. Ensure the adapter and connections are protected from excessive moisture. If a section is damaged, discontinue use and contact customer support. |
8. Specifications
| Feature | Specification |
|---|---|
| Model Number | HX-ZXS-CS |
| Height | 7.5 Feet (approx. 228.6 cm) |
| Base Diameter | 22.8 inches (approx. 58 cm) |
| LED Count | 310 LEDs |
| Light Color | Warm White (3000 Kelvin) |
| Power Source | Corded Electric (UL Certified Low-Voltage Adapter) |
| Indoor/Outdoor Usage | Outdoor (IP44 Waterproof) |
| Control Method | Remote Control, Adapter Button |
| Lighting Modes | 8 Modes |
| Timer Function | 8 Hours ON / 16 Hours OFF |
| Memory Function | Yes |
| Material | Metal, Plastic |
| Manufacturer | Shenzhen Hengxian Technology Co.Ltd |

Image 8.1: Product dimensions and specifications overview.
9. Warranty and Support
For product support, warranty information, or to report any issues, please contact HELESIN customer service through the retailer's platform or the contact information provided with your purchase. Please retain your proof of purchase for warranty claims.