
1. Introduction
This manual provides detailed instructions for the installation, operation, and maintenance of your CSBST 24V/36V/48V 500W Ebike Controller Kit with G23 LCD Display. This kit is designed for electric bicycles, scooters, and tricycles, offering sensitive control and robust protection for brushless motors.
The kit includes:
- 1 x Brushless DC Motor Controller (500W, 25A)
- 1 x G23 LCD Display Control Panel with integrated thumb throttle
The controller supports 24V, 36V, and 48V battery systems and is compatible with 500W brushless motors, including those with Hall sensors. The G23 LCD display provides essential riding information and allows for parameter adjustments.
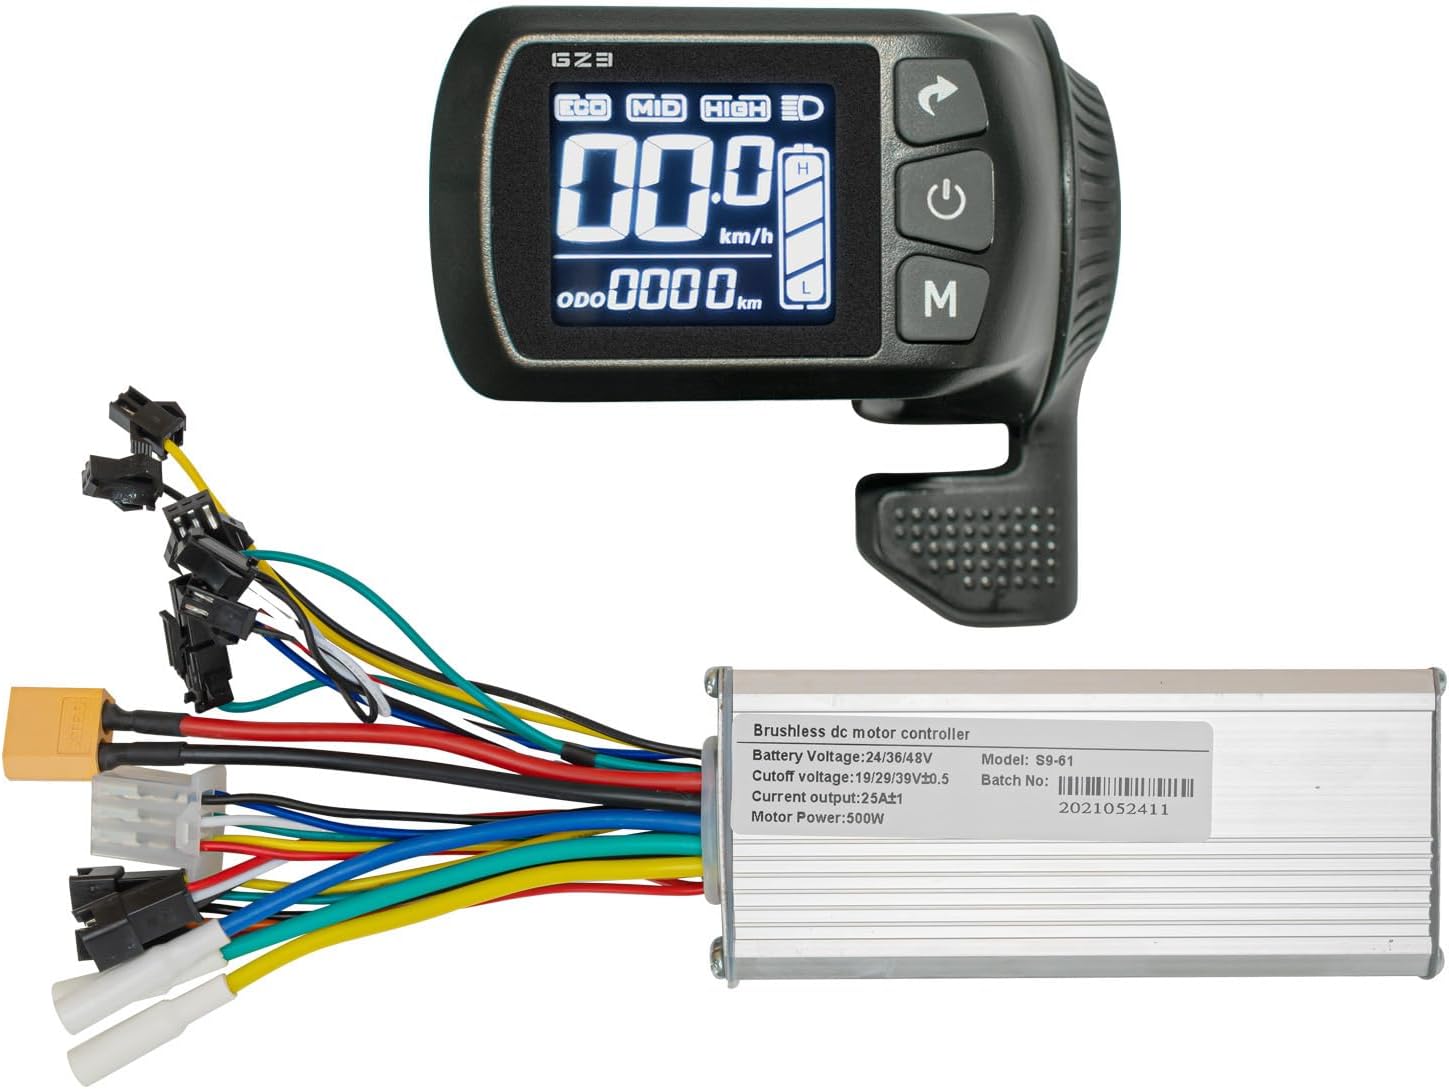
Image 1.1: The CSBST 500W Ebike Controller and G23 LCD Display Kit.
2. Product Specifications
Controller Specifications:
- Voltage: 24V/36V/48V (Auto-detection)
- Current Output: 25A
- Motor Power: 500W
- Cutoff Voltage: 19V/28V/39V/50.5V (depending on battery voltage)
- Type: Brushless DC
- Mosfet: 9Mos
- Material: Aluminum + Plastic
- Dimensions: 120mm x 50mm x 30mm (approx.)
- Weight: Approx. 250g
G23 LCD Display Specifications:
- Product Name: G23
- Product Shell: ABS
- Gear Mode: 1-3
- Net Weight: 130g
- Voltage Rating: 24V/36V/48V
- Waterproof Rating: IP65
- Mounting Bracket Diameter: 22mm / 0.8in

Image 2.1: Detailed specifications and dimensions of the brushless DC motor controller.
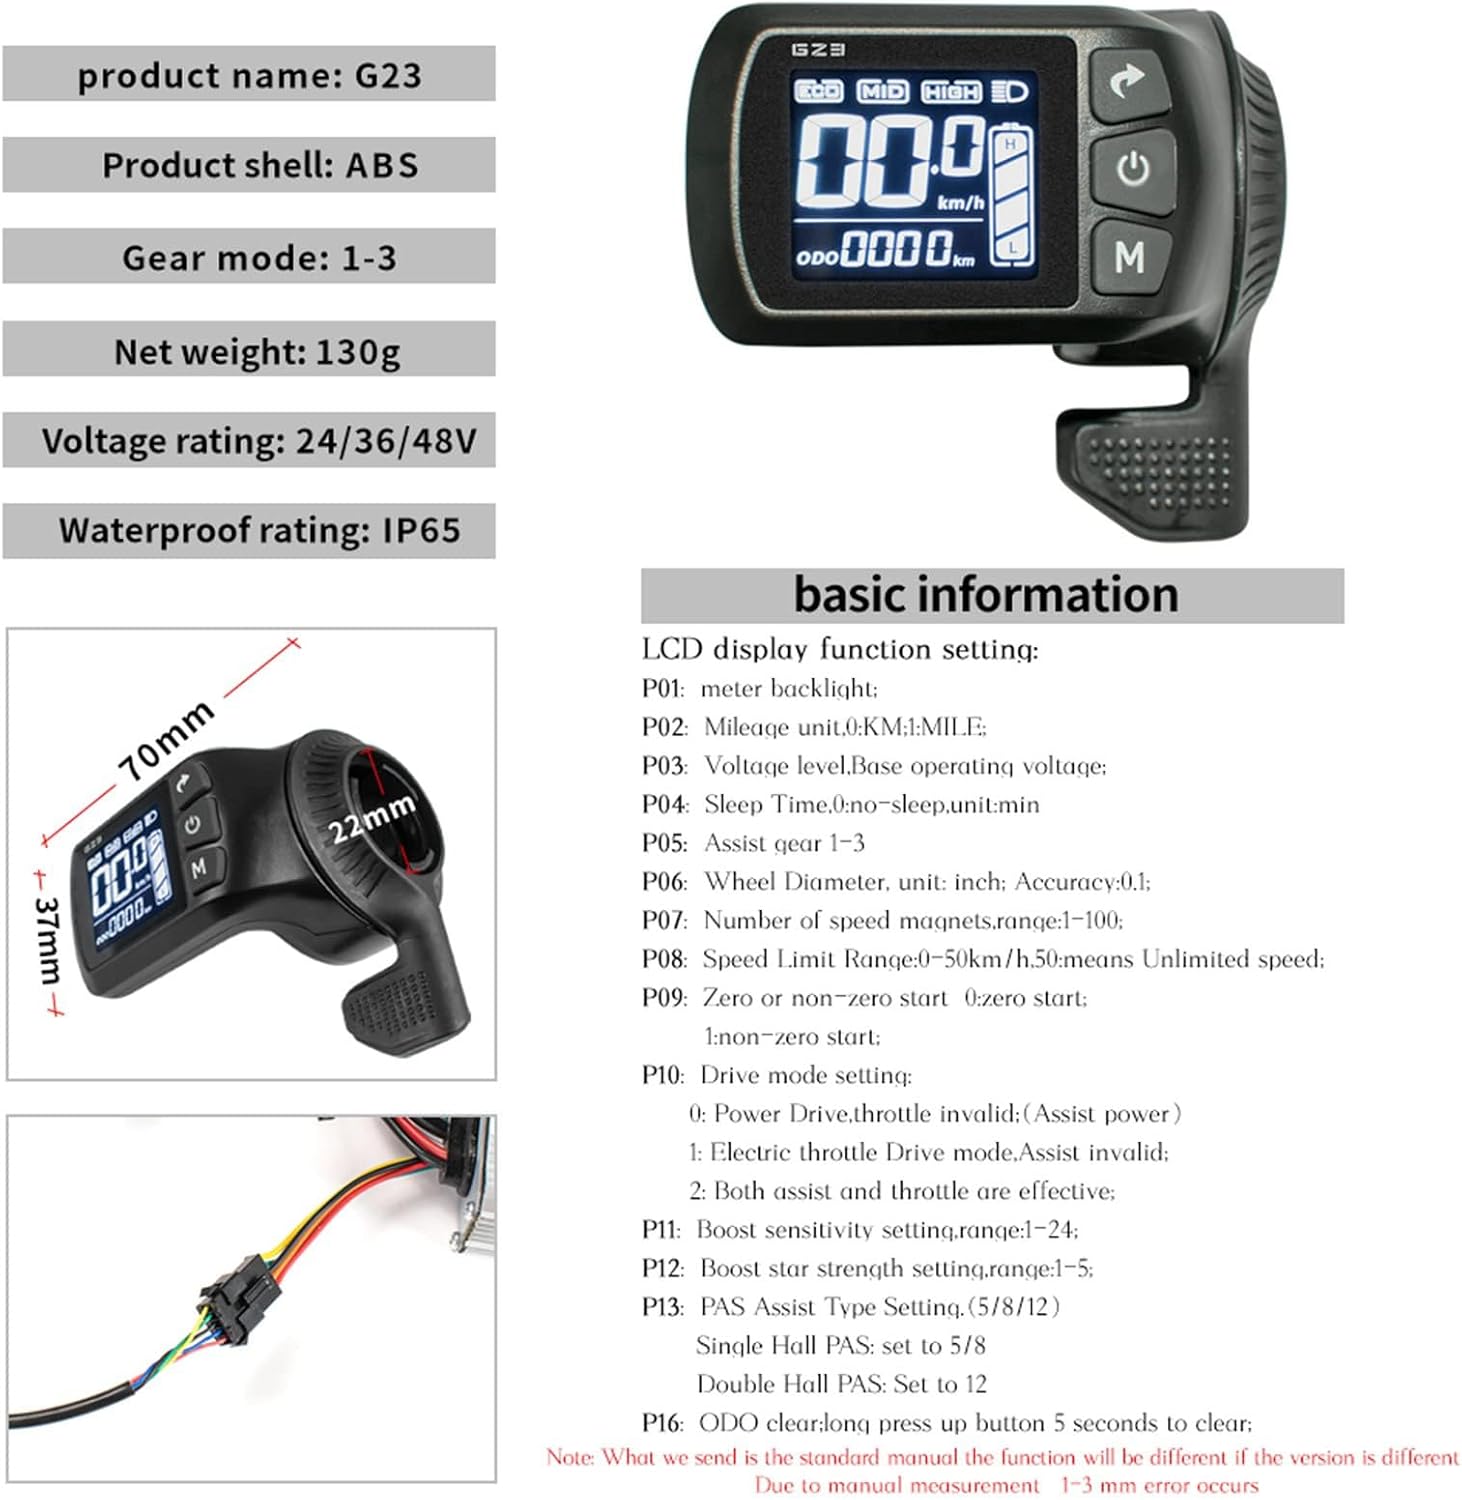
Image 2.2: G23 LCD display dimensions and IP65 waterproof rating.
3. Installation Guide
Follow these steps carefully to install your ebike controller kit. Ensure the power is off before making any connections.
3.1 Wiring Diagram
Refer to the following diagram for correct wire connections. Each interface on the controller has an instruction label for easy identification.

Image 3.1: Main wiring diagram for the ebike controller, showing connections for headlight, PAS sensor, brake, throttle, Hall sensor, display, battery, and motor phase.

Image 3.2: Detailed wiring diagram showing specific connector types for battery, throttle, Hall sensor, display, brake, PAS sensor, and headlight.
3.2 Connection Steps
- Connect the battery and motor:
- Connect the controller power wire to the battery. Caution: Ensure correct positive and negative polarity.
- Connect the controller to the motor. This includes the motor phase wires and the motor Hall sensor wires, connecting them one by one.
- Connect the controller to the G23 LCD display.
- Self-learning matching motor:
The self-learning function helps the controller adapt to your motor. This process is valid within 2 minutes of starting up. If more than 2 minutes pass, the system needs to be turned off and restarted.
- Power on the meter (long press the power button of the display for 3 seconds).
- Locate the two green self-learning wires on the controller and plug them into each other. The motor wheel will rotate. Note: Lift the motor wheel off the ground beforehand to prevent speeding.
- Allow the motor to rotate for 10 seconds, then disconnect the two self-learning wires from each other. Do not turn off the power during this step.
After completing these steps, the motor matching is complete, and the test motor can be connected to the throttle.
For other functions, please connect the wiring harness on the ebike controller into the socket of the corresponding accessories according to the instruction labels.

Image 3.3: Visual guide for connecting and detaching the self-learning wires.
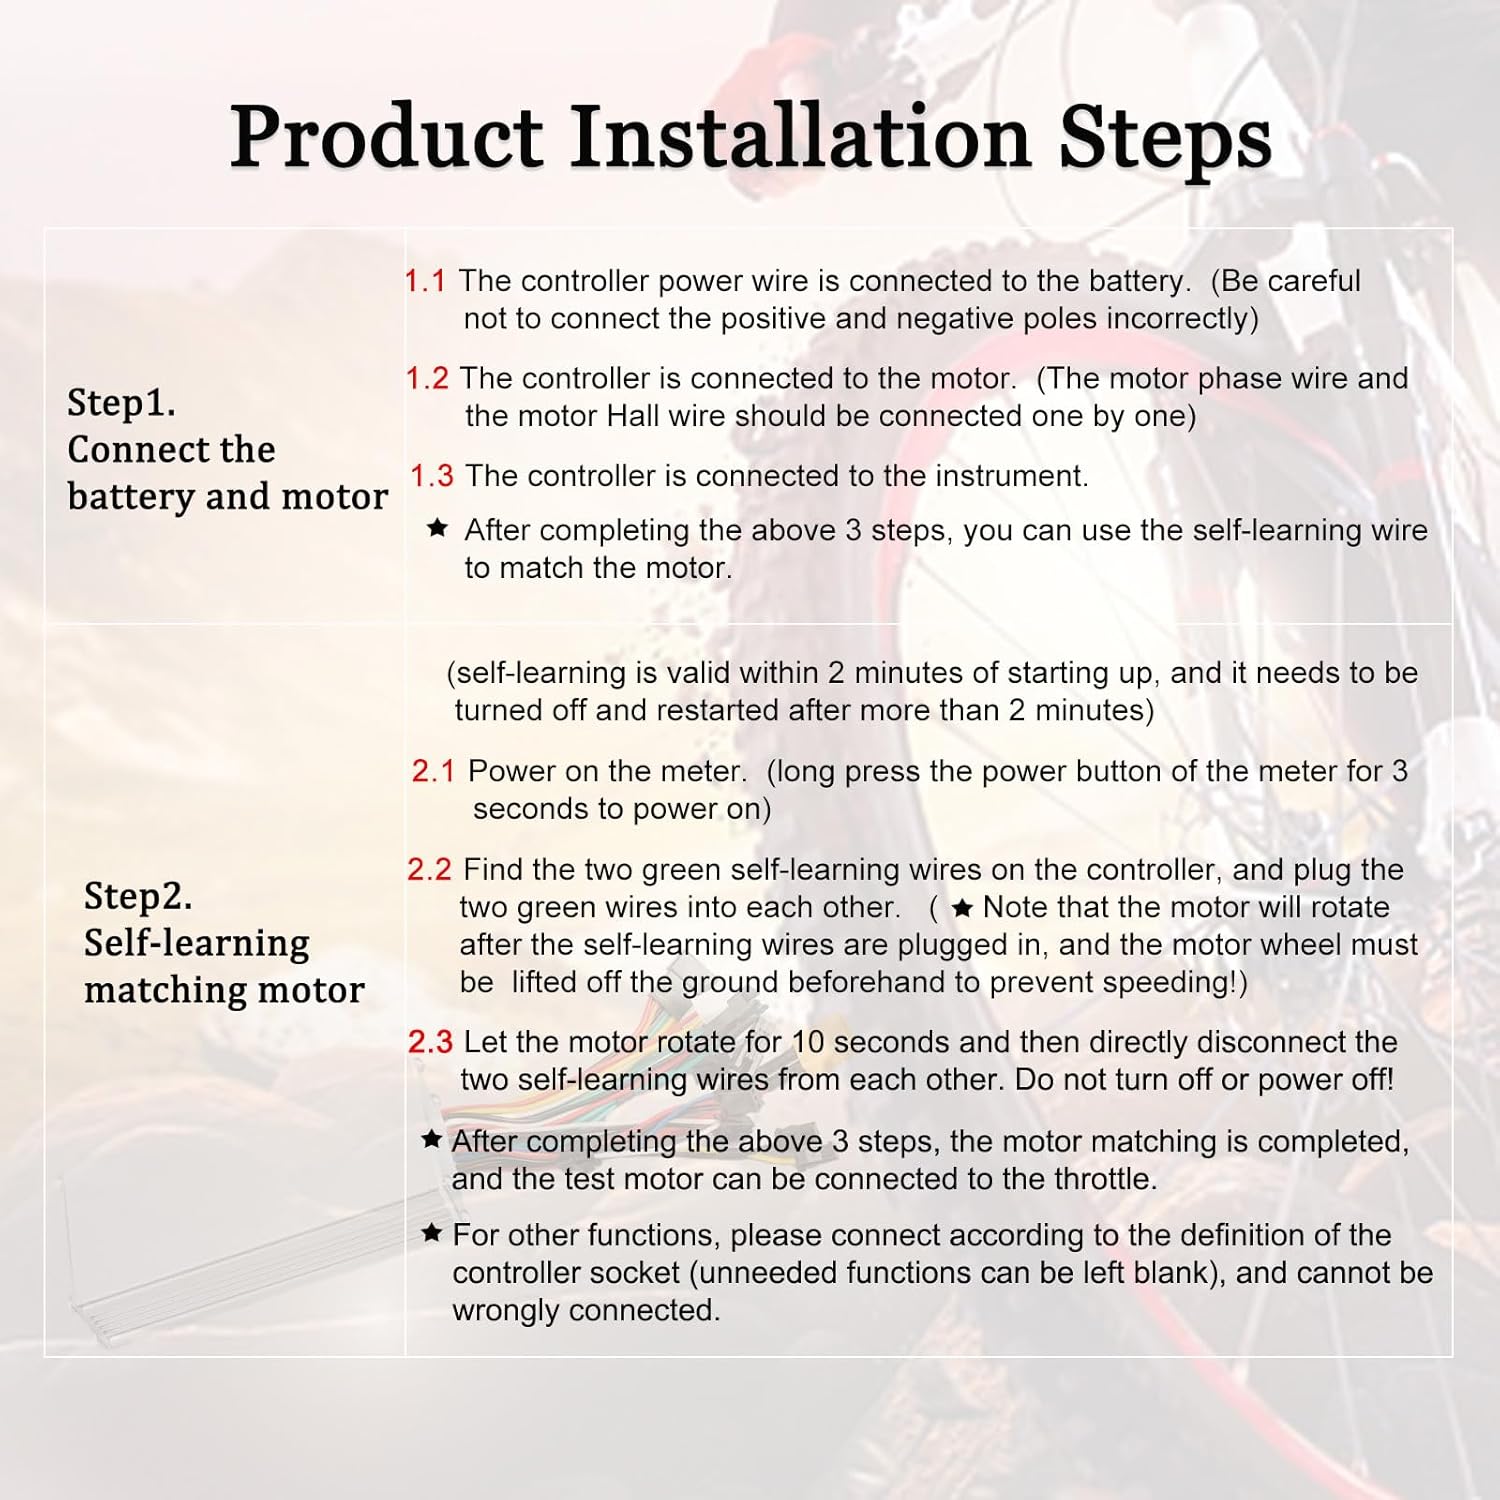
Image 3.4: Diagram illustrating the product installation steps, including battery/motor connection and self-learning.
4. G23 LCD Display Operation
The G23 LCD display provides various functions and settings for your ebike. It is waterproof and heat-resistant, ensuring durability.
4.1 Display Overview
The display shows real-time speed, battery power, riding time, and total or single mileage. It also features a headlight icon, battery level indicator, speed unit (km/mile), parameter value display area, and an integrated thumb throttle.

Image 4.1: Overview of the G23 LCD display's functions, including mileage, switch setting, mode setting, electricity display, brightness setting, fault display, voltage setting, speed display, and headlight display.

Image 4.2: Detailed guide for operating the G23 LCD display buttons, including power on/off, headlight control, cruise mode, and setting adjustments.
4.2 Button Operations
- Press and hold the Power button for 3 seconds to turn on/off the display.
- Press and hold the Power button for 3 seconds to turn on/off the headlight.
- Press the M button to start or close the cruise control (6 km/h cruise).
- Press the Up and M buttons together for 3 seconds to enter/exit and save the setting interface.
- Press the Power button to select function items (P01~P16 can be selected).
- Press the Up or M buttons to add/reduce the parameter values of relevant functions.
The first button is used to shift up, the second button is ON/OFF, and the 'M' button is used to shift down.
4.3 LCD Display Function Settings (P01-P16)
The display allows you to adjust various parameters. Note that the actual function may differ slightly if the display version is different.
| Parameter | Description | Range/Notes |
|---|---|---|
| P01 | Meter backlight brightness | Adjustable |
| P02 | Mileage unit | 0:KM, 1:MILE |
| P03 | Voltage level/Base operating voltage | Adjustable |
| P04 | Sleep Time | 0:no-sleep, unit:min |
| P05 | Assist gear | 1-3 |
| P06 | Wheel Diameter | Unit: inch, Accuracy: 0.1 |
| P07 | Number of speed magnets | Range: 1-100 |
| P08 | Speed Limit | Range: 0-50km/h, 50 means Unlimited speed |
| P09 | Zero or non-zero start | 0:zero start, 1:non-zero start |
| P10 | Drive mode setting | 0: Power Drive (throttle invalid), 1: Electric Throttle Drive (assist invalid), 2: Both assist and throttle are effective |
| P11 | Boost sensitivity setting | Range: 1-24 |
| P12 | Boost start strength setting | Range: 1-5 |
| P13 | PAS Assist Type Setting | Single Hall PAS: set to 5/8, Double Hall PAS: set to 12 |
| P16 | ODO clear | Long press Up button for 5 seconds to clear. |
Image 4.3: Table of G23 LCD display function settings (P01-P16) and their descriptions.
5. Troubleshooting
This section addresses common questions and issues you might encounter.
- How does the LCD display show speed?
Check the accuracy of the parameter settings for meter P07. The P07 value should be set according to the motor parameters. If you are unsure, set the values one by one. When the LCD speed is similar to your GPS speed, the settings are correct. Note: P07 setting only affects the speed value on the LCD display, not the actual speed.
- How to turn on the headlights?
Press and hold the first button on the LCD display for 3 seconds after turning on the LCD to power on the headlights. The headlight should then function.
- How to solve the E07 error in the Display?
E07 indicates a motor malfunction. It is usually necessary to check if the cable sequence of the motor and controller is consistent. If the motor is not connected correctly, E07 errors may also occur.

Image 5.1: Common questions and troubleshooting tips for the ebike controller and display.
6. Warranty and Support
The CSBST Ebike Controller Kit comes with a limited 6-month warranty. For warranty claims or technical support, please contact the seller or refer to the official CSBST brand store.
For additional information and support, visit the CSBST Store on Amazon.