1. Product Overview
This manual provides detailed instructions for the installation and operation of your BrickSoul LED Light Kit, specifically designed to enhance the Lego Walt Disney Tribute Camera (Model 43230). This kit adds illumination to your Lego model, bringing it to life with vibrant lighting effects.

Image 1.1: The BrickSoul LED Light Kit illuminating the Lego Walt Disney Tribute Camera model.
The BrickSoul LED Light Kit is engineered for seamless integration with your Lego set, ensuring that the added lighting complements the original design without compromising structural integrity. It features high-quality LED components and durable wiring for reliable performance.

Image 1.2: Visual comparison demonstrating the enhanced appearance of the Lego model with the LED light kit installed.
2. Package Contents
Please verify that all components listed below are present in your package before beginning installation. If any parts are missing or damaged, please contact customer support.
- LED Light Strips and Individual LEDs
- Connecting Cables
- USB Power Cable
- Battery Box (batteries not included)
- Instruction Manual (this document)
- Additional Lighting Accessories (e.g., small circuit boards, adhesive pads)

Image 2.1: Overview of the main components included in the BrickSoul LED Light Kit.
- Cable Interface: Reinforced, high-quality light cables for secure connections.
- Battery Box: Designed for durability and long-lasting power (requires 3x AA batteries, not included).
- Lighting Accessories: Exquisite and delicate components ensuring quality illumination.
- LED Lighting: Provides excellent and stable lighting effects.
3. Safety Information
Please read and follow these safety guidelines carefully to prevent injury or damage to the product.
- This product contains small parts and is not suitable for children under 3 years old due to choking hazards.
- Keep all electrical components away from water or moisture. This product is not waterproof.
- Do not attempt to modify or disassemble the LED components or wiring. This may damage the product and void the warranty.
- Ensure the power source (USB or battery box) is appropriate for the kit (5V DC).
- Handle wires and LEDs gently to avoid breakage.
- If using a battery box, ensure batteries are inserted with correct polarity. Remove batteries if the kit will not be used for an extended period.
4. Setup and Installation
This section guides you through the process of integrating the LED light kit with your Lego Walt Disney Tribute Camera (Model 43230). It is recommended to have the original Lego instruction manual handy for reference during disassembly and reassembly.
4.1 Preparation
- Ensure your Lego model 43230 is fully assembled according to its original instructions.
- Gather all components of the BrickSoul LED Light Kit and verify against the package contents list.
- Prepare a clean, well-lit workspace.
4.2 Installing the Lights
The installation process involves carefully disassembling specific sections of your Lego model, integrating the LED components, and then reassembling. Refer to the images for visual guidance.
- Camera Reels Illumination:
Carefully detach the top sections of the camera, specifically the film reels. Integrate the circular LED light strips into the designated areas within the reels. Ensure wires are neatly tucked and routed through existing gaps or under bricks to remain hidden.
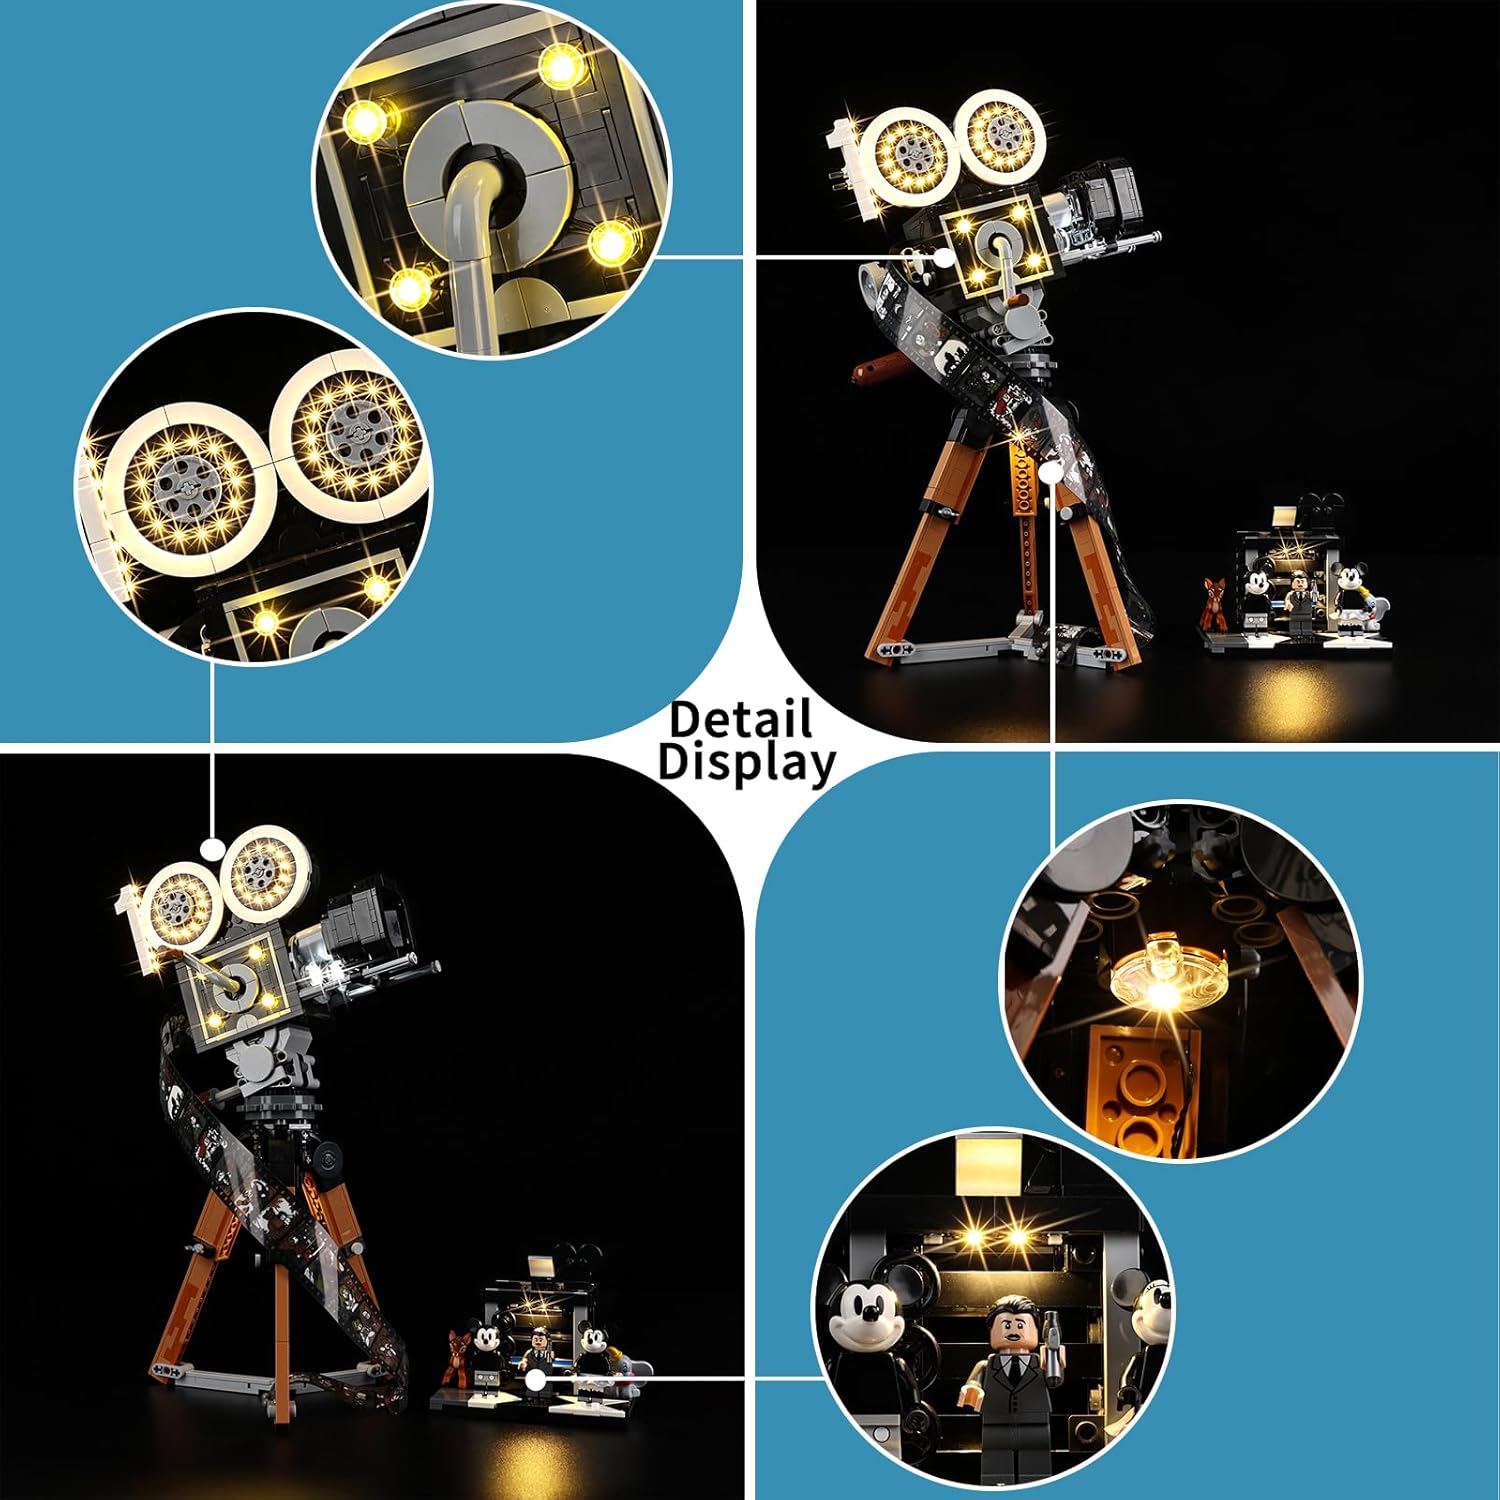
Image 4.1: Close-up showing the integration of LED lights into the camera's film reels and central lens.
- Central Lens and Viewfinder Lighting:
Install smaller LEDs or light strips around the central lens and within the viewfinder area. These lights often require careful placement to shine through transparent or translucent Lego elements. Route wires discreetly along the camera body.
- Mini-Set Illumination (Mickey Mouse and Minnie Mouse Scene):
For the accompanying mini-set featuring Mickey Mouse and Minnie Mouse, place individual LEDs or small light strips to illuminate the characters and the backdrop. This may involve lifting small sections of the baseplate or walls to secure the lights and route the wiring.
Image 4.2: Close-up illustrating the lighting of the mini-set, highlighting the figures and background elements.
- Connecting Components:
Connect all individual LED light components to the main circuit board or connecting cables provided. Ensure all connections are firm. Use the reinforced cable interfaces for secure attachment.
- Power Source Connection:
Connect the main wiring harness to either the USB power cable or the battery box. If using the battery box, insert 3x AA batteries (not included) ensuring correct polarity.
- Cable Management:
Carefully route all wires to minimize visibility and prevent them from being pinched or damaged during reassembly. Use adhesive pads or small Lego elements to secure wires if necessary.
- Reassembly:
Gently reassemble the Lego model, ensuring no wires are caught or stressed. Test the lights periodically during reassembly to confirm functionality.
5. Operating Instructions
Once the BrickSoul LED Light Kit is fully installed, operating it is straightforward.
- Power On:
- If using the USB power cable, connect it to a 5V USB power source (e.g., wall adapter, power bank, computer USB port).
- If using the battery box, ensure batteries are installed, then slide the switch on the battery box to the "ON" position.
- Light Control:
The kit features a touch-sensitive switch for controlling the lights. Gently touch the designated area (often a small, integrated button or sensor) to cycle through lighting modes or to turn the lights on/off. Refer to the specific lighting accessories for exact control methods.
- Power Off:
- Disconnect the USB power cable from its source.
- Slide the switch on the battery box to the "OFF" position.

Image 5.1: The illuminated Lego model displayed in different ambient light conditions.
6. Maintenance
Proper care will ensure the longevity and optimal performance of your BrickSoul LED Light Kit.
- Cleaning: Use a soft, dry cloth to gently wipe dust from the LED components and wires. Avoid using liquid cleaners or abrasive materials.
- Storage: If storing the Lego model with the light kit installed, ensure wires are not kinked or under pressure.
- Battery Replacement: If using the battery box, replace all batteries simultaneously with new ones of the same type (AA). Do not mix old and new batteries or different battery types.
- Environmental Conditions: Keep the model and light kit in a dry environment, away from direct sunlight and extreme temperatures.
7. Troubleshooting
If you encounter issues with your BrickSoul LED Light Kit, refer to the following common problems and solutions.
| Problem | Possible Cause | Solution |
|---|---|---|
| Lights do not turn on. |
|
|
| Some lights are not working. |
|
|
| Lights flicker or are dim. |
|
|
8. Specifications
| Feature | Detail |
|---|---|
| Product Name | BrickSoul LED Light Kit for Lego Walt Disney Tribute Camera |
| Model Number | 43230-cv-FBM (Compatible with Lego Model 43230) |
| Light Source Type | LED |
| Power Source | Corded Electric (USB) or Battery Box |
| Voltage | 5 Volts (DC) |
| Control Method | Touch Switch |
| Base Material | Plastic |
| Indoor/Outdoor Usage | Indoor Only |
| Water Resistance Level | Not Water Resistant |
| Item Weight | Approximately 1.92 ounces (0.12 Pounds) |
| UPC | 731140979351 |
9. Warranty and Customer Support
BrickSoul is committed to providing high-quality products. For specific warranty details, please refer to the warranty card included with your purchase or visit the official BrickSoul website.
If you have any questions, require assistance with installation, or experience issues not covered in the troubleshooting section, please contact our customer support team:
- Email: [Insert Customer Support Email Here, if available]
- Website: Visit the BrickSoul Store on Amazon
- Phone: [Insert Customer Support Phone Number Here, if available]
Please have your product model number (43230-cv-FBM) and purchase date ready when contacting support.


