Introduction
Thank you for choosing the ONEMANA 20V MAX Brushless Cordless Drywall Screw Gun Kit. This versatile tool is engineered for efficiency and precision, combining the functionality of a high-torque drywall screwdriver with an auto-feed screw gun. Designed for professional and demanding applications, it ensures consistent performance in various construction tasks, from drywall installation to framing.
Please read this manual thoroughly before operating the tool to ensure safe and effective use. Keep this manual for future reference.
Safety Information
Always follow basic safety precautions when using power tools to reduce the risk of fire, electric shock, and personal injury.
- Work Area Safety: Keep your work area clean and well-lit. Cluttered or dark areas invite accidents. Do not operate power tools in explosive atmospheres, such as in the presence of flammable liquids, gases, or dust.
- Electrical Safety: Avoid body contact with earthed or grounded surfaces such as pipes, radiators, ranges, and refrigerators. Do not expose power tools to rain or wet conditions.
- Personal Safety: Always wear eye protection. Use safety glasses, goggles, or a face shield. Wear hearing protection when operating the tool for extended periods. Dress properly; do not wear loose clothing or jewelry. Keep hair, clothing, and gloves away from moving parts.
- Tool Use and Care: Do not force the power tool. Use the correct power tool for your application. Disconnect the plug from the power source and/or the battery pack from the power tool before making any adjustments, changing accessories, or storing power tools.
- Battery Pack Safety: Recharge only with the charger specified by the manufacturer. Do not use battery packs with any other power tools. Do not incinerate the battery pack even if it is severely damaged.
Product Overview and Components
The ONEMANA 20V MAX Brushless Cordless Drywall Screw Gun Kit includes the main screw gun unit, a collated attachment, a 4.0Ah battery, and a rapid charger. Key features include a brushless motor, depth adjustment, and an integrated LED light.

Figure 1: ONEMANA 20V MAX Brushless Cordless Drywall Screw Gun Kit with included battery, charger, and accessories.

Figure 2: The innovative 2-in-1 design allows for quick conversion between a standard drywall screwdriver and an auto-feed screw gun.
Key Features:
- Brushless Motor: Delivers 4,200 RPM for smooth, vibration-free operation with reduced noise.
- 2-in-1 Design: Combines a high-torque drywall screwdriver with an auto-feed screw gun.
- Intuitive Operation: Features a lock-on mechanism and quick-release magazine for efficient screw installation.
- Smart Depth Control: Tool-free depth adjustment with clear visual markers for precise screw setting.
- 360° Jobsite Access: Rotating head design and slim profile for reaching tight spaces.
- Integrated LED Light: Illuminates the work area for improved visibility.
Setup
1. Battery Installation and Charging
Ensure the battery is fully charged before first use. Connect the charger to a power outlet and insert the battery pack. The charger indicator light will show charging status. Once fully charged, remove the battery from the charger.

Figure 3: The 4.0Ah battery features advanced propulsion technology for efficient power delivery and faster charging.
To install the battery, align the battery pack with the base of the tool handle and slide it in until it clicks securely into place. To remove, press the battery release button and slide the battery out.
2. Attaching the Collated Attachment
The collated attachment allows for rapid, continuous screw feeding. To attach, align the attachment with the front of the screw gun and push it firmly until it locks into position. Ensure it is securely fastened before use.
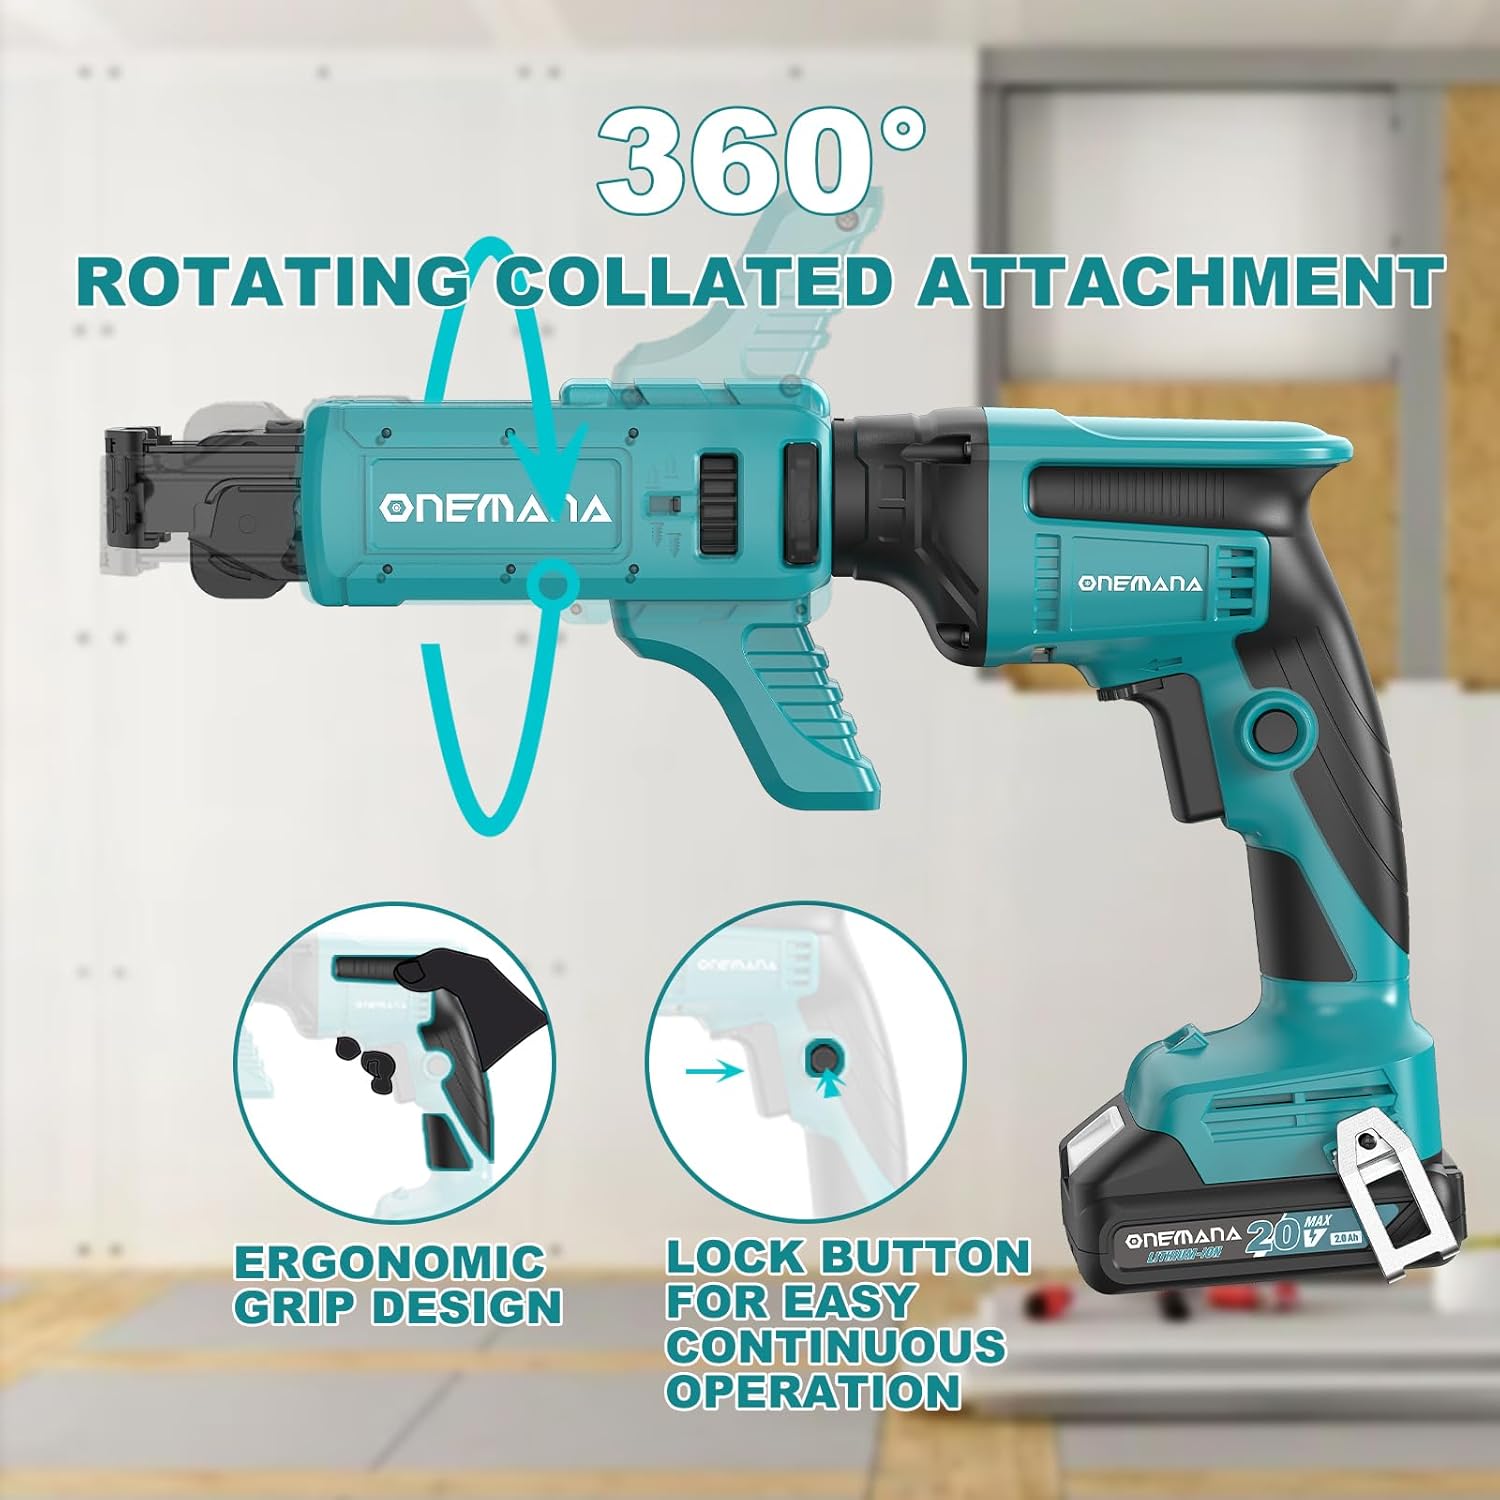
Figure 4: The collated attachment can rotate 360 degrees for optimal access in various working conditions.
3. Installing Screw Strips and Bits
For the auto-feed function, insert a strip of collated screws into the magazine of the attachment. Ensure the screws are properly aligned with the feeding mechanism. The tool supports screws ranging from 3/4" to 2-3/16" (25-57mm).

Figure 5: The quick-release magazine allows for easy switching between different screw sizes.
To install the driver bit, ensure the tool is off and the battery is removed. Insert the appropriate driver bit into the chuck until it is fully seated. For the auto-feed attachment, ensure the bit extends sufficiently to engage the screws.
Operating Instructions
1. Powering On/Off and Trigger Operation
To operate the tool, press the trigger switch. The tool will start rotating. For continuous operation, engage the lock-on button located near the trigger. To stop, release the trigger or disengage the lock-on button.
2. Adjusting Depth Control
The tool features tool-free depth adjustment. Rotate the depth adjustment collar to set the desired screw depth. Clear visual markers assist in achieving perfect screw sets every time, preventing over-driving or under-driving.
3. Using the Auto-Feed Mechanism
With the collated attachment installed and screw strips loaded, press the nose of the tool against the workpiece. The auto-feed mechanism will automatically advance the next screw as you drive the current one. Maintain steady pressure for consistent results.

Figure 6: The auto-feed mechanism ensures fast, continuous, and accurate screw feeding for increased productivity.
4. Forward/Reverse Control
The forward/reverse control lever is located above the trigger. Push it to the left for forward rotation (driving screws) and to the right for reverse rotation (removing screws). Always ensure the tool has come to a complete stop before changing direction.
5. LED Work Light
The integrated LED light automatically illuminates the work area when the trigger is pressed, providing enhanced visibility in dimly lit conditions.

Figure 7: The built-in LED light illuminates the work area, and the steel belt clip provides user convenience.
Maintenance
Cleaning
Regularly clean the tool's ventilation openings to prevent overheating. Use a soft, damp cloth to wipe down the exterior. Do not use harsh chemicals or abrasive cleaners. Ensure the tool is disconnected from the battery before cleaning.
Storage
Store the tool and battery in a cool, dry place, away from direct sunlight and extreme temperatures. Keep out of reach of children. If storing for extended periods, remove the battery from the tool.
Battery Care
To maximize battery life, avoid fully discharging the battery before recharging. Store batteries with a partial charge. Do not store batteries in extreme heat or cold.
Troubleshooting
| Problem | Possible Cause | Solution |
|---|---|---|
| Tool does not start | Battery not charged or improperly installed. | Ensure battery is fully charged and securely inserted. |
| Screws not feeding properly | Screw strip misaligned or jammed. Incorrect screw size. | Check screw strip alignment. Clear any jams. Ensure screws are within supported size range. |
| Screws not setting to correct depth | Depth adjustment incorrect. Worn driver bit. | Adjust depth collar. Replace worn driver bit. |
| Tool overheating | Blocked ventilation slots. Continuous heavy use. | Clean ventilation slots. Allow tool to cool down during prolonged use. |
Specifications
| Specification | Value |
|---|---|
| Brand | ONEMANA |
| Model Number | BR8504-P1901-ODSG18V+OCM57-NA-color box |
| Voltage | 20 Volts |
| Speed (No Load) | 4200 RPM |
| Chuck Size | 1/4" (6.35mm) |
| Compatible Screw Lengths | 1" - 2 1/4" (25-57mm) |
| Item Weight | 3.3 pounds |
| Power Source | Battery Powered |
Warranty and Support
Warranty Information
This ONEMANA product is covered by a limited warranty against defects in materials and workmanship. Please refer to the warranty card included with your purchase for specific terms and conditions, including warranty period and coverage details. Keep your proof of purchase for warranty claims.
Customer Support
For technical assistance, troubleshooting, or warranty inquiries, please contact ONEMANA customer support. Contact information can typically be found on the product packaging or on the official ONEMANA website. When contacting support, please have your product model number and purchase date ready.


