
1. Introduction
Thank you for choosing the Technoline WT320 Digital Alarm Clock. This device provides accurate time via DCF77 radio control, displays indoor and outdoor temperatures, and offers convenient alarm functions. Please read this manual carefully to ensure proper setup and operation.
2. Safety Information
- Keep the device away from extreme temperatures, direct sunlight, and moisture.
- Do not expose the device to strong vibrations or shocks.
- Do not attempt to disassemble or modify the device. This will void the warranty.
- Use only the specified battery types (2 x AA for main unit, 2 x AAA for sensor).
- Dispose of used batteries according to local regulations.
3. Package Contents
- Technoline WT320 Digital Alarm Clock (Main Unit)
- TX206 Outdoor Temperature Sensor
- User Manual (this document)
4. Product Features
- DCF77 Radio Controlled Clock: Automatic time synchronization for precision. Manual setting option available.
- Time Zone Setting: Adjustable from -2 to +2 hours.
- Date Display: Shows the current date.
- Weekday Display: Available in 7 languages.
- Indoor and Outdoor Temperature: Displays temperature in °C or °F.
- Dual Alarms with Snooze: Two independent alarms with a snooze function.
- Alarm Setting Types: Weekdays, weekends, or daily alarm options.
- Backlight: For easy viewing in low light conditions.
- Table Stand: Integrated for convenient placement.

Figure 1: Overview of Technoline WT320 key features including radio control, date display, dual alarms, and indoor/outdoor temperature measurement.
5. Setup
5.1 Battery Installation
- Main Unit (WT320): Open the battery compartment cover on the back of the main unit. Insert 2 x AA Mignon LR06 batteries, observing the correct polarity (+/-). Close the cover.
- Outdoor Sensor (TX206): Open the battery compartment cover on the back of the sensor. Insert 2 x AAA Micro LR03 batteries, observing the correct polarity (+/-). Close the cover.
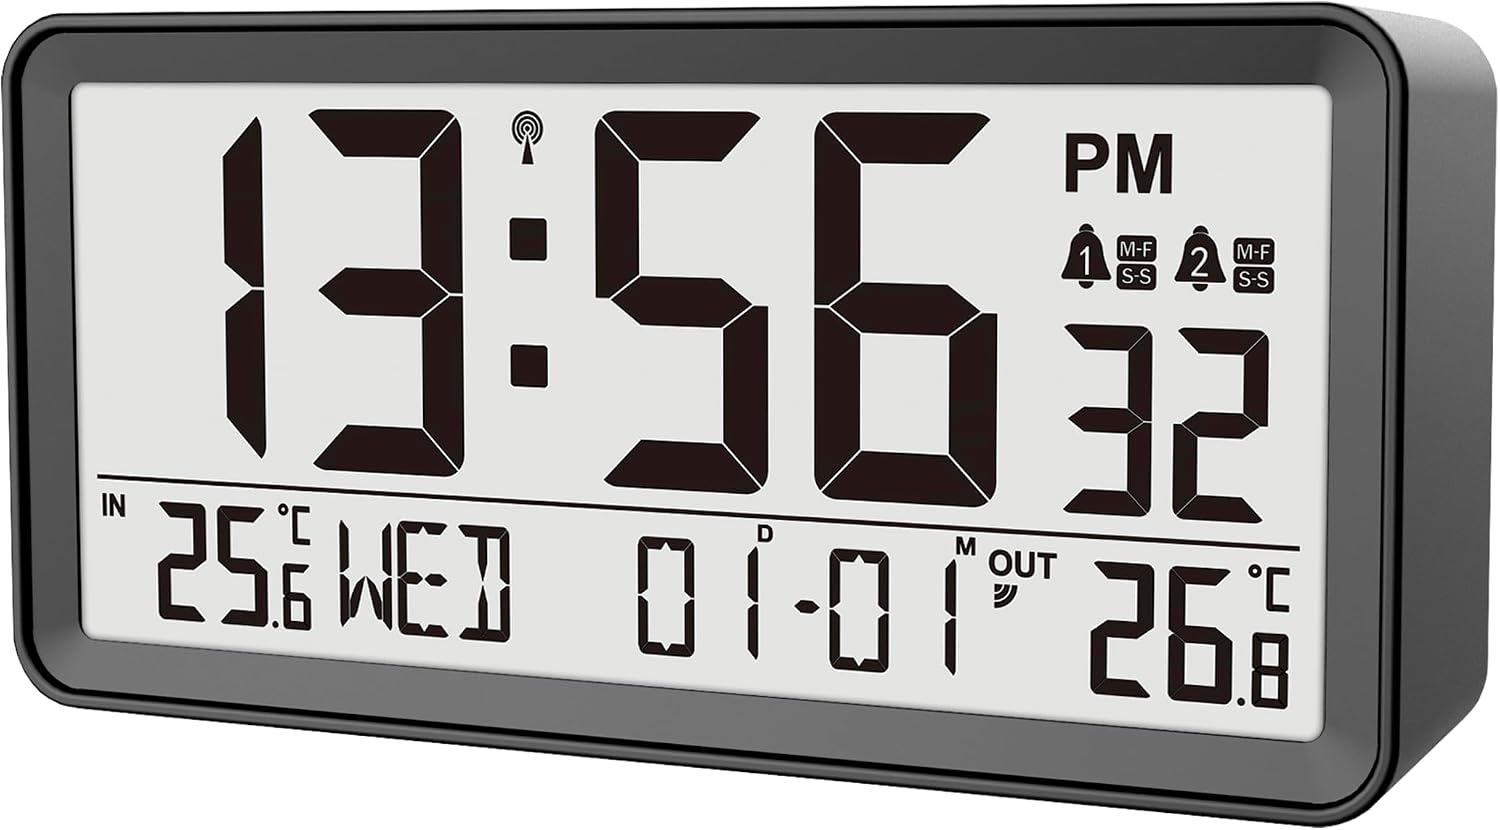
Figure 2: Front display of the Technoline WT320 main unit.

Figure 3: Back view of the TX206 outdoor temperature sensor, showing the battery compartment.
5.2 Initial Setup and DCF77 Signal Reception
After inserting batteries, the main unit will automatically begin searching for the DCF77 radio signal. This process can take several minutes. During this time, the radio signal icon will flash on the display. Once the signal is received, the time, date, and weekday will be set automatically, and the icon will become solid.
5.3 Time Zone Setting
If you are in a region with a different time zone than the DCF77 signal, you can manually adjust the time zone. Refer to the detailed instructions in the full manual for specific button presses to enter time zone adjustment mode.
6. Operating
6.1 Time and Date Display
The clock automatically displays the current time, date, and weekday once the DCF77 signal is received. You can manually set the time if the radio signal is unavailable or if you prefer a manual setting.
6.2 Temperature Display
The main unit displays both indoor and outdoor temperatures. The outdoor temperature is transmitted wirelessly from the TX206 sensor. You can switch between Celsius (°C) and Fahrenheit (°F) display modes.
6.3 Alarm Functions
The WT320 features two independent alarms. To set an alarm:
- Press the ALARM button to select Alarm 1 or Alarm 2.
- Use the SET buttons to adjust the desired alarm time.
- Choose the alarm type: weekdays (M-F), weekends (S-S), or daily.
- Activate the alarm. An alarm icon will appear on the display.
When an alarm sounds, press the SNOOZE button to temporarily silence it. The alarm will sound again after a short interval. To turn off the alarm completely, press any other button.
6.4 Backlight
Press the LIGHT button to activate the display backlight for a few seconds, improving visibility in dark environments.
7. Maintenance
7.1 Cleaning
Clean the device with a soft, damp cloth. Do not use abrasive cleaners or solvents, as these may damage the display or casing.
7.2 Battery Replacement
When the display becomes dim or the outdoor sensor loses connection, it is time to replace the batteries. Follow the battery installation steps in Section 5.1.
8. Troubleshooting
- No DCF77 Signal: Ensure the clock is placed away from electronic interference (TVs, computers) and metal objects. Try repositioning the unit. The signal reception is strongest at night.
- Incorrect Time: If the DCF77 signal is not received, manually set the time. Check the time zone setting.
- Outdoor Temperature Not Displaying: Ensure the TX206 sensor has fresh batteries and is within range (typically up to 30 meters in open air). Re-establish the connection by removing and reinserting batteries in both units.
- Display is Dim: Replace the batteries in the main unit.
9. Specifications

Figure 4: Dimensions of the Technoline WT320 main unit and TX206 outdoor sensor.
| Feature | Specification |
|---|---|
| Model | WT320 |
| Brand | Technoline |
| Colour | Black |
| Display Type | Digital |
| Main Unit Dimensions (WxHxD) | 187 x 91 x 48 mm (18.7W x 9.1H cm) |
| Sensor Dimensions (WxHxD) | 40 x 92 x 23 mm |
| Main Unit Power Supply | 2 x AA Mignon LR06 (not included) |
| Sensor Power Supply | 2 x AAA Micro LR03 (not included) |
| Indoor Temperature Range | -9.9 °C to 49.9 °C |
| Outdoor Temperature Range | -39.9 °C to 69.9 °C |
| Material | ABS (Acrylonitrile Butadiene Styrene) |
| Weight | 0.38 Kilograms (Main Unit) |
| Special Features | Calendar display, Snooze function, Alarm clock |
10. Warranty and Support
Technoline products are manufactured to high-quality standards. For warranty information and technical support, please refer to the documentation provided with your purchase or visit the official Technoline website. Keep your proof of purchase for warranty claims.


