
Introduction
This manual provides essential instructions for the safe and efficient use of your ORIA OUS-HY-HA140 Electric Precision Screwdriver Set. Please read this manual thoroughly before operating the device and retain it for future reference.
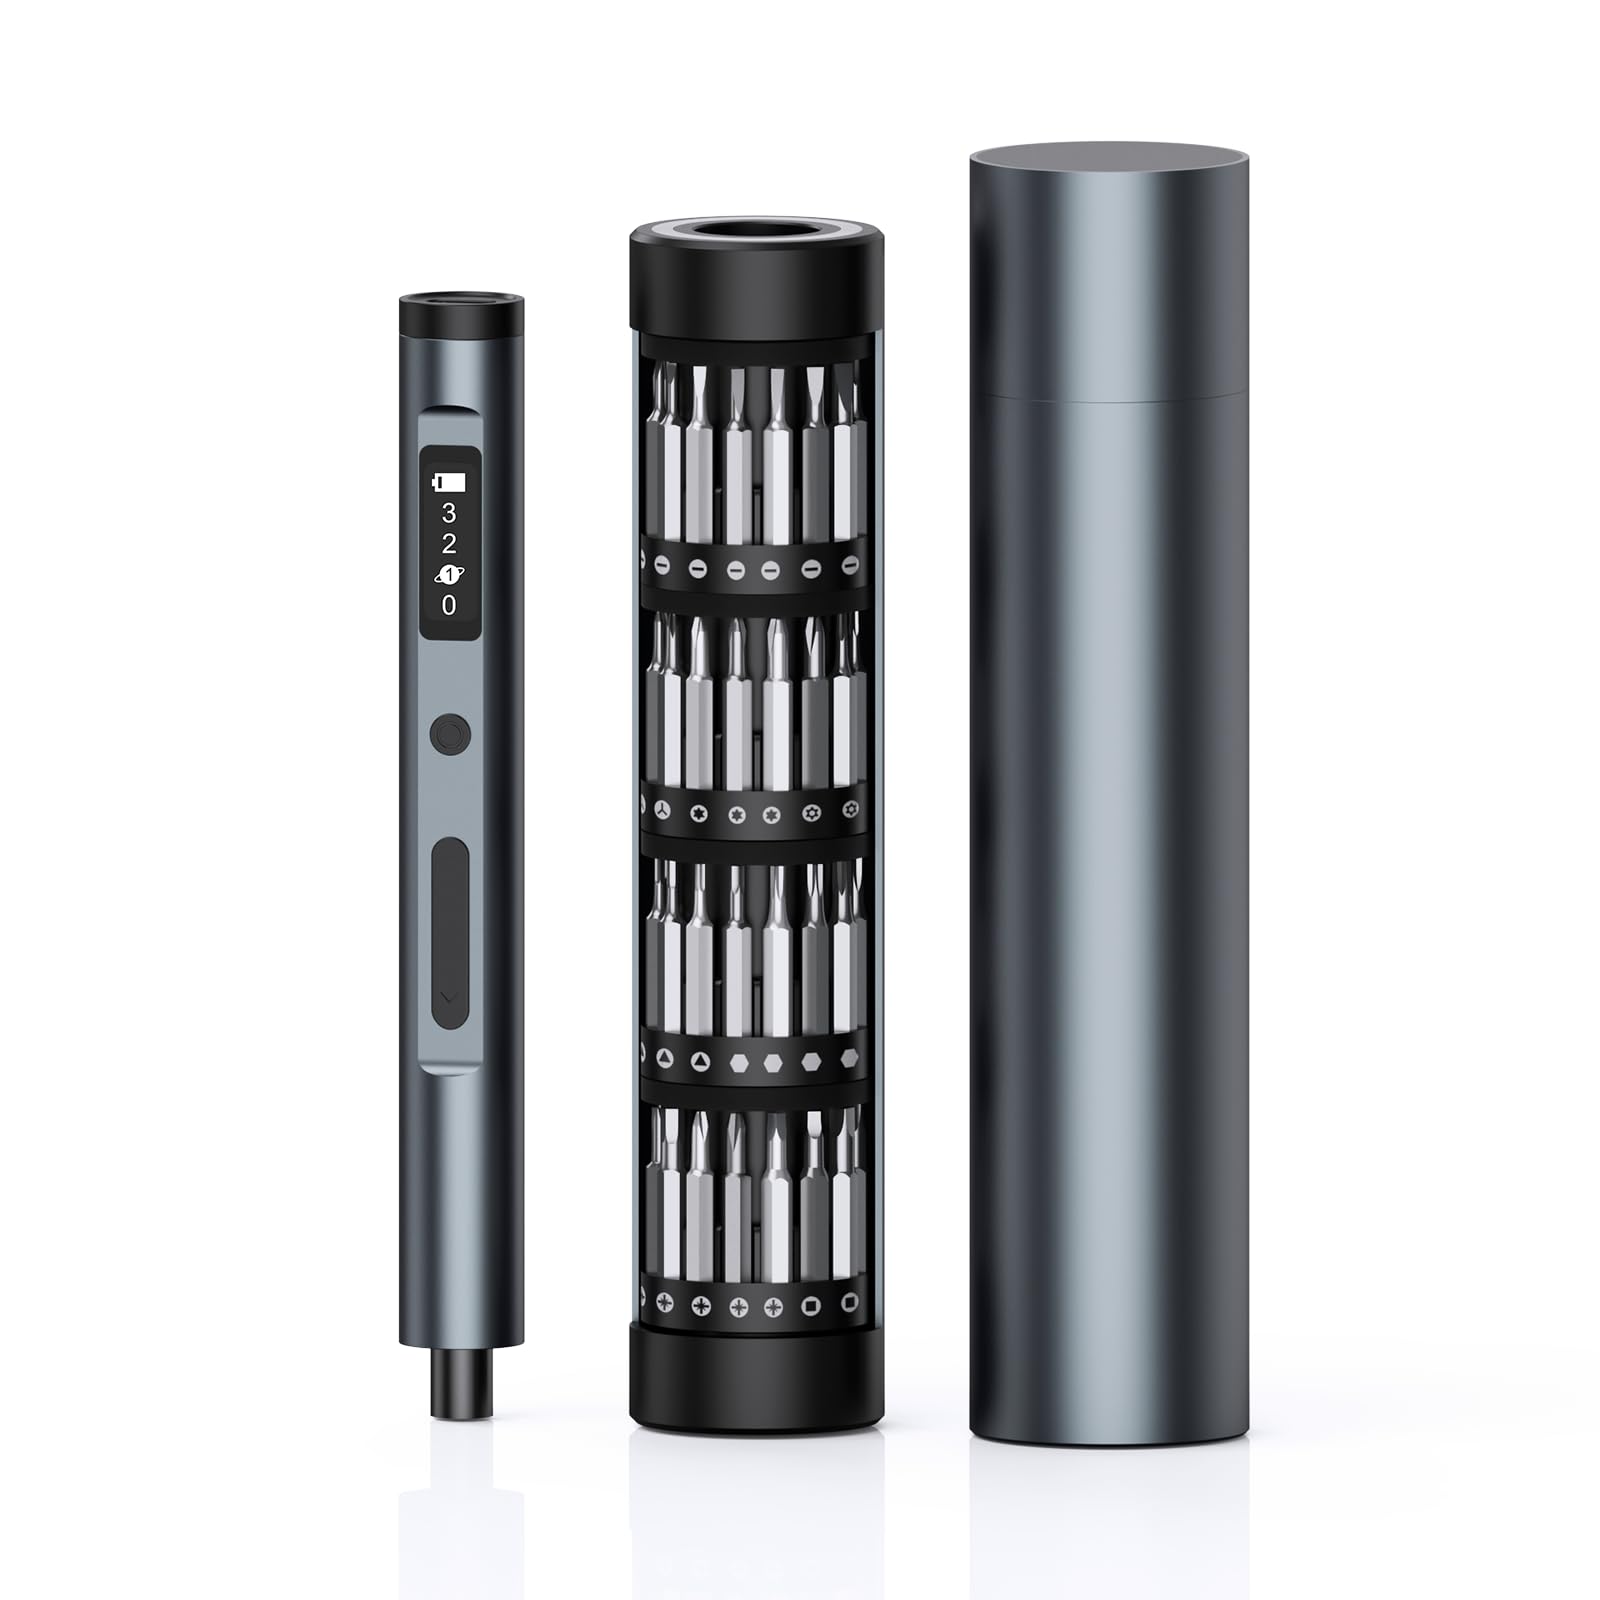
The ORIA OUS-HY-HA140 is a versatile 62-in-1 electric precision screwdriver kit designed for delicate repair tasks on electronics such as phones, laptops, and watches. It features an OLED screen, three adjustable torque gears, and a comprehensive set of 60 precision bits.
Product Components
The ORIA OUS-HY-HA140 Electric Precision Screwdriver Set includes the following components:
- Electric Screwdriver Handle with OLED Display
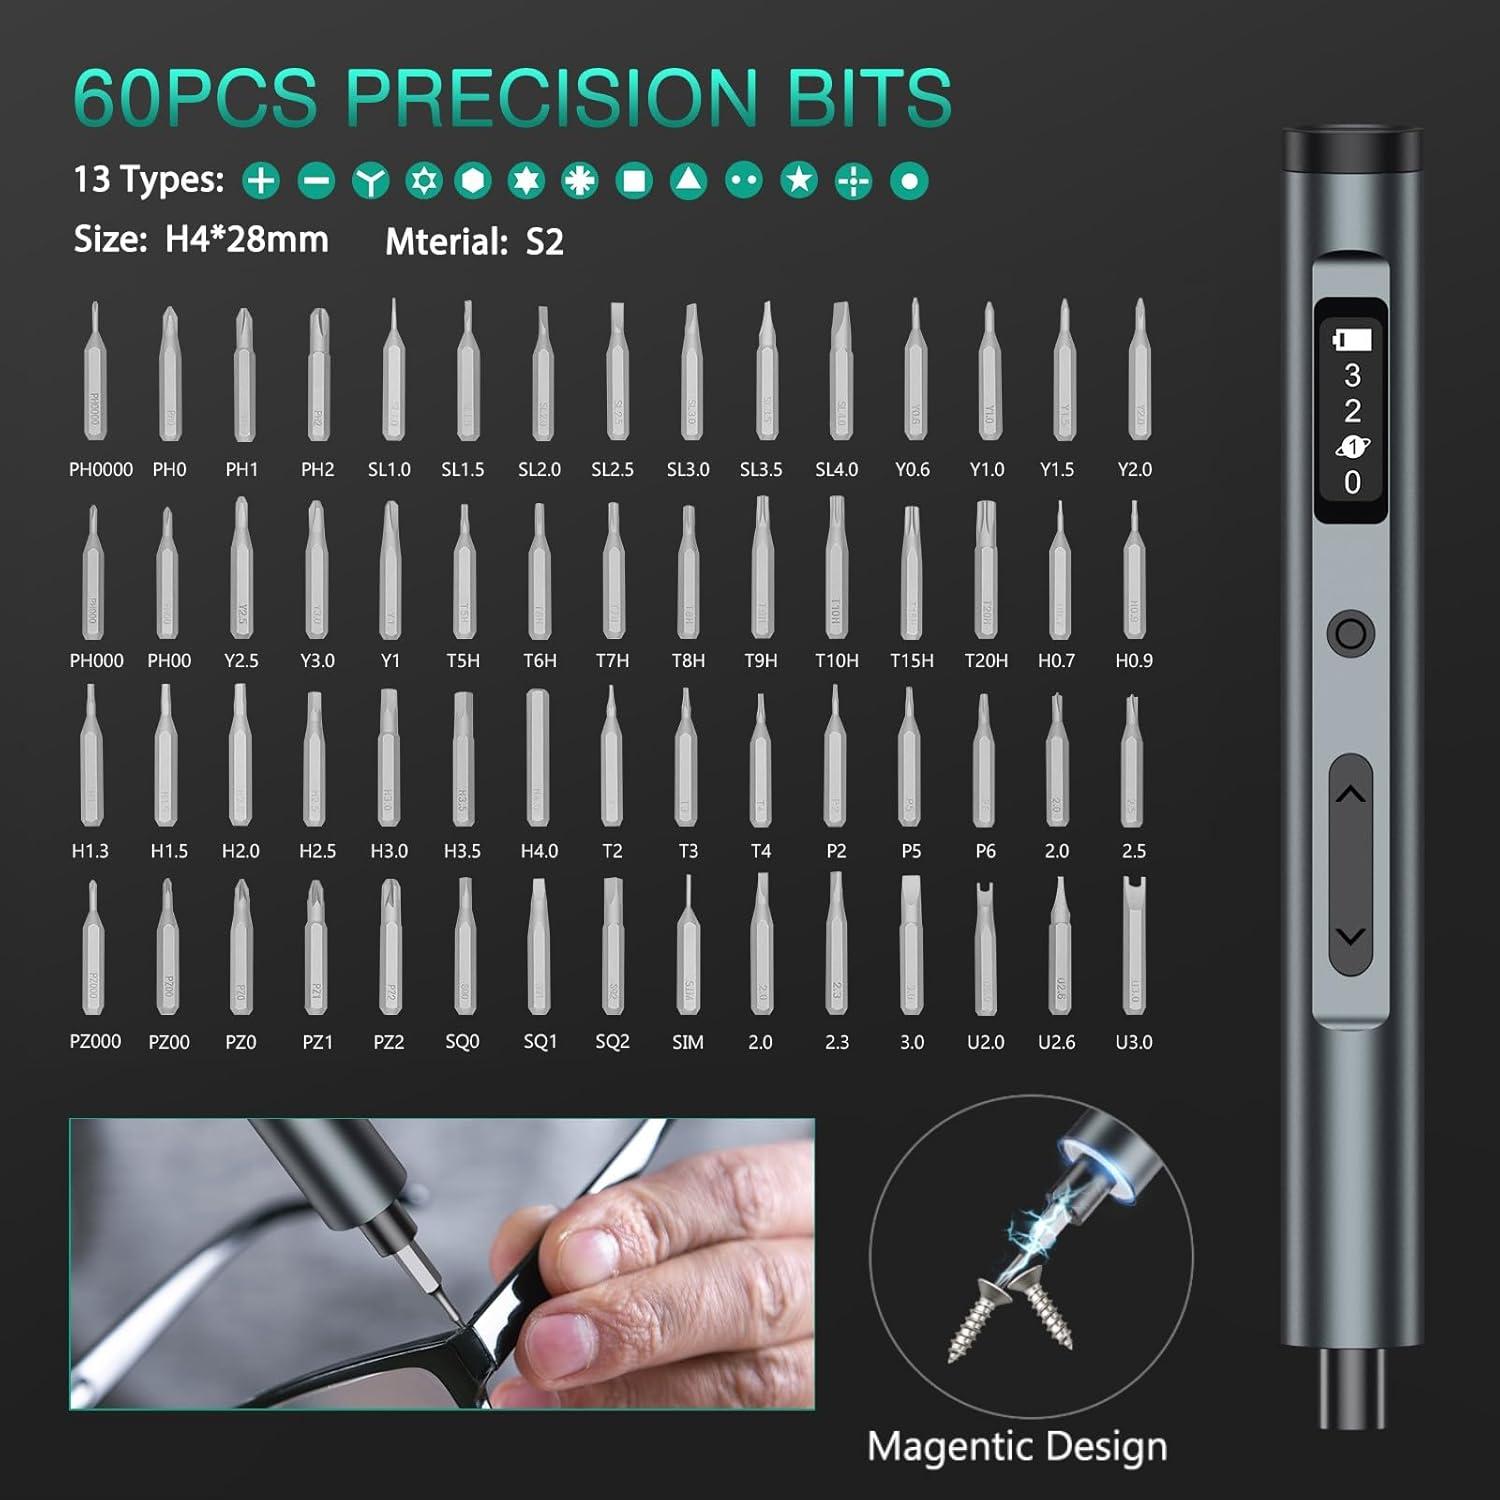
- 60 Precision Bits (various types)
- Rotating Magnetic Bit Storage Box
- Type-C Charging Cable
- User Manual

The set is designed for organized storage, with a semi-concealed rotatable bit storage column that holds all 60 bits, each labeled for easy identification. The screwdriver handle connects magnetically to the inner organizer, ensuring secure storage.

Setup
Charging the Screwdriver
- Locate the Type-C charging port on the end of the screwdriver handle.
- Connect the provided Type-C charging cable to the screwdriver and a suitable USB power source (e.g., computer, wall adapter).
- The OLED screen will display a cyclic incremental flashing of the battery indicator icon during charging.
- Once fully charged, the battery icon on the OLED screen will remain steadily lit.
Installing a Precision Bit
- Select the appropriate precision bit from the storage box for your task. The bits are magnetically held in the storage column.
- Insert the selected bit into the magnetic bit socket at the tip of the screwdriver handle. The magnetic design ensures a secure fit.
Operating Instructions
Powering On/Off and Torque Adjustment
- The screwdriver is activated by pressing the forward or reverse buttons.
- Use the 'Gear Button' (refer to Figure 3) to cycle through the three electric torque gears (1st, 2nd, 3rd) or to turn the electric torque off (0). The current gear setting is displayed on the OLED screen.
- The OLED screen also shows the remaining battery life.

Driving and Removing Screws
- To drive a screw, press the 'Forward Button' (down arrow, refer to Figure 3).
- To remove a screw, press the 'Reverse Button' (up arrow, refer to Figure 3).
- For stubborn screws or initial loosening/final tightening, the screwdriver also supports manual torque up to 3 N.m.
LED Working Light
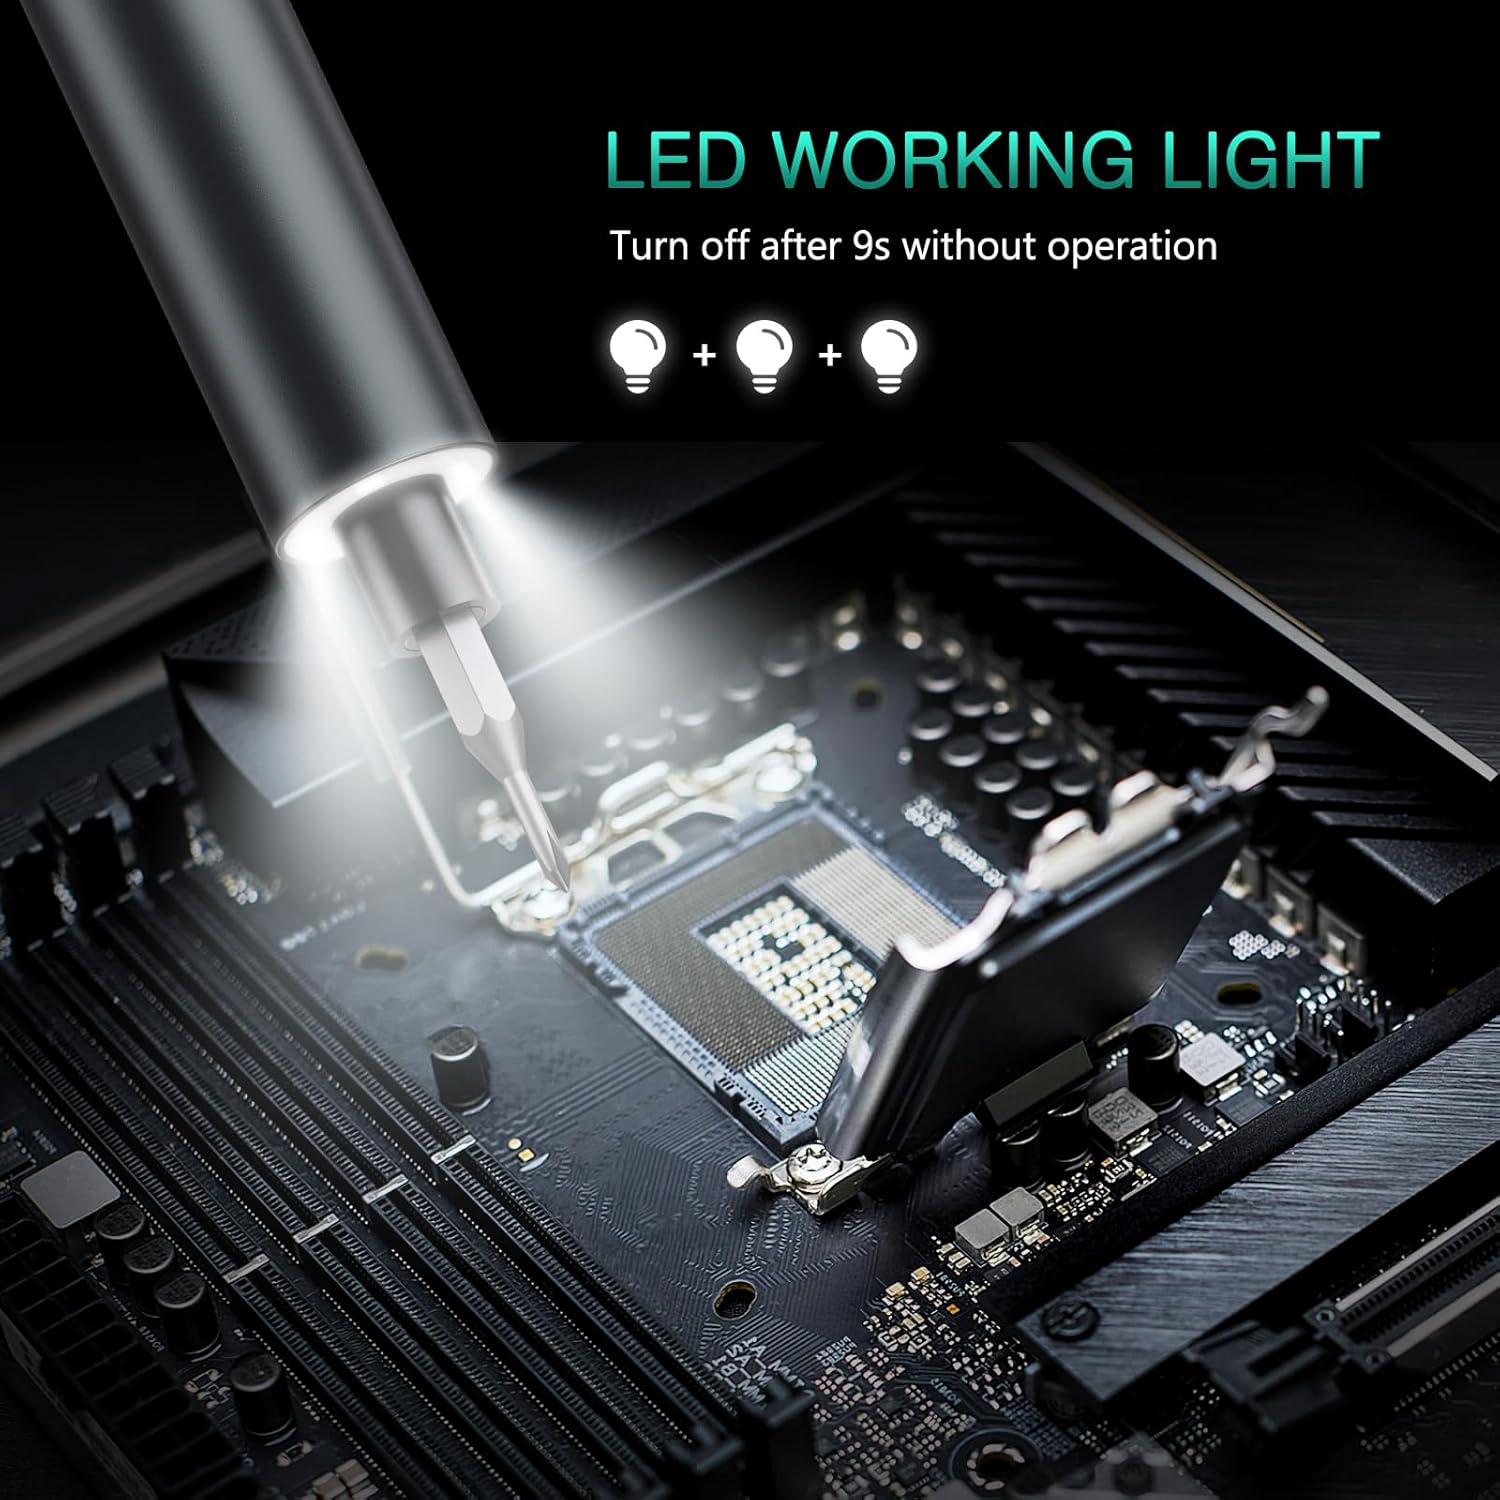
- The integrated LED light at the tip illuminates the working area, improving visibility in dimly lit conditions.
- The LED light automatically turns off after 9 seconds of inactivity.

Precision Bits Overview
The set includes 60 precision bits of 13 different types, suitable for a wide range of applications. Refer to the diagram below for a visual representation of the included bit types.
Typical Applications
The ORIA OUS-HY-HA140 is suitable for various precision repair tasks:
- Repairing smartphones and tablets.
- Servicing laptops and small electronic devices.
- Adjusting and repairing eyeglasses.
- Maintenance of cameras and other delicate equipment.

Maintenance
Cleaning
- Ensure the screwdriver is powered off before cleaning.
- Wipe the screwdriver handle and bits with a soft, dry cloth.
- Do not use abrasive cleaners or solvents, as these can damage the finish or electronic components.
Bit Care
- After use, return all bits to their designated slots in the rotating magnetic storage box to prevent loss and maintain organization.
- Inspect bits periodically for wear or damage. Replace worn bits to ensure optimal performance and prevent damage to screw heads.
Storage
- Store the screwdriver set in a cool, dry place, away from direct sunlight and extreme temperatures.
- The foam inside the packaging is designed to protect the screwdriver from collision damage during transport. It is normal for this foam to shift or fall out during use.
Troubleshooting
Screwdriver Not Turning On
- Check the battery level on the OLED screen. If low, charge the screwdriver using the provided Type-C cable.
- Ensure the forward or reverse button is pressed firmly.
Insufficient Torque/Screws Not Loosening/Tightening
- Verify that the correct torque gear is selected on the OLED screen. Increase the gear setting if more power is needed.
- For very tight screws, apply manual torque by twisting the screwdriver handle while the electric motor is engaged or disengaged. The manual torque capacity is 3 N.m.
- Ensure the correct bit size and type are used for the screw head to prevent stripping.
- Check if the bit is fully inserted into the magnetic bit socket.
OLED Screen Not Displaying
- Charge the screwdriver fully. A very low battery might prevent the screen from activating.
- If the issue persists after charging, contact customer support.
Specifications
| Feature | Specification |
|---|---|
| Model Name | OUS-HY-HA140 |
| Brand | ORIA |
| Electric Torque Gears | 3 (0.1 N.m, 0.2 N.m, 0.3 N.m) |
| Manual Torque | 3 N.m |
| Bits Included | 60 Precision Bits (13 types) |
| Display | OLED Screen (Battery, Gear Indicator) |
| Charging Port | Type-C |
| Special Features | Adjustable Torque, LED Light, Magnetic Tip, OLED Screen, Rotating Magnetic Storage Box |
| Material | Metal |
| Color | Black |
| Item Weight | 449 g |
| Manufacturer | ORIA |
Warranty and Support
Warranty Information
This product is covered by a standard manufacturer's warranty. Please refer to the product packaging or your purchase documentation for specific warranty terms and duration. Keep your proof of purchase for warranty claims.
Customer Support
For technical assistance, troubleshooting not covered in this manual, or warranty inquiries, please contact ORIA customer support through the retailer where the product was purchased or visit the official ORIA website for contact information.
