
BLACK+DECKER GSTD2075-B5
BLACK+DECKER Digital Garment Steamer GSTD2075-B5 User Manual
Model: GSTD2075-B5
1. Introduction
Thank you for purchasing the BLACK+DECKER Digital Garment Steamer, Model GSTD2075-B5. This appliance is designed to quickly and efficiently remove wrinkles from various fabrics using steam. Please read this manual carefully before use to ensure safe operation and optimal performance. Keep this manual for future reference.
2. Important Safety Instructions
WARNING: To reduce the risk of fire, electric shock, or injury, always follow basic safety precautions.
- Read all instructions before using the appliance.
- Use the appliance only for its intended household use as described in this manual.
- Do not immerse the appliance, power cord, or plug in water or other liquids.
- Always unplug the appliance from the electrical outlet when filling with water, emptying, or when not in use.
- Do not operate the appliance with a damaged cord or plug, or if the appliance malfunctions or has been dropped or damaged.
- Keep the steam head away from your body and hands during operation to avoid steam burns.
- Never direct steam at people or pets.
- Use distilled or demineralized water to prevent mineral buildup and extend the life of the steamer.
- Ensure the water tank cap is securely closed before operating.
- Do not overfill the water tank.
- Place the steamer on a stable, flat surface during use.
- Children should be supervised to ensure they do not play with the appliance.
3. Product Overview
Familiarize yourself with the components of your BLACK+DECKER Digital Garment Steamer.
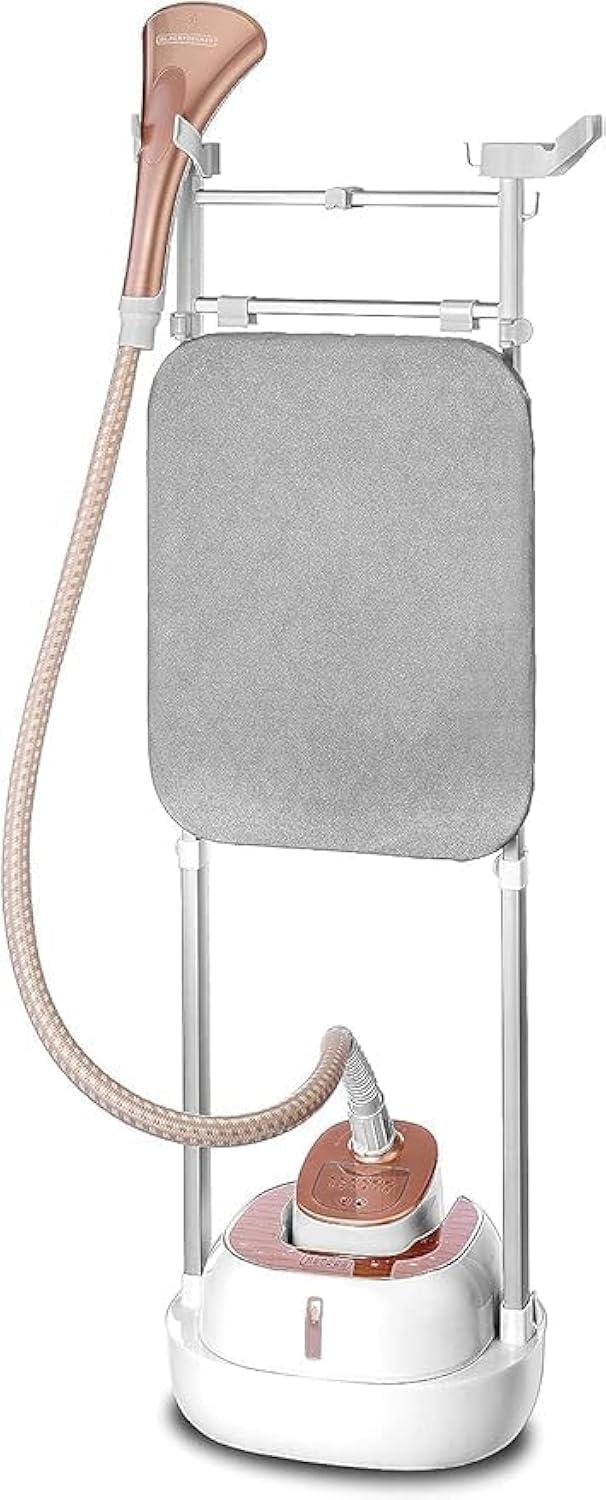

Components:
- Steam Head with 9-hole nozzle
- Flexible Anti-Tangle Steam Tube (1.2m)
- Adjustable Dual Poles
- Multi-purpose Dual Clothes Hanger
- Integrated Ironing Board
- Steam Head Holder
- Water Tank (2L capacity, detachable)
- Digital Control Panel
- Main Unit Base
- Water Drain Plug
4. Setup
4.1 Assembly
- Carefully unpack all components from the packaging.
- Insert the adjustable dual poles into the designated slots on the main unit base until they click into place.
- Attach the multi-purpose dual clothes hanger and the integrated ironing board to the top of the poles.
- Secure the steam head holder to the pole at a convenient height.
- Connect the flexible anti-tangle steam tube to the steam outlet on the main unit base and the steam head. Ensure connections are secure.
4.2 Filling the Water Tank
- Ensure the steamer is unplugged from the power outlet.
- Remove the detachable water tank from the main unit base.
- Unscrew the cap of the water tank.
- Fill the tank with clean, distilled, or demineralized water. Do not exceed the maximum fill line.
- Securely screw the cap back onto the water tank.
- Place the filled water tank back into the main unit base, ensuring it is properly seated.

5. Operating Instructions
5.1 Powering On and Heating
- Ensure the water tank is filled and correctly installed.
- Plug the power cord into a suitable electrical outlet (240V).
- Press the power button on the digital control panel. The indicator light will illuminate.
- The steamer will begin to heat up. This typically takes approximately 45 seconds.
- Once heated, the steamer is ready for use.

5.2 Selecting Steam Levels
The steamer offers 6 continuous steam levels (35-40g/min) to suit different fabric types. Use the digital controls to select the desired steam intensity:
- Low Steam: Suitable for delicate fabrics like silk, satin, and synthetics.
- Medium Steam: Ideal for wool, linen, and general clothing.
- High Steam: Best for heavy fabrics such as denim, cotton, and upholstery.
5.3 Steaming Garments
- Hang the garment on the multi-purpose hanger. For best results, gently pull the fabric taut with one hand while steaming with the other.
- Hold the steam head a few inches away from the fabric. Move the steam head slowly up and down over the wrinkles.
- For stubborn wrinkles, press the steam head gently against the fabric while steaming. The integrated ironing board can be used for additional support and to create creases.
- Always steam in a vertical motion.
- After steaming, allow the garment to cool and dry before wearing or storing.

5.4 Finishing
- When finished, press the power button to turn off the steamer.
- Unplug the appliance from the electrical outlet.
- Allow the steamer to cool completely before storing.
6. Maintenance and Cleaning
Regular maintenance ensures the longevity and optimal performance of your garment steamer.
6.1 Draining Water
- Always ensure the steamer is unplugged and completely cool before draining.
- Remove the water tank and empty any remaining water.
- Locate the water drain plug at the bottom of the main unit base.
- Carefully open the drain plug and allow any residual water to drain into a sink or bucket.
- Close the drain plug securely after all water has been removed.
6.2 Descaling (Recommended Monthly)
To prevent mineral buildup, especially if using tap water, descaling is recommended:
- Mix a solution of 50% white vinegar and 50% water.
- Pour the solution into the water tank and fill it to the MAX line.
- Plug in the steamer and turn it on. Allow it to heat up.
- Run the steamer until half of the solution has been used.
- Turn off and unplug the steamer. Let it cool for at least 30 minutes.
- Drain the remaining solution from the tank and the main unit base using the drain plug.
- Rinse the water tank and main unit thoroughly with fresh water.
- Refill the tank with fresh water and run the steamer for a few minutes to flush out any remaining vinegar residue.
- Repeat rinsing if necessary until the vinegar smell is gone.
6.3 Cleaning the Exterior
Wipe the exterior surfaces of the steamer with a soft, damp cloth. Do not use abrasive cleaners or solvents.
7. Troubleshooting
If you encounter issues with your steamer, refer to the following table for common problems and solutions.
| Problem | Possible Cause | Solution |
|---|---|---|
| No steam or very little steam. |
|
|
| Water leakage from steam head. |
|
|
| Steamer not turning on. |
|
|
8. Specifications
| Feature | Detail |
|---|---|
| Brand | BLACK+DECKER |
| Model Number | GSTD2075-B5 |
| Product Type | Garment Steamer |
| Power | 2000 W |
| Voltage | 240 V |
| Water Tank Capacity | 2 Liters |
| Heat-up Time | Approx. 45 seconds |
| Steam Rate | 35-40 g/min |
| Steam Levels | 6 |
| Product Dimensions (L x W x H) | 35 cm x 33 cm x 39 cm |
| Item Weight | 4 kg |
| Color | White/Gold |
9. Warranty and Support
According to the product specifications, there is no explicit warranty description provided for this product.
For any product inquiries, technical support, or service needs, please contact BLACK+DECKER customer service or refer to their official website for assistance.
Please retain your purchase receipt as proof of purchase.
Related documentsGSTD2075-B5


Ask a question about this manual
Ask about setup, troubleshooting, compatibility, parts, safety, or missing instructions. Manuals+ will review the question and use this page’s manual context to help answer it.