1. Introduction
Thank you for choosing the MEEDEN Airbrush Compressor Kit, Model ABC-7001-US. This kit is designed for various airbrushing applications, including model painting, cake decoration, body art, and other creative projects. This manual provides essential information for the safe and effective use, setup, operation, and maintenance of your airbrush compressor.
2. Product Overview and Components
The MEEDEN Airbrush Compressor Kit is a 1/5 HP powerful and quiet air compressor featuring an oil-free piston design for low maintenance. It includes essential accessories to get you started with your airbrushing projects.
Key Components:
- Air Compressor: 1/5 HP, 150W dynamic power, 23L/min air flow, 47 Decibels noise level.
- Air Hose: 1/8'' x 6 feet soft air hose.
- Airbrush Holders: Integrated holders for convenient airbrush storage.
- External Visual Barometer: For monitoring air pressure.
- Air Filter: Includes a moisture air filter.
- Electronic Self-Stop Function: For extended compressor life.
- Thermal Overload Protection: Automatically turns off if the motor overheats.

Image 2.1: Overview of the MEEDEN Airbrush Compressor with key components labeled. This image highlights the airbrush holder, oil-water separator, air pressure gauge, air hose, and air filter, providing a visual guide to the main parts of the unit.

Image 2.2: The MEEDEN Airbrush Compressor with an airbrush connected, viewed from a slightly different angle. This image provides a clearer view of the compressor unit and its connection points.
3. Setup Instructions
Follow these steps to set up your MEEDEN Airbrush Compressor Kit:
- Unpack Components: Carefully remove all items from the packaging. Ensure all components listed in Section 2 are present.
- Connect Air Hose: Securely connect the 6-foot air hose to the air outlet on the compressor. Ensure a tight fit to prevent air leaks.
- Install Airbrush Holders: Attach the two airbrush holders to the designated slots on the compressor unit. These provide convenient storage for your airbrushes when not in use.
- Connect Airbrush: Attach your airbrush to the other end of the air hose. The joint is compatible with 1/8" diameter spray guns.
- Position Compressor: Place the compressor on a stable, level surface. The rubber feet will help prevent slipping and protect the working surface.
- Power Connection: Plug the power cord into a standard 110V electrical outlet.
Video 3.1: This video demonstrates the initial setup of the MEEDEN Airbrush Compressor Kit, including connecting the air hose, installing airbrush holders, and attaching an airbrush. It provides a visual guide to ensure correct assembly.
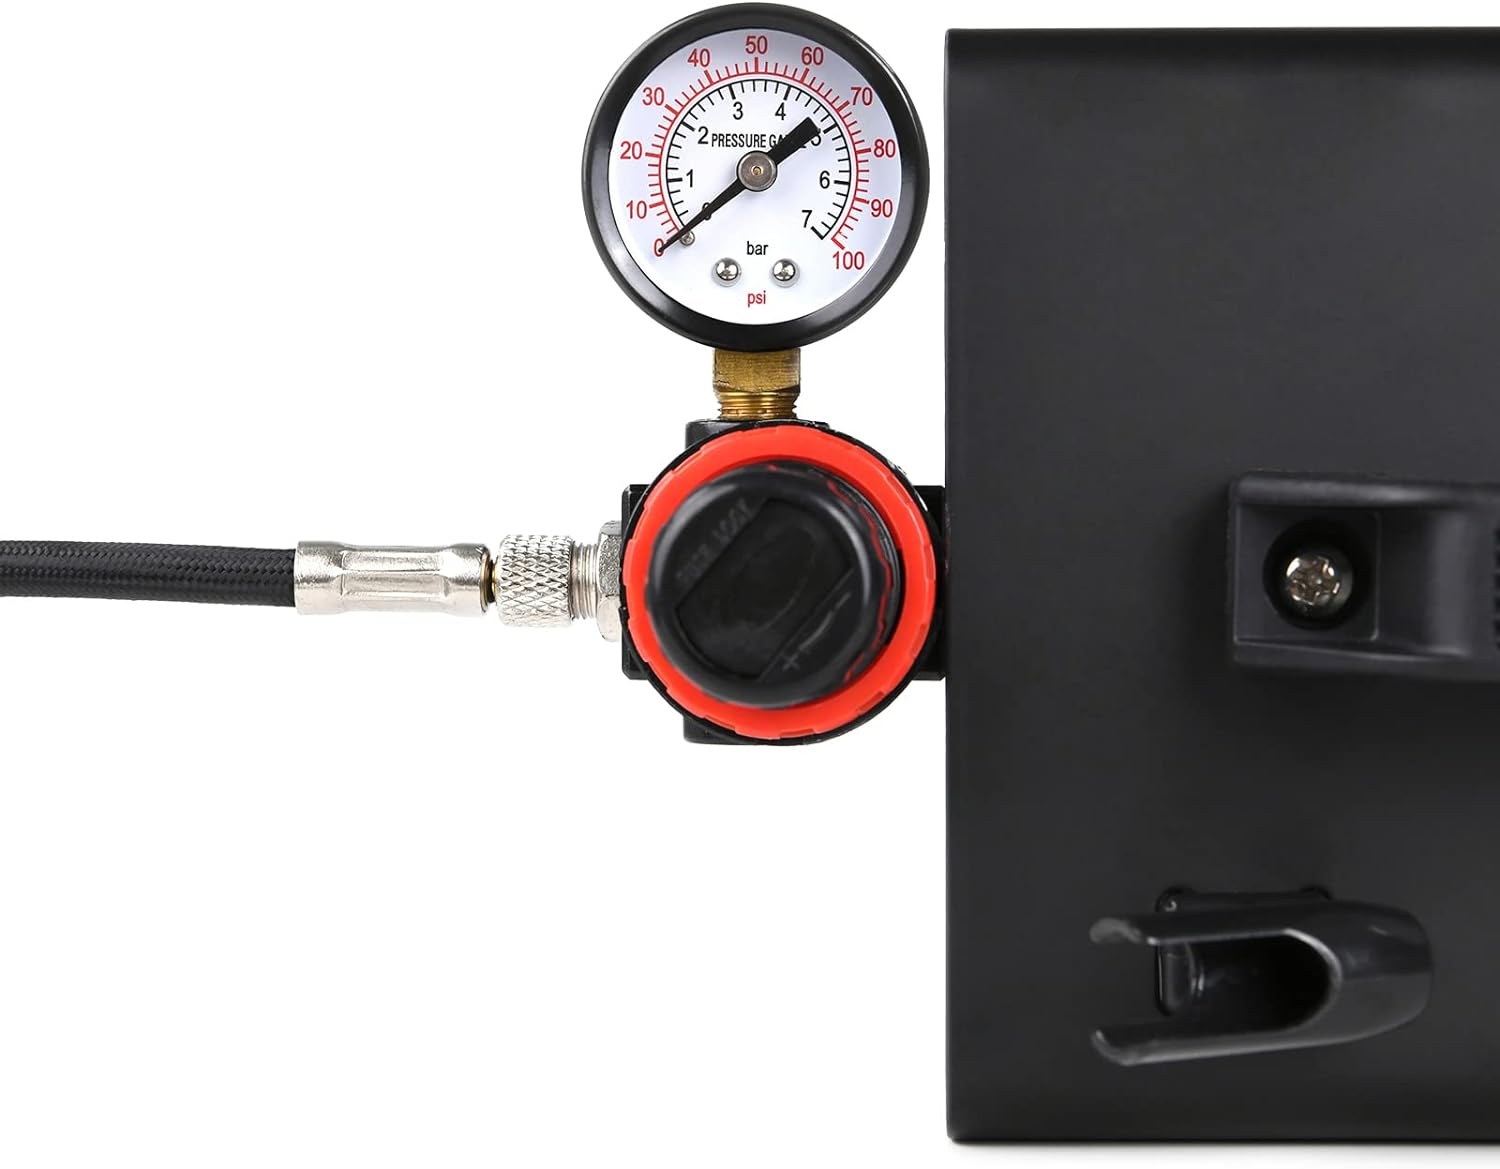
Image 3.1: A close-up view of the air pressure gauge and regulator on the compressor. This component allows for precise control over the air pressure during operation.
4. Operating Instructions
Once the compressor is set up, follow these steps for operation:
- Power On: Flip the power switch to the 'ON' position. The compressor will start and build pressure.
- Adjust Air Pressure: Use the regulator knob next to the pressure gauge to set the desired air pressure (0-4 BAR / 0-57 PSI). Turn clockwise to increase pressure and counter-clockwise to decrease.
- Prepare Airbrush: Fill your airbrush cup with the desired paint or medium. Ensure the paint is properly thinned for airbrushing.
- Begin Airbrushing: Hold the airbrush approximately 6-8 inches from your working surface. Press down on the trigger for air, then pull back for paint flow. Practice on scrap material to get a feel for the spray pattern and pressure.
- Electronic Self-Stop: The compressor features an electronic self-stop function. It will automatically turn off when the desired pressure is reached and restart when pressure drops, conserving energy and extending motor life.
- Power Off: When finished, turn off the compressor using the power switch and disconnect it from the power source.
Applications:
This airbrush compressor is suitable for a wide range of applications:
- Model Painting
- Canvas Painting
- T-shirt DIY
- Shoe Customization
- Food Decoration (e.g., cakes)
- Makeup and Body Art
- Nail Art
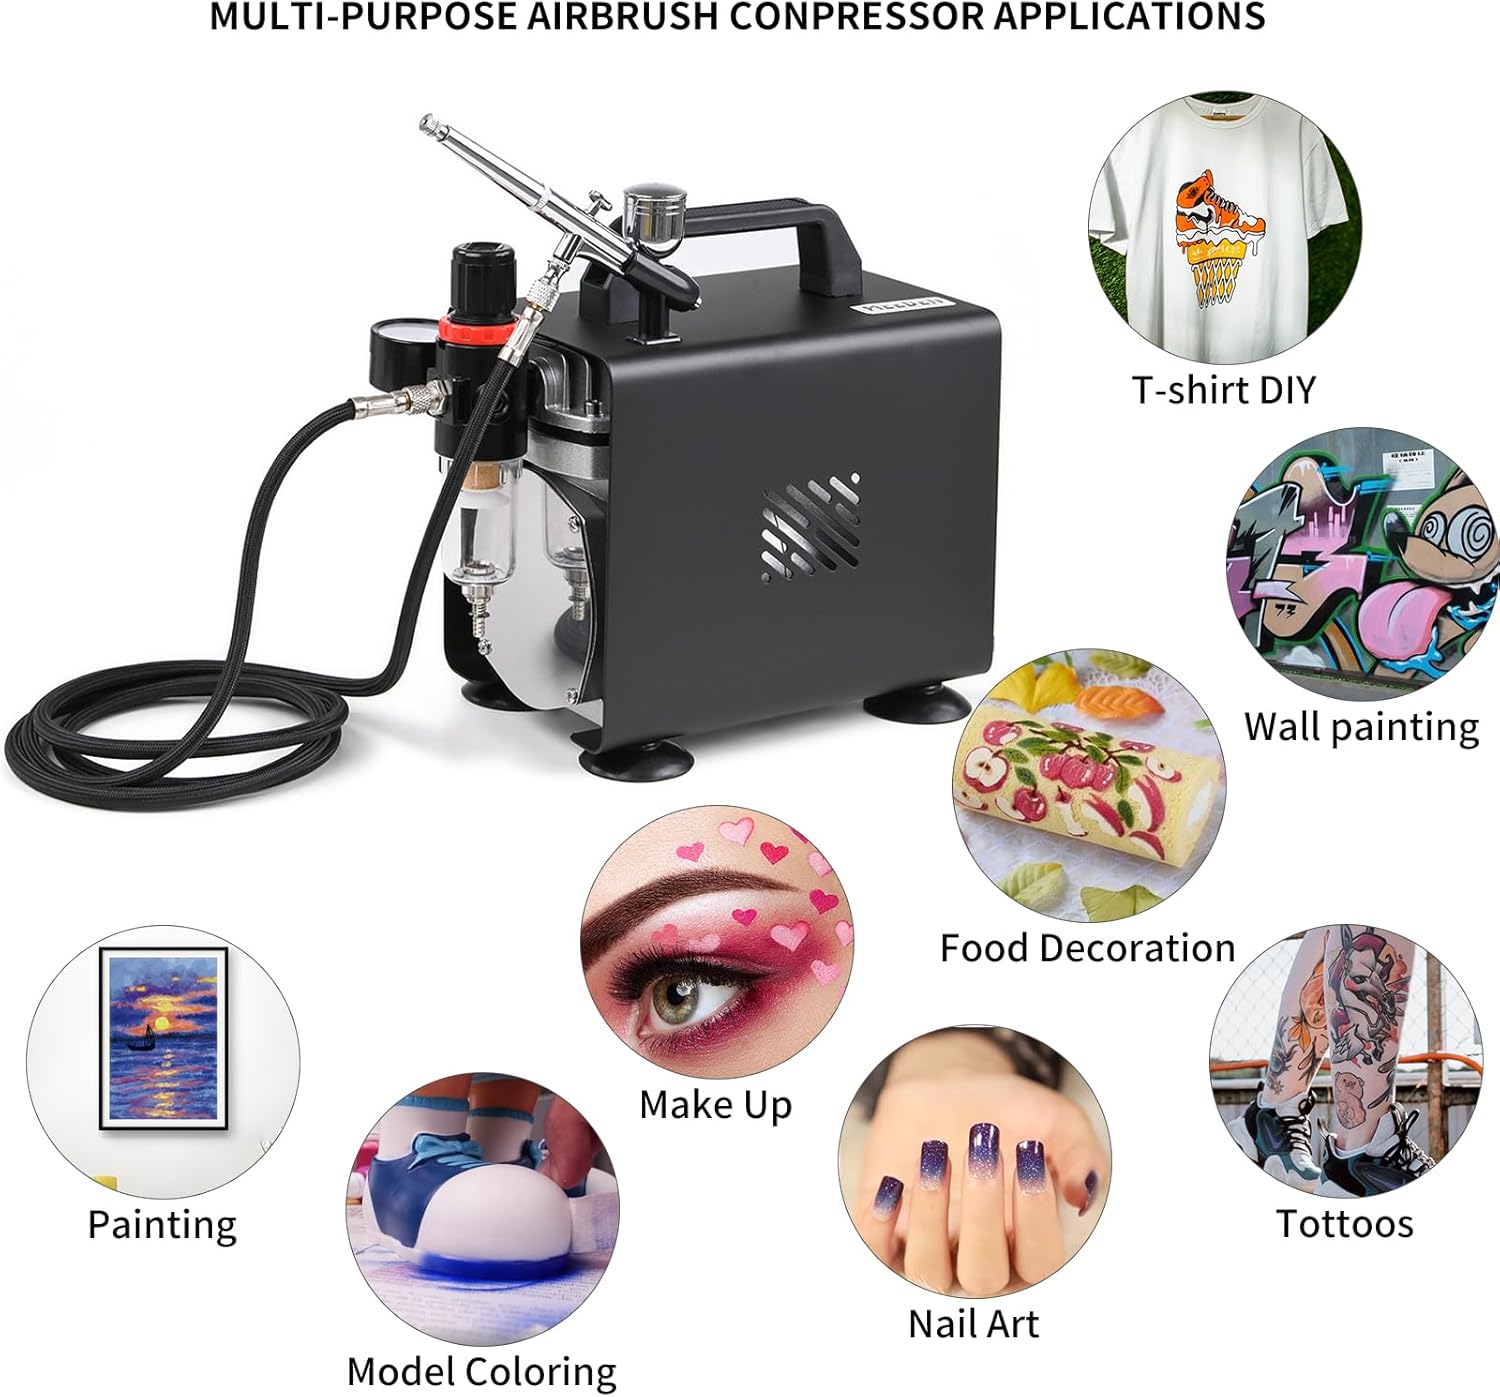
Image 4.1: Visual examples of the diverse applications possible with the MEEDEN Airbrush Compressor Kit, showcasing its versatility for various artistic and hobby projects.
5. Maintenance
Proper maintenance ensures the longevity and optimal performance of your airbrush compressor kit.
- Airbrush Cleaning: After each use, thoroughly clean your airbrush. Disassemble the airbrush components and clean them with appropriate cleaning solutions. A cleaning pot (if included in your specific kit) can be used to flush out residual paint.
- Air Filter: Regularly check the moisture trap/air filter for accumulated moisture. Drain any collected water by opening the valve at the bottom of the filter. Replace the filter element if it becomes clogged or discolored.
- Compressor Exterior: Wipe down the exterior of the compressor with a damp cloth to remove dust and paint residue. Do not use harsh chemicals.
- Oil-Free Design: The compressor is designed to be oil-free, requiring no lubrication. Do not attempt to add oil to the compressor.
- Storage: Store the compressor in a clean, dry, and dust-free environment when not in use.

Image 5.1: Rear and side views of the MEEDEN Airbrush Compressor, illustrating the motor's cooling fan and the air filter assembly, both crucial for maintenance.
6. Troubleshooting
If you encounter issues with your airbrush compressor, refer to the following common troubleshooting tips:
| Problem | Possible Cause | Solution |
|---|---|---|
| Compressor does not turn on | Power cord not plugged in; Power switch off; Electrical outlet fault. | Check power connection; Ensure switch is ON; Test outlet with another device. |
| No air output | Air hose disconnected; Airbrush clogged; Regulator set to zero. | Check hose connections; Clean airbrush; Adjust pressure regulator. |
| Inconsistent air pressure | Air leaks in connections; Moisture in air filter; Faulty regulator. | Tighten all connections; Drain moisture from filter; Contact support if regulator is faulty. |
| Compressor overheats and shuts off | Prolonged continuous use; Blocked ventilation. | Allow compressor to cool down; Ensure adequate ventilation around the unit. |
| Paint not spraying | Airbrush nozzle clogged; Paint too thick; Needle bent. | Clean nozzle thoroughly; Thin paint appropriately; Inspect and replace needle if damaged. |
7. Specifications
Detailed technical specifications for the MEEDEN Airbrush Compressor Kit (Model ABC-7001-US):
| Feature | Specification |
|---|---|
| Brand | MEEDEN |
| Model Name | Airbrush Compressor Kit (ABC-7001-US) |
| Voltage | 110 Volts |
| Power Source | Corded Electric |
| Maximum Power | 150 Watts |
| Motor Horsepower | 0.2 Horsepower (1/5 HP) |
| Air Flow Capacity | 23 Liters Per Minute |
| Maximum Operating Pressure | 4 Bars (57 PSI) |
| Noise Level | 47 Decibels |
| Hose Length | 6 Feet |
| Compatible Hose Diameter | 0.13 Inches (1/8'') |
| Special Feature | Single piston airbrush compressor with hose, oil-free, electronic self-stop, thermal overload protection |
| Included Components | 1/8''x 6 ft air hose, external visual barometer, spray gun holder |
| Item Weight | 9.57 pounds |
| Package Dimensions | 10.43 x 9.65 x 5.98 inches |

Image 7.1: A visual summary of the MEEDEN Airbrush Compressor's key specifications, including model number, voltage, power, and noise level.

Image 7.2: This image highlights the professional features of the 1/5 HP single piston compressor, such as low noise, airflow, pressure range, auto-stop, and thermal protection.

Image 7.3: Illustration of the compressor's thermal overload protection feature, which automatically shuts down the unit if the motor overheats, ensuring safety and product longevity.

Image 7.4: This image showcases the user-friendly design elements of the compressor, specifically the portable handle for easy transport and the anti-slip rubber feet for stability and surface protection.
8. Warranty and Support
MEEDEN is committed to providing high-quality art supplies and ensuring customer satisfaction. If you encounter any issues or have questions regarding your Airbrush Compressor Kit, please do not hesitate to contact us. Our dedicated support team is ready to assist you.
For assistance, please reach out via mail, phone, or message through our official channels. We stand by our products and are here to help you succeed in your artistic endeavors.


