
1. Safety Instructions
Read and understand all safety warnings and instructions before operating this hydraulic hole punch machine. Failure to follow these instructions may result in electric shock, fire, serious injury, or property damage. Keep this manual for future reference.
- Personal Protective Equipment (PPE): Always wear safety glasses, hearing protection, and heavy-duty gloves when operating the machine. Avoid loose clothing or jewelry that could get caught in moving parts.
- Work Area Safety: Ensure the work area is clean, well-lit, and free from obstructions. Do not operate in damp or wet conditions. Keep children and bystanders away.
- Electrical Safety: Ensure the power supply matches the machine's voltage (220V/110V). Do not use the machine with a damaged cord or plug. Avoid operating in explosive atmospheres.
- Material Handling: Securely position the material to be punched. Ensure the material thickness and type are within the machine's specified limits. Never attempt to punch materials thicker or harder than recommended.
- Machine Operation: Do not force the machine. Use the correct die size for the desired hole. Keep hands and fingers clear of the punching head during operation. Disconnect power before making adjustments, changing dies, or performing maintenance.
- Hydraulic System: The machine uses hydraulic oil. Handle with care and follow local regulations for disposal. Check for leaks regularly.
- Auxiliary Handle: Always use the auxiliary handle for better control and stability during operation.
- Foot Switch: Use the foot switch for controlled and precise punching. Ensure it is placed in a stable position where accidental activation is prevented.
2. Package Contents
Carefully unpack the box and ensure all items are present and undamaged. If any items are missing or damaged, contact your supplier immediately.
- 1x Electric Hydraulic Punching Machine
- 5x Punch Dies (Φ6.5mm, Φ9mm, Φ13mm, Φ17mm, Φ20.5mm)
- 2x Wrenches (Large and Small)
- 5x Hex Wrenches + Screws
- 2x Base Screws
- 1x Base
- 1x Auxiliary Handle
- 1x Hydraulic Oil (initial supply)
- 1x Foot Switch
- 1x Pair of Gloves
- 1x Instruction Manual
3. Product Overview
The JJENXYYDS 1200W Hydraulic Hole Punch Machine is designed for efficient and precise punching of various metal plates. It features a powerful motor, quick punching speed, and a robust hydraulic system.
3.1 Main Components

Figure 1: Main Components of the Hydraulic Hole Punch Machine. This diagram illustrates the key parts such as the hand switch for manual operation, the oil hole for hydraulic fluid, the oil return switch, the punching head where dies are installed, the carbon brush access, the auxiliary handle for stability, and the foot switch for remote operation.
- Hand Switch: Activates the punching mechanism.
- Oil Hole: Port for adding or checking hydraulic oil.
- Oil Return Switch: Releases hydraulic pressure to retract the punch.
- Punching Head: Houses the punch die and performs the punching action.
- Carbon Brush: Motor component, accessible for maintenance.
- Auxiliary Handle: Provides additional grip and control during operation.
- Foot Switch: Allows for hands-free operation and precise control.
3.2 Key Features
- High Power Motor: 1200W motor for strong hydraulic pressure and efficient punching.
- Fast Punching Speed: Capable of punching holes in 2-3 seconds.
- Precise Positioning: Designed to ensure accurate hole punching without material displacement.
- Versatile Dies: Includes 5 common punch die sizes (Φ6.5mm, Φ9mm, Φ13mm, Φ17mm, Φ20.5mm).
- Adjustable Punching Depth: Bolts allow for adjustment of punching depth.
- Safety Valve Switch: Unique design for safe refueling operations.
- Portable Design: Comes with a carrying case and can be used with or without the base.
4. Specifications
The following table outlines the technical specifications of the JJENXYYDS 1200W Hydraulic Hole Punch Machine.

Figure 2: Machine Dimensions and Specifications. This image provides a visual representation of the machine's physical dimensions and a table detailing its operational parameters.
| Parameter | Value |
|---|---|
| Output | 10T |
| Voltage | 220V/110V |
| Power | 1200W |
| Copper/Aluminum Plate Thickness | ≤8 mm (0.3 inches) |
| Iron/Steel Plate Thickness | ≤6 mm (0.2 inches) |
| Angle Iron Capacity | 4-6# Angle Iron |
| Throat Depth | 35 mm (1.4 inches) |
| Punching Speed | 2-3 seconds |
| Punching Diameter | 4.2-20.5 mm (0.2-0.8 inches) |
| Dimensions (L x W x H) | 530 x 280 x 140 mm (20.9 x 11 x 5.5 inches) |
| Item Weight | 33 pounds |
| Material | Aluminum (housing) |
5. Setup
Before first use, assemble the necessary components and prepare the machine for operation.
5.1 Attaching the Auxiliary Handle
- Locate the auxiliary handle and its mounting point on the machine body.
- Screw the auxiliary handle into the designated threaded hole until it is securely fastened. Ensure it is tight enough to provide stable grip but do not overtighten.
- The handle can be repositioned for different working angles as needed.

Figure 3: Auxiliary Handle Design. This image demonstrates the attachment point and flexibility of the auxiliary handle.
5.2 Installing Punch Dies
- WARNING: Disconnect the machine from the power supply before changing dies.
- Select the appropriate punch die size for your application.
- Insert the chosen die into the punching head. Ensure it is seated correctly and securely.
- Use the provided wrenches to tighten any retaining bolts or nuts that secure the die in place.
- Verify the die is firmly installed and aligned before reconnecting power.
5.3 Connecting the Foot Switch
- Locate the foot switch and its corresponding port on the machine.
- Plug the foot switch cable firmly into the port.
- Position the foot switch on a stable surface where it can be easily and safely operated without accidental activation.
5.4 Adding Hydraulic Oil (If Necessary)
The machine comes pre-filled with hydraulic oil. However, if you need to add or replenish oil:
- WARNING: Disconnect the machine from the power supply.
- Locate the oil hole and the unique safety valve switch (refer to Figure 1).
- Open the safety valve switch to allow for refueling.
- Carefully add the recommended hydraulic oil (supplied) into the oil hole. Do not overfill.
- Close the safety valve switch securely after refueling.
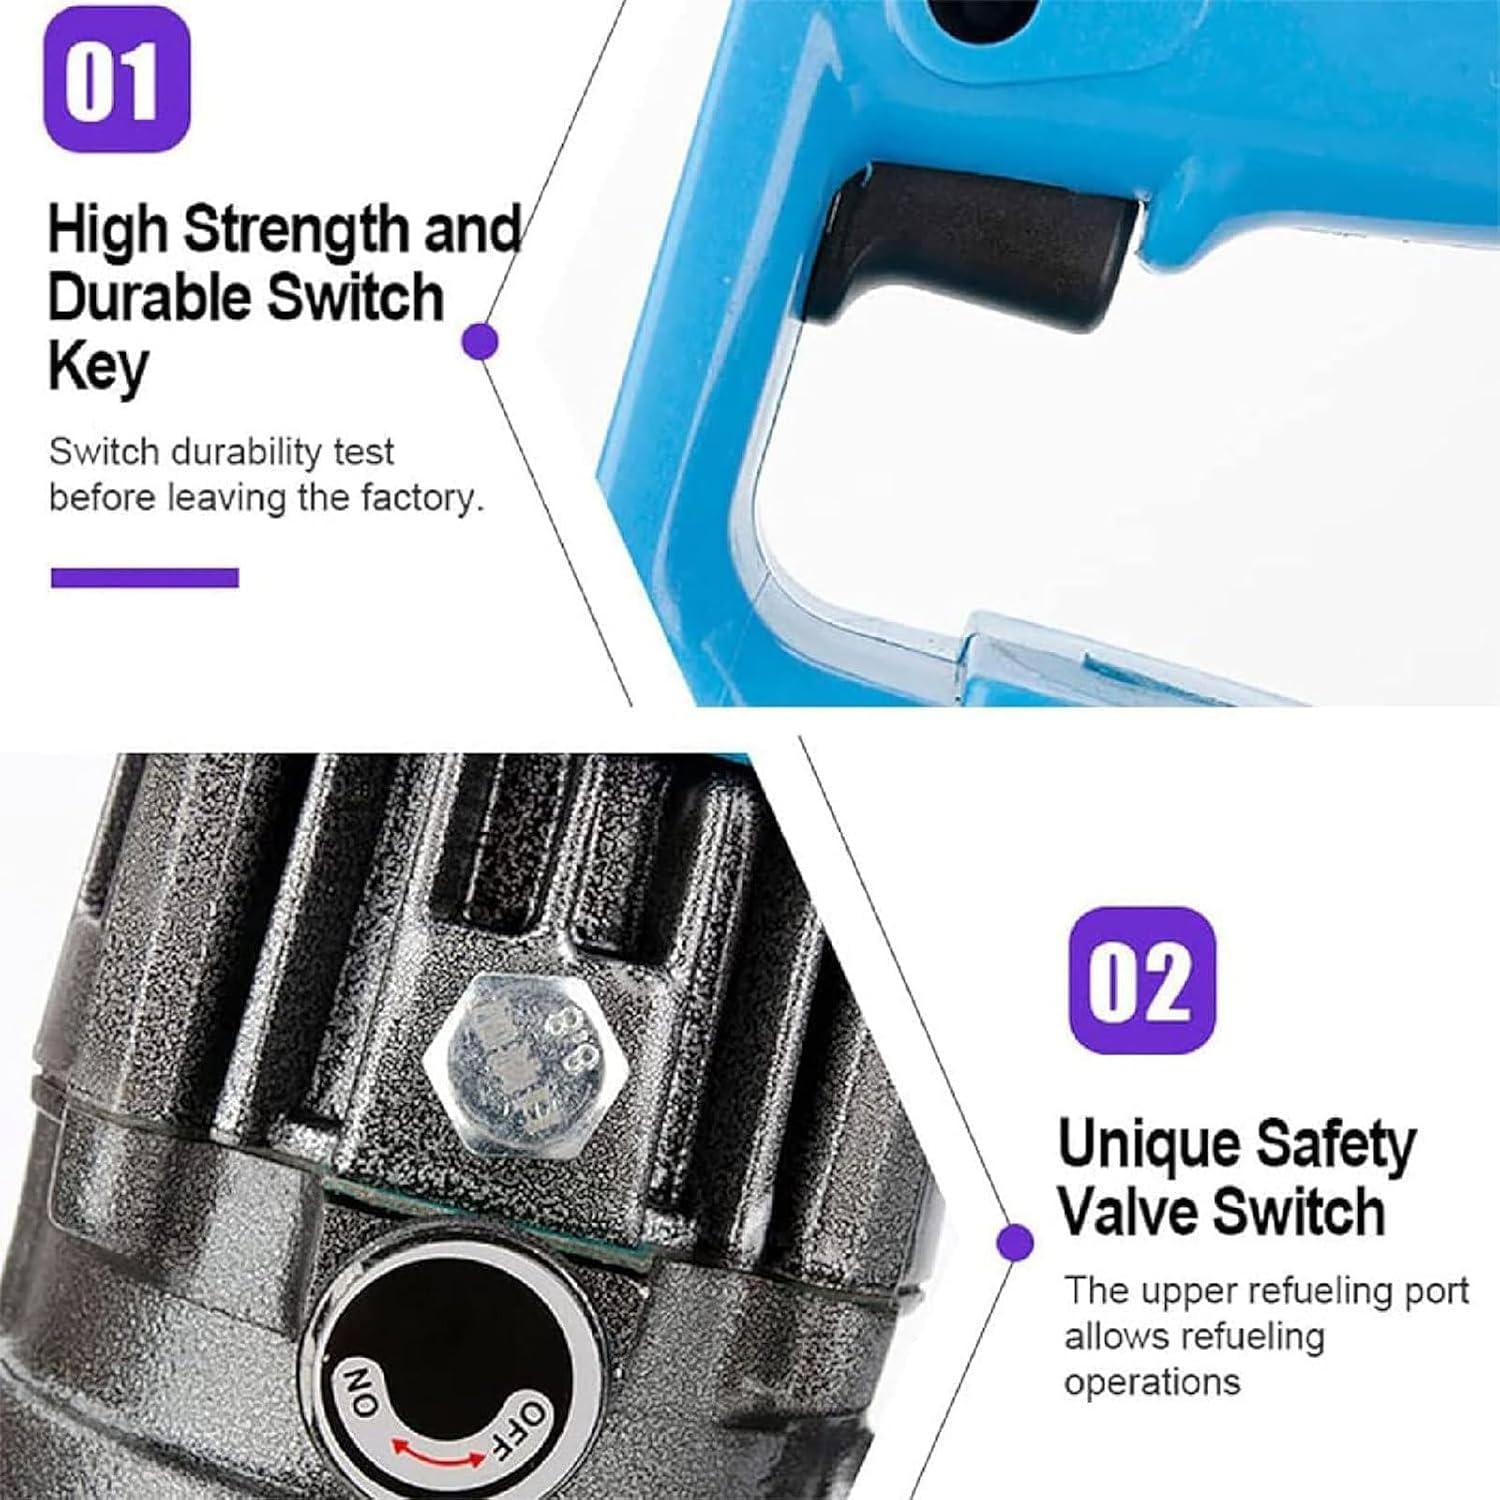
Figure 4: Switch Key and Safety Valve. This image highlights the main power switch and the safety valve for hydraulic oil access.
6. Operating Instructions
Follow these steps for safe and effective operation of your hydraulic hole punch machine.
6.1 Material Compatibility
This machine is suitable for punching holes in various metal plates. Always ensure the material type and thickness are within the specified limits:
- Copper/Aluminum Plate: Maximum thickness ≤8 mm (0.3 inches)
- Iron/Steel Plate: Maximum thickness ≤6 mm (0.2 inches)
- Angle Iron: 4-6#

Figure 5: Applicable Materials. This image visually confirms the types of materials suitable for punching with this machine.
6.2 Punching Procedure
- Preparation: Ensure the correct punch die is installed and secured. Connect the machine to a suitable power supply. Wear all recommended PPE.
- Positioning Material: Place the metal plate or profile under the punching head. Align the desired punching location with the center of the die. The machine is designed for accurate positioning without displacement.
- Using the Foot Switch: With the material correctly positioned, firmly press the foot switch to activate the punching mechanism. The punch will extend, create the hole, and then retract automatically.
- Using the Hand Switch: Alternatively, you can use the hand switch on the machine handle to initiate punching.
- Observe Punching: The punching process typically takes 2-3 seconds. Monitor the operation to ensure proper function.
- Clear Debris: After each punch, remove any metal slugs or debris from the work area to prevent interference with subsequent operations.
Video 1: Hydraulic Punching Machine in Operation. This video demonstrates the machine's punching action on a metal piece, showcasing its speed and efficiency.

Figure 6: Punching Action. This image captures the machine in the process of creating holes, emphasizing the clean cut and precise alignment.
6.3 Adjusting Punching Depth
The punching depth can be adjusted using the bolts located near the punching head. Refer to Figure 3 for visual guidance on the auxiliary handle and general area. Adjusting these bolts allows for fine-tuning the punch's travel to suit specific material thicknesses and desired hole characteristics.
7. Maintenance
Regular maintenance ensures the longevity and optimal performance of your hydraulic hole punch machine. Always disconnect the machine from the power supply before performing any maintenance.
- Cleaning: After each use, clean the machine, especially the punching head and die area, to remove metal chips and debris. Use a brush or compressed air. Do not use solvents that may damage plastic parts.
- Hydraulic Oil Check: Periodically check the hydraulic oil level through the oil hole. If the level is low, replenish with the recommended hydraulic oil. Refer to section 5.4 for adding oil.
- Die Inspection: Inspect punch dies for wear, damage, or dullness. Worn dies can lead to poor punch quality and increased strain on the machine. Replace damaged or excessively worn dies promptly.
- Carbon Brush Inspection: The carbon brushes in the motor may wear out over time. If the motor performance decreases or sparks are visible, inspect and replace the carbon brushes as needed. Refer to Figure 1 for the carbon brush location.
- General Inspection: Regularly check all screws, bolts, and connections for tightness. Tighten any loose fasteners. Inspect the power cord for any signs of damage.
- Storage: Store the machine in a clean, dry place, away from direct sunlight and extreme temperatures. Use the provided carrying case for protection during storage and transport.
8. Troubleshooting
This section addresses common issues you might encounter and their potential solutions. For problems not listed here, contact customer support.
| Problem | Possible Cause | Solution |
|---|---|---|
| Machine does not start. | No power supply. Damaged power cord/plug. Foot switch not connected or faulty. | Check power connection and outlet. Inspect cord/plug for damage; replace if necessary. Ensure foot switch is securely connected. |
| Punching is slow or weak. | Low hydraulic oil level. Worn or dull punch die. Material too thick/hard. | Check and replenish hydraulic oil (Section 5.4). Inspect and replace punch die. Verify material specifications are within limits (Section 6.1). |
| Punch does not retract. | Oil return switch not activated. Hydraulic system issue. | Ensure the oil return switch is properly engaged. If problem persists, contact customer support. |
| Poor hole quality (burrs, uneven edges). | Dull or incorrect punch die. Improper material support. Material exceeding capacity. | Replace punch die or ensure correct size. Ensure material is stable and flat. Check material specifications (Section 6.1). |
| Machine overheats. | Continuous heavy use. Blocked ventilation. Motor issue. | Allow machine to cool down between uses. Ensure ventilation slots are clear. If persistent, contact customer support. |
9. Warranty and Support
This product comes with a standard manufacturer's warranty. Please refer to the warranty card included in your package for specific terms and conditions, including the warranty period and coverage details.
For technical assistance, spare parts, or warranty claims, please contact the seller or manufacturer directly. Have your product model number (B0D9XGG1PV) and purchase date ready when contacting support.
Manufacturer: JJENXYYDS